
Related Manuals for Condair GS II Series


Summary of Contents for Condair GS II Series
- Page 1 INSTALLATION MANUAL Gas-fired steam humidifier Condair GS Series II Humidification and Evaporative Cooling...
- Page 2 Condair Group AG, except to the extent required for installation or maintenance of recipient's equipment. Liability Notice Condair Group AG does not accept any liability due to incorrect installation or operation of the equipment or due to the use of parts/components/equipment that are not authorised by Condair Group AG. Copyright Notice ©...
-
Page 3: Table Of Contents
Clearances to be observed 5.4.2.2 Dimensions and Weights 5.4.3 Removing the Humidifier from the Shipping Pallet 5.4.4 Wall Mounting – Condair GS 23/45 compact units only 5.4.5 Floor Stand Mounting 5.4.6 Mounting Checklist Steam Installation Installing the Main Steam Pipe 5.6.1... - Page 4 5.7.3 Notes on water installation 5.7.4 Water Connections Checklist Combustion Air Installation 5.8.1 In-Room Air Installation 5.8.2 Room Seal Installation 5.8.3 Room Seal Installation Requirements 5.8.4 Combustion Air Checklist Exhaust Vent Installation 5.9.1 General Requirements 5.9.1.1 Installation as a C6 Appliance 5.9.2 Exhaust Vent Installation 5.9.2.1...
-
Page 5: Introduction
The various options and accessories are only described insofar as is necessary for proper installation of the equipment. Further information on options and accessories can be obtained that are supplied with them. This installation manual is restricted to the installation of the Condair GS steam humidifier and is meant for well trained personnel being sufficiently qualified for their respective work. Other Related Publications This installation manual is supplemented by various separate items of documentation (operation manual, spare parts list, etc.), which are included in the delivery as well. - Page 6 Please safeguard this installation manual in a safe place, where it can be immediately accessed. If the equipment is moved to another location, make sure that the manual is passed on to the new user. If the manual is lost or misplaced, contact your Condair representative for a replacement copy. Language versions This installation manual is available in other languages.
-
Page 7: For Your Safety
For your safety General Every person, who is in charge of the installation work on the Condair GS must have read and understood this manual and the Condair GS operation manual before carrying out any work. Knowing and understanding the contents of the installation manual and the operation manual is a basic requirement for protecting personnel against any kind of danger, to prevent faulty operation, and to operate the unit safely and correctly. - Page 8 Before starting work on the gas system, make sure that the Condair GS is taken out of operation (de- vice switched off, disconnected from the power supply and water and gas supply closed) and secured against unintentional power-up.
- Page 9 Safety labels on the unit Various safety and identification labels are attached to the Condair GS. Please note and comply with the relevant information on these labels. Gas safety warning label Keep cabinet closed warning label General safety label Specification label Position of the safety and identification labels Fig.
-
Page 10: Product Overview
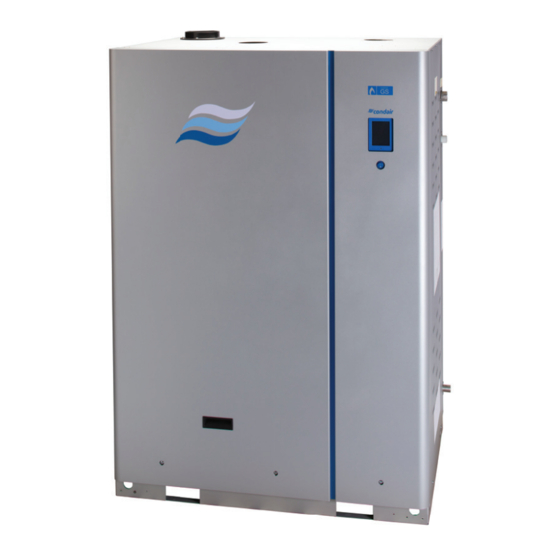
Product Overview Model overview Condair GS are available in two different housing designs ("Compact" for wall mounting and "Standard" for floor mounting), two efficiency classes (high efficiency: with condensing heat exchanger (option CS), standard efficiency: without condensing heat exchanger) and maximum steam outputs ranging... -
Page 11: Model Designation
Model designation The specification label on the right side of the Condair GS shows the model number, the serial number and the nominal values of the device (position of the specification label see Fig. OTTAWA, CANADA PFAFFIKON, SWITZERLAND SERIAL NUMBER... -
Page 12: Accessories
Accessories 3.3.1 Accessories overview Model Condair GS 23 ... 45 ... 65 ... 90 ... 130 ... 195 ... 260 ... Steam distribution pipe 81-... (see details in Section 3.3.2) Quantity Steam distribution system OptiSorp System 1 System 1 System 2 System 3 System 3 System 3... -
Page 13: Accessory Details
OptiSorp must be used. If this is the case, contact your Condair representative. Note: for further information regarding the DV81-... steam distribution pipe please refer to the separate installation and operating instructions of this product. -
Page 14: Optisorp Steam Distribution System
3.3.2.2 OptiSorp steam distribution system The OptiSorp steam distribution system is used in ventilation ducts with a short humidification distance. When ordering an OptiSorp system the duct dimension must be specified. Please consult the data in the following table: System 1 System 2 System 3 System 4... -
Page 15: Control Of Delivery / Storage And Transportation
Check packing slip to ensure all parts has been delivered. All material shortages are to be reported to your Condair supplier within 48 hours after receipt of the goods. Condair Group AG assumes no responsibility for any material shortages beyond this period. -
Page 16: Storage And Transportation
Storage and Transportation Storing Until installation store the Condair GS in its original packaging in a protected area meeting the following requirements: – Room temperature: 5 ... 40 °C – Room humidity: 10 ... 75 %rh Transportation For optimum protection always transport the unit and components in their original packaging and use appropriate lifting/transporting devices. -
Page 17: Mounting And Installation Work
DANGER! Risk of electric shock! The Condair GS is mains powered. Live parts may be exposed when the unit is open. Touching live parts may cause severe injury or even death. Prevention: The Condair GS must be connected to the mains only after all mounting and installation work has been completed, all installations have been checked for correct workmanship and the access panels are installed and properly locked. -
Page 18: Installation Overviews
Installation overviews 5.2.1 Typical installation compact units 11 10 Fig. 3: Typical installation compact units Humidity sensor or external humidity controller (installed 17 Connection fitting gas supply line in the extract air duct for extract air humidity control or in 18 Shutoff valve water supply line the supply air duct for supply air humidity control) 19 Water filter... -
Page 19: Typical Installation Standard Units
5.2.2 Typical installation standard units GS 65-CS GS 90-260 -CS Fig. 4: Typical installation standard units (GS 65 unit is shown) Humidity sensor or external humidity controller (installed 14 Connection fitting water supply line in the extract air duct for extract air humidity control or in 15 Electrical isolator voltage supply (mandatory) the supply air duct for supply air humidity control) 16 Water drain line... -
Page 20: Installation Space Requirements
– It must be possible to install the Condair GS humidifier in the room in such a way that the maximum permissible length of the steam line between the humidifier and the steam distributor(s) is not ex-... -
Page 21: Mounting The Humidifier
Mounting the Humidifier 5.4.1 Notes on positioning the humidifier – Before mounting the Condair GS humidifier, ensure that the requirements for the installation space are met (see Section 5.3). – Place the Condair GS humidifier so that: – there is enough space for operation and maintenance (for minimum clearances, see Section 5.4.2),... -
Page 22: Dimensions And Weights
5.4.2.2 Dimensions and Weights The dimensions and weights shown below do not include the wall mount bracket. See also dimensional drawings in Section 6.5. Table 2: Overall dimensions and weights Condair GS CS Dimensions Weights in mm in kg Model... -
Page 23: Removing The Humidifier From The Shipping Pallet
Prevention: Use an appropriate lifting device to lift the humidifier. Lift the unit always from the bottom by its base frame, and not on the side or top panels. 5.4.4 Wall Mounting – Condair GS 23/45 compact units only Fig. 7: Wall mounting compact unit Condair GS 23/45... -
Page 24: Floor Stand Mounting
Proceed as follows to mount the GS 23/45 compact devices to a wall (see Fig. 1. Check that the selected mounting location provides adequate clearances for maintenance, and is at an easily serviceable height (clearances to be observed see Section 5.4.2.1). -
Page 25: Mounting Checklist
Steam Installation Steam generated by the humidifier can be distributed into a conditioned space through an air handling unit (AHU) using Condair steam distributors or OptiSorp steam distribution systems. Refer to their re- spective manuals for installation details. 2596642-C_EN_2010_Condair GS_IM... -
Page 26: Installing The Main Steam Pipe
Main Steam Line Installation Steam outlet humidifier Steam hose (DN100 adapter supplied with Condair GS 195/260) (Maximum length 4 m, minimum bend radius 300 mm, must be led with a minimum upslope of 20% or minimum Worm gear hose clamp (supplied) -
Page 27: Best Practices For Installing Steam And Condensate Lines
Use only rigid steam pipes made of copper (MED Type-L) or stainless steel (at least DIN 1.4301) for the main steam pipe of the Condair GS 65-260 devices and only the Condair steam hose or also a rigid steam pipe made of copper (MED Type-L) or stainless steel (at least DIN 1.4301) for the steam line of the Condair GS 23/45 devices. - Page 28 Fig. 10 on page – Only use Condair steam hoses for steam lines made with hoses. Other types of steam hoses can affect performance of the unit. The minimum bend radius of the steam hose is 300 mm. The steam hose must not sag, and must have a minimum upslope of 20%, or a minimum downslope of 5% to the steam distributor.
-
Page 29: Condensate Drain Lines
Steam line Condensate drain line Minimum upslope 20% Min. 300 mm Min. Minimum downslope 5% Min. 300 mm 300 mm Min. 300 mm Minimum downslope 2% Minimum downslope 2% Fig. 10: Steam and Condensate Line 5.6.1.2 Condensate drain lines WARNING! Risk of severe burns from contact with hot water or steam!! The condensate lines may be filled with hot water or steam. -
Page 30: Common Steam And Condensate Line Installation Mistakes
5.6.1.3 Common Steam and Condensate Line Installation Mistakes Some common steam and condensate line installation mistakes are shown in Fig. 11 on page 2, 5 3, 5 >20% >2% Fig. 11: Common steam and condensate line installation mistakes The condensate trap is located less than the required minimum 300 mm below the steam distributor. No condensate trap is installed at the horizontal-to-vertical transition. -
Page 31: Steam Installation Checklist
… Steam line does not reduce in diameter except at the steam distributor; and condensate drain line installed just before the restriction? … Steam lines do not merge except at the steam distributor through a Condair adaptor? … Steam line does not sag? …... -
Page 32: Water Installation
Water Installation The water installation must be carried out in accordance with Fig. 12 and the notes on water installation Section 5.7.3. 5.7.1 Water installation overview Compact units GS 23/45 Full-size units (GS 65 shown) G 3/4" 3... 8 bar ø22 mm 1...25 °C ø22 mm... -
Page 33: Exhaust Condensate Drain Installation Overview (Cs Model Only)
Bracket to fix trap to floor stand have minimum downslope of 2%, and must not touch sides or bottom of funnel. Use Condair condensate hose. Open funnel with trap – funnel must be located below the condensate outlet and within 1 m of the unit (or according... -
Page 34: Notes On Water Installation
The water supply to the humidifier must be cold potable drinking water, reverse osmosis (RO) water or de-ionized water (DI), with a flow rate of 10 l/min for GS 23-130 unit or 20 l/min for Condair GS 195-260 units. The water quality must meet the requirements as listed in Table... - Page 35 Notes on water drain The water drain is to be carried out according to Fig. 12 on page 32 and the applicable local plumb- ing codes. – The drain hose from the humidifier should be as short as possible, and empty into the open fun- nel with trap without touching its sides or bottom (min.
-
Page 36: Water Connections Checklist
5.7.4 Water Connections Checklist Check the following to ensure that the water installations for the humidifier carried out correctly: – Water supply … Water quality meets the requirements listed in Table 7 on page … Filter valve (or shutoff valve and 125 µm filter) installed in the supply line close to the humidifier? …... -
Page 37: Combustion Air Installation
Adhere to all local and national installation regulations. Note: Condair requires installing an elbow (fitted with a screen) at the intake air inlet on all GS 65-260 (full size) units to prevent dirt and debris from being drawn into the combustion chamber. Seal the con- nection with silicone sealant. - Page 38 Model Free area grille sizes (cm Low Level High Level Condair GS 23 / GS 23-CS Condair GS 45 / GS 45-CS Condair GS 65 / GS 65-CS Condair GS 90 / GS 90-CS Condair GS 130 / GS 130-CS...
-
Page 39: Room Seal Installation
5.8.2 Room Seal Installation A room seal installation draws fresh combustion air from the outside. Sealed combustion requirements for combustion air are governed by national and local installation codes, as stated at the beginning of this section. The vent diameter listed in Table 10 must be maintained over the entire length of the vent. -
Page 40: Room Seal Installation Requirements
1 m between them. – At low temperatures, water condensation can occur on the outside of the air intake vent. To prevent this, Condair suggests adding in-line heating and insulation on the intake vent. 5.8.4 Combustion Air Checklist... -
Page 41: Exhaust Vent Installation
The general requirements and the different exhaust venting types are described in the following chapter. 5.9.1 General Requirements The exhaust vent system used with the Condair GS series humidifier must satisfy the following general requirements: – The exhaust vent systems must meet the installation requirements of local regulations related to exhaust venting systems . - Page 42 – Table 11 lists the diameter of the exhaust vent. The vent diameter must remain uniform over the entire run. Adhere to all local and national installation codes. Table 11: Exhaust Vent Diameters Model Exhaust Vent Diameter in mm Additional Requirements for Sidewall Venting The following additional requirements must be satisfied if the exhaust vent terminates through a sidewall: –...
- Page 43 Additional Requirements for Room Seal Exhaust Venting The Condair GS humidifiers are certified as a C13, C33, and a C53 appliance. Where local regulations permit, the humidifier can be installed as a C6 appliance. Refer to for the requirements). Section 5.9.1.1 Contact your Condair representative for installation assistance.
- Page 44 Fig. 16 on page Fig. 17 on page Fig. 18 on page 45, and Fig. 19 on page 48 show the general types of venting arrangements. Adhere to all national or local codes. 3.5% Fig. 16: Type C13 exhaust venting for room seal installations Concentric terminal (not supplied) Exhaust vent (not supplied) –...
- Page 45 2.5 m max. 1.5 m max. 3.5 % 1.2 m max. Fig. 18: Type C53 exhaust venting for room seal installations Rain cap (not supplied) Air intake terminal (not supplied) - Horizontal exhaust vent (not sup- refer to local regulations plied) - minimum 1.5 m, maximum Exhaust terminal (not supplied) - 30 m long with a constant minimum...
-
Page 46: Installation As A C6 Appliance
5.9.1.1 Installation as a C6 Appliance Where local regulations permit, the Condair GS humidifier may be installed as a C6 appliance. When installed as a C6 appliance, the humidifier must be connected to a separately approved and marketed system for the supply of combustion air and discharge of flue gases. The exhaust vent, intake vent and... - Page 47 Intake vent requirements – Room seal installations must use a sealed intake vent to supply fresh combustion air from the outside. – Unless specified by the vent manufacturer, the length of the intake vent must meet the requirements shown in 46. Refer to vent manufacturer’s literature for recommended pressure Table 13 on page loss for elbows, fittings and terminations.
- Page 48 Table 14: Flue products Minimum heat input Maximum heat input Model Flue temperature Mass flow rate Flue temperature Mass flow rate (°C) (kg/min) (°C) (kg/min) GS 23 0.10 0.50 GS 23-CS 0.09 0.44 GS 45 0.20 1.00 GS 45-CS 0.18 0.88 GS 65 0.30 1.49 GS 65-CS 0.27...
-
Page 49: Exhaust Vent Installation
5.9.2 Exhaust Vent Installation All vent installations must be in accordance with national and the local regulations. Connect the stainless steel (or plastic, only for CS models) exhaust vent directly to the exhaust outlet. The exhaust outlet has internal gaskets, hence a sealant is not required. An adapter may be used, but is not required or supplied. -
Page 50: Exhaust Venting Requirements, Standard-Efficiency Models
5.9.2.1 Exhaust Venting Requirements, Standard-Efficiency Models The exhaust venting for the GS standard-efficiency model humidifier must be designed for negative pressure utilizing suitable high temperature venting material with condensate drainage. In addition to the notes in Section 5.9.1, the following requirements must also be satisfied for the exhaust vent installation in a GS standard-efficiency models: –... -
Page 51: Exhaust Vent Checklist
Exhaust Vent Checklist Check the following to ensure that the exhaust vent for the humidifier has been installed correctly: … Exhaust vent installed to meet all national and local codes, vent manufacturer and Condair require- ments? … Proper clearances maintained between exhaust vent and combustible materials? …... -
Page 52: Gas Installation
5.10 Gas Installation 5.10.1 Overview Gas Supply Installation for Compact and Full-Size Unit Compact units GS 23-45 Full-size units GS 65-260 (GS 65 shown) Fig. 21: Gas supply installation overview Gas inlet connector Sediment trap (not supplied) (NPT to BSBP adapter supplied) Test port (not supplied) Union fitting (not supplied) Note: Where measuring of the gas firing rate of the humidifier is necessary, installing a gas meter (sup-... -
Page 53: Gas Supply Installation Requirements
5.10.2 Gas Supply Installation Requirements The gas supply installation must be carried out in accordance with Fig. 21 and the applicable national and local codes for gas supply installations. In addition, the following requirements must be satisfied: – A certified manual gas shutoff valve must be installed immediately upstream from the humidifier. A thermally actuated gas shut-off device may also be installed upstream from the humidifier. -
Page 54: Gas Leakage Test
5.10.3 Gas Leakage Test DANGER! Risk of explosion or fire! Prevention: NEVER use an open flame to check for gas leaks (Risk of injury, death or property dam- age). Use a commercial soap solution or a gas sniffer to check for leaks. CAUTION! Risk of damage to the gas pressure regulating valve! Prevention: Before performing the leakage test described below, close the manual gas shutoff valve at the humidifier to isolate the gas pressure regulating valve from system pressure. -
Page 55: Humidity Control Systems
– fresh supply air humidity control — Configuration 3 Direct room humidification Configuration 1 — Please contact your Condair representative for assistance if you have other requirements such as: – Humidification of rooms up to 200 m – Air conditioning systems with a high number of air exchanges – Systems with variable air volume flow –... -
Page 56: Configuration 1 - Room Humidity Control
5.11.1.1 Configuration 1 – Room humidity control Configuration 1 is suitable for direct room humidification and air conditioning systems with mainly recirculated air. The humidity sensor or humidistat respectively is preferably located in the room itself or in the exhaust air duct. humidity sensor ventilation interlock airflow monitor safety humidistat humidistat Internal P/PI controller... -
Page 57: Configuration 3 - Supply Air Humidity Control With Continuous Output Limit Ation
5.11.1.3 Configuration 3 – Supply air humidity control with continuous output limit a tion Configuration 3, Supply air humidity control (humidity sensor installed in supply air duct) should be used only where room humidity control is impracticable for technical reasons. Such configura- tions always require a PI-controller. The humidity sensor (A1) is located in the supply air duct after the steam distributor. The humidity sensor (A2) for the continuous output limitation is located in the supply air duct before the steam distribution pipe. -
Page 58: Electrical Installations
DANGER! Risk of electric shock! The Condair GS is mains powered. Live parts may be exposed when the unit is open. Touching live parts may cause severe injury or even death. Prevention: The Condair GS must be connected to the mains only after all mounting and installation work has been completed, all installations have been checked for correct workmanship and the access panels are installed and properly locked. -
Page 59: Wiring Diagrams
R W Bl R W Bl Blower 2 Ignition Ignition Spark Spark PS - Module 1 Module 2 Igniter Igniter Gr/Y HS out PS + 2-Burner Units Only Fig. 25: Wiring Diagram - Condair GS 23/45/90 2596642-C_EN_2010_Condair GS_IM Mounting and installation work... - Page 60 3 or 4-Burner Units O nly Units O nly Units O nly Continued on Fig. 27 Continued on Fig. 27 Continued on Fig. 27 Continued on Fig. 27 Fig. 26: Wiring Diagram - Condair GS 65/130/195/260 Mounting and installation work 2596642-C_EN_2010_Condair GS_IM...
- Page 61 Igniter PS + 4-Burner Units Only Fig. 27: Supplementary Wiring Diagram Condair GS 195/260 Legend Wiring Diagrams External humidity controller or humidity sensor (signal CH1) External humidity limiter controller or humidity limiter sensor (signal CH2), additional for Dual channel control...
-
Page 62: External Connections
5.12.3 External Connections This section describes the different external control signal and power connections to the Condair GS humidifier. 5.12.3.1 External Security Loop The external security loop consists of dry contacts of the external safety monitoring devices (for example, ventilation interlock, high limit humidistat, air proving switch, etc.). Connect the external safety monitoring devices in series to terminals "1"... -
Page 63: Humidity Demand Or Humidity Sensor Signal / Limiter Signal
(CH2) to pin "5" and "3", using pin "3" as common. Make sure that "Control Channels" is set to "Dual" in the control software to utilize the limiter signal – refer to the Condair GS operation manual. -
Page 64: On/Off Humidistat Signal
"X2". Refer to Fig. The "Control Mode" must be set to "On/Off" in the control software – refer to the Condair GS operation manual. IMPORTANT! When connecting a 24 VDC On/Off humidistat, jumper "JP2" on the driver board #1 must be set to 24 V (so that pin "6"... -
Page 65: Monitoring Devices Exhaust Gas Management System
Note: On a GS 130/195/260 units with two driver boards, the jumpers "JP1" and "JP2" only need to be set onto the corresponding pins on driver board #1. 1 2 3 EXTERNAL Condair GS INTERNAL 1 2 3 Fig. 32: Monitoring Devices Exhaust Gas Management System Driver board (#1) -
Page 66: Remote Fault Pcb Connections
5.12.3.6 Remote Fault PCB Connections The remote fault PCB connected to the connector "J2" on the Condair GS control board in the humidi- fier has the following four dry relay contacts for remote display of humidifier status and fault conditions. -
Page 67: Single-Phase Power Supply Connection
5.12.3.7 Single-Phase Power Supply Connection Connect the single-phase power supply (230 V / 1~ / 50-60 Hz) to the Condair GS humidifier as shown Fig. 34. The installation of an external fused disconnect switch "Q" (all pole disconnecting device with a minimum contact clearance of 3 mm, supplied by others) with 10 A, slow acting fuses "F1" in the mains supply line are mandatory. -
Page 68: Modbus Connection
Modbus communication cable to the Condair GS humidi- Fig. 35 on page 68 fier as follows: 1. Connect the Modbus cable to the connector "J6" on the Condair GS control board. Refer to Table 19 for Modbus cable requirements, and Table 20 for communication parameters. -
Page 69: Connecting Multiple Units Using Linkup
IMPORTANT! Do not reverse polarity. 4. Install the termination jumper "JP8" in the control board of the last extension unit in the Linkup system. 5. Finally, refer to the Condair GS operation manual to set up the multi-unit configuration in the control software. -
Page 70: Electrical Connections Checklist
5.12.4 Electrical Connections Checklist Check the following to ensure that the electrical connections for the humidifier have been installed correctly: … Power supply meet the rated current draw limits shown on the specification label (see Section 3.2)? … Power supply have an external dedicated 10 A slow acting fused disconnect switch? …... -
Page 71: Product Specifications
Product specifications Performance Data Power consumption at Power consumption at minimum demand maximum demand Manifold Min./Max. Steam [kW] [kW] Model Pressure Capacity in Pa in kg/h Natural gas Propane Natural gas Propane (G20) (G31) (G20) (G31) GS 23-CS 18.2 18.2 -2,5 4.6-23 GS 23 20.5... -
Page 72: Operating Data
Operating Data Control signal input types Active 0-5 VDC, 1-5 VDC, 0-10 VDC, 2-10 VDC, 0-20 VDC, 0-16 VDC, 3,2-16 VDC, 0-20 mADC, 4-20 mADC Passive 135-10 kΩ ohmic humidity sensor On/Off control <2,5 VDC (Off) 2,5-20 VDC (On) Digital (via Modbus, BACnet IP/MSTP BACnet IP, BACnet MSTP, Modbus, LonWorks (Option), BACnet MSTP BTL-Certified (Option), BACnet IP BTL-Certified (Option) Ambient Conditions Ambient temperature... -
Page 73: Weights
0.32 GS130-CS 0.53 GS 195-CS 0.72 GS 260-CS 0.92 IP Rating IP20 for all units Weights For the weights of the Condair GS humidifier models refer to Table 2 on page 22 Table 3 on page 2596642-C_EN_2010_Condair GS_IM Product specifications... -
Page 74: Dimensions
101 mm 3/4" BSPP 129 mm Condensate Drain Ø 3/8" (9.5 mm) Fig. 37: Dimensions Condair GS 23/45 Wall mount is default. Floor stands come with the compact unit. ** Adaptor ø80 mm, for Condair GS 45 Product specifications 2596642-C_EN_2010_Condair GS_IM... - Page 75 786 mm 783 mm Fig. 38: Dimensions Condair GS 65 Mounting stand supplied. The humidifier may also be installed directly onto the floor. Follow local guidelines. The condensate drain (via secondary heat-exchanger) at the bottom of the unit is applicable to CS units only.
- Page 76 Ø 22 mm Condensate Drain Ø 13 mm 1026 mm 783 mm Fig. 39: Dimensions Condair GS 90/130 Mounting stand supplied. The condensate drain (via secondary heat-exchanger) at the bottom of the unit is applicable to CS units only. Product specifications...
- Page 77 783 mm Condensate Drain Ø 13 mm Drain Outlet Ø 22 mm Fig. 40: Dimensions Condair GS 195 Mounting stand supplied. The condensate drain (via secondary heat-exchanger) at the bottom of the unit is applicable to CS units only. 2596642-C_EN_2010_Condair GS_IM...
- Page 78 Condensate Drain Drain Outlet Ø 13 mm Ø 22 mm Fig. 41: Dimensions Condair GS 260 Mounting stand supplied. The condensate drain (via secondary heat-exchanger) at the bottom of the unit is applicable to CS units only. Note: Gas inlet 1 1/4" to 1" BSP adaptor (required), not supplied with unit.
- Page 80 CONSULTING, SALES AND SERVICE: CH94/0002.00 Condair Group AG Gwattstrasse 17, 8808 Pfäffikon SZ, Sitzerland Phone +41 55 416 61 11, Fax +41 55 588 00 07 info@condair.com, www.condairgroup.com...
Need help?
Do you have a question about the GS II Series and is the answer not in the manual?
Questions and answers