
Subscribe to Our Youtube Channel
Related Manuals for Condair GS II Series


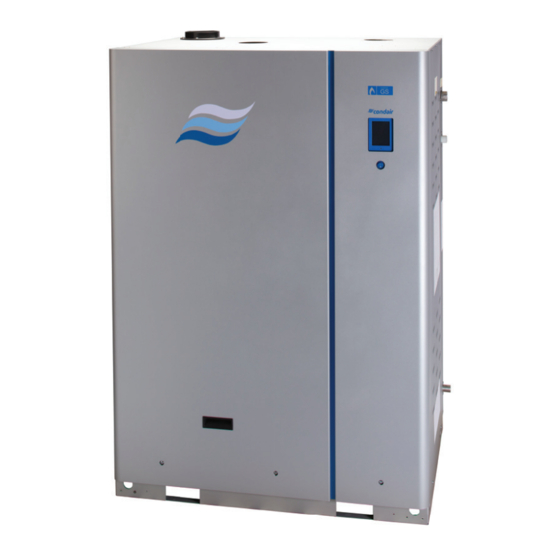
Summary of Contents for Condair GS II Series
- Page 1 OPERATION MANUAL Gas-fired steam humidifier Condair GS Series II Humidification and Evaporative Cooling...
- Page 2 Condair Group AG, except to the extent required for installation or maintenance of recipient's equipment. Liability Notice Condair Group AG does not accept any liability due to incorrect installation or operation of the equipment or due to the use of parts/components/equipment that are not authorised by Condair Group AG. Copyright Notice ©...
-
Page 3: Table Of Contents
Contents Introduction To the very Beginning Notes on the Operation Manual For your safety Product Overview Model overview Functional Description System overviews 3.3.1 System overview compact units GS 23/45 3.3.2 System overview full-size units Operator Interface Display and operating elements Control Software 4.2.1 Home Screen... - Page 4 Installing Software Updates Fault Isolation General Fault Indication General Troubleshooting Warning and Fault List Resetting Fault Status Decommissioning of the Condair GS General Removal from Service for Disposal or Long-term Storage Disposal/Recycling Product specifications Performance Data Gas consumption at maximum power...
-
Page 5: Introduction
The various options and accessories are only described insofar as is necessary for proper operation of the equipment. Further information on options and accessories can be obtained that are supplied with them. This installation manual is restricted to the installation of the Condair GS steam humidifier and is meant for well trained personnel being sufficiently qualified for their respective work. - Page 6 Please safeguard this operation manual in a safe place, where it can be immediately accessed. If the equipment is moved to another location, make sure that the manual is passed on to the new user. If the manual is lost or misplaced, contact your Condair representative for a replacement copy. Language versions This operation manual is available in other languages.
-
Page 7: For Your Safety
For your safety General Every person, who is in charge of any work on the Condair GS must have read and understood the instal- lation manual and the operation manual (this document) of the Condair GS before carrying out any work. - Page 8 Prevention: Never perform any work on the steam system (including the steam lines, steam distribu- tors, etc.) while the humidifier is operating. Shut down the Condair GS humidifier, as described in Section 5.3.8 before carrying out any work on the steam system.
- Page 9 Risk of severe burns from contact with hot surfaces! The water tank, steam line and exhaust system in the Condair GS humidifier get very hot during op- eration. Bare skin in contact with hot surfaces can result in severe burns.
- Page 10 Preventing Unsafe Operation All persons working with the Condair GS must report any alterations to the unit that may affect safety to the owner without delay. If it is suspected that safe operation is no longer possible, the Condair GS...
-
Page 11: Product Overview
Product Overview Model overview Condair GS are available in two different housing designs ("Compact" for wall mounting and "Full-size" for floor mounting), two efficiency classes (high efficiency: with condensing heat exchanger (option CS), standard efficiency: without condensing heat exchanger) and maximum steam outputs ranging from 23 kg/h up to 260 kg/h. - Page 12 Fig. 2: Humidifier Components (left: compact unit GS 23/45, right: Full-size unit GS 65), front, side and top panels removed in the figure for clarity. Steam outlet 12 Secondary heat-exchanger (CS models only) Exhaust gas high limit temperature sensor 13 Drain valve Blower 14 Dual fill valve Burner...
-
Page 13: Functional Description
Table 1: Components installed by models Quantity Component GS 23/45 GS 65 GS 90/130 GS 195 GS 260 Primary heat-exchanger Secondary heat-exchanger Water tank Burner Blower Gas valve Ignition control module Spark-igniter and flame sensor Dual fill valve Secondary heat-exchanger on CS models only. Functional Description Combustion The combustion system consists of a fully modulating forced-draft combustion air blower(s), a negative... - Page 14 Water Management The humidifier is equipped with a level control unit that monitors the water level in the tank. The tank is supplied with water from the water supply, and from the secondary heat exchanger in CS models. A vacuum break valve is used to prevent siphoning in the drain connection. In the CS model, a secondary heat-exchanger promotes higher efficiencies.
-
Page 15: System Overviews
System overviews 3.3.1 System overview compact units GS 23/45 11 10 Fig. 3: System overview compact units GS 23/45 Humidity sensor or external humidity controller (installed 17 Connection fitting gas supply line in the extract air duct for extract air humidity control or in 18 Shutoff valve water supply line the supply air duct for supply air humidity control) 19 Water filter... -
Page 16: System Overview Full-Size Units
3.3.2 System overview full-size units GS 65-CS GS 90-260 -CS Fig. 4: System overview full-size units GS 65-260 (GS 65 unit is shown) Humidity sensor or external humidity controller (installed 14 Connection fitting water supply line in the extract air duct for extract air humidity control or in 15 Electrical isolator voltage supply (mandatory) the supply air duct for supply air humidity control) 16 Water drain line... -
Page 17: Operator Interface
Function Electrical isolator External fused electrical isolator installed in the mains voltage supply Touchscreen display Allows the user to monitor and control the Condair GS humidifier – Refer to Section 4.2. LED status indicator The status LED is a multi-function LED, which lights up in different colors depending on the operating status of the humidifier. -
Page 18: Control Software
4.2.1 Home Screen When the Condair GS humidifier is turned on, it starts initializing and performs system checks. When initialization and system checks are completed successfully, it goes into the normal operating mode. The Home screen then appears on the touchscreen display. The major elements of the Home screen are shown in Fig. -
Page 19: Operating Status
The humidifier is stopped because a condition with a "Fault" status is active. Disabled The Condair GS humidifier is disabled by the BMS (building management system). Safety Loop One or more contacts in the external security loop is open, so the humidifier has stopped produc- ing steam. -
Page 20: Accessing Support Informations
Typically, these conditions are of a temporary nature, or conditions that cannot cause damage to the system. Depending on the condition, the Condair GS humidifier may be stopped (e.g. if the warning relates to a control signal fault) or remains operable. If the cause of the condition clears on its own accord, the warning message is automatically reset. - Page 21 Timer Tab – On/Off Timers: shows the current status of the On/Off timer function. – Capacity Timers: shows the current status of the capacity timer function Operational Status Tab Output: shows the current actual steam output level of the humidifier. –...
- Page 22 – Channel 1: shows the input signal for Channel 1. If configured for demand control, it represents the demand. If configured for RH(P/PI), it represents sensed humidity. – Setpoint Channel 1: shows the current fixed humidity setpoint value for the unit. Select the field to adjust the setpoint value. Refer to "PI Control Parameters Tab"...
-
Page 23: Main Menu
– Idle Mode: shows the current Idle Mode setting. Select the field to choose a different mode – "Idle Only", "Idle Drain" or "Keep Warm". Refer to the "Operation Tab" on page 27 for more details. – Idle Drain Time: shows the set time duration the humidifier stays in standby mode without a demand, after which the humidifier carries out the function specified in "Idle Mode". -
Page 24: Configuration Menu
Main Menu Structure 4.2.7 Configuration Menu Fig. 9: Configuration Menu The Configuration menu lets you configure the operation of the Condair GS humidifier. The menu and sub-menu items are discussed below. Refer to Fig. 8 for the menu structure. Operator Interface... -
Page 25: 4.2.7.1 Features Menu
4.2.7.1 Features Menu Water Management Tab – Idle Mode: allows you to set the idle function of the humidifier when it is in standby mode. Options: Idle Only – the humidifier waits indefinitely for a demand signal. Idle Drain – the tank is drained after "Idle Drain Time"... - Page 26 Fill Correction 1: allows you to set a correction factor for the high volume fill valve(s) to compensate for valve tolerances, as well as site-specific conditions. CAUTION! Do not adjust this value unless instructed to do so by a Condair representative. Setting range: 0.1-2.0...
- Page 27 Operation Tab – Manual Capacity: allows you to set the capacity limitation value as a percentage of the maximum steam capacity of the unit. Setting range: 20-100 % Factory setting: 100 % – Capacity Timers: allows you to activate/deactivate and configure the timer controlled capacity limitation.
-
Page 28: Control Settings Menu
4.2.7.2 Control Settings Menu Basic Tab – Source: allows you to select the source of incoming control/humidity signal to the humidifier. Options: Analog – signals from analog sensors or humidi- stats connected to the humidifier's low voltage terminal block. Modbus – signals from BMS via the Modbus com- munication protocol. - Page 29 Band Channel 1: allows you to set the proportional range for the internal P/PI humidity controller as a percentage of relative humidity (% RH) within which the humidifier will modulate between 0 and 100% output. CAUTION! Do not adjust this value unless instructed to do so by a Condair representative. Setting range:...
- Page 30 0 and 100% output. Note: Band channel 2 setting appears only if "Control Channels" is set to "Dual". CAUTION! Do not adjust this value unless instructed to do so by a Condair representative. Setting range: 6-65% Factory setting: –...
- Page 31 Multi-Unit Operation Tab Refer to Section 4.3.2 for setup procedure – Linkup: allows you to enable or disable the Linkup function, which allows up to six humidifier to connect and operate together from a single set of control signals. It also allows you to designate the humidifier to operate as a "Main"...
-
Page 32: 4.2.7.3 General Menu
– Sequence Interval: allows you to set the time interval used by the control software to establish a new operating sequence to balance operating hours of linked humidifiers. Note: This setting is available only if Sequence Rotation is enabled. Setting range: 24-1000 h Factory setting: 24 h... -
Page 33: Communications Menu
– Contrast: allows you to set the contrast level of the touchscreen display. Setting range: 1 (low) - 31 (high) Factory setting: – Brightness: allows you to set the brightness level of the touchscreen display. Setting range: 1 (black) - 100 (white) Factory setting: –... - Page 34 Fixed – manually configure the network address and settings. Factory setting: DHCP – IP Address: allows you to manually set the IP address of the Condair GS. Note: the IP address must be set only if "IP Type" is set to "Fixed". –...
- Page 35 BACnet/IP (BACnet/IP via RJ45 interface enabled) Important: regarding the setting of the individual BACnet parameters as well as the wiring of the Condair GS for the BACnet IP or BACnet MS/TP communication, please observe the instructions in the sepa- rate BACnet addendum manual. This manual can be requested from your Condair representative.
-
Page 36: 4.2.7.5 Service Menu
4.2.7.5 Service Menu The Service menu lets you enter the startup code, reset the service reminder after performing scheduled maintenance, access the fault and maintenance history lists and perform diagnostics. Note: the Service menu can also be accessed from the maintenance and fault status area on the Home screen –... - Page 37 – Fault History: allows you to view the fault history list. – Service History: allows you to view the service history list. – Export History: allows you to export the fault and service history to a USB device. Diagnostics Tab Input Diagnostics: Allows you to access the "Input Diagnostics"...
-
Page 38: 4.2.7.6 Setpoint
4.2.7.6 Setpoint If the is set to "RH P" or "RH PI" the menu item "Setpoint" is shown in the Main "Control Mode CH 1" Menu additionally. After pressing this button the setpoint entry window appears where you can set the desired humidity setpoint (CH1) that the humidifier must try to maintain. - Page 39 Condair representative for assistance with this. – Backup Parameters to USB: allows you to save the current value of all persistent parameters from a certain Condair GS integrated controller to USB (XML file). – Restore Parameters from USB: loads the persistent parameters (XML file) from USB to a Condair GS integrated controller.
-
Page 40: Software Configuration
Software Configuration The Condair GS humidifier is shipped fully configured from the factory to suit your site-specific require- ments, but this can be modified as needed. This section provides the necessary instructions to recon- figure the control software. 4.3.1 Configuring the Control Software Perform the basic setup of the Condair GS control software as follows, if necessary: 1. -
Page 41: Configuring For Multi-Unit Operation
Configuring for Multi-Unit Operation Set up the control software for multi-unit operation as described below. A maximum of six humidifiers can be set up in a "Main-Extension" configuration using Condair's Linkup system to satisfy large hu- midification needs. IMPORTANT! This procedure should only be used to control multiple humidifiers that are using the same control signal inputs from the same conditioned environment. -
Page 42: Operation
Operation General The Condair GS humidifier must only be operated by personnel who is adequately qualified, well trained and are authorized by the customer. Observe all safety precautions described in Section Initial Commissioning The humidifier must always be commissioned for the first time by a service technician from your local Condair representative, by a Condair employee, or by personnel who are well trained and authorized by the customer. -
Page 43: Operating Procedures
5.3.1 Filling the water tank of the humidifier Fill the Condair GS humidifier as follows: Note: When the tank is filling the control software performs the level control unit test to ensure that the fill system, the level control unit and the drain pump(s) are functioning properly. -
Page 44: Ignition Safety Shutoff Test
5.3.2 Ignition Safety Shutoff Test Perform the ignition safety shutoff test as described below: 1. Check that the manual gas shutoff valve in the supply line is still closed. 2. Make sure that the contacts of all devices connected to the external security loop are closed. 3. -
Page 45: Starting The Humidifier
5.3.3 Starting the Humidifier Start the humidifier as follows: Note: This procedure applies also for starting the humidifier after maintenance or at the start of the season. 1. Examine the humidifier and other system components for damage. Do not use the appliance if any part of the humidifier has been under water. -
Page 46: Remote Monitoring
5.3.4 Remote Monitoring The Condair GS humidifier can be monitored remotely through the remote fault board wired to a remote monitoring system. Table 6 describes the function of each relay. Table 6: Remote Relay Function Remote Relay Description Error This relay energizes if the humidifier is stopped due to a fault condi- tion, or may be operable only for a limited period of time. -
Page 47: Manually Initiate Tank Draining
5.3.6 Manually Initiate Tank Draining Fig. 10: Manual Draining During periods of inactivity (e.g. off-season), drain the water from the tank. To drain the tank in the Con- dair GS humidifier, manually initiate draining as follows. Refer to Fig. 1. Press <Drain> button on the Home screen. 2. -
Page 48: Full Tank Blowdown
Shut down the Condair GS humidifier as follows (e.g. for maintenance, or at the end of the season): 1. Set the demand signal to the humidifier from the BMS or the humidistat at 0%. Then allow the burner(s) to shut off and the blower(s) to perform a post-purge of the combustion chamber(s). -
Page 49: Maintenance
The exhaust vent connected to the Condair GS humidifier does not require cleaning, but needs to be inspected regularly for leaks, blockages, sagging and proper condensate removal. -
Page 50: Mandatory Maintenance Schedule
Mandatory Maintenance Schedule Table 7 lists the mandatory maintenance schedule for the Condair GS humidifier. Table 7: Mandatory Maintenance Schedule Task 30 Days Mid-sea- End of Maintenance after Initial Season Start-up (2000 h) Inspect drainage. Perform a visual check of the drainage system, including the air gap funnel and drainage into the building drain. -
Page 51: List Of Consumables
Check for leaks and cracks. hose cuffs on the ex- haust connection(s) List of Consumables Table 8 shows the list of consumable items for the Condair GS humidifier that must be replaced in regular intervals. Table 8: Consumables Consumable Item Replace... -
Page 52: Management Of Scale And Chloride Levels
Table 9) are not covered by warranty. The Condair GS humidifier periodically drains water from the tank to reduce the concentration of dis- solved minerals that accumulate during long-term operation. This is achieved in two ways – through a partial blowdown and a full tank blowdown (FTBD). -
Page 53: Adjusting Blowdown Settings
Table chloride level in the feed water. c. Set the "FTBD Interval" in the control software of the Condair GS humidifier to the lesser of the two noted values. 4. Once the base settings are set, monitor the water quality and maintenance history periodically, and adjust the settings accordingly. -
Page 54: Maintenance Procedures
Maintenance Procedures 6.5.1 Removal and Installation of Access Panels Removal 1. Turn the captive screw at the bottom of the door panel (control cabinet/plumbing cabinet) counter- clockwise with a screwdriver. 2. Lift up the door panel slightly so that the top tabs clear the notches in the cabinet, then carefully swing the bottom of the panel up, and remove the panel. -
Page 55: Cleaning The Tank
3. Inspect all fill hoses for scale build-up or blockages. Clean or replace where necessary. 4. Remove and discard the tank gasket (Condair does NOT recommend reusing the tank gasket). 5. Use a soft-bristled or plastic brush or scraper (not wire brush, not metal) to remove any scale build- up on the inside surfaces of the tank, all tank ports, the outside of the primary heat-exchanger coils, and inside of the drain fitting. -
Page 56: Cleaning The Secondary Heat-Exchanger
M6x22 Fig. 12: Tank Door Torque Sequence Gasket Tank door Tank M6 nut - 7.91 Nm M6x22 hex head screw - 7.91 Nm Sacrificial anode Insulation Heat exchanger coils 6.5.3 Cleaning the Secondary Heat-exchanger Clean the secondary heat-exchanger and condensate trap (CS model only) as follows. Refer to Fig. - Page 57 Fig. 13: Cleaning Secondary Heat-exchanger -CS Model Only (compact and double unit shown) Tank bracket Hose, fill valve to top of Hose clamps heat-exchanger Hanger bracket Silicone exhaust tube Hose, heat-exchanger to tank L-bracket * (for the top of the Exhaust outlet connector heat-exchanger only) Silicone fitting elbow...
-
Page 58: Cleaning The Level Control Unit
6.5.4 Cleaning the Level Control Unit Clean the level control unit as follows. Refer to Fig. 1. Shut down the humidifier as described in Section 5.3.8 2. Remove the right door panel and the right side panel – refer to Section 6.5.1. -
Page 59: Cleaning Hoses, Dual Fill Valves And Drain Pump
6.5.5 Cleaning Hoses, Dual Fill Valves and Drain Pump Clean the fill and drain hoses, the dual fill valves, and the drain pump as follows. Refer to Fig. 15 on page 1. Shut down the humidifier as described in Section 5.3.8. - Page 60 Fig. 15: Cleaning Hoses, Dual Fill Valves and Drain Pump (A-G are connection points to humidifier) Drain pump Bracket, drain pump Drain pump cover Fill valve O-ring 12 O-ring (x2) Level control unit Drain valve 13 Dual fill valve P-trap Drain pump adapter 14 Strainer Secondary heat-exchanger...
-
Page 61: Cleaning The Burner Assembly
6.5.6 Cleaning the Burner Assembly The burner(s) in the Condair GS humidifier does/do not require maintenance. However, if the burner(s) is/are not operating properly, clean the burner(s) and spark-igniter(s) as described below. Refer to Fig. 16 on page 1. Shut down the humidifier as described in Section 5.3.8. - Page 62 7. Visually inspect the matting on the inside surface of the burner assembly for hot spots, tears, or any clogging. If the matting has hot spots or tears, replace the burner assembly. If the matting is clogged, DO NOT use a scraper to remove the blockage. Use low pressure air at maximum 35 Pa to clear all blockages without damaging the matting.
-
Page 63: Replacing Backup Battery And The Internal Fuse
Only a qualified service technician authorized by the customer should replace the backup battery and/ or the internal fuse on the control board of the Condair GS. Replace the backup battery and/or the internal fuse on the control board as follows. Refer to Fig. -
Page 64: Resetting Service Reminder
6.5.9 Installing Software Updates All software updates can be downloaded from www.condair.com. Download the software update file and extract it to a USB memory stick that has been formatted to 32-bit FAT system. The software update file (ending with .bin) should be located at the root level on the USB stick. -
Page 65: Fault Isolation
Fault Isolation General Personnel Qualifications Troubleshooting of the Condair GS humidifier must only be performed by well qualified and properly trained personnel authorized by the customer. It is the customer's responsibility to verify qualifications of the personnel. Electrical repairs must only be performed by a licensed electrician authorized by the customer or by Condair service technicians. -
Page 66: General Troubleshooting
General Troubleshooting Most operational warning/fault conditions are caused by improper installation, or by not adhering to the suggested best practices for installation of the humidifier and system components. Hence, a full fault diagnosis always requires a thorough examination of the entire system (hose connections, control systems, etc.). Table 13 provides general guidelines for troubleshooting the humidifier. For detailed troubleshooting information of the auxiliary system components, refer to their product manuals. -
Page 67: Warning And Fault List
The SIM card may not be seated properly on the integrated control board. • Check that the SIM card is seated properly. Defective SIM card. • Contact your Condair representative. – Main Missing No communication between the Extension unit and the Main unit in the Linkup chain. Opera- (or) tion is interrupted until a signal is received. - Page 68 Code Message Probable Cause/Remedy Warning Fault Service Due Warning The set service interval time has elapsed. The unit will continue to run for 200 hours before a fault message is generated and the operation of the humidifier is stopped. Service Due Fault Unit needs to be serviced.
- Page 69 • With the unit powered up, check that LED1 and LED10 on the driver board are flashing. Otherwise, contact your Condair representative. Unspecified driver board fault. • Check that the heartbeat LED10 on the driver board is blinking. Otherwise, contact your Condair representative.
- Page 70 • Check the status LED on the ignition control module – three flashes of the red LED indi- cate problem with the supply, or gas valve, or a loose connection. Contact your Condair representative if further assistance is required. Faulty ignition control module.
- Page 71 Check for voltage at locations labelled "TH" and "V2" on the ignition control module after the blower has completed pre-purging the system. If 24 VAC voltage is detected at "V2" but not at "TH", replace the gas valve. Contact Condair to order a replacement gas valve. –...
- Page 72 Restart the unit, and check the blower rpm in in the control software. "Input Diagnostics" If the rpm is low, contact your Condair representative. Restrictions at blower, or damaged blower. • Visually inspect the blower and blower inlet for restrictions.
-
Page 73: Resetting Fault Status
Code Message Probable Cause/Remedy Warning Fault W149 E149 Air Proving Switch The air proving switch identified has opened while the unit was operating or during blower Open start-up. The unit will interrupt operation and retry three times. After a third attempt a fault message is generated. -
Page 74: Decommissioning Of The Condair Gs
7. Disconnect and remove the intake and exhaust vents. 8. Remove the humidifier from its mounting surface. 9. If the Condair GS humidifier is to be put into long-term storage, store the humidifier in its original packaging inside a protected area that meets the following requirements: –... -
Page 75: Product Specifications
Product specifications Performance Data Power consumption at Power consumption at minimum demand maximum demand Manifold Min./Max. Steam [kW] [kW] Model Pressure Capacity in Pa in kg/h Natural gas Propane Natural gas Propane (G20) (G31) (G20) (G31) GS 23-CS 18.2 18.2 -2,5 4.6-23 GS 23 20.5... -
Page 76: Operating Data
Operating Data Control signal input types Active 0-5 VDC, 1-5 VDC, 0-10 VDC, 2-10 VDC, 0-20 VDC, 0-16 VDC, 3,2-16 VDC, 0-20 mADC, 4-20 mADC Passive 135-10 kΩ ohmic humidity sensor On/Off control <2,5 VDC (Off) 2,5-20 VDC (On) Digital (via Modbus, BACnet IP/MSTP BACnet IP, BACnet MSTP, Modbus, LonWorks (Option), BACnet MSTP BTL-Certified (Option), BACnet IP BTL-Certified (Option) Ambient Conditions Ambient temperature... - Page 77 Drain water Drain water temperature 60 °C maximum (with drain water cooling), 100 °C (without drain water cooling) Drainage capacity 20 l/min Power Model 230 V/1~50 Hz Pn max. in kW In max. in A Cable cross sec- Fuse "F1" in A tion in mm slow acting (aM) GS 23-CS...
- Page 78 Notes...
- Page 80 CONSULTING, SALES AND SERVICE: CH94/0002.00 Condair Group AG Gwattstrasse 17, 8808 Pfäffikon SZ, Sitzerland Phone +41 55 416 61 11, Fax +41 55 588 00 07 info@condair.com, www.condairgroup.com...
Need help?
Do you have a question about the GS II Series and is the answer not in the manual?
Questions and answers