
Subscribe to Our Youtube Channel
Related Manuals for Condair NORTEC GS II Series


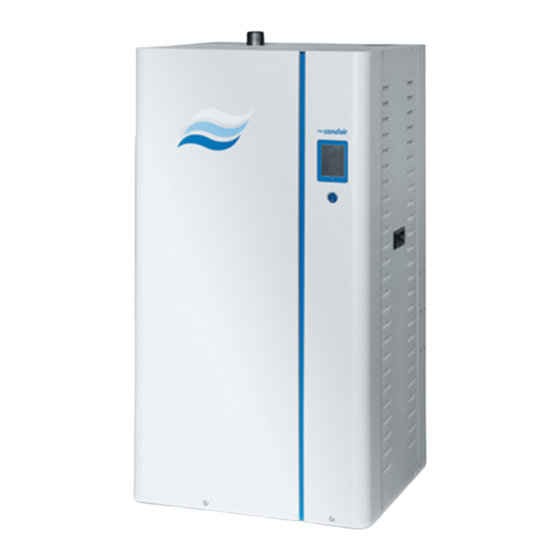
Summary of Contents for Condair NORTEC GS II Series
- Page 1 NORTEC OPERATION AND MAINTENANCE MANUAL Gas-fired Steam Humidifier Nortec GS Series II Humidification and Evaporative Cooling...
- Page 2 Serial number: Proprietary Notice This document and the information disclosed herein are proprietary data of Condair Ltd. Neither this document, nor the information contained herein shall be reproduced, used, or disclosed to others without the written authorization of Condair Ltd., except to the extent required for installation, operation or maintenance of the customer's equipment.
-
Page 3: Table Of Contents
Contents Introduction General For Your Safety Product Overview General Description Functional Description Operator Interface Controls Control Software 4.2.1 Home Screen 4.2.2 Operating Status 4.2.3 Maintenance and Fault Status 4.2.4 Help 4.2.5 System Information 4.2.6 Main Menu 4.2.6.1 Configuration Menu 4.2.6.2 Service Menu 4.2.6.3 Setpoint... - Page 4 6.5.3 Cleaning the Secondary Heat-exchanger 6.5.4 Cleaning the Float Chamber 6.5.5 Cleaning Hoses, Dual Fill Valves and Drain Pump 6.5.6 Cleaning the Burner Assembly 6.5.7 Replacing Backup Battery 6.5.8 Replacing Internal Fuse 6.5.9 Resetting Service Reminder 6.5.10 Installing Software Updates Fault Isolation General Fault Indication...
-
Page 5: Introduction
Comply with all local and regional regulations dealing with gas, combus- tion air, flue gases, water, steam and electrical systems. If you have additional questions, contact your Condair representative. They will be glad to assist you. General Limitations The subject of this manual is the Nortec GS humidifier. -
Page 6: For Your Safety
(refer to for details). Any other type of application, without the express written consent of Condair, is considered to be NOT conforming to its intended purpose, and may lead to dangerous operation and will void the warranty. - Page 7 DANGER! Risk of fire or explosion! The Nortec GS is a gas-fired humidifier. Improper installation, adjustment, alteration, service, maintenance or use can cause carbon monoxide poisoning, explosion, fire or other hazards that can cause serious injury, death or property damage. If over-heating occurs or if the gas fails to shut off: Shut off the gas supply at the manual gas shutoff valve before shutting off the electrical power supply.
- Page 8 All personnel working with the unit must immediately report to the customer any alterations to the unit that may affect safety, and if it is suspected that the Condair GS steam humidifier cannot be operated safely for any of the reasons listed below, shut it down immediately as described in "Shutting Down"...
- Page 9 The location of the various safety labels on the Nortec GS humidifier is shown below. Figure 1: Safety Labels Label, gas safety warning Label, keep cabinet closed warning Label, installation guidelines Label, general safety warning Label, specification Nortec GS For Your Safety 2596646_A_EN_1911_Nortec-GS_OM...
-
Page 10: Product Overview
In addition, up to four humidifiers can be set up in a "Main- Extension" configuration using Condair's Linkup system to satisfy large humidification needs. The Nortec GS humidifier comes in two housing styles – compact 50-100 lb/h (23-45 kg/h), and full-size 150-600 lb/h (65-260 kg/h). - Page 11 Figure 3: Humidifier Components (GS 100 and 300 shown). Door, side and top panels removed for clarity. Steam outlet Exhaust Manifold (GS 200-600) 15 Silicone tube, exhaust High limit sensor Float chamber 16 Exhaust adapter Blower 10 Overflow 17 Low voltage terminal Burner 11 Condensate trap (from exhaust) 18 Integrated control board...
-
Page 12: Functional Description
Functional Description Combustion The combustion system consists of a fully modulating forced-draft combustion air blower(s), a negative pressure regulated gas valve(s), and a premix burner(s). On a call for humidity, the blower is energized to purge the system. During this time the control software performs diagnostic checks of the safety systems –... - Page 13 Note: The water levels should appear in ascending then descending order; L1, L2, L3, L4, L5, L4, L3. A fault message "Fill Check Fault" appears if the water level does not rise to level L5. A fault message "Drain Check" appears if the water lvel does not drop below the level L3. 3.
-
Page 14: Operator Interface
Operator Interface Controls Figure 5. It The operator interface in the Nortec GS humidifier is located on the front of the unit – refer to consists of a touchscreen display with a LED status indicator, and an On/Off switch. Refer to Table 2 a description of each of these elements. -
Page 15: Operating Status
Figure 6: Home Screen Elements Date and time, Current Service/Warning/Fault status message – Button, <About> – access the system in- Operating status message – refer to refer to formation. Refer to "Maintenance and Fault Status" "System Information" "Operating Status" on page 15 on page 16 for details. -
Page 16: Maintenance And Fault Status
Table 4: Status Icon Descriptions Icon Description The icon appears to the left of the operating status message or the maintenance/fault message when the system is working normally. The icon appears to the left of the maintenance/fault status message when a maintenance reminder or a condition with a "Warning"... - Page 17 General Tab Serial Number: shows the serial number, which is also shown on – the specification label. – Humidifier Model: shows the model number, which is also shown on the specification label (on the right side of the humidifier). – Humidifier Capacity: shows the total steam output capacity of the humidifier.
- Page 18 Operational Status Tab Output: shows the current actual steam output level of the – humidifier. – Operating Hours: shows the current accumulated number of hours the humidifier has been producing steam since startup. – Weighted Hours: shows the number of operating hours on the unit weighted x demand % output.
- Page 19 Features Tab Blowdown Rate: shows the rate at which the tank is partially – drained, as a percentage of actual steam production. Refer to the "Water Management Tab" on page 21 for more details. Drain Cool: shows the configuration setting of the drain cool func- –...
-
Page 20: Main Menu
4.2.6 Main Menu Select the <Menu> button on the Home screen to view the Main menu. The Main menu and its contents are password-protected. Refer to Figure 7. Enter the password "0335" to access the Main menu. Figure 7: Main Menu Access The structure of the Main menu and its sub-menus is shown in Table Table 6: Main Menu Structure... - Page 21 Features Menu Each tab under the Features menu is discussed below. Water Management Tab Idle Mode: allows you to set the idle function of the humidifier – when it is in standby mode. Options: Idle Only – the humidifier waits indefinitely for a demand signal.
- Page 22 Fill Correction 1: allows you to adjust all the parameters for the – high volume fill valve(s) to compensate for valve tolerances, as well as site-specific conditions. CAUTION! Do not adjust this value unless instructed to do so by a Condair representative. Setting range: 0.1-2.0 Factory setting: –...
- Page 23 Operation Tab Manual Capacity: allows you to set the capacity limitation value – as a percentage of the maximum capacity of the unit. Setting range: 20-100 % Factory setting: 100 % – Capacity Timers: Present status of the timer controlled capacity limitation ("On": timer controlled capacity limitation activated, "Off": timer controlled capacity limitation deactivated).
- Page 24 Control Settings Menu Table 6 on page Control Settings menu is discussed below. Refer to the structure of the tabs in Basic Tab Source: allows you to select the source of incoming control/hu- – midity signal to the humidifier. Options: Analog –...
- Page 25 100% output. Note: Band channel 2 setting appears only if Control Channels is set to "Dual". CAUTION! Do not adjust this value unless instructed to do so by a Condair representative. Setting range: 6-65% Factory setting: – ITime Channel 1: allows you to set the integral time for error cor- rections by the internal P/PI controller.
- Page 26 RH Alerts Tab Note: This tab appears only if Control Mode is set to "RH P" or "RH PI". RH Alerts: allows you to enable or disable the alert function that – warns if sensed humidity is too high or too low. Options: On –...
- Page 27 Multi-Unit Operation Tab Linkup: allows you to enable or disable the Linkup function, which – allows up to six humidifier to connect and operate together from a single set of control signals. It also allows you to designate the humidifier to operate as a "Main" or "Extension" unit. Options: Main –...
- Page 28 Multi-Unit Operation Tab, continued... Sequence Interval: allows you to set the time interval used by – the control software to establish a new operating sequence to balance operating hours of linked humidifiers. Note: This set- ting is available only if Sequence Rotation is enabled.
- Page 29 General Menu Table 6 on page 20 Each tab under the General menu is discussed below. Refer to for the menu structure. Basic Tab Date: allows you to set the current date in MM/DD/YYYY or DD/ – MM/YYYY format depending on the Date Format setting.
- Page 30 Communications Menu Table 6 on page 20 Each tab under the Communications menu is discussed below. Refer to for the menu structure. Remote Enable Tab – Allow Remote Disable: allows you select whether steam produc- tion by the humidifier can be remotely disabled via the BMS. Options: Yes –...
- Page 31 BMS Timeout Tab BMS Timeout: allows you to set the maximum time the humidifier – will wait without any communications from the BMS network before a timeout warning is generated. Setting range: 1-300 s Factory setting: 300 s Modbus Parameters Tab –...
- Page 32 BACnet Parameters Tab (continued) BACnet The following settings appear only if is set to "BACnet/IP" or "MSTP". – Device Name: allows you to assign a name to the humidifier for communications over the BACnet/IP protocol. – MSTP Mode: Master or Slave When set to BACnet MSTP the Nortec GS humidifier commu- nicates as a BACnet slave only.
- Page 33 Remote Fault Board Indication: Alters how system warnings are generated on the – remote fault board. If warning is selected the RFB will activate the service output on any system warning, including system notifica- tions prior to completing automated corrective actions (ex. fill time- out).
-
Page 34: 4.2.6.2 Service Menu
4.2.6.2 Service Menu The Service menu lets you enter the startup code, reset the service reminder after performing scheduled maintenance, access the fault and maintenance history lists and perform diagnostics. Refer to Figure 7 on page 20. Refer to Table 6 on page 20 for the menu structure. - Page 35 Reset Fault History: (requires special service code - contact your – Condair representative) allows you to reset the fault history. A warn- ing message is displayed asking you to confirm the reset. All previ- ously recorded fault history is erased.
-
Page 36: Setpoint
– Output Diagnostics: (requires special service code - contact your Condair representative) allows you to access the Output Diagnostics menu to enable or disable various system components. Note: The diagnostic menu will only be displayed after you acknowledge the warning message that the humidifier will be placed in standby mode. - Page 37 (for technical support) in the unit, from a USB memory stick. This information is shown when selecting Help on the Home Screen. Information includes Company Name, Address, Telephone Number, Email, and Website. Please contact your Condair representa- tive for assistance with this. –...
-
Page 38: Software Configuration
Configuring for Multi-Unit Operation Set up the control software for multi-unit operation as described below. A maximum of four humidifiers can be set up in a "Main-Extension" configuration using Condair's Linkup system to satisfy large hu- midification needs. IMPORTANT! This procedure should only be used to control multiple humidifiers that are using the same control signal inputs from the same conditioned environment. - Page 39 Linkup Type – select the mode of operation of the humidifiers in the Linkup chain ("Series" or "Parallel"). Sequence Rotation – enable or disable the function that manages the starting order to balance the operating hours on each steam cylinder. Note: This setting is available only if Linkup Type is set to "Series".
-
Page 40: Operation
Operation General Personnel Qualifications The Nortec GS humidifier must only be operated by personnel who are adequately qualified, well trained and are authorized by the customer. Safety Observe all safety precautions described in "For Your Safety" on page Operating Procedures 5.2.1 Filling the System Fill the Nortec GS humidifier as follows. -
Page 41: Starting The Humidifier
After all burners have failed to ignite, the fault message "No Burners Available" will appear on the display. The blowers will perform a post-purge and then shut off. 5. Power cycle the humidifier to reset the fault condition. 6. Open the manual gas shutoff valve. 5.2.3 Starting the Humidifier Start the humidifier as follows:... -
Page 42: Remote Monitoring
The humidifier has power, and the On/Off switch is in the On position. The Nortec GS humidifier can also be monitored remotely from a laptop or desktop computer using the ethernet port on the integrated control board. Contact your Condair representative for assistance. 5.2.5 Inspections During Operation Perform regular inspection of the Nortec GS humidifier and the humidification system when it is in op- eration. -
Page 43: Manually Initiate Tank Draining
5.2.6 Manually Initiate Tank Draining Figure 8: Drain Screens During periods of inactivity, such as off-season or periods of low demand, drain the water from the tank. To drain the tank in the Nortec GS humidifier, manually initiate draining as follows. Refer to Figure 1. -
Page 44: Shutting Down
212 °F (100 °C). Close the drain valve after emptying the tank. 3. Make a note of any fault code displayed on the Home screen. Note: At the end of the season, report the fault history to a Condair-certified technician. Select Service > Fault/Service History tab to access the fault history. -
Page 45: Maintenance
Maintenance General To ensure proper performance and long operating life of the Nortec GS humidifier, Condair recommends inspection of the appliance and installation at least once a year by a qualified service person. The amount and type of maintenance required is generally dependent on how much the humidifier operates. The Nortec GS humidifier monitors the amount of steam produced over time and will indicate when service is required. -
Page 46: Mandatory Maintenance Schedule
Mandatory Maintenance Schedule Table 8 lists the mandatory maintenance schedule for the Nortec GS humidifier. Table 8: Mandatory Maintenance Schedule 30 Days End of After Mid- Task Season Maintenance Initial season (2000 hrs) Start-up Inspect drainage. Perform a visual check of the drainage system, including the air gap funnel and drainage into the building drain. -
Page 47: List Of Consumables
30 Days End of After Mid- Task Season Maintenance Initial season (2000 hrs) Start-up Inspect high Visually check that the thermocouple is attached to the exhaust vent, limit switch and and the thermocouple wires are connected properly to the switch. sensor. -
Page 48: Adjusting Blowdown Settings
Table 10. Do-it-yourself kits are available to test hardness in the feed water. You can also contact your local municipality for a water quality report, or order a Condair water test kit. Table 10: Water Quality Requirements Water Type Hardness... -
Page 49: Maintenance Procedures
5-15 15-25 25-40 > 40 Not recommended for the humidifier without treatment of the water. Contact your local Condair representative. Maintenance Procedures 6.5.1 Removal and Installation of Access Panels Removal 1. Turn the captive screw at the bottom of the door panel (control cabinet/plumbing cabinet) counter- clockwise with a screwdriver. -
Page 50: Cleaning The Tank
3. Inspect all fill hoses for scale build-up or blockages. Clean or replace where necessary. 4. Remove and discard the tank gasket (Condair does NOT recommend reusing the tank gasket). 5. Use a soft-bristled or plastic brush or scraper (not wire brush, not metal) to remove all scale build-up on the inside surfaces of the tank, all tank ports, the outside of the primary heat-exchanger coils, and inside of the drain fitting. -
Page 51: Cleaning The Secondary Heat-Exchanger
8. Install a new tank gasket and secure the tank cover to the tank. Note: The order of torquing the bolts for the tank cover are shown in the hexagonal symbols in Figure 10 on page 51. Tighten bolts with your fingers and torque at the end of assembly. (What is the max torque?) M6 (top of door) -
Page 52: Cleaning The Float Chamber
Figure 11: Cleaning Secondary Heat-exchanger -CS/NX Model Only (compact and double unit shown) Tank bracket Hose, fill valve to top of heat-exchanger Exhaust adaptor Hanger bracket Hose, heat-exchanger to tank. Screw 8-32 x 0.5 in TA and star washer * L-bracket (for the top of the heat- Silicone fitting elbow 10 Silicone exhaust tube exchanger only) -
Page 53: Cleaning Hoses, Dual Fill Valves And Drain Pump
7. Re-start the humidifier – refer to "Restarting After Shutdown" on page 44 and ensure that the Float Check is enabled in the features menu – refer to "Features Menu" on page 8. Check for leaks. Figure 12: Cleaning Float Chamber Bracket, float chamber and P-trap Float (x2) Hose, to bottom of tank... - Page 54 Figure 13: Cleaning Hoses, Dual Fill Valves and Drain Pump (A-G are connection points to humidifier) Drain pump Secondary heat-exchanger 10 Drain pump, 24 V Fill valve (CS/NX models only) 11 Drain pump cover Float chamber Bracket, drain pump 12 O-ring (x2) P-trap O-ring 13 Dual fill valve...
-
Page 55: Cleaning The Burner Assembly
6.5.6 Cleaning the Burner Assembly The burner(s) in the Nortec GS humidifier does not require maintenance. However, if the burner(s) is not operating properly, clean the burner(s) and spark-igniter as described below. Refer to Figure 1. Shut down the humidifier. Remove the plumbing cabinet door panel and make sure that the tank has been emptied. -
Page 56: Replacing Backup Battery
6. Visually inspect the matting on the inside surface of the burner assembly for hot spots, tears, or any clogging. If the matting has hot spots or tears, replace the burner assembly. If the matting is clogged, DO NOT use a scraper to remove the blockage. Use low pressure air at maximum 0.005 psi (35 Pa) to clear all blockages without damaging the matting. -
Page 57: Replacing Internal Fuse
2. Select the <Yes> button on the confirmation screen. Select the <No> button to abort the reset. 6.5.10 Installing Software Updates All software updates can be downloaded from www.condair.com. Download the file and extract it to a USB memory stick that has been formatted to 32-bit FAT system. The software update file (ending with .bin) should be located at the root level on the USB stick. -
Page 58: Fault Isolation
Troubleshooting of the Nortec GS humidifier must only be performed by well qualified and well trained personnel. Electrical repairs must only be performed by a licensed electrician authorized by the customer or by Condair service technicians. Troubleshooting the Nortec GS humidifier may require personnel to access the inside of the control cabinet in the humidifier which may expose personnel and equipment to the hazards described in "For... -
Page 59: Warning And Fault List
The SIM card may not be seated properly on the integrated control board. Check that the SIM card is seated properly. Defective SIM card. Contact your Condair representative. – Main Unit Miss- No communication between the Extension unit and the Main unit in the Linkup chain. - Page 60 – Check the Extension unit(s). – CTRLR Fault Flash memory read/write fault. (or) – Contact your Condair representative. Memory (or) CTRLR Reset Fill Warning The fill valve(s) have been active for an extended length of time and the water level is (W22) still zero.
- Page 61 – Inspect all hoses and connections. – Clean the float chamber – refer to "Cleaning the Float Chamber" on page – Startup Code Activation code required to use the humidifier. Activation code missing. – Contact your Condair representative. Nortec GS Fault Isolation 2596646_A_EN_1911_Nortec-GS_OM...
- Page 62 J12 on the integrated control board. – With the unit powered up, check that LED1 and LED10 on the driver board are flash- ing. Otherwise, contact your Condair representative. Unspecified driver board fault. – Check that the heartbeat LED10 on the driver board is blinking. Otherwise, contact your Condair representative.
- Page 63 – Check for voltage at locations labelled "TH" and "V2" on the ignition control module after the blower has completed pre-purging the system. If 24 VAC voltage is detected at "V2" but not at "TH", replace the gas valve. Contact Condair to order a replacement gas valve.
- Page 64 Code Message Probable Cause Warning Fault – E144 Float Level On three consecutive occasions, more than one float level was registering at the same time. The unit cannot operate without accurate float level reading. Fix the problem before restarting the unit. Floats may not be working properly.
- Page 65 – Restart the unit, and check the blower rpm in Input Diagnostics in the control software. If the rpm is low, contact your Condair representative. Restrictions at blower, or damaged blower. – Visually inspect the blower and blower inlet for restrictions.
-
Page 66: Resetting Fault Status
Code Message Probable Cause Warning Fault – E153 AP Exhaust One or more of the external safety switches installed for the Exhaust in Duct feature Fault have opened. – Safety switches have been wired incorrectly. Verify for the proper installation of all safety switches, and verify that the switches have been wired correctly to the controls low-voltage terminal. -
Page 67: Decommissioning
The Nortec GS humidifier should not be disposed off in domestic waste, and should only be disposed off in accordance with local regulations at authorized collection facilities. If you have any questions, contact the appropriate local authorities or your local Condair representative. Nortec GS... -
Page 68: Performance And Operating Data
Performance and Operating Data Performance Data Minimum Input (gross) BTUh (kW) Maximum Input (gross) BTUh (kW) Min./Max. Steam Nortec Capacity Model Natural Gas Propane Natural Gas Propane lb/h (kg/h) GS 50-CS 12,400 (3.6) 13,000 (3.8) 62,000 (18.2) 62,000 (18.2) 10-50 (4.5-23) GS 50-NX 13,000 (3.8) –... - Page 69 Gas Operating Pressure: Natural gas 4.5-10.0 in H2O (1.1-2.4 kPa) Propane 9.0-13.0 in H2O (2.2-3.2 kPa) Water Supply: Water pressure (regulated) 30-80 psig (3.0-8.0 bar, 207-550 kPa) Flow rate 2.6 gpm (10 L/min) for Nortec GS 50-300 , 5.3 gpm (20 L/min) for Nortec GS 450- Water temperature 34-59 °F (1-15 °C) recommended;...
- Page 70 Warranty Condair Inc. and/or Condair Ltd. (hereinafter collectively referred to as THE COMPANY), warrant for a period of two years after installation or 30 months from manufacturer’s ship date, whichever date is earlier, that THE COMPANY’s manufactured and assembled products, not otherwise expressly warranted, are free from defects in material and workmanship.
- Page 71 CONSULTING, SALES AND SERVICE: Condair Ltd. U.S.A. 835 Commerce Park Ave Ogdensburg, NY 1366-2209 CANADA 2740 Fenton Road Ottawa, ON, K1T 3T7 Tel: 1.866.667.8321 Fax: 613.822.7964 Email: na.info@condair.com Website: www.condair.com...
Need help?
Do you have a question about the NORTEC GS II Series and is the answer not in the manual?
Questions and answers