CYBEX ATON 2 Owner's Manual
Hide thumbs
Also See for ATON 2:
- User manual (132 pages) ,
- Owner's manual (96 pages) ,
- User manual (48 pages)
Table of Contents
Advertisement
CYBEX Industrial Limited
Suite 1222, 12/F | Leighton Centre | 77 Leighton Road | Causeway Bay | Hong Kong
www.cybex-online.com
Distributed in the United States by Columbus Trading-Partners USA Inc.
1801 Commerce Drive | Piqua, Ohio 45356, USA
Tel: 1-877-242-5676 | e-mail: support.americas@goodbabyint.com | www.cybex-online.com
© 2019 CYBEX Industrial Limited All rights reserved. Printed in China.
This product and its components are subject to change without notice. Patents pending.
© 2019 CYBEX Industrial Limited All rights reserved. Printed in China.
This product and its components are subject to change without notice. Patents pending.
Advertisement
Table of Contents

Subscribe to Our Youtube Channel
Related Manuals for CYBEX ATON 2


Summary of Contents for CYBEX ATON 2
- Page 1 1801 Commerce Drive | Piqua, Ohio 45356, USA Tel: 1-877-242-5676 | e-mail: support.americas@goodbabyint.com | www.cybex-online.com © 2019 CYBEX Industrial Limited All rights reserved. Printed in China. This product and its components are subject to change without notice. Patents pending. © 2019 CYBEX Industrial Limited All rights reserved. Printed in China.
- Page 2 ATON 2 OWNER’S MANUAL MANUAL DEL PROPIETARIO READ this Owner’s Manual carefully before first use, and keep it for future reference. LEA este Manual del Propietario minuciosamente antes de usarlo y guarde para su futura referencia.
- Page 3 Thank you for purchasing the CYBEX Aton 2. We are proud to bring this Before the first use of the Aton 2 infant car seat, please make sure you have German engineered product to North America. We hope the Aton 2 will make followed all the steps in the Safety Checklist and CYBEX Safe Car Practices your child’s travel both safer and more pleasant, as well as make installation...
-
Page 4: Table Of Contents
Using a Lap Belt Only ................36 Warnings and Important Safety Information ...........3 Using the Infant Carrier with the Base ...........38 Overview of the Aton 2 Infant Carrier .............10 Using the Linear Side-impact Protection (LSP) ........39 Overview of the Aton 2 Base ..............12 Installing the Infant Carrier without the Base .........40... -
Page 5: Registration And Recall Information
Columbus Trading-Partners USA Inc. Attn: ParentLink 1801 Commerce Drive Piqua, Ohio 45356, USA Register online at: http://register.cybex-online.com/us/carseats or call 1-877-242-5676 For recall information, call the U.S. Government’s Vehicle Safety Hotline at: 1-888-327-4236 (TTY: 1-800-424-9153), or visit www.NHTSA.gov. Certification This child restraint system conforms to all applicable Federal Motor Vehicle Safety Standards. -
Page 6: Warnings And Important Safety Information
WARNING! DEATH or SERIOUS INJURY can occur restraint installations, to determine allowable • READ this Owner’s Manual carefully before seating positions. first use, and keep it for future reference. • NEVER INSTALL or use this child restraint • Not every location within a vehicle may be until you have read and understand the safe for the installation of this child restraint. - Page 7 WARNING! DEATH or SERIOUS INJURY can occur When Used Inside a Vehicle • DO NOT USE this child restraint if the top of your child's head is LESS THAN 2.5 cm • ONLY USE with children who weigh between (1 inch) from the top of the restraint. 1.8 and 15.9 kg (4 and 35 lb) AND whose •...
- Page 8 WARNING! DEATH or SERIOUS INJURY can occur • ONLY USE this child restraint REAR FACING. • NEVER INSTALL the Aton 2 Base in a • NEVER INSTALL this child restraint in vehicle seating position where the Load Leg, even seats that face the rear or side of the vehicle.
- Page 9 WARNING! DEATH or SERIOUS INJURY can occur • NEVER LEAVE a vehicle seat back with a • ALWAYS CHECK buckles and other parts for folding mechanism unlocked. In the event hot surfaces. A hot surface could burn your of a sudden stop, an unlocked vehicle seat child! Cover an unoccupied child restraint back could prevent this child restraint from with a blanket when leaving it in a vehicle...
- Page 10 • ALWAYS KEEP your child properly secured • NEVER USE accessories or parts with this in the Harness, even when using the carrier child restraint other than those approved outside of the vehicle. by CYBEX. Use of accessories or parts...
- Page 11 For a list of compatible strollers, • DO NOT ATTEMPT to make repairs to or please visit www.cybex-online.com otherwise modify or tamper with this child restraint. • DO NOT USE a used child restraint whose history you do not know.
- Page 12 WARNING! DEATH or SERIOUS INJURY can occur • DO NOT ALLOW children to play with • ALWAYS LOCK an unoccupied vehicle. vehicle seat belts. They may create an Children can get into vehicle and ENTANGLEMENT HAZARD for any child that accidentally lock themselves in, resulting in DEATH or SERIOUS INJURY.
-
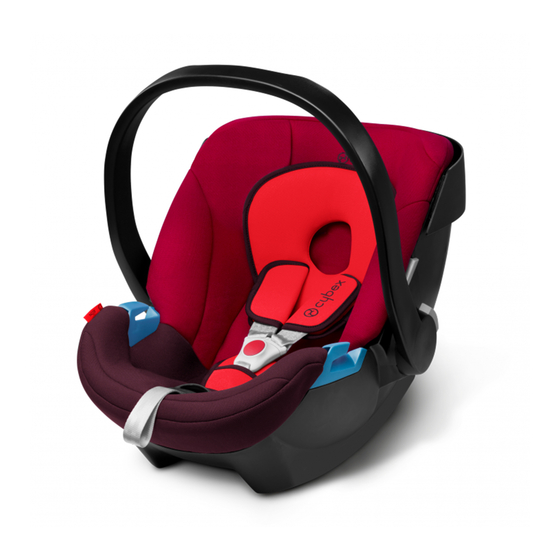
Page 13: Overview Of The Aton 2 Infant Carrier
Overview of the Aton 2 Infant Carrier Top View Designer Canopy (Stored) Carry Handle Infant Insert Shoulder Pads (removable) Travel System Release Button Chest Clip LSP device (raised) LSP device (lowered) Belt Guide Buckle Pad Harness Straps Harness Adjustment Button... - Page 14 Overview of the Aton 2 Infant Carrier Bottom View Shoulder Belt Guide Harness Slots Harness Base Attachment Rod Splitter Plate Carry Handle Adjustment Button Carry Handle Adjustment Button Clear Plastic Cover (Do not discard) Owner's Manual (Stored) Base Attachment Rod...
-
Page 15: Overview Of The Aton 2 Base
Overview of the Aton 2 Base Front View Level Indicator (hidden) Locking Lever Infant Carrier Attachment Lock Belt Tensioning Plate Leveling Foot Belt Guide Steel Chassis LATCH Strap Tensioning Loop Infant Carrier Attachment Catch Infant Carrier Release Green Safety Button... - Page 16 Overview of the Aton 2 Base Rear View Level Adjustment Handle Belt Tensioning Plate Locking Lever LATCH Connector Storage Leveling Foot (fully extended) LATCH Strap Adjuster LATCH Connector LATCH Guides...
-
Page 17: Unique Features Of The Aton 2
Unique Features of the Aton 2 Linear Side-impact Protection (LSP) Super Easy And Tight Installation The side protectors transfer the initial impact The Aton 2 Belt Tensioner uses of a side crash to the shell. The optimized CYBEX's Super Easy And Tight... -
Page 18: Child Size Requirements
Use the CYBEX Aton 2 until your child reaches the maximum weight or height limits. Because not all children have the same shapes and sizes, DO NOT USE the Aton 2 when the top of the child's head is less than 2.5 cm (1 inch) from the top of the Infant Carrier. This allows for proper protection during a crash. -
Page 19: Using The Infant Carrier
Using the Infant Carrier Harness Buckle To release Buckle Tongues, firmly press the button on the Harness Buckle and pull the tongues out. To fasten, insert each Tongue into Buckle, listening for an audible Pull on each to verify a secure connection. Check that the Buckle functions properly and is kept free of dirt and debris. -
Page 20: Handle Positions
Using the Designer Canopy™ Simply pull forward to extend the Aton 2 Canopy. The Canopy has two positions as shown. To retract the Canopy, gently push it back into its original position. -
Page 21: Adjusting The Harness Height
Using the Infant Carrier Adjusting the Harness Height For proper use of the Infant Carrier, the Harness shoulder straps MUST be at the correct height for your child. Side View 1. Place child in Infant Carrier making sure their bottom is in the seat, and their back is fully supported. -
Page 22: Newborn Inlay
Newborn Inlay from the seat. Keep it for future use. Infant Insert To ensure a better fit for infants, we recommend using the Aton 2 Infant Insert. The Insert will give more stability to the head and upper torso, as well as provide a better Harness fit for smaller babies. -
Page 23: Securing The Child
Using the Infant Carrier Securing the Child 1. Loosen Harness by firmly pressing down the Harness Adjustment Button while pulling forward on both straps at shoulder level. 2. Press button on Harness Buckle to release Tongues. 3. Separate Chest Clip and spread straps apart. Place child in Infant Carrier in seated position making sure their bottom is in the seat, and their back is fully supported. - Page 24 Using the Infant Carrier 7. Pull up on Harness Straps to snug around the child's hips while holding the Harness Buckle in place. 8. Slowly pull the adjuster strap to tighten the Shoulder Straps. A snug strap should not allow any slack. It lies in a relatively straight line without sagging.
-
Page 25: More Support Options
Make sure legs are straddling the crotch strap. WARNING!: To avoid DEATH or SERIOUS INJURY, NEVER PLACE extra padding UNDER or BEHIND the child. The Infant Insert is the only approved padding to be used with the Aton 2. -
Page 26: Vehicle Seat Location Requirements
Vehicle Seat Location Requirements WARNING! DEATH or SERIOUS INJURY can occur NEVER place this child restraint on a front seat with an active airbag. DEATH or SERIOUS INJURY may occur. The REAR seat is the safest place for children 12 and under. Based on crash statistics, the US National Highway Traffic Safety Administration (NHTSA) recommends that parents select the REAR SEAT... - Page 27 Use this child restraint in FORWARD FACING VEHICLE SEATS ONLY. The Aton 2 is allowed to touch the vehicle seat(s) in front of it, as long the recline angle of the Aton 2 is not affected. The best position for the child restraint is one that is recommended by your AND allows a proper and secure installation of the vehicle Owner’s Manual...
- Page 28 Vehicle Seat Location Requirements Vehicle Seat Belts The design and operation of vehicle seat belt systems vary from vehicle to vehicle and from seating location to seating location in the same vehicle. Refer to your vehicle Owner’s Manual for proper use, placement, and adjustment of the vehicle’s lap and shoulder belts.
-
Page 29: Sensorsafe™ Application
4. Installation Videos 5. Customer care contact information SensorSafe Technology ™ Questions? Comments?: Visit us at: www.cybex-online.com or call CYBEX at: 1-877-242-5676 * Not available on all models. Styles may vary. ** Trademarks are the property of their respective owners. -
Page 30: Using Latch
Top tether anchors are located in various places behind the seat but are NOT USED for the Aton 2 Infant Carrier or the Base. Is it safer? LATCH typically offers an easier and more consistent installation. However, this child restraint can be safely installed using either LATCH or vehicle belts. -
Page 31: Center Seating Positions
Lower Anchors from the outboard seating positions to install a Child Restraint. CYBEX allows this child restraint to be installed using the two inner Lower Anchors from the outboard seating positions if the distance between the inner Lower Anchors is between 28-51 cm (11 and 20 inches) AND if your vehicle manufacturer allows it. -
Page 32: Removing And Storing Latch Connectors
Removing and Storing LATCH Connectors To Remove from Storage To install the Base using LATCH, the Connectors must be removed from their storage compartments. 1. To access the LATCH Connector Storage compartments, squeeze the Level Adjustment Handle to fully extend the Leveling Foot. 2. -
Page 33: Using The Load Leg
Using the Load Leg The Load Leg is an effective safety feature of the Aton 2 and using it is STRONGLY RECOMMENDED. However, if necessary (e.g. in a center position with a hump in the floor), the Base may be installed with the Load Leg folded up underneath. -
Page 34: Adjusting The Recline Angle Using The Base
Adjusting the Recline Angle Using the Base It is very important for your child's safety that this child restraint be installed at the correct recline angle. Before attaching the Infant Carrier to the Base, always check the Level Indicator for the correct recline angle range based on child's weight. -
Page 35: Installing The Base
Installing the Base using LATCH 1. Remove LATCH anchors from storage. See page 29. 2. Unfold the Load Leg from underneath the Base. 3. Position Base on a rear vehicle seat. If a hump is present on the floor of the vehicle, see page 30 for important information on using the Load Leg in this seating position. - Page 36 Installing the Base using LATCH 8. Press the Belt Tensioning Plate down with both hands, where indicated, until it locks into place. The ORANGE Locking Lever will rotate to the CLOSE position when the Plate is locked. PRESS If Belt Tensioning Plate does not lock, try loosening the LATCH strap slightly.
-
Page 37: Using A Lap And Shoulder Belt
Installing the Base Using a Lap and Shoulder Belt 1. Unfold the Load Leg from underneath the Base. 2. Position Base on a rear vehicle seat. If a hump is present on the floor of the vehicle, see page 30 for important information on using the Load Leg in this seating position. - Page 38 Installing the Base Using a Lap and Shoulder Belt 8. Press the Belt Tensioning Plate down with both hands where indicated, until it locks into place. The ORANGE Locking Lever will PRESS rotate to the CLOSE position when the Plate is locked. If Belt Tensioning Plate does not lock, try loosening the vehicle belt slightly.
-
Page 39: Using A Lap Belt Only
Installing the Base Using a Lap Belt Only 1. Unfold the Load Leg from underneath the Base. 2. Position Base on a rear vehicle seat. If a hump is present on the floor of the vehicle, see page 30 for important information on using the Load Leg in this seating position. - Page 40 Installing the Base Using a Lap Belt Only 8. Press the Belt Tensioning Plate down with both hands, where PRESS indicated, until it locks into place. The ORANGE Locking Lever will rotate to the CLOSE position when the Plate is locked. If the Belt Tensioning Plate does not lock, try loosening the vehicle belt slightly.
-
Page 41: Using The Infant Carrier With The Base
Safety Button will pop out from the middle of the Infant Carrier Release to indicate proper attachment. The Aton 2 is allowed to touch the vehicle seat(s) in front of it, as long the recline angle of the Aton 2 is not affected. -
Page 42: Using The Linear Side-Impact Protection (Lsp)
Using the Linear Side-impact Protection (LSP) ALWAYS USE the LSP device when the Infant Carrier is installed in an outer seating position, either WITH OR WITHOUT the Base. WARNING! DEATH or SERIOUS INJURY can occur • ALWAYS USE an LSP device on the side of the child restraint immediately adjacent to a vehicle door or panel. -
Page 43: Installing The Infant Carrier Without The Base
WARNING!: To avoid DEATH or SERIOUS INJURY, NEVER install this child restraint using a non-locking vehicle lap shoulder belt. A locking clip MUST BE used with a vehicle belt that DOES NOT LOCK. Call the CYBEX Customer Care Department at 1-877-242-5676 to obtain a locking clip. - Page 44 Infant Carrier near the vehicle seat back to adjust the angle. See page 43. The Aton 2 is allowed to touch the vehicle seat(s) in front of it, as long the recline angle of the Aton 2 is not affected.
-
Page 45: Using A Lap Belt Only
Infant Carrier near the vehicle seat back to adjust the angle. See page 43. The Aton 2 is allowed to touch the vehicle seat(s) in front of it, as long the recline angle of the Aton 2 is not affected. -
Page 46: Adjusting The Recline Angle Without The Base
Adjusting the Recline Angle without the Base It's very important for your child's safety that this child restraint be installed at the correct angle. WARNING! DEATH or SERIOUS INJURY can occur • DO NOT use this or any other child restraint with a premature, low birth weight, or medically fragile infant, until after you have consulted with your doctor. -
Page 47: Using The Infant Carrier On Aircraft
The Federal Aviation Administration (FAA) recommends that children up to 18 kg (40 pounds) use a certified, harnessed child seat while travelling on an aircraft. The Aton 2 is certified for airplane use. Installing the Carrier on Aircraft Install your Infant Carrier in a window seat to avoid blocking the aisle. -
Page 48: Care And Cleaning
Care and Cleaning Removing the Seat Cover Installing the Seat Cover The seat cover is designed to be very taut and to fit exactly inside the Infant Reverse the removal instructions to reinstall the Seat Cover. Start at the top of Carrier. - Page 49 Care and Cleaning Spot Cleaning Harness Buckle Spot clean Seat Covers, Shoulder Pads, Buckle Pad, and the Infant Insert as Sponge clean or thoroughly rinse Harness Buckle with warm water. Test by needed with a clean cloth using mild detergent and water. fastening and unfastening until an audible CLICK is heard after inserting each buckle Tongue into the Buckle.
-
Page 50: Safety Checklist
Safety Checklist Did you read and understand this Owner’s Manual and all labels found on Is today’s date before the “Do Not Use After” date on the child restraint? this child restraint? Did you check for hot surfaces in sunny weather? Is the child restraint rear facing in an approved vehicle seat location? Safe Car Practices If using the Base, is it securely installed with the Load Leg locked firmly... -
Page 51: General Information About Sensorsafe
General Information About Sensorsafe Secure your child into the child restraint as you would normally. The SensorSafe Receiver Plug monitors both the Chest Clip Transmitter and the vehicle. When you arrive at your destination and turn your vehicle off, the SensorSafe system sounds a series of gentle tones reminding you that your baby is in the vehicle. - Page 52 “low battery” alarm will sound different from the beeps you typically hear when activating your SensorSafe system. The SensorSafe Chest Clip uses a Panasonic™ CR2032 Lithium button cell Battery. Should you have problems with SensorSafe hardware, please contact CYBEX at: 1-877-242-5676 or online at: www.cybex-online.com to order a replacement battery/parts.
- Page 53 Technology ™ Questions? Comments?: Visit us at: www.cybex-online.com or call CYBEX at: 1-877-242-5676 This device meets the requirements of SAE J3005. FCC Certified: Chest Clip Model: SOSR2, FCC ID: 2ABS2-SOSR3 Receiver Plug Model: SS2, FCC ID: 2ABS2-SS2 This device complies with Part 15 of the FCC Rules. Operation is subject to the following two conditions: (1) This device may not cause harmful interference.
- Page 54 General Information About Sensorsafe (Cont.) This equipment generates, uses, and can radiate radio frequency energy and, if not installed and used in accordance with the instructions, may cause harmful interference to radio communications. However, there is no guarantee that interference will not occur in a particular installation. If this equipment does cause harmful interference to radio or television reception, which can be determined by turning the equipment off and on, the user is encouraged to try to correct the interference by one or more of the following measures:...
-
Page 55: Using Sensorsafe
Using SensorSafe 1. INSTALL THE SENSORSAFE RECEIVER. Locate the 16PIN OBDII port in your vehicle. Refer to your vehicle owner’s manual for location. Plug in the SensorSafe Receiver. If unable to locate your vehicle manual, the SensorSafe Application may contain information regarding the location of the 16PIN OBDII port for your vehicle. - Page 56 SensorSafe reminder, alerting you that your baby is in the vehicle. If you don’t hear the reminder tone, test your SensorSafe by following steps 1-5 again. Contact CYBEX at: 1-877-242-5676 or online at: www.cybex-online.com if the reminder tone again fails to sound.
- Page 57 Using SensorSafe (Cont.) Replacing the SensorSafe Chest Clip Battery. 1. Loosen Harness by pressing Harness Release Button on the front of the Child Restraint and pulling forward on both Harness Straps. 2. Unbuckle Harness by pressing the button on the Crotch Buckle and pulling out both Buckle Tongues.
- Page 58 6. Place the Circuit Board with the new Battery in the Chest Clip. Replace the Cover and tighten the screws. This completes the battery replacement process. 7. If you have questions, please contact CYBEX at: 1-877-242-56761 or online at: www.cybex-online.com CR2032 ** Trademarks are the property of their respective owners.
-
Page 59: If You Need Help
Date ready so that we may help you efficiently. This information can be found on the underside of your Infant Carrier and Base. • www.safekids.org Please contact Cybex: • www.seatcheck.org • To find an available CPS Technician in your area, go to bit.ly/FindATech... -
Page 60: Warranty
(the “Warranty Period”). During the Warranty Period, this product. CYBEX, at its option, may repair or replace this product if it is found by the manufacturer to be defective in material or workmanship. CYBEX reserves the right to discontinue or change parts, fabrics, models, or products, or to LIMITATION OF WARRANTIES AND STATE/PROVINCIAL substitute this product with a comparable model or product.
Need help?
Do you have a question about the ATON 2 and is the answer not in the manual?
Questions and answers