
Related Manuals for HomeMatic HmIP-WRCR

Summary of Contents for HomeMatic HmIP-WRCR
- Page 1 Montage- und Bedienungsanleitung Mounting instruction and operating manual Drehtaster S. 2 Rotary Button p. 32 HmIP-WRCR...
- Page 2 Lieferumfang Anzahl Bezeichnung Homematic IP Drehtaster Wechselrahmen Montageplatte Doppelseitige Klebestreifen Schrauben 3,0 x 30 mm Dübel 5 mm 1,5 V LR03/Micro/AAA Batterien Bedienungsanleitungen Beiblatt mit Sicherheitshinweisen Dokumentation © 2020 eQ-3 AG, Deutschland Alle Rechte vorbehalten. Ohne schriftliche Zustimmung des Herausgebers darf diese Anleitung auch nicht auszugsweise in...
- Page 4 Homematic IP...
- Page 8 click...
- Page 9 click...
-
Page 11: Table Of Contents
Inhaltsverzeichnis Hinweise zur Anleitung ..........12 Gefahrenhinweise ............12 Funktion und Geräteübersicht ........14 Allgemeine Systeminformationen ......15 Inbetriebnahme .............. 15 Anlernen ................15 Montage................. 17 5.2.1 Klebestreifenmontage..........18 5.2.2 Schraubmontage ............18 5.2.3 Montage auf einer Unterputzdose ..... 20 5.2.4 Montage in bestehenden Schalterserien ...21 Bedienung ................22 Batterien wechseln ............22 Fehlerbehebung .............24... -
Page 12: Hinweise Zur Anleitung
Hinweise zur Anleitung Hinweise zur Anleitung Lesen Sie diese Anleitung sorgfältig, bevor Sie Ihre Homematic IP Geräte in Betrieb nehmen. Bewahren Sie die Anleitung zum späteren Nachschlagen auf! Wenn Sie das Gerät anderen Personen zur Nutzung über- lassen, übergeben Sie auch diese Anleitung. - Page 13 Gefahrenhinweise Betreiben Sie das Gerät nur in trockener sowie staubfreier Umgebung, setzen Sie es keinem Ein- fluss von Feuchtigkeit, Vibrationen, ständiger Sonnen- oder anderer Wärmeeinstrahlung, Kälte und keinen mechanischen Belastungen aus. Das Gerät ist kein Spielzeug! Erlauben Sie Kindern nicht damit zu spielen. Lassen Sie das Verpa- ckungsmaterial nicht achtlos liegen.
-
Page 14: Funktion Und Geräteübersicht
Funktion und Geräteübersicht Funktion und Geräteübersicht Der Homematic IP Drehtaster ist ein flexibel einsetzbarer Funk-Taster mit drei Kanälen zur Steuerung von Home- matic IP Geräten, wie z. B. einem Dimmaktor. So können Sie bspw. ganz einfach Leuchten rauf- oder runter dim- men und ein- bzw. -
Page 15: Allgemeine Systeminformationen
Anlernen Bitte lesen Sie diesen Abschnitt erst vollständig, bevor Sie mit dem Anlernen beginnen. Sie können das Gerät an den Homematic IP Access Point oder an die Zentrale CCU2/CCU3 anlernen. Weitere Informationen dazu entnehmen Sie bitte dem Homematic IP Anwenderhandbuch (zu finden im... - Page 16 Inbetriebnahme Richten Sie zunächst Ihren Homematic IP Access Point über die Homematic IP App ein, um weitere Homematic IP Geräte im System nutzen zu kön- nen. Ausführliche Informationen dazu finden Sie in der Bedienungsanleitung des Access Points. Damit das Gerät in Ihr System integriert werden und per Homematic IP App gesteuert werden kann, muss es an den Homematic IP Access Point angelernt werden.
-
Page 17: Montage
Inbetriebnahme • Zur Bestätigung geben Sie in der App die letzten vier Ziffern der Gerätenummer (SGTIN) ein oder scannen Sie den QR-Code. Die Gerätenummer finden Sie auf dem Aufkleber im Lieferumfang oder direkt am Gerät. • Warten Sie, bis der Anlernvorgang abgeschlossen ist. -
Page 18: Klebestreifenmontage
Inbetriebnahme 5.2.1 Klebestreifenmontage Um das Gerät mit den Klebestreifen zu montieren, gehen Sie wie folgt vor: • Wählen Sie einen beliebigen Montageort aus. Achten Sie darauf, dass der Montageuntergrund glatt, eben, unbeschädigt, sauber, fett- sowie lö- sungsmittelfrei und nicht zu kühl ist, damit der Klebestreifen langfristig haften kann. - Page 19 Inbetriebnahme Halten Sie die Montageplatte (D) an die ge- • wünschte Montageposition. Achten Sie darauf, dass der Pfeil auf der Vorderseite der Montage- platte nach oben zeigt (s. Abbildung 7). • Zeichnen Sie zwei diagonal gegenüberliegende Bohrlöcher anhand der Montageplatte mit einem Stift an der Wand an (s.
-
Page 20: Montage Auf Einer Unterputzdose
Inbetriebnahme 5.2.3 Montage auf einer Unterputzdose Sie können das Gerät mithilfe der Schraublöcher auf einer Unterputz-/Installationsdose montieren (s. Abbildung 11). In der Unterputzdose dürfen sich keine offenen Leiterenden befinden. Sollten für die Montage bzw. Installation des Geräts Änderungen oder Arbeiten an der Hausinstallation (z. ... -
Page 21: Montage In Bestehenden Schalterserien
Schrauben an der Wand befestigen. Bei der Montage in Mehrfachkombinationen ist darauf zu achten, dass die Montageplatte des Drehtasters bündig neben bereits befestigten Montageplatten/Tragringen angebracht und daran ausgerichtet wird. Eine Übersicht mit den kompatiblen Schalterserien finden Sie im Downloadbereich unter www.homematic-ip.com. -
Page 22: Bedienung
Bedienung Nach dem Anlernen und der Montage stehen Ihnen ein- fache Bedienfunktionen direkt am Gerät zur Verfügung. Die Konfiguration erfolgt über die Homematic IP App oder über die WebUI Bedienoberfläche. Über das Drehrad (C) können Sie Schaltbefehle an andere Homematic IP Geräte, wie z. B. Dimmaktoren, senden. - Page 23 Batterien wechseln zulegen. • Legen Sie zwei neue 1,5 V LR03/Micro/AAA Bat- terien polungsrichtig gemäß Markierung in die Batteriefächer ein (s. Abbildung 13). • Setzen Sie die Elektronikeinheit wieder in den Rahmen. Achten Sie darauf, dass die Klammern der Montageplatte in die Öffnungen der Elektro- nikeinheit rasten.
-
Page 24: Fehlerbehebung
Fehlerbehebung Fehlerbehebung Schwache Batterie Wenn es der Spannungswert zulässt, ist das Gerät auch bei niedriger Batteriespannung betriebsbereit. Je nach Beanspruchung kann evtl. nach kurzer Erholungszeit der Batterien wieder mehrfach gesendet werden. Bricht beim Senden die Spannung wieder zusammen, wird in der App das Symbol für leere Batterien ( ) und der Fehlercode am Gerät angezeigt (s. -
Page 25: Duty Cycle
Erreichen des 1 %-Limits nicht mehr senden, bis diese zeitliche Begrenzung vorüber ist. Gemäß dieser Richtlinie, werden Homematic IP Geräte zu 100 % nor- menkonform entwickelt und produziert. Im normalen Betrieb wird der Duty Cycle in der Regel nicht erreicht. -
Page 26: Fehlercodes Und Blinkfolgen
Fehlerbehebung Fehlercodes und Blinkfolgen Fehler- und Bedeutung Lösung Blinkcode Kurzes Funkübertra- Warten Sie, bis oranges gung/Sende- die Übertragung Blinken* versuch/Da- beendet ist. tenübertragung 1x langes Vorgang Sie können mit grünes bestätigt der Bedienung Leuchten* fortfahren. Kurzes Anlernmodus Geben Sie die oranges aktiv letzten vier Ziffern... -
Page 27: Wiederherstellung Der Werkseinstellungen
Wiederherstellung der Werkseinstellungen 6x langes Gerät defekt Achten Sie auf die rotes Blinken Anzeige in Ihrer App oder wenden Sie sich an Ihren Fachhändler. 1x oranges Testanzeige Nachdem die und 1x grünes Testanzeige Leuchten erloschen ist, (nach dem können Sie fort- Einlegen der fahren. -
Page 28: Wartung Und Reinigung
Wartung und Reinigung spitzen Gegenstand (z. B. mit einem Stift), bis die LED (E) schnell orange zu blinken beginnt (s. Ab- bildung 14). • Lassen Sie die Systemtaste wieder los. • Drücken Sie die Systemtaste erneut für 4 s, bis die LED grün aufleuchtet (s. -
Page 29: Allgemeine Hinweise Zum Funkbetrieb
Gegebenheiten vor Ort eine wichtige Rolle. Hiermit erklärt die eQ-3 AG, Maiburger Str. 29, 26789 Leer, Deutschland, dass der Funkanlagentyp Home- matic IP HmIP-WRCR der Richtlinie 2014/53/EU ent- spricht. Der vollständige Text der EU-Konformitätserklä- rung ist unter der folgenden Internetadresse verfügbar:... -
Page 30: Technische Daten
Technische Daten Technische Daten Geräte-Kurzbezeichnung: HmIP-WRCR Versorgungsspannung: 2x 1,5 V LR03/Micro/AAA Stromaufnahme: 100 mA max. Batterielebensdauer: 3 Jahre (typ.) Schutzart: IP20 Verschmutzungsgrad: Umgebungstemperatur: 5 bis 35 °C Abmessungen (B x H x T): Ohne Rahmen: 55 x 55 x 27 mm... - Page 31 Technische Daten Entsorgungshinweis Gerät nicht im Hausmüll entsorgen! Elektroni- sche Geräte sind entsprechend der Richtlinie über Elektro- und Elektronik-Altgeräte über die örtlichen Sammelstellen für Elektronik-Altgeräte zu entsorgen. Konformitätshinweis Das CE-Zeichen ist ein Freiverkehrszeichen, das sich ausschließlich an die Behörden wendet und keine Zusicherung von Eigenschaften beinhaltet.
- Page 32 Package contents Quantity Description Homematic IP Rotary Button Clip-on frame Mounting plate Double-sided adhesive strips Screws 3.0 x 30 mm Plugs 5 mm 1.5 V LR03/micro/AAA batteries Operating manuals Supplement sheet with safety instructions Documentation © 2020 eQ-3 AG, Germany All rights reserved.
- Page 33 Table of contents Information about this manual........34 Hazard information ............34 Function and device overview ........36 General system information ........37 Start-up ................37 Teaching-in ................37 Mounting ................39 5.2.1 Adhesive strip mounting ........39 5.2.2 Screw mounting ............. 40 5.2.3 Mounting on flush-mounted boxes ....41 5.2.4 Mounting in existing switches ......
-
Page 34: Information About This Manual
Information about this manual Read this manual carefully before beginning operation with your Homematic IP components. Keep the manual so you can refer to it at a later date if you need to. If you hand over the device to other persons for use, hand over this manual as well. - Page 35 Hazard information The device may only be operated in dry and dust- free environment and must be protected from the effects of moisture, vibrations, solar or other methods of heat radiation, cold and mechanical loads. The device is not a toy; do not allow children to play with it.
-
Page 36: Function And Device Overview
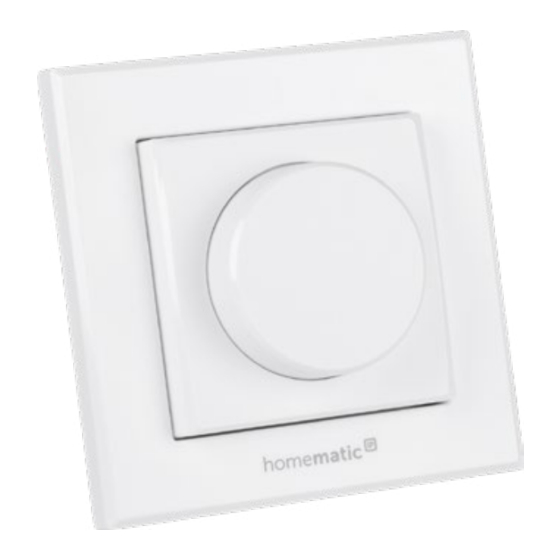
Function and device overview Function and device overview The Homematic IP Rotary Button is a flexible wireless push-button with three channels controlling Homematic IP devices, such as dimming actuators. For example, you can easily dim lights bright or dark and switch them on or off. -
Page 37: General System Information
General system information General system information This device is part of the Homematic IP smart home system and works with the Homematic IP protocol. All devices of the system can be configured comfortably and individually with the user interface of the Central... - Page 38 For further information, refer to the operating manual of the Access Point. To integrate the device into your system and to enable control via the Homematic IP app, you must teach-in the device to your Homematic IP Access Point first. •...
-
Page 39: Mounting
Start-up Therefore, see the sticker supplied or attached to the device. • Wait until the connection is completed. • If connection of the device was successful, the LED (E) lights up green (see figure 3). The device is now ready for use. •... -
Page 40: Screw Mounting
Start-up Make sure that the mounting surface is smooth, solid, non-disturbed, free of dust, grease and solvents and not too cold to ensure long-time adherence. • Fix the adhesive strips on the back side of the mounting plate (D) in the provided area. You should be able to read the letters on the back side (see figure 4). -
Page 41: Mounting On Flush-Mounted Boxes
Start-up • Drill the marked holes (see figure 8). If you are working with a stone wall, drill the marked two 5 mm holes and insert the plugs supplied. If you are working with a wooden wall, you can pre-drill 1.5 mm holes to make screws easier to insert. - Page 42 Start-up If changes or works have to be made on the house installation (e.g. extension, bypass of switch- or socket inserts) or the low-voltage distribution for mounting or installing the device, following safety instruction must considered: Please note! Only to be installed by persons with the relevant electro-technical knowledge and experience!* Incorrect installation can put...
-
Page 43: Mounting In Existing Switches
For mounting with multiple combinations, make sure that the mounting plate of the device is seamlessly aligned to the already fixed mounting plate/retaining ring. An overview of compatible switch series is available in the download area of www.homematic-ip.com. -
Page 44: Operation
Operation After the device has been connected and installed, simple operations are available directly on the device. Configuration is possible via the Homematic IP app or the WebUI user interface. The rotary button (C) is used to transmit switching commands to other Homematic IP device like dimming actuators for example. - Page 45 Replacing batteries the battery compartment, making sure that you insert them the right way round (see figure 13). • Put the electronic unit back into the frame. Make sure that the clips on the mounting plate latch into the openings on the electronic unit. •...
-
Page 46: Troubleshooting
Troubleshooting Troubleshooting Weak battery Provided that the voltage value permits it, the device will remain ready for operation also if the battery voltage is low. Depending on the particular load, it may be possible to send transmissions again repeatedly, once the batteries have been allowed a brief recovery period. -
Page 47: Duty Cycle
Devices must cease transmission when they reach the 1% limit until this time restriction comes to an end. Homematic IP devices are designed and produced with 100% conformity to this regulation. During normal operation, the duty cycle is not usually reached. -
Page 48: Error Codes And Flashing Sequences
Troubleshooting Error codes and flashing sequences Error and Meaning Solution flashing codes Short Radio Wait until the orange transmission/ transmission is flashing* attempting to completed. transmit/data transmission 1x long green Operation You can continue lighting* confirmed operation. Short orange Teach-in mode Enter the last four flashing active... -
Page 49: Restore Factory Settings
Restore factory settings 6x long red Device Have a look at flashing defective your app for error message or contact your retailer. 1x orange Test display After the test and 1 x green display has lighting (after stopped, you can inserting continue. -
Page 50: Maintenance And Cleaning
Maintenance and cleaning • Press and hold down the system button again for 4 seconds, until the LED lights up green (see figure 15). • Release the system button to finish the procedure. The device will perform a restart. Maintenance and cleaning The device does not require you to carry out any maintenance other than replacing the battery when necessary. -
Page 51: General Information About Radio Operation
Hereby, eQ-3 AG, Maiburger Str. 29, 26789 Leer/Germany declares that the radio equipment type Homematic IP HmIP-WRCR is in compliance with Directive 2014/53/ EU. The full text of the EU declaration of conformity... -
Page 52: Technical Specifications
Technical specifications Technical specifications Device short name: HmIP-WRCR Supply voltage: 2x 1.5 V LR03/micro/AAA Current consumption: 100 mA max. Battery life: 3 years (typ.) Degree of protection: IP20 Degree of pollution: Ambient temperature: 5 to 35 °C Dimensions (W x H x D):... - Page 53 Technical specifications Information about conformity The CE sign is a free trading sign addressed exclusively to the authorities and does not include any warranty of any properties. For technical support, contact your specialist dealer.
- Page 54 Kostenloser Download der Homematic IP App! Free download of the Homematic IP app! Bevollmächtigter des Herstellers: Manufacturer’s authorised representative: eQ-3 AG Maiburger Straße 29 26789 Leer / GERMANY www.eQ-3.de...
Need help?
Do you have a question about the HmIP-WRCR and is the answer not in the manual?
Questions and answers