
Related Manuals for ResMed VS III


Summary of Contents for ResMed VS III
- Page 1 VICTORIAN RESPIRATORY SUPPORT SERVICE AUSTIN HEALTH GUIDELINES FOR THE OPERATION RESMED VS III VENTILATOR SIZE: Width: 27.5cm Height: 14.5cm Depth: 22.0cm Weight: 2.9kg...
-
Page 2: Modes Of Ventilation
The ResMed VSIII ventilator is a portable positive pressure ventilator. It delivers air to the user until a predetermined volume or pressure is reached. MODES OF VENTILATION: The ResMed VSIII ventilator has EIGHT modes of operation and a PEEP (Positive End Expiratory Pressure) function. -
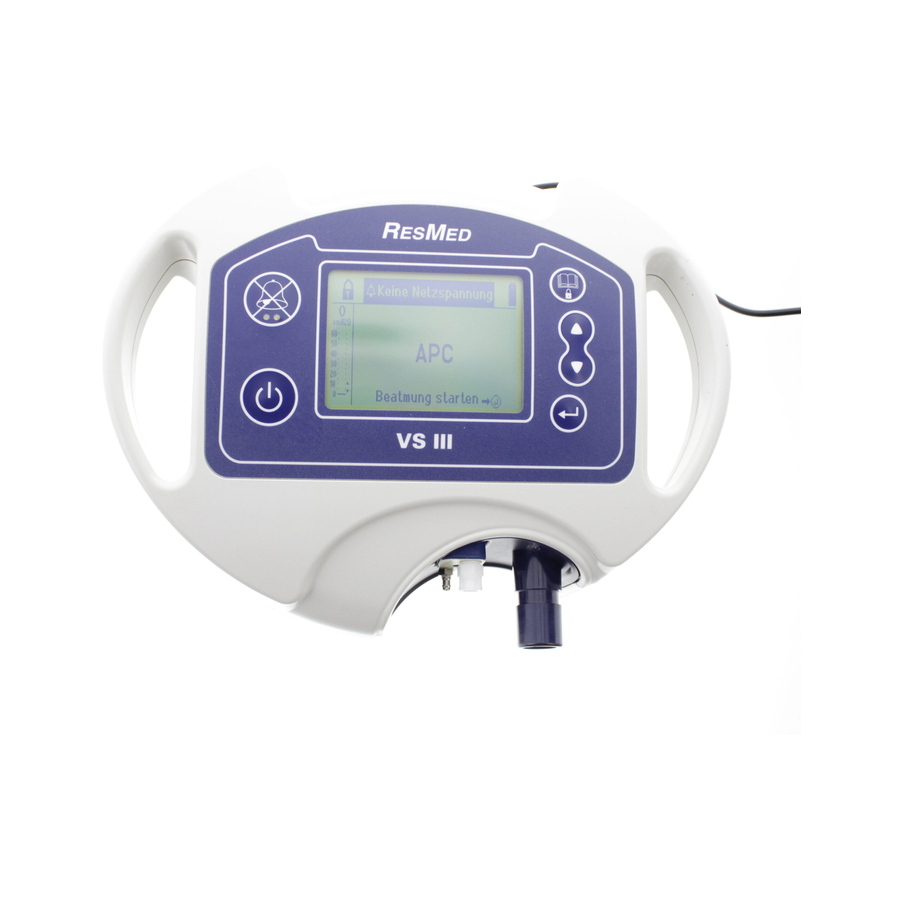
Page 3: Front Panel
FRONT PANEL 1. Carrying handle – one on each side of machine. 2. Alarm silence button. 3. LCD screen – displays ventilation mode, power supply etc. 4. Menu button. 5. Up/Down buttons. 6. Enter button. 7. Air outlet – attach 22mm air tubing here. 8. -
Page 4: Breathing Circuit
BREATHING CIRCUIT: The breathing circuit consists of a flex tube and swivel connector, ONE length of 22mm diameter smooth bore tubing, TWO lengths of small bore tubing and a dual line exhalation manifold. Flex tube & swivel connector 22mm, 3mm & 4mm tubes Single circuit ports Single circuit Flex tube and swivel connector... - Page 5 Exhalation Manifold Exhalation Valve Consists of a Body (1), Green Diaphragm (2), Diaphragm Cap (3) and Lid (4). The Diaphragm (2) fits into the Body (1). The Diaphragm Cap (3) sits on top of the Diaphragm and is secured by the Lid (4) which locks with a clock-wise turn. Daily –...
- Page 6 CONROL PANEL: LCD Display Menu Button When operating it shows the bar graph, control lock, date and time, power sources available, Prog 1 and Prog 2 (if activated). Press the Menu button, use the Up/Down arrows to select View Settings then press Enter to view the current settings.
- Page 7 Power Indicator Power Indicator Located in the upper right hand corner of the LCD it indicates the power source being used – Mains (AC) power, Internal battery or External battery. Patient Pressure Graph A bar graph on the LEFT side of the LCD shows the patient pressure during every breath cycle. The pressure meter is calibrated from 0 to 60cmH20.
-
Page 8: Accessing Menus
Alarm Silence and Alarm Indicator The alarm LED shows a RED or ORANGE light, an audible alarm will sound and alarm type will be displayed across the top of the screen if any of the ventilation parameters are not met. Press the Alarm Silence button to stop the alarm for TWO minutes, press again to clear the alarm icon from the screen once the problem has been corrected. - Page 9 (A)CV Mode: Vt: Setting range: 50ml to 2500ml. Controls the tidal volume (Vt) of air delivered by the machine in (A)CV mode. f min: Setting range: 5 to 50 bpm. Indicates the MINIMUM breath rate to be delivered to the user in ACV mode.
- Page 10 PS.Vt Mode: PS: Setting range: 5cm to 50cm. PEEP: Setting range:0, 4cm to 20cm f min: Setting range: No, 5 to 50 bpm Vt: Setting range: No, 0.05 litres to 2.5 litres Rise t: Setting range: 0, 1 to 3 TgI (P): Setting range: Auto, 1 to 6 TgE: Setting range: Auto, 5% to 90% Ti max: Setting range: 0.3 sec to 2.7 sec...
- Page 11 (A)PCV Mode: PS: Setting range: 5cm to 50cm H20 PEEP: Setting range: 0, 4cm to 20cm H20 f min: Setting range: 5 to 50 bpm Ti : Setting Range: 0.5sec to 3.0 sec Rise t: Setting range: 0, 1 to 3 Vts: Setting range: no, 0.05 litres to 2.5 litres TgI (P): Setting range: Auto, 1 to 6, No ALARMS:...
- Page 12 PS.Vs Mode: PS: Setting range: 5cm to 50cm H20 PEEP: Setting range: 0, 4cm to 20cmH20 f min: Setting range: No, 5 to 20 bpm Rise t: Setting range: 0, 1 to 3 Vts: Setting range: No, 0.05 litres to 2.5 litres TgI (P): Setting range: Auto, 1 to 6 TgE: Setting range: Auto, 5% to 90% Ti min: Setting range: 0.3 sec to 2.5 sec...
-
Page 13: Alarm Priorities
ALARM PRIORITIES: High Priority Alarms: Red LED flashes rapidly and there is a series of beeps every 10 seconds (*** ** *** **) Medium Priority Alarms: Orange LED flashes slowly and there is a series of beeps every 20 seconds (* * *) ADJUSTABLE ALARMS: High Frequency (Rate) Alarm: Orange LED... -
Page 14: Cleaning And Maintenance
Red LED flashes and alarm sounds if any of the tubes disconnect or become loose or if the exhalation manifold in not correctly assembled CLEANING AND MAINTENANCE: Do not place anything on top of the ventilator. Do not allow water or other fluid to spill onto the ventilator. If a humidifier is in use a water trap should be placed between the humidifier tube and the ventilator to prevent fluid running back into the air outlet. - Page 15 Troubleshooting Guide: 11.1 Alarms that can be stopped for TWO minutes: Press the alarm silence button to stop the audible alarm for 2 minutes. The message and LED continue to flash. If the problem is not resolved within this time the audible alarm starts to beep again. Once the problem is resolve the message stops flashing.
- Page 16 11.2 Alarms that can be stopped permanently: The audible alarm can be stopped by pressing the alarm silence button . The LED and message will continue to flash. Once the problem is resolved the message disappears and the beeping stops. Press the alarm silence button again to clear the message from the screen.
Need help?
Do you have a question about the VS III and is the answer not in the manual?
Questions and answers