
Related Manuals for ResMed VPAP COPD


Summary of Contents for ResMed VPAP COPD
- Page 1 VPAP COPD ™ NONINVASIVE VENTILATOR ™ HEATED HUMIDIFIER Welcome Guide English Respiratory Care Solutions Making quality of care easy...
- Page 2 Respiratory Care Solutions Making quality of care easy...
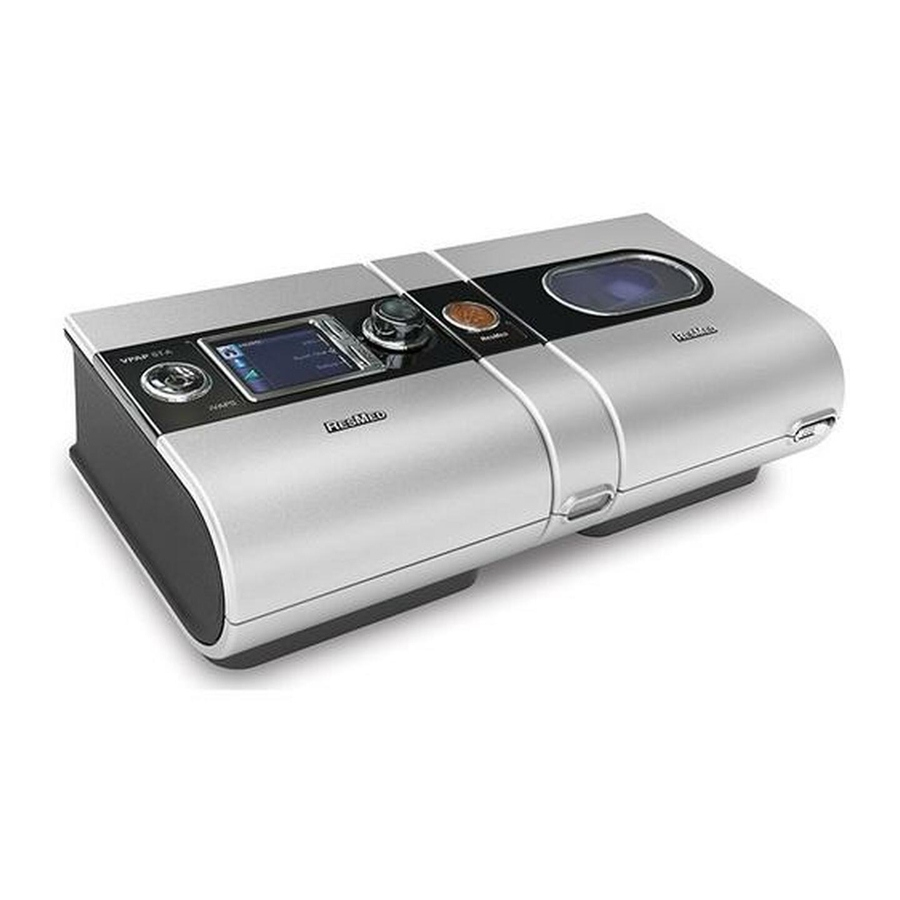
- Page 3 VPAP COPD at a glance The VPAP COPD system comprises the following elements: • VPAP COPD device • Air tubing • 90W power supply unit • S9 Travel bag • SD card • S9 SD card protective folder. Optional components include: •...
- Page 4 Flip lid seal Flip lid Air outlet Release button ClimateLine, ClimateLine or ClimateLine connection port Latch H5i water tub H5i at a glance The H5i system comprises the following elements: • H5i heated humidifier • H5i standard water tub • ClimateLine Oxy heated air tubing (if sold as a Climate Control Kit).
- Page 5 Setting up English...
- Page 6 Ensure that the cap of the oxygen connector is attached firmly. Notes: • Always ensure that the VPAP COPD and H5i are placed on a stable, level surface for proper operation. • Always ensure that the VPAP COPD is placed in an area where the alarm LED indicators are clearly visible.
-
Page 7: Filling The Water Tub
Filling the water tub 1. Slide the latch and lift open the flip lid. 2. Remove the water tub. 3. Fill the water tub (through the center hole) with distilled or deionized water up to the maximum water level mark (12.5 fl oz / 380 mL). 4. - Page 8 VPAP COPD basics Key: Home Humidity Level Ramp Heated Tube Info menu* Allows you to view your sleep statistics or exit Climate Control from the menu. Start/Stop LCD screen Displays the menus, treatment Push dial screens and reminders. Alarm mute...
- Page 9 Adjusting humidity level Ranging from OFF to 6, you can adjust the humidity level at any time to find the setting that is most comfortable for you. To adjust the humidity level: 1. From your HOME 3. Turn until 2. Press 4.
-
Page 10: Using Mask Fit
Adjusting ramp time Designed to make the beginning of treatment more comfortable, ramp time is the period during which the pressure increases from a low start pressure to the treatment pressure. To adjust your ramp time: 1. From your HOME 2. -
Page 11: Selecting The Mask Type
S9 Essentials S9 Essentials is designed to make device interaction and menu navigation easier for you. If enabled by the clinician, S9 Essentials disables the Info and Setup functionality so that you can simply start and stop therapy and adjust ramp, humidification and Climate Control. Selecting the mask type To select your type of mask: 1. -
Page 12: Getting Started
Getting started 1. Make sure the power is connected. 2. Adjust the ramp time or humidification level if required. 3. Fit your mask as described in your mask user guide. 4. To start therapy, simply breathe into the mask and/or press 5. -
Page 13: Viewing The Treatment Screens
Viewing the treatment screens Depending on how the system has been configured, you will see one of the following example screens once therapy has started: 9 H5i humidifier 9 H5i humidifier 9 H5i humidifier 9 ClimateLine or ClimateLine 9 ClimateLine or ClimateLine 9 Climate Control –... - Page 14 To toggle between the treatment screens, press from your HOME screen. 9 Treatment with cycle 9 Treatment with spontaneous 9 Treatment with alarm (Ti Max or Ti Min) breath cycled breaths functionality indicators Viewing the Info menu The Info menu has a series of screens showing your sleep quality, sleep report and service information. To view the Info menu, push from your HOME screen.
-
Page 15: Viewing Alarms
Viewing alarms The VPAP COPD is fitted with an alarm module that continuously monitors both therapy and device conditions. Alarms are only activated when therapy is running. An alarm condition is indicated by an audible sound, a flashing yellow alarm LED and a message on the screen. When the device is turned on, the yellow alarm LED will flash, and the alarm will sound to confirm that the alarm is working. -
Page 16: Cleaning And Maintenance
Cleaning and maintenance You should regularly carry out cleaning and maintenance as described in this section. Disassembling the H5i water tub 1. Slide the latch. 2. Lift open the flip lid. 3. Remove the water tub. 4. Discard any excess water from the water tub. 5. - Page 17 1. Remove the air filter cover from the back of the device. 2. Remove and discard the old air filter. 3. Insert a new ResMed air filter ensuring that it is sitting flat in the air filter cover. 4. Replace the air filter cover.
- Page 18 S9 SD Card Protective Folder provided with your device. Please retain the S9 SD Card Protective Folder for future use. Notes: • For Troubleshooting information refer to the Information Guide. • For more product information see www.resmed.com.
- Page 19 Respiratory Care Solutions Making quality of care easy...
- Page 20 See www.resmed.com for other ResMed locations worldwide. For patent information, see www.resmed.com/ip. S9, H5i, ClimateLine, SlimLine, SmartStart and VPAP are trademarks of ResMed Ltd. S9, ClimateLine, SlimLine, SmartStart and VPAP are registered in U.S. Patent and Trademark Office. © 2017 ResMed Ltd.
Need help?
Do you have a question about the VPAP COPD and is the answer not in the manual?
Questions and answers