Advertisement
Available languages
Available languages
Quick Links
Quick Star t Guide
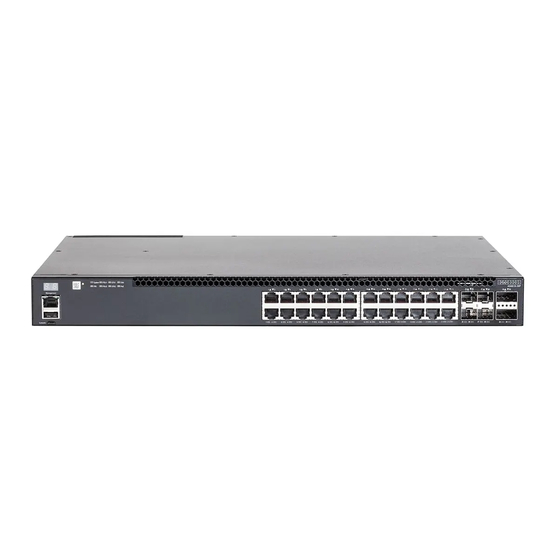
24/48-Port GE Data Center Switch
AS4610-30T | AS4610-30P | AS4610-54T | AS4610-54P
1. Unpack the Switch and Check Contents
Rack mounting kit—two brackets and eight screws
Four adhesive foot pads
Two power cords
Console cable—RJ-45 to DB-9
Micro-USB to USB Cable
Ground wire (included with DC PSUs only) (AS4610-
30T/54T only)
DC power connector (included with DC PSUs only)
(AS4610-30T/54T only)
Documentation—Safety and Regulatory Information,
Quick Start Guide (this document) and WEEE flyer
Note:
For information on switch software, refer to
www.edge-core.com.
Switches with part numbers 4610-54-O-******** have the
Open Network Installer Environment software installer pre-
loaded on the switch, but no switch software image.
Information about compatible switch software can be
found at www.edge-core.com.
Note:
The switch drawings in this document are for
illustration only and may not match your particular switch
model.
Warning:
For a safe and reliable installation, use only
accessories and screws provided with the AS4610 series.
Use of other accessories and screws could result in damage
to the unit. Any damages incurred by using unapproved
accessories are not covered by the warranty.
Avertissement:
Pour une installation sûre et fiable,
uniquement les accessoires et les vis fournies avec le
AS4610 serie L'utilisation d'autres accessoires et vis pourrait
endommager l'appareil. Les dommages causés par
l'utilisation d'accessoires non approuvés ne sont pas
couverts par la garantie.
Warning:
For indoor use only. The switch, AC power, and
all connected cables are not designed for outdoor use.
www.edge-core.com
AS4610-30T
AS4610-30P
AS4610-54T
AS4610-54P
the
utilisez
– English 1 –
2. Mount the Switch
2
1
Attach the brackets to the switch.
2
Use the screws and cage/clip nuts appropriate for the rack
to secure the switch in the rack.
Caution:
Installing the switch in a rack requires two
people. One person should position the switch in the rack,
while the other secures it using the rack screws.
Note:
The switch can also be installed on a desktop or shelf
using the included adhesive rubber foot pads.
3. Ground the Switch
2
1
1
Ensure the rack on which the switch is to be mounted is
properly grounded and in compliance with ETSI ETS 300 253.
Verify that there is a good electrical connection to the
grounding point on the rack (no paint or isolating surface
treatment).
2
For a PoE switch, attach a lug (not provided with PSU) to a
#12 AWG minimum grounding wire (not provided with PSU),
and connect it to the grounding point on the switch rear
panel. Then connect the other end of the wire to rack
ground.
For a Non-PoE switch, attach a lug (not provided with PSU) to
a #18 AWG minimum grounding wire (not provided with
PSU), and connect it to the grounding point on the switch
rear panel. Then connect the other end of the wire to rack
ground.
Caution:
The earth connection must not be removed
unless all supply connections have been disconnected.
1
E092018-AP-R02
150200001921A
Advertisement

Related Manuals for Edge-Core AS4610-30T


Summary of Contents for Edge-Core AS4610-30T
- Page 1 Quick Star t Guide 24/48-Port GE Data Center Switch AS4610-30T | AS4610-30P | AS4610-54T | AS4610-54P 1. Unpack the Switch and Check Contents 2. Mount the Switch AS4610-30T AS4610-30P AS4610-54T AS4610-54P Attach the brackets to the switch. Rack mounting kit—two brackets and eight screws Use the screws and cage/clip nuts appropriate for the rack to secure the switch in the rack.
- Page 2 Quick Start Guide 4. Connect Power 7. Connect Network Cables Install one or two universal AC or DC PSUs in the switch. Connect an external AC or DC power source to the PSUs. For RJ-45 ports, connect 100-ohm Category 5, 5e or better twisted-pair cable.
- Page 3 920 W AC PSU (AS4610-54P) AC Input 100-240 VAC, 50-60 Hz, 12-6.5 A or 13-6.5 A Power Rating 920 W maximum 150 W 48 VDC PSU (AS4610-30T/54T only) DC Input -36 – -72 VDC, 6–3 A Power Rating 150 W maximum...
- Page 4 快 速 入 门 指 南 24/48 端口 1G 乙太网络交换机 AS4610-30T | AS4610-30P | AS4610-54T | AS4610-54P 1. 打开交换机包装和检查内容物 2. 安装交换机 AS4610-30T AS4610-30P AS4610-54T AS4610-54P 将支架安装到交换机。 机架安装套件 — 两个支架和八个螺丝 使用机架配套螺丝和笼式 / 夹具螺母将交换机固定到机 架上。 小心: 在机架中安装交换机需要两个人操作。一个人在 4 个粘性脚垫 机架中定位交换机,另一个人使用机架螺丝固定。 注意: 也可以使用附带的粘性橡胶支脚垫将交换机安装...
- Page 5 快速入门指南 4. 连接电源 7. 连接网线 在交换机中安装一个或两个通用交流电源或直流电源装 置。 如果是 RJ-45 端口,请连接 100-ohm Category 5、5e 或 将外部交流电源或直流电源连接到电源装置。 双绞线。 AS4610-30P,1-16 端口可支援 PoE 連線達 30 W,17- 24 端口可支援 UPoE 連線達 60 W。 36 – 72 VDC 回返 AS4610-54P,1-40 端口可支援 PoE 連線達 30 W,41- 48 端口可支援 UPoE 連線達 60 W。 -36 –...
- Page 6 600 W (最大) 920 W 交流电源装置 (AS4610-54P) 交流 100-240 V, 50-60 Hz, 12-6.5 A 或 13- 交流输入 6.5 A 额定功率 920 W (最大) 150 W 48 VDC PSU (限 AS4610-30T/54T) -36–-72 VDC,6–3 A DC 输入 额定功率 150 W (最大) 法规符合性 EN 55032:2012+AC:2013/EN...
- Page 7 快 速 啟 動 指 南 24/48 埠 1G 乙太網路交換機 AS4610-30T | AS4610-30P | AS4610-54T | AS4610-54P 1. 拆開交換器包裝並檢查內容物 2. 安裝交換器 AS4610-30T AS4610-30P AS4610-54T AS4610-54P 將托架安裝於交換器。 機架安裝套件 — 兩個托架與八顆螺絲 使用適合機架的螺絲及浮動螺帽 / 卡緊螺帽,將交換器 固定於機架內。 小心: 將交換器安裝於機架需要兩人合作。應由一人將 四個自黏腳墊 交換器置於機架內,另一人使用機架螺絲固定交換器。 備註: 交換器也可利用隨附的自黏橡膠腳墊安裝於桌面 兩條電源線...
- Page 8 快速啟動指南 4. 接電 7. 連接網路線 將一或兩個通用 AC 或 DC PSU 安裝於交換器。 若為 RJ-45 連接埠,請連接 100-ohm Category 5、5e 或 將外部 AC 或 DC 電源接至 PSU。 以上的雙絞線。 AS4610-30P, 1-16 連接埠可支援 PoE 連線達 30 W, 17-24 36 – 72 VDC 回路 連接埠可支援 UPoE 連線達 60 W. AS4610-54P, 1-40 連接埠可支援...
- Page 9 尺寸 440 x 350 x 44 mm (寬 x 深 x 高) (17.32 x 13.78 x 1.77 英吋) AS4610-30T: 5.16 kg (11.37 磅 ) AS4610-30P: 6.02 kg (13.27 磅 ) 重量 AS4610-54T: 5.38 kg (11.86 磅 ) AS4610-54P: 6.36 kg (14.02 磅 ) 操作:0°C 至...
-
Page 10: Краткое Руководство
Для коммутатора PoE прикрепите наконечник (не коммутатора. Сведения о совместимом с коммутатором поставляется с блоком питания) к проводу заземления ПО представлены на веб-сайте www.edge-core.com. минимального калибра #12 AWG (не поставляется с блоком питания) и присоедините его к точке заземления Предупреждение. - Page 11 Краткое руководство Загрузите коммутатор. Дождитесь, пока ПО ONIE найдет 4. Подключение питания и выполнит программу установки NOS, а затем дождитесь, пока программа установки выполнит загрузку образа ПО NOS. При последующих загрузках коммутатора сразу запускается ПО NOS, минуя ONIE. Примечание. Подробные сведения о вариантах расположения...
- Page 12 Вход 100-240 VAC, 50-60 Hz, 12-6.5 A or 13-6.5 A переменного тока Номинальная Не более 920 Ватт мощность Блок питания 150 Ватт 48 В пост. тока (только AS4610-30T/ 54T) Вход -36 – -72 VDC, 6–3 A постоянного тока Номинальная Не более 150 Ватт...
- Page 13 빠른 시작 설명서 - 포트 GE 데이터 센터 스위치 24/48- AS4610-30T | AS4610-30P | AS4610-54T | AS4610-54P 1. 스위치 포장 해체 및 내용물 점검하기 2. 스위치 장착하기 AS4610-30T AS4610-30P AS4610-54T AS4610-54P 브래킷을 스위치에 부착합니다 . 랙 장착 키트 —2 개의 브래킷과 8 개의 나사...
-
Page 14: 초기 구성 수행
Quick Start Guide 4. 전원 연결하기 7. 네트워크 케이블 연결하기 1 개 또는 2 개의 범용 AC 또는 DC PSU 를 스위치에 설치하십시오 . RJ-45 포트의 경우, 100옴 카테고리 5, 5e 또는 그 이상의 외부 AC 또는 DC 전원을 PSU 에 연결하십시오 . 트위스트... - Page 15 920 W AC PSU (AS4610-54P) AC 입력 100-240 VAC, 50-60 Hz, 12-6.5 A 는 13-6.5A 정격 전력 최대 920 W 150 W 48 VDC PSU (AS4610-30T/54T) DC 입력 -36 – -72 VDC, 6–3 A 정격 전력 최대 150 W 규정 준수...
Need help?
Do you have a question about the AS4610-30T and is the answer not in the manual?
Questions and answers