Table of Contents
Advertisement
Quick Links
Advertisement
Table of Contents

Related Manuals for RIKA induo II


Summary of Contents for RIKA induo II
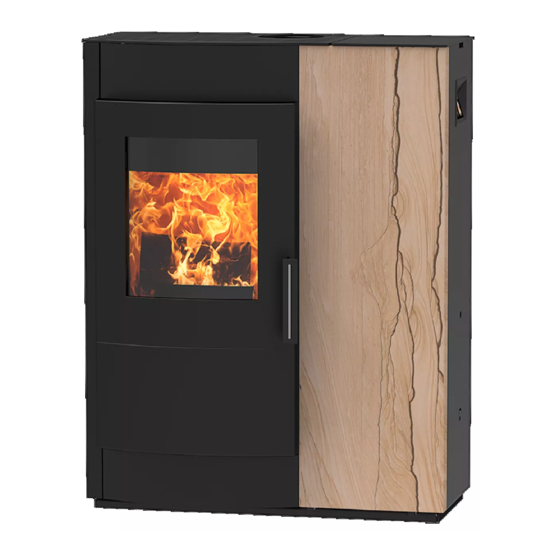
- Page 1 INDUO II Operating Manual...
-
Page 2: Table Of Contents
TABLE OF CONTENTS Spare part overview exploded diagram ..............................4 Spare part overview article numbers .................................6 1. PREFACE Explanations to symbols ...................................7 Dimensions ......................................8 Amount of fuel ......................................8 Technical data ......................................8 Packaging .........................................8 Electrical connection ....................................8 2. IMPORTANT INFORMATION General warning and safety information ..............................9 First heating......................................9 Safety distances ......................................9 Prior to set up ......................................10... - Page 3 10. MAINTENANCE Cleaning the fire trough - daily ................................19 Cleaning the flame temperature sensor ..............................19 Empty the ash drawer .....................................19 Cleaning the door glass ..................................19 Cleaning painted surfaces ..................................19 11. CLEANING Cleaning the convection air openings ..............................20 Combustion air - intake ..................................20 Cleaning the pellet container ..................................20 Bearings ........................................20 Checking door seal ....................................20...
-
Page 4: Spare Part Overview Exploded Diagram
Spare part overview exploded diagram... -
Page 6: Spare Part Overview Article Numbers
Spare part overview article numbers Art.Nr. Description Art.Nr. Description L02007 Guide stone Z34557 Chain Dumping grate N111965 Washer D05 B16559 Actuating cam dumping grate N111866 Hexagonal screw N111825 Door contact switch N111856 Hexagonal countersunk screw M04x12 Z34461 Bearing plate bottom metallic L01957 Closure plate Z34964... -
Page 7: Preface
Art.Nr. Description Art.Nr. Description Z34971 Rear panel left black L01445 Switch spacer B17925 Flap handle N111732 Magnetic switch top part B16574 Touch-Display plug-in L02310 Guard plate N111730 Grommet N111942 Self-locking nut N111993 Levelling screw Z34885 Activator security flap B17924 Right side panel metallic Z34529 Torsion spring B17931... -
Page 8: Dimensions
Dimensions Technical data Description Measure Data R O - T 3 Heating capacity range [kW] 3 - 10 R O - T 2 R O - S Room heating capacity depending on house [m³] 70 - 260 coating Pellet consumption [kg/h] till 2,4 Pellet container capacity*... -
Page 9: Important Information
First heating RIKA stoves should only be installed in rooms with normal humidity (dry The stove body, just as various steel parts, cast iron parts and the flue pipes areas according to VDE 0100 Part 200). The furnaces are not splash water are painted with a heat resistant paint. -
Page 10: Prior To Set Up
Prior to set up Stoves type 1 (BA 1): Floor bearing capacity These may only be operated with the combustion chamber door closed. Ensure that the substructure is capable of bearing the weight of the stove prior to set-up. Suitable for multiple occupancy. (note the different country regulations) Note The combustion chamber door may only be opened to add fuel and must No modifications may be made to the firing installation. -
Page 11: Installing The Stove
Ø50mm (pellet stoves) and fix it with a hose clamp (not included!). We recommend original flue pipes from RIKA for proper connection. At pellet stoves with longer intake pipes than 1m the diameter should be increased to 100mm. (see RIKA range). -
Page 12: Brief Information On Fuel Pellets
4. BRIEF INFORMATION ON FUEL PELLETS Your pellet stove is only approved for the burning of pellets of tested quality. What are pellets? Please ask your pellet stove dealer for tested fuel and a list of monitored fuel manufacturers. Wood pellets are a standardised fuel. Every manufacturer must adhere to certain conditions in order to enable flawless, energy-efficient heating. -
Page 13: Brief Information On Combustible Logs
5. BRIEF INFORMATION ON COMBUSTIBLE LOGS Suitable fuels and fuel amounts Output controlling Your stove is generally suitable for burning dry firewood. You can also burn The output of your stove is regulated manually or via the Rikatronic-control. combustibles such as wood briquettes. Please observe that the output of your stove also depends on the chimney draught and the amount of fuel added. -
Page 14: Technology And Safet Y Functions
6. TECHNOLOGY AND SAFET Y FUNCTIONS The technological advances in your new combi stove are the result of years of Overheating testing and practical experience. The practical advantages of your pellet/log stove are convincing: A safety temperature limiter (STL) switches the stove off automatically on overheating. -
Page 15: Assembly/Dismantling Stone And Options
7. ASSEMBLY/DISMANTLING STONE AND OPTIONS Tip the stone slightly forwards and lift it out of the floor bracing. Pay attention to Note the edges of the stone to prevent damage. Place the stone on a suitable base. Only work on the unit when the mains plug has been disconnected and the stove has cooled completely. -
Page 16: Conversion To Flue Pipe Connection Rear
Conversion to flue pipe connection rear Swap the flue connections and the fluegas cover. Remove the left rear wall by opening the 3 top hex head bolts. Grease the fastening screw with copper paste. The rear wall is mounted at the floor, it is removed by pressing it back slightly and lifting. -
Page 17: Burnback And Flue Gas Flap
8. BURNBACK AND FLUE GAS FLAP Start of operation Ref illing logs - opening flue gas flap Once the stove has been reconnected to the mains you see the following Attach the wrench in shown position. warning on the display. WARNING BURNBACK AND FLUE GAS FLAP... -
Page 18: Flow Diagram Pellet Log Operation
9. FLOW DIAGRAM PELLET LOG OPERATION... -
Page 19: Maintenance
first and slaked with water. Note We recommend at least once a year to have all maintenance carried out by your RIKA dealer. Note Ash may contain embers – only place ash in sheet steel containers! Empty the ash drawer Cleaning the f ire trough - daily Empty the ash drawer regularly. -
Page 20: Cleaning
11. CLEANING Cleaning flue pipes Your RIKA dealer will gladly advise you about their service and maintenance The flue pipes should be cleaned at least 2 x a year or after approx. 700 kg offers. pellets. The flues are behind the combustion chamber. -
Page 21: Cleaning Flue Gas Deflector Section
Dismantle the two cleaning covers behind the ash drawer by loosening the 4 milled nuts. Turn the cast cover carefully out of the frame and place it down. Vacuum out the chambers in the lower section of the flue pipes. Vacuum out the deflector section. -
Page 22: Problems Possible Solutions
12. PROBLEMS POSSIBLE SOLUTIONS Problem 1 Problem 3 Fire burns with weak, orange flame. Pellets heap up in fire trough, window Flue gas discharge when wood is added and during heating phase. sooted up. Cause(s) pellet / log operation Cause(s) pellet operation Flue gas flap is not open for refueling Insufficient combustion air Combustion chamber door opened too fast... -
Page 23: Instructions For Commissioning Protocol
Note points, is a document. Please return 1 completed protocol for putting into service to RIKA Innovative Ofentechnik GmbH, Müllerviertel 20, 4563 Micheldorf, Austria. Warranty terms Difference between warranty (statutory) and guarantee (voluntary), terms of guarantee, determination of wearing parts, reference to pellet quality to be Electrical periphery used and the consequences of poor quality. - Page 24 Please contact your warranty partner for any warranty questions or claims. This is your dealer or installation company. No warranty claims can be accepted without proper putting into operation, proper operation according to the operating instructions and the supplements in this information sheet. Protocol for putting into operation for RIKA pellet and combi stoves Date:____________________...
-
Page 26: Warrant Y
In case of doubt as well as missing or incorrect translations, the German version is the only valid one. For the purpose of timely damage limitation the claimant is required to file the warranty claim with the RIKA dealer in writing, submitting the invoice and stating the purchase date, model name, serial number and reason for complaint. - Page 28 In case of doubt as well as missing or incorrect translations, the German version is the only valid one. Technical and design changes, as well as typesetting and printing errors reserved. © 2018 | RIKA Innovative Ofentechnik GmbH RIKA Innovative Ofentechnik GmbH 4563 Micheldorf / Austria, Müllerviertel 20 Telefon: +43 7582 686 - 41, Fax-DW: 43 E-Mail: verkauf@rika.at...
Need help?
Do you have a question about the induo II and is the answer not in the manual?
Questions and answers