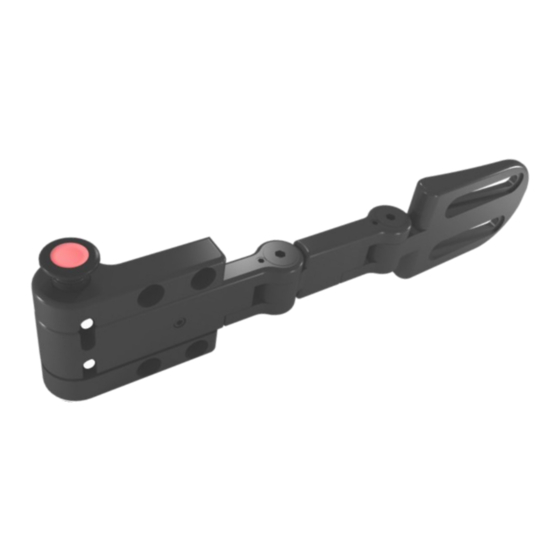
Summary of Contents for Stealth Products The World’s Best Laterals
- Page 1 Lateral and Trunk Support USER MANUAL The World’s Best Laterals Stealth’s User Manual and Maintenance Guide for The World’s Best Laterals...
-
Page 2: Warranty
Customer Satisfaction Stealth Products strives for 100% customer satisfaction. Your complete satisfaction is important. Please contact us with feedback or suggested changes that will help improve the quality and usability of our products. You may reach us at: Stealth Products, LLC... - Page 3 Important Information Important Information! All persons responsible for fitting, adjustment, and daily use of the devices discussed in these instructions must be familiar with and understand all safety aspects of the devices mentioned. In order for our products to be used successfully, you must: ...
- Page 4 They also contain important safety and maintenance information. For further assistance, or more advanced applications, please contact your supplier or Stealth Products at (512) 715-9995 or, toll free, at (800) 965-9229. Always keep the operating instructions in a safe place so they may be referenced as necessary.
- Page 5 Warranty Our products are designed, manufactured, and produced to the highest of standards. If any defect in material or workmanship is found, Stealth Products will repair or replace the product at our discretion. Any implied warranty, including the implied warranties of merchantability and fitness for a particular purpose, shall not extend beyond the duration of this warranty.
-
Page 6: Table Of Contents
Table of Contents 1.0 Customer Satisfaction ................i 2.0 Important Information ................ii 3.0 Introduction ................... iii 4.0 Warranty ....................iv 5.0 Table of Contents ................... v 6.0 Warning Labels ..................vi 6.1 Warning Labels ....................vi 6.2 Limited Liability ....................vi 6.3 Testing........................ -
Page 7: Warning Labels
SAFETY be necessary. Limited Liability Stealth Products, LLC accepts no liability for personal injury or damage to property that may arise from the failure of the user or other persons to follow the recommendations, warnings, and instructions in this manual. -
Page 8: Functioning
Functioning Operating Laterals To operate the laterals: Depress the quick release button (A). The lateral will swing away 180° into an open-locked position. Depress the quick release button again to return swing-away arm to the closed- locked position. WARNING Not intended to be used as a weight bearing surface. Using them as a weight bearing surface during transfers can damage the laterals and may harm the user. -
Page 9: Mounting
Mounting Standard Track Mounting To adjust standard track mounting: Insert the 1/4-20 x 3/4 Socket Head Screws (F) through the counter bore holes (G) and into the threaded holes of the Universal Track Nut (H). Tighten with a 3/16 T-Handle to 200in-lbs of torque. Do not over-tighten screws. -
Page 10: Standard Planar Mounting
Mounting Standard Planar Mounting To install planar mounts: Use 1/4-20 x 5/8 Socket Head Screws (A) to mount on the base of the planar mount to the interior of the lateral. Screw the 1/4-20 x 5/8 Button Head Screws (B) through the slots on the planar mount onto the mounting hardware on the chair. -
Page 11: Full Surface Contact Mounting
Mounting Full Surface Contact Mounting The Full Surface Contact mounts are pre-assembled before they are delivered. To adjust the angle of the pad mount: Loosen the 10-32 x 1/2” Socket Head Screws (A) with a 5/32 T-Handle. Adjust pad mount to desired angle and re-tighten screws to 79in-lbs of torque. Do not over-tighten. -
Page 12: First Time Use
First Time Use Dealer Assistance During first time use by the client, it is advised that the dealer or service technician assist and explain the configuration to the customer (the user and/or the attendant). If needed, the dealer can make final adjustments. WARNING The laterals should only be fitted by a qualified healthcare professional. -
Page 13: Maintenance
Maintenance 10.0 Cleaning 10.1 To wash the covers of the laterals: Remove the pad/cover from the laterals. Machine wash in cold water on delicate cycle and drip dry. To wash sheepskin covers: Remove the cover from the laterals. ... - Page 14 NOTES 11.0...
- Page 15 NOTES 11.0...
- Page 16 Stealth Products, LLC. • info@stealthproducts.com • www.stealthproducts.com +1(800) 965-9229 | +1(512) 715-9995 | 104 John Kelly Drive, Burnet TX 78611 P91D276 Revision Date 2019-12-17...


Need help?
Do you have a question about the The World’s Best Laterals and is the answer not in the manual?
Questions and answers