
Related Manuals for Datamax H-Class H-6 Series


Summary of Contents for Datamax H-Class H-6 Series
- Page 1 Maintenance Manual Mantenimiento Periféricos Informáticos C/Canteras,15 28860 Paracuellos de Jarama Madrid Tel: 91 748 16 04 www.mpi.com.es...
- Page 2 Information in this document is subject to change without notice and does not represent a commitment on the part of Datamax-O’Neil. No part of this manual may be reproduced or transmitted in any form or by any means, for any purpose other than the purchaser's personal use, without the expressed written permission of Datamax-O’Neil.
- Page 3 Contents Overview Adjustments and Maintenance Troubleshooting Removal and Replacement Mantenimiento Periféricos Informáticos C/Canteras,15 28860 Paracuellos de Jarama Madrid Tel: 91 748 16 04 www.mpi.com.es...
- Page 4 Mantenimiento Periféricos Informáticos C/Canteras,15 28860 Paracuellos de Jarama Madrid Tel: 91 748 16 04 www.mpi.com.es...
-
Page 5: Table Of Contents
Overview Introduction ......................1 About the Printer ....................2 1.1.1 Front View ..................... 2 1.1.2 Side View – User, All Models ..............3 1.1.2.1 Side View – User, H-6XXX & H-8308 Models ......4 1.1.2.1.1 Side View – User, H-8308 Models ......4 1.1.3 Side View - Electronics ................. - Page 6 Mantenimiento Periféricos Informáticos C/Canteras,15 28860 Paracuellos de Jarama Madrid Tel: 91 748 16 04 www.mpi.com.es...
-
Page 7: Introduction
H-Class model printers. It primarily includes technical information relating to the electrical and mechanical assemblies and components of the printer. If necessary, refer to the following documents for additional printer information (downloadable at http://www.datamax-oneil.com/): • For operating information, reference the Operator’s Manual (part number 88-2329-01); and, •... -
Page 8: About The Printer
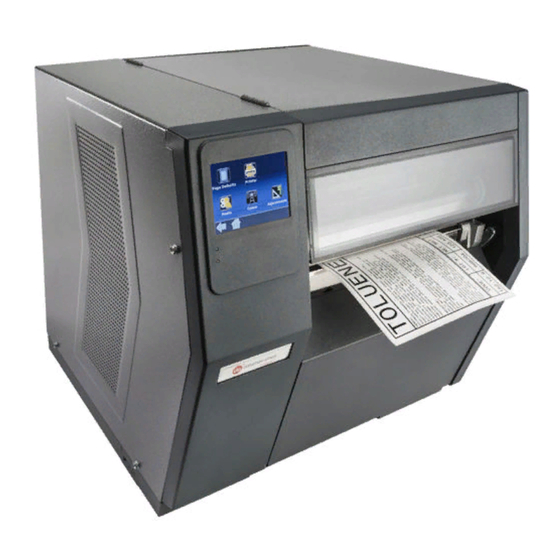
Overview 1.1 About the Printer The following tables and illustrations highlight exterior printer components and controls. Note that some items are optional and may not be present on all models. To identify the model number, look on the Serial Tag affixed to the rear of the printer. Use the model number when referencing specific information in this manual. -
Page 9: Side View - User, All Models
Overview 1.1.2 Side View – User, All Models Item Number Item Description Center Plate Connector Leveling Cam Ribbon Idler Adjustment * Printhead Latch Media Sensor Slide Tab Media Guide Media Retainer Powered Internal Rewinder Assembly * Media Hub Media Backstop Ribbon Supply Hub * Ribbon Take-Up Hub * *Optional feature... -
Page 10: Side View - User, H-6Xxx & H-8308 Models
Overview 1.1.2.1 Side View – User, H-6XXX & H-8308 Models The following items are specific to wide model printers. Item Number Item Description Platen Block Support Bouncer Assembly 1.1.2.1.1 Side View – User, H-8308 Models H-8308 The following item is specific to model printers equipped with the Powered Internal Rewind option. -
Page 11: Side View - Electronics
Overview 1.1.3 Side View - Electronics Item Number Item Description SDIO Slot 1.1.4 Rear View Item Number Item Description Card Cage External Media Slot Fan Filter AC Receptacle Serial Tag Power Switch Main Logic CCA Mantenimiento Periféricos Informáticos C/Canteras,15 28860 Paracuellos de Jarama Madrid Tel: 91 748 16 04 www.mpi.com.es... - Page 12 Overview Mantenimiento Periféricos Informáticos C/Canteras,15 28860 Paracuellos de Jarama Madrid Tel: 91 748 16 04 www.mpi.com.es...
- Page 13 Adjustments and Maintenance Introduction ........................1 Media Sensor Calibration....................1 2.1.1 Quick Calibration ....................1 2.1.2 Standard Calibration....................2 2.1.3 Advanced Entry Calibration ................... 5 Printhead Assembly Adjustments ................... 12 2.2.1 Leveling Cam ...................... 13 2.2.2 Printhead Burn Line..................... 14 2.2.3 Printhead Voltage....................
- Page 14 2.4.5 Cleaning the Ribbon Path Components .............. 36 2.4.6 Cleaning the Exterior Surfaces................37 2.4.7 Cleaning the Interior Compartment ..............37 2.4.8 Cleaning the Cutter ..................... 37 2.4.9 Cleaning the Fan Filter ..................39 Updating Firmware......................40 Boot Loader Program Updates ..................41 Resetting the Printer .......................
-
Page 15: Introduction
Adjustments and Maintenance 2.0 Introduction This section details the correct calibrations, hardware adjustments, and maintenance for the printer. 2.1 Media Sensor Calibration In addition to selecting the Media Sensor type and positioning the Media Sensor, calibration is required to ensure that each label is detected correctly and reliably. Three calibration methods, described below, are available. -
Page 16: Standard Calibration
Adjustments and Maintenance 2.1.2 Standard Calibration Standard Calibration should be performed when ‘CANNOT CALIBRATE’ or ‘UNCALIBRATED’ is displayed. During this process, the printhead assembly can be raised for visual access. In addition, active sensor readings can be used to further determine the best position for small, position-critical TOF notches or marks. - Page 17 Adjustments and Maintenance Step Action Displayed Message Comment(s) This sets the empty value - REMOVE LABEL STOCK Ensure that no label stock is where ‘yyy’ is a numerical installed in the printer then press PRESS ESC KEY value representing the sensor the ESC Key.
- Page 18 Adjustments and Maintenance Step Action Displayed Message Comment(s) This sets the paper value - where ‘yyy’ is a numerical value representing the sensor Position the label material (and SCAN PAPER reading for the media. liner, if any) over the sensor PRESS ANY KEY then press the ESC If using preprinted media,...
-
Page 19: Advanced Entry Calibration
Adjustments and Maintenance Step Action Displayed Message Comment(s) Press the ESC Key to exit the calibration routine, and then press the EXIT Key to exit the CALIBRATION COMPLETE Menu System. Finally, to The printer is now ready for complete the calibration for die- followed by... - Page 20 Adjustments and Maintenance Step Action Displayed Message Comment(s) Press the ENTER Key to You are beginning access SENSOR ADVANCED ENTRY CALIBRATION. Use the UP ADVANCED CALIBRATION calibration. Press the ESC Button to scroll to Key to abort this procedure. ADVANCED CALIBRATION and press the ENTER Key.
- Page 21 Adjustments and Maintenance Step Action Displayed Message Comment(s) Create a table with 32 rows The YYY value represents the (one for each of the Gain current sensor reading. (The Numbers that will be tested) numbers given in this and four columns with headings procedure are meant only as similar to the one shown below.
- Page 22 Adjustments and Maintenance Step Action Displayed Message Comment(s) Raise the printhead assembly and proceed according to your media type: Do not position the Media Sensor under a perforation. Die-cut stock -- Remove a label or two from the liner Also, do not move the position material, and then position of the Media Sensor after it...
- Page 23 Adjustments and Maintenance Gain Label Difference Number Value Value Value … … … Step Action Displayed Message Comment(s) In the table, where both the In this example, Gain Number Label Value and TOF Value are 08 is chosen because, where above 20, subtract them and TRAN SENSOR GAIN both the Label Value (178) and...
- Page 24 Adjustments and Maintenance Step Action Displayed Message Comment(s) Complete a table (see below) using new measurements, as Where YYY is a numerical follows: value representing the current sensor reading. (A) Raise the Printhead Assembly. Place the label over The re-sampled values may the Media Sensor, then lower differ from those previously and latch the Printhead...
- Page 25 Adjustments and Maintenance Step Action Displayed Message Comment(s) Press the ESC Key. Use the UP Button to scroll to PAPER SENSOR LEVEL (or, if using reflective media, REFL PAPER SENSOR LEVEL PAPER LEVEL) and then press the ENTER Key. (0 - 255) Use the UP, DOWN, LEFT, and RIGHT Buttons to set the Paper value determined in...
-
Page 26: Printhead Assembly Adjustments
Adjustments and Maintenance Step Action Displayed Message Comment(s) Press the EXIT Key and, when This completes the Advanced prompted, press the YES Key at OFFLINE Calibration procedure. the SAVE CHANGES prompt. CALIBRATION COMPLETE Press and hold the FEED Key The printer is now ready for until at least one label has been followed by... -
Page 27: Leveling Cam
Adjustments and Maintenance 2.2.1 Leveling Cam The Leveling Cam adjustment assures even print quality and lessens the wear on the platen roller and printhead when less than four-inch wide (102mm) media is used in the printer. Adjust the Leveling Cam whenever narrow media is used, as follows: Leveling Cam 1. -
Page 28: Printhead Burn Line
Adjustments and Maintenance 2.2.2 Printhead Burn Line The Printhead Burn Line adjustment changes the position of the thermal element row that creates the image on the media. Factory adjusted using 6.5-mil media to ensure compliance on most labeling stocks, first try the suggestions in the Operator’s Manual if print quality is unacceptable (also, consult the Troubleshooting section of this manual for other possible causes). -
Page 29: Printhead Voltage
Adjustments and Maintenance 6. Rotate each Burn Line Adjustment Screw clockwise about one-quarter of a turn then print another VALIDATION LABEL and examine its print quality. Repeat this step until an image with even contrast begins to be produced across the label. 7. - Page 30 Adjustments and Maintenance 2. Remove the Cover (see Section 4.1 for details). Raise the Printhead Assembly. Locate the attached Printhead Label and note the resistance value of the printhead. Make sure that media is loaded in the printer then lower and lock the Printhead Assembly. Printhead Assembly Printhead Label 3.
Need help?
Do you have a question about the H-Class H-6 Series and is the answer not in the manual?
Questions and answers