Table of Contents
Advertisement
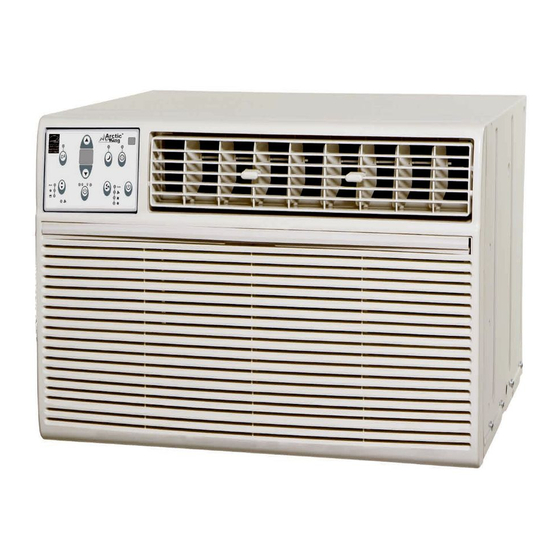
WINDOW AIR CONDITIONER
Operator's Manual
Customer Service / Service à la clientèle: 1-866-206-0888
Our customer service staff is available to help you. For any problem with your purchase, or to receive further
information about this product, please call our toll-free number.
SAVE THIS MANUAL
Keep this manual and the original sales invoice in a safe, dry place for future reference.
Notre personnel du service à la clientèle est disponible pour vous aider. En cas de problème avec votre achat, ou pour
obtenir plus d'informations à propos de ce produit, veuillez composer notre numéro sans frais.
CONSERVEZ CE GUIDE
Conservez ce manuel avec la facture d'origine dans un endroit sûr et sec pour référence future.
Model/Modèle :
8
7
MWFUK-15CRN1-BCK8
7
9
5
0
6
3
Advertisement
Table of Contents

Subscribe to Our Youtube Channel
Related Manuals for Arctic King MWFUK-15CRN1-BCK8


Summary of Contents for Arctic King MWFUK-15CRN1-BCK8
- Page 1 Model/Modèle : MWFUK-15CRN1-BCK8 WINDOW AIR CONDITIONER Operator's Manual Customer Service / Service à la clientèle: 1-866-206-0888 Our customer service staff is available to help you. For any problem with your purchase, or to receive further information about this product, please call our toll-free number.
-
Page 3: Read This Manual
2. OPERATING INSTRUCTIONS REMOTE CONTROL OPERATING INSTRUCTIONS Read this Manual You will find inside many helpful tips on how to use and maintain your air conditioner properly. Just a little preventive care on your part can save you a great deal of time and money over the life of your air conditioner. - Page 4 must be followed. Incorrect operation due to failure to following the instructions may cause harm or damage. The severity level is classified as follows: This symbol indicates a risk of death or serious injury. This symbol indicates a risk of injury or damage to property. Plug in the power plug properly.
- Page 5 Ventilate the room properly when used together with a stove, etc.. An oxygen deficiency may occur. any other When the unit is to be purpose than air cooling. cleaned, switch it off and turn off the circuit breaker. Do not clean the unit when the This could harm the pet or plant.
-
Page 6: Safety Precautions
Safety Precautions For Your Safety The power supply with this air conditioner contains a current detection device designed to reduce the risk of fire. Please refer to the section "Operating the Current Device" for details. In the event that the power cord is damaged, it cannot be repaired-it must be replaced with a selected.Ths information can be found on the serial plate, which... -
Page 7: Normal Sounds
Operating Instructions Normal Sounds The unit may vibrate and make noise becaure of poof wall or winodw construction, or incorrect instlalation. /64-109°F /62-90°F NOTE: Performance may be reduced outside of these operating temperatures. -
Page 8: Unit Control Panel
Operating Instructions refer to the unit controls remote control. Unit Control Panel The unit will initiate automatically the Energy Saver function under COOL, DRY, and AUTO (AUTO COOL and AUTO FAN only) modes. Press or hold either UP ( ) or DOWN ( ) button until the desired temperature is displayed. - Page 9 Operating Instructions ● To choose the operating mode, press the MODE button. At each button press, a mode is selected in a sequence that goes from AUTO, COOL, DRY and FAN. The indicator light illuminate and remain ON once the mode is selected. The unit will initiate automatically the Energy Saver function under Cool, Dry, Auto( Auto -Cooling and Auto-Fan) modes.
- Page 10 Operating Instructions AUTO TIMER setting. While on FAN ONLY AS- Room temperature sensor error. Unplug the unit and Displays plug it back in. If error repeats, call for service. NOTE: The FAN ONLY mode will display LO or HI. ● -Evaporator temperature sensor error. Unplug the unit and plug it back in.
-
Page 11: Installation Instructions
Installation Instructions Please read ALL the instructions before installing. Two people are recommended to install this product. If a new electrical outlet is required, have the outlet installed by a qualified electrician before installing the unit. Window sash seal Safety lock and 3/4"... - Page 12 Installation Instructions Tools Required (Not Included) -long flat head bolt and locknut Sill angle bracket R1 hardware Weather stripping (10 *3/4 *1/12 )
-
Page 13: Window Mounting
Installation Instructions Window Mounting Remove the chassis Install the top angle and side bracket. 1. Pull down the front grill and remove the filter (see Fig.1). 1. Attach the foam gasket to the top angle above 2. Lift the front grill upwards and place to one side. the holes as shown in Fig.6. -
Page 14: Install The Support Bracket
Installation Instructions 3. Insert the top and bottom legs of the window filler panel frame in to the channel in the top angle and bottom rail. Repeat on the other side. 4. Insert the two 7/16" washing head locking screws Bottom (2) into the holes in the top leg of the filler pane rail seal... - Page 15 Installation Instructions Attach the window filler 3. Install the support brackets (with the sill angle brackets attached) to the correct holes at the panels to the window frame bottom of the cabinet (see Fig. 16). 1. Extend the window filler panels out against the 4.
- Page 16 Installation Instructions Safety lock 3/4" (or 1/2") hex head screws Fig.19 Install the chassis into the Fig.21 cabinet and front of the unit 3. Slide the R1 insulation panel into the side 1. Lift the air conditioner and carefully slide it into the curtain.
-
Page 17: Prepare The Wall
Installation Instructions Through-the-Wall Installtaion NOTE: Consult the local building codes prior to installation or a qualified carpenter. Select Wall Location Maximum wall thickness: 12" or 10" All the parts needed for through-the-wall- installation are provided, except for the wood frame, shims, and 10 wood screws (at least #10-1"... - Page 18 Installation Instructions NOTE: If the wall thickness is 8-1/2" or more, add aluminum flashing over the bottom of the frame opening to prevent water from entering the area between the inner and outer wall. 1" wood screw Caulk as required Refer to Step 5 in the "Window Mounting"...
- Page 19 Installation Instructions You may apply caulking and install a trim on the interior wall. You can buy wood from your local hardware. On the outside, caulk the openings around the top and sides of the cabinet, including all the wood sleeve sides. NOTE: Refer to Item 3, Step 5 of the "Window Mounting"...
-
Page 20: Care And Cleaning
Care and Cleaning Air Filter Cleaning You may vacuum the filter clean instead of washing it. Cabinet Cleaning moistened with Winter Storage store it in its original box. -
Page 21: Troubleshooting
Troubleshooting Before calling for service, review this list. It may save your time and money. This list includes common issues that are not the result of detective workmanship or materials in this appliance. House fuse blown or circuit breaker tripped. Replace the fuse with a time delay type or reset the circuit breaker. - Page 22 Remote Control Operating Instructions Handling the Remote Control Location of the Remote controll. Use the remote controll within a distance of 16 feet (5 m) from the appliance, pointing it towards the receiver. The reception is confirmed by a beep. CAUTIONS The air conditioner will not operate if curtains, doors, or other materials block the signals from the remote controller to the indoor unit.
-
Page 23: Remote Controller Specifications
Remote Control Operating Instructions WARNING 1. The battery must be disposed of properly. Do not short circuit or dispose of in fire. 2. Keep batteries out of the reach of children. 3. Batteries must not be ingested. 4. Non-rechargeable batteries are not to be recharged. 5. - Page 24 Remote Control Operating Instructions NOTE: Function Buttons MODE Button Press this button to select the ON/OFF Button desired operation mode from AUTO, COOL, DRY, HEAT Operation starts when this button (cooling & heating models is pressed and stops when the button is pressed again.
- Page 25 Remote Control Operating Instructions How to Use the Buttons AUTO Operation AUTO. In AUTO mode, the air conditioner can automatically choose between the COOL, FAN, and HEAT mode by sensing the difference between the actual room temperature and the set temperature on the remote control. AUTO cannot AUTO...
- Page 26 Remote Control Operating Instructions DRY Operation DRY. DRY mode, you cannot switch the SLEEP Operation Press this button to active the SLEEP mode. This function is available under the most comfortable temperature for you. In this mode, the selected temperature will increase by 1 °C/ 2 °F 30 minutes after the mode is selected.
- Page 27 Remote Control Operating Instructions TIMER Operation Press the TIMER button to initiate the AUTO-START and AUTO-STOP setting program of the unit. The time can be set in a range of 0~24 hours. To set the AUTO-START/AUTO-STOP Time. 1. Press the TIMER button. When the TIMER ON indicator is displayed on the air conditioner LED window, it indicates that the AUTO-START setting program is initiated.
- Page 28 Remote Control Operating Instructions Combined Timer AUTO-STOP AUTO-START going when waking up in the morning returning the air conditioner LED display. the air conditioner LED display. the air conditioner LED display. the air conditioner LED display. reverts screen. AUTO-STOP AUTO-START waking leaving the air conditioner...
- Page 29 Remote Control Operating Instructions ENERGY SAVER Operation 10-minute compressor starts.
- Page 30 Remote Control Operating Instructions The design of buttons on the . In such case, the All functions described in these instructions apply to the available different models. If your model doesn't have a specific function, pressing the corresponding button will have no effect. If a function description between the "Remote Control Operating Instructions"...
-
Page 31: Air Conditioner Limited Warranty
Air Conditioner Limited Warranty These products have been made to quality standards and are guaranteed for domestic use against manufacturing faults for a period of 5 years from the date of purchase. One (1) year full warranty from original purchase date and limited 2nd through 5th year sealed system warranty if used for normal trade purposes.
Need help?
Do you have a question about the MWFUK-15CRN1-BCK8 and is the answer not in the manual?
Questions and answers