Table of Contents
Advertisement
Available languages
Available languages
Advertisement
Chapters
Table of Contents

Related Manuals for Arctic King AKPD-12CR4


Summary of Contents for Arctic King AKPD-12CR4
- Page 1 AKPD-12CR4 AKPD-12ER4...
- Page 3 Read This Manual Inside you will find many helpful hints on how to use and maintain your air conditioner properly. Just a little preventive care on your part can save you a great deal of time and money over the life of your air conditioner. You'll find many answers to common problems in the chart of troubleshooting tips.
-
Page 4: Table Of Contents
CONTENTS SOCIABLE REMARK Sociable remark..........................2 SAFETY PRECAUTIONS Safety rules ............................3 Operating condition ...........................3 Electrical information .........................4 IDENTIFICATION OF PARTS Accessories ............................4 Names of parts...........................5 AIR CONDITIONER FEATURES Electronic control operating instructions ...................6 OPERATING INSTRUCTIONS Operating instructions ........................7 INSTALLATION INSTRUCTIONS Location ............................9 Window kit installation ........................9 Exhaust hose installation ........................12 Water drainage ..........................13... -
Page 5: Sociable Remark
SOCIABLE REMARK When using this air conditioner in the European countries, the following informa- tion must be followed: DISPOSAL: Do not dispose this product as unsorted municipal waste. Collection of such waste separately for special treatment is necessary. It is prohibited to dispose of this appliance in domestic household waste. For disposal, there are several possibilities: A) The municipality has established collection systems, where electronic waste can be disposed of at least free of charge to the user. -
Page 6: Safety Precautions Safety Rules
SAFETY PRECAUTIONS Safety rules To prevent injury to the user or other people and property damage, the following instructions must be followed. Incorrect operation due to ignoring of instructions may cause harm or damage. Always do this Never do this Do not operate your air conditioner in a wet room such as a bathroom or laundry room. -
Page 7: Electrical Information
IDENTIFICATION OF PARTS WARNING For your safety Do not store or use gasoline or other flammable vapors and liquids in the vicinity of this or any other appliance. Avoid fire hazard or electric shock. Do not use an extension cord or an adaptor plug. Do not remove any prong from the power cord. -
Page 8: Names Of Parts
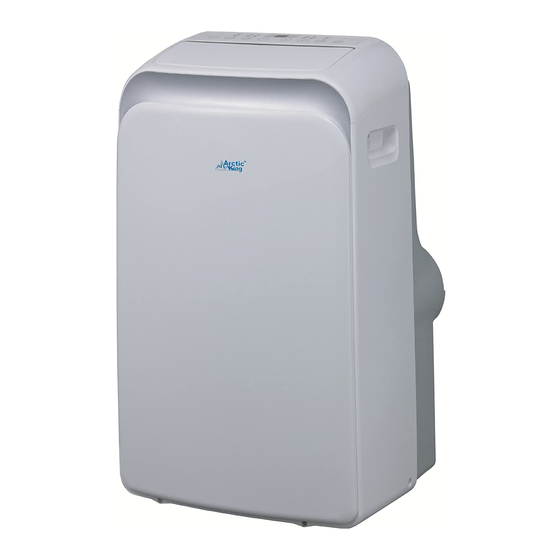
IDENTIFICATION OF PARTS NAMES OF PARTS Front Operation panel Horizontal louver blade (swing automatically) Caster Carrying handle (both sides) Fig.1 Rear Air filter (Behind the grille) Air intake Air outlet Drain outlet (only for Pump heating model) Power cord outlet Power cord buckle (Used only when storing the unit) CLOSE... -
Page 9: Air Conditioner Features
AIR CONDITIONER FEATURES ELECTRONIC CONTROL OPERATING INSTRUCTIONS Before you begin, thoroughly familiarize yourself with the control panel and remote controller and all its functions, then follow the symbol for the functions you desire. The unit can be controlled by the unit control panel alone or with the remote controller . NOTE: This manual does not include Remote Controller Operations, see the <<Remote Controller Instruction>>... -
Page 10: Operating Instructions Operating Instructions
OPERATING INSTRUCTIONS Error codes and protection code: Press the "MODE" button until the "DRY" E1- Room temperature sensor error- indicator light comes on. Unplug the unit and plug it back in. Under this mode, you cannot select a fan If error repeats, call for service. speed or adjust the temperature. - Page 11 OPERATING INSTRUCTIONS SLEEP operation - Turning the unit ON or OFF at any Press this button, the selected temperature will time or adjusting the timer setting C/2 F increase(cooling) or decrease(heating) by 1 to 0.0 will cancel the Auto Start/ 30 minutes.The temperature will then increase Stop timer program.
-
Page 12: Installation Instructions Location
INSTALLATION INSTRUCTIONS(optional) INSTALLATION INSTRUCTIONS Location The air conditioner should be placed on a firm foundation to minimize noise and virbration. For safe and secure positioning, place the unit on a smooth, level floor strong enough to support the unit. The unit has casters to aid placement, but it should only be rolled on smooth, flat surfaces. - Page 13 INSTALLATION INSTRUCTIONS(optional) Installation in a double-hung sash window Foam seal A (adhesive type) 1. Cut the foam seal(adhesive type) to the proper length and attach it to the window stool. Fig.8 2. Attach the window slider kit to the window stool. Adjust the Fig.8 length of the window slider kit according to the width of window, shorten the adjustable window kit if the width of...
- Page 14 INSTALLATION INSTRUCTIONS(optional) Installation in a sliding sash window 1. Cut the foam seal(adhesive type) to the proper length and Foam seal A (adhesive type) attach it to the window frame. See Fig.12. 2. Attach the window slider kit to the window stool. Adjust the length of the window slider kit according to the width of window, shorten the adjustable window kit if the width of Fig.12...
-
Page 15: Window Kit Installation
INSTALLATION INSTRUCTIONS Exhaust hose installation: The exhaust hose and adaptor must be installed or removed in accordance with the usage mode. Fig.16a Fig.16b COOL,HEAT(heat pump type) or AUTO Install mode FAN,DEHUMIDIIFY or HEAT(electrical heat type) Remove mode Fig.17a 1. Install the adaptor B and adaptor I onto the exhaust hose as shown in Fig.16a or Fig.16b. -
Page 16: Water Drainage
INSTALLATION INSTRUCTIONS Water drainage: During dehumidifying modes, remove the upper Continuous drain plug from the back of the unit, install the drain drain hose connector(5/8 universal female mender) with 3 4 hose(locally purchased). For the models √ without drain connector, just attach the drain hose to the hole. -
Page 17: Care And Maintenance
CARE AND MAINTENANCE CARE AND MAINTENANCE Air filter (take out) IMPORTANT: 1) Be sure to unplug the unit before cleaning or servicing. 2) Do not use gasoline, thinner or other chemicals to clean Air filter the unit. (take out) 3) Do not wash the unit directly under a tap or using a hose. It may cause electrical danger. -
Page 18: Troubleshooting Tips
TROUBLESHOOTING TIPS TROUBLE SHOOTING TROUBLES POSSIBLE CAUSES SUGGEST REMEDIES 1. Unit does not - P1 appears in the display window Drain the water in the bottom tray. Start when Pressing on/off - Room temperature is lower than Reset the temperature. Button the set temperature.(Cooling mode) - The windows or doors in the room... - Page 19 Costs of service calls that are a result of items listed under NORMAL RESPONSIBILITIES OF THE CONSUMER** Arctic King replacement parts shall be used and will be warranted only for the period remaining on the original warranty. NORMAL RESPONSIBILITIES OF THE CONSUMER** This warranty applies only to products in ordinary household use, and the consumer is responsible for the items listed below: Proper use of the appliance in accordance with instructions provided with the product.
- Page 20 The design and specifications are subject to change without prior notice for product improvement. Consult with the sales agency or manufacturer for details.
- Page 21 AIRE ACONDICIONADO PORTATIL Modelo: AKPD-12CR4 AKPD-12ER4 En este manual usted puede encontrar muchas indicaciones útiles sobre cómo usar y mantener su aire acondicionado de manera correcta. Únicamente algunos cuiddados preventativos en su máquina puede ahorrarle mucho tiempo y dinero durante la vida de su aire acondicionado. Antes del uso de este producto,...
- Page 23 Lea el siguiente manual En el siguiente manual, usted encontrará varios consejos sobre cómo utilizar y mantener su acondicionador de aire correctamente. Si toma las medidas preventivas correspondientes, podrá ahorrar una gran cantidad de tiempo y dinero durante la vida útil de su producto. También encontrará varias respuestas a problemas recurrentes en el cuadro sobre consejos para solucionar problemas.
- Page 24 CONTENIDOS REGLAS DE DISPOSICIÓN DE RESIDUOS Reglas de disposición de residuos ……………………………………………………………….2 MEDIDAS DE SEGURIDAD Normas de seguridad ………………………………………………………………………………3 Condición de operación ……………………………………………………………………………3 Información sobre la electricidad…………………………………………………………………4 IDENTIFICACIÓN DE LAS PARTES A c ce sor i os ……… …… ………… ……… ……… ………… ……… ……… ………… ……… ……. . 4 Nombres de las partes ……………………………………………………………………………..5 CARACTERÍ...
- Page 25 REGLAS DE DESECHADO DE RESIDUOS Al utilizar este acondicionador de aire en paí ses europeos, se debe prestar atención a la siguiente información: DESECHADO: No deseche este producto junto con otros tipos de residuos municipales. Es necesario recolectar dichos residuos en forma separada para que reciban un tratamiento especial.
-
Page 26: Normas De Seguridad
PRECAUCIONES DE SEGURIDAD Normas de seguridad Para evitar lesiones al usuario o a otras personas y daños materiales, debe seguir las siguientes instrucciones. El uso incorrecto ocasionado al ignorar las instrucciones puede causar lesiones o daños. Haga esto siempre Nunca haga esto ... -
Page 27: Identificación De Las Partes
IDENTIFICACIÓN DE PARTES ADVERTENCIA Para su seguridad No almacene ni utilice gasolina y otros vapores y lí quidos inflamables en las cercaní as de este o cualquier otro electrodoméstico. Evite el riesgo de incendios o descargas eléctricas. No utilice un cable de extensión o un adaptador de enchufe. -
Page 28: Nombres De Las Partes
IDENTIFICACIÓN DE PARTES NOMBRES DE LAS PARTES Parte frontal 1. Panel de operación 2. Hoja de lama horizontal (giro automático) 3. Rueda 4. Manija para transportar(ambos lados) Fig.1 Parte posterior 5. Filtro de aire (detrás de la rejilla) 6. Entra de aire 7. -
Page 29: Instrucciones De Operación De Control Electrónico
CARACTERÍ STICAS DEL AIRE ACONDICIONADO INSTRUCCIONES DE OPERACIÓN DEL CONTROL ELECTRÓNICO Antes de comenzar, familiarí cese por completo con el panel de control y el control remoto y todas sus funciones, entonces siga el sí mbolo de las funciones que desee. La unidad puede controlarse con el panel de control o con el control remoto. -
Page 30: Instrucciones De Operación
INSTRUCCIONES DE OPERACIÓN Presione botón “VELOCIDAD Códigos de errores y de protección: VENTILADOR” para seleccionar la velocidad del E1- Error del sensor de temperatura del ambiente- Desenchufe la unidad y vuelva a enchufarla. Si el ventilador. En algunos modelos, la velocidad del error se repite, llame para pedir asistencia técnica. - Page 31 INSTRUCCIONES DE OPERACIÓN - Encender o apagar la unidad en cualquier Si presiona este botón, la temperatura momento o ajustar el temporizador a 0.0 seleccionada aumentara (frio) o disminuirá cancelará programa (calor) de a 1℃/2℉ cada 30 minutos. La Encendido/Apagado automático. temperatura luego aumentara (frio) o - Si ocurre un error (E1, E2, E3 o E4), el disminuirá...
-
Page 32: Instrucciones De Instalación Ubicación
INSTRUCCIONES DE INSTALACIÓN (opcional) INSTRUCCIONES DE INSTALACIÓN Ubicación La unidad debe colocarse sobre una base firme para minimizar el ruido y las vibraciones. Para lograr una posición segura y firme, coloque la unidad sobre un piso liso y nivelado que sea suficientemente fuerte A:30cm-100cm B:≥30cm Fig.5... - Page 33 INSTRUCCIONES DE INSTALACIÓN (opcional) Instalación en ventanas de guillotina de dos hojas Sello de espuma A (tipo 1. Corte el sello de espuma (tipo adhesivo) adhesivo) a la longitud apropiada y adhiéralo al alféizar de la ventana. Figura 8. 2. Coloque el juego deslizable para la Fig.8 ventana en el alféizar de la ventana.
- Page 34 INSTRUCCIONES DE INSTALACIÓN (opcional) Instalación en ventanas de guillotina deslizables Sello de espuma A (tipo adhesivo) 1. Corte el sello de espuma (tipo adhesivo) a la longitud correcta y péguelo en el marco de la ventana. Ver la figura 12. 2.
-
Page 35: Instalación De La Manguera De Escape
INSTRUCCIONES DE INSTALACIÓN (opcional) Instalación de la manguera de escape: La manguera de escape y el adaptador deben instalarse o desinstalarse según el modo de funcionamiento. MODO FRIO, CALOR Instalación (tipo de bomba de calor) Fig.16a Fig.16b MODO VENTILADOR, Desinstalación DESHUMIDIFICADOR O CALOR (tipo de bomba de calor) -
Page 36: Drenaje De Agua
INSTRUCCIONES DE INSTALACIÓN (opcional) Drenado del agua - Durante el modo de deshumidificación, retire Manguera de el tapón de drenado de la parte de atrás de drenado la unidad, instale el conector de drenado constante (adaptador hembra universal de 5/8”) con una manguera de 3/4"... -
Page 37: Cuidado Y Mantenimiento
CUIDADO Y MANTENIMIENTO CUIDADO Y MANTENIMIENTO IMPORTANTE: 1) Asegúrese de desenchufar la unidad antes limpiarla realizarle mantenimiento. Filtro de aire (remover) 2) No utilice gasolina, diluyente u otros quí micos para limpiar la unidad. 3) No lave la unidad directamente bajo un grifo o utilizando una manguera. - Page 38 CONSEJOS PARA IDENTIFICAR PROBLEMAS IDENTIFICACIÓN DE PROBLEMAS PROBLEMAS CAUSAS POSIBLES SOLUCIONES SUGERIDAS - Aparece P1 en la ventana de Drene el agua de la rejilla visualización. inferior 1. La unidad no enciende temperatura cuando presiono el botón habitación es menor a la de Encendido/Apagado Reinicie la temperatura temperatura...
- Page 39 uno año...
- Page 40 El diseño y las especificaciones quedan sujetos a cambio sin previo aviso para cualquier mejora de los equipos. Consulte con su agencia de ventas o con el fabricante para más información.
Need help?
Do you have a question about the AKPD-12CR4 and is the answer not in the manual?
Questions and answers