Advertisement

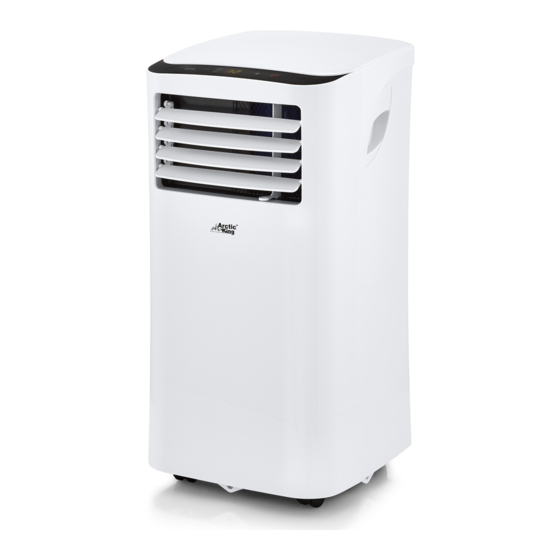
PORTABLE AIR CONDITIONER
Operator's manual
Customer Service / Service à la clientèle:
Our customer service staff is available to help you. For any problem with your purchase, or to receive further
information about this product, please call our toll-free number.
SAVE THIS MANUAL
Keep this manual and the original sales invoice in a safe, dry place for future reference.
Notre personnel du service à la clientèle est disponible pour vous aider. En cas de problème avec votre achat, ou pour
obtenir plus d'informations à propos de ce produit, veuillez composer notre numéro sans frais.
CONSERVEZ CE GUIDE
Conservez ce manuel avec la facture d'origine dans un endroit sûr et sec pour référence future.
Model/modèle :
87795056
MPPH-08CRN1-BI01
87795049
MPPH-10CRN1-BI0
87795057
MPPH-10CRN1-BI0B
87795064
MPPHB-12CRN1-BH9B
1-866-206-0888

Advertisement

Table of Contents
loading

Summary of Contents for Arctic King MPPH-08CRN1-BI01

  • Page 1 Model/modèle : 87795056 MPPH-08CRN1-BI01 87795049 MPPH-10CRN1-BI0 87795057 MPPH-10CRN1-BI0B 87795064 MPPHB-12CRN1-BH9B PORTABLE AIR CONDITIONER Operator's manual 1-866-206-0888 Customer Service / Service à la clientèle: Our customer service staff is available to help you. For any problem with your purchase, or to receive further information about this product, please call our toll-free number.
  • Page 2: Table Of Contents

    TABLE OF CONTENTS Preparation.............................2 Safety Precautions..........................4 Cautions..............................5 Installation..............................6 Operation..............................10 Maintenance............................12 Troubleshooting ..........................13 Design and Compliance Notes......................14 REMOTE CONTROL INSTRUCTIONS....................15 Air Conditioner Limited Warranty......................26...
  • Page 3: Preparation

    Preparation control panel remote signal receptor horizontal louver control lever(adjustable manually) NOTE: PHA can not be adjusted. vertical louver control lever(adjustable manually) NOTE: PHA can not be adjusted. panel Caster front handle (both sides) air filter (behind the grille) upper air intake drain outlet air outlet lower air intake...
  • Page 4: Safety Precautions

    Safety Precautions Please read through these instructions before you start the installation process. Improper installation can cause damage to the unit, your personal property, and also poses a personal safety hazard. -Installation must be performed according to the installation instructions. Improper installation can cause water leakage, electrical shock, or fire.
  • Page 5: Cautions

    Cautions -This appliance is not intended for use by people (including children) with reduced physical, sensory or mental capabilities or lack of experience and knowledge, unless they have been given supervision or instruction concerning use of the appliance by a person responsible for their safety. -Children should be supervised to ensure that they do not play with the appliance.
  • Page 6: Installation

    Installation Choosing The Right Location Your installation location should meet the following requirements: -Make sure that you install your unit on an even surface to minimize noise and vibration. -The unit must be installed near a grounded plug, and the Collection Tray Drain (found on the back of the unit) must be accessible.
  • Page 7 Installation Tools Needed -Medium Philips screwdriver; -Tape measure or ruler; -Knife or scissors; -Saw (optional, to shorten window adaptor for narrow windows) Accessories Your Window Installation Kit fits windows 67.5-123cm (26.5-48”) a nd can be shortened for smaller windows. Part Description Quantity 1 pc...
  • Page 8 Installation Note: Once the Exhaust Hose assembly and Adjustable Window Slider are prepared, choose from one of the following two installation methods. Type 1: Hung Window Installation Foam seal B Foam seal C (Adhesive type-shorter) (Non-adhesive type) Window slider B Window slider A (if required) Foam seal A...
  • Page 9 Installation Security Bracket 2 Screws Insert the window slider adaptor If desired, install the security into the hole of the window slider. bracket with 2 screws as shown. Note: To ensure proper function, DO NOT overextend or bend the hose. Make sure that there is no obstacle around the air outlet of the exhaust hose (in the range of 500mm) for the exhaust system to work properly.
  • Page 10: Operation

    Operation MODE button Timer mode indicator Selects the appropriate operating light (set only by remote controller) mode. Each time you press the Power indicator light button, a mode is selected in a sequence that goes from COOL, LED display FAN and DRY .The mode indicator Shows the set temperature while on cool light illuminates under the different mode.
  • Page 11 Operation Operation Instructions COOL operation -Press the "MODE" button until the "COOL" indicator light comes on. -Press the ADJUST buttons "+" or "-" to select your desired room temperature. The temperature can be set within a range of 17°C~30°C/62°F~86°F. -Press the "FAN SPEED" button to choose the fanspeed. DRY operation -Press the "MODE"...
  • Page 12 Operation AUTO-RESTART IIn the event of an unexpected power outage, the unit will automatically restart with the previous settings when the power resumes. WAIT 3 MINUTES BEFORE RESUMING OPERATION After the unit has stopped, it can not be restarted for the first 3 minutes. This is to protect the unit.
  • Page 13: Maintenance

    Maintenance Safety Precautions -Always unplug the unit before cleaning or servicing. -DO NOT use flammable liquids or chemicals to clean the unit. -DO NOT wash the unit under running water. Doing so causes electrical danger. -DO NOT operate the machine if the power supply was damaged during cleaning. A damaged power cord must be replaced with a new cord from the manufacturer.
  • Page 14: Troubleshooting

    Troubleshooting Please check your air conditioner according to the following form before asking for maintenance: Problem Troubleshooting Possible Cause The water collection tray is full.Turn off the unit, drain the water from the P1 Error Code water collection tray and restart the Unit does not turn on unit.
  • Page 15: Design And Compliance Notes

    Design and Compliance Notes Design Notice In order to ensure the optimal performance of our products, the design specifications of the unit and remote control are subject to change without prior notice. Energy Rating Information The Energy Rating for this unit is based on an installation using an un-extended exhaust duct without adapters A or B (as shown in the Installation section of this manual).
  • Page 16: Remote Control Instructions

    REMOTE CONTROL INSTRUCTIONS Technical Specifications Model RG09E/BGCE 3.0V(Dry batteries R03/LR03×2) Rated Voltage Lowest Voltage of 2.0V CPU Emitting Signal 26 ft (8 m) Transmission Distance 。 。 Environment -5 C 60 C( 23 F~140 F)
  • Page 17 REMOTE CONTROL INSTRUCTIONS Features of remote control ON/OFF Button: Push this button to start the air conditioner; push the button again to stop the air conditioner. MODE Select Button: Each time you push the button, a mode is selected in a sequence that goes from AUTO, COOL, DR Y and FAN, as the following figure indicates: AUTO COOL...
  • Page 18 REMOTE CONTROL INSTRUCTIONS Features of remote control(continued) temperature setting or to adjust the TIMER in a counter-clockwise direction. NOTE: Press and hold buttons together for 3 seconds to alternate the temperature display between the C & F scale. SLEEP Button: In SLEEP mode, pressing this button will activate or deactivate sleep function.
  • Page 19 REMOTE CONTROL INSTRUC Indicators on remote controller Transmission Indicator This transmission indicator lights up when remote controller transmits signals to the indoor unit. Mode display Displays the current operation mode. Including ) , F AN AUTO( ), COOL( ), DRY( AUTO ONLY ( )and back to AUTO(...
  • Page 20 REMOTE CONTROL INSTRUCTIONS Handling the remote controller Loca tion of the remote contr oller. Keep the remote controller where its signals can reach the receiver of the unit (a distance of 8m is allowed). When you select the timer operation, the remote controller automatically transmits a signal to the indoor unit at the specified time.
  • Page 21 REMOTE CONTROL INSTRUCTIONS Setting the clock Before you start operating the air conditioner, set the clock of the remote controller using the procedures given in this section. The clock panel on the remote controller will display the time regardless of whether the air conditioner is in use or not.
  • Page 22 REMOTE CONTROL INSTRUCTIONS Automatic operation When you set the air conditioner in AUTO mode, it will automatically select cooling, or fan only operation depending on what temperature you have selected and the room temperature. Once you select the operating mode, the operating conditions are saved in the AUTO unit's microcomputer memory.
  • Page 23 REMOTE CONTROL INSTRUCTIONS Cooling /Fan only operation Start Check that unit is plugged and power is available. The OPERATION indicator on the display panel of the indoor unit starts flashing. 1. Mode select button (MODE) CLOCK SET TEMP. Press to select COOL, FAN ONLY 2.
  • Page 24 REMOTE CONTROL INSTRUCTIONS Timer operation 1. TIMER button Press the TIMER button, the remote displays 0.0 alongside either the TIMER ON or TIMER OFF indicator, and will flash. SET TEMP. 2. TEMP/TIME button Press to set the desired time. Forward FAN SPEED Backward Press or hold the forward or backward...
  • Page 25 REMOTE CONTROL INSTRUCTIONS Example of timer setting TIMER ON (Timer Start Operation) The TIMER ON feature is useful when you want the unit to turn on automatically for example when you return home. The air conditioner will automatically start operating at the set time. IMPORTANT: The time will be registered Start within a 3 second period(after pressing...
  • Page 26 REMOTE CONTROL INSTRUCTIONS COMBINED TIMER etting both ON and OFF timers simultaneously) TIMER OFF → TIMER ON (On → Stop → Start operation) This feature is useful when you want to stop the air conditioner after you go to bed, and start it again in the morning when you wake up or when you return home.
  • Page 27: Air Conditioner Limited Warranty

    Air Conditioner Limited Warranty These products have been made to quality standards and are guaranteed for domestic use against manufacturing faults for a period of 5 years from the date of purchase. One (1) year full warranty from original purchase date and limited 2nd through 5th year sealed system warranty if used for normal trade purposes.

Table of Contents