Emerson Rosemount 5900 Instruction For Installation, Configuration, And Operation
Proof test function with reference reflector
Hide thumbs
Also See for Rosemount 5900:
- Reference manual (100 pages) ,
- Safety manual for use in safety instrumented systems (92 pages) ,
- Instruction for installation, configuration, and operation (62 pages)

Related Manuals for Emerson Rosemount 5900


Summary of Contents for Emerson Rosemount 5900
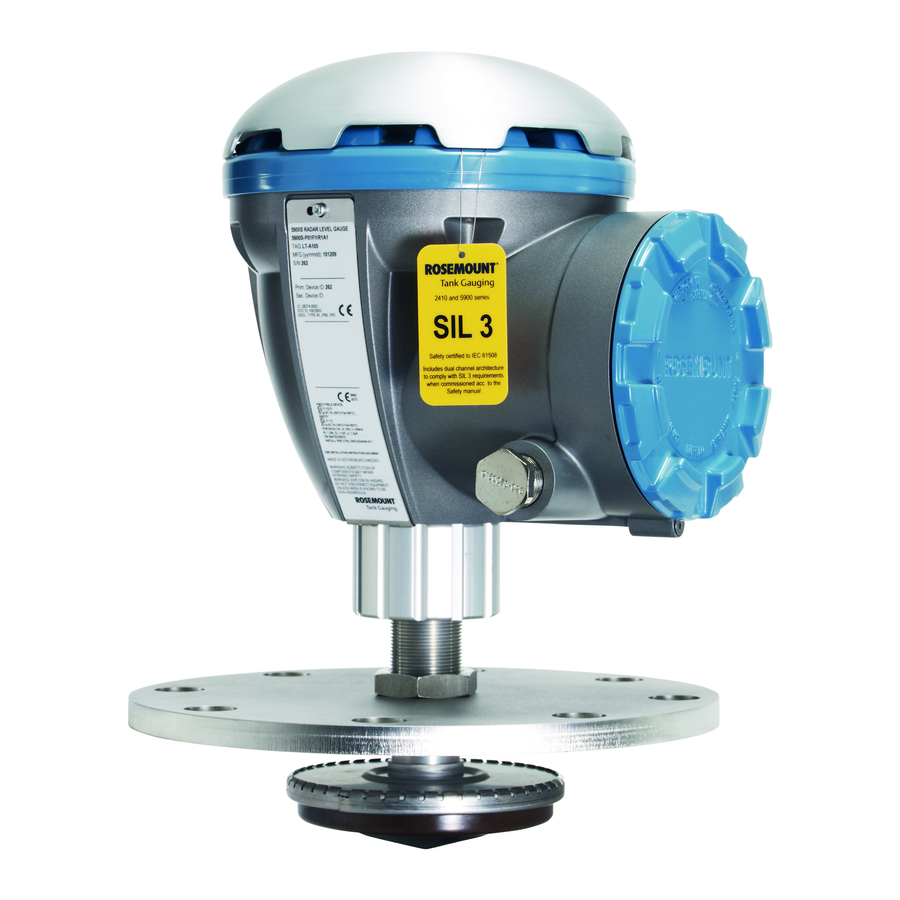
- Page 1 Manual Supplement 00809-0200-5900, Rev AC November 2019 ™ Rosemount 5900 Instruction for Installation, Configuration, and Operation of Proof Test Function with Reference Reflector...
-
Page 3: Table Of Contents
Manual Supplement Contents 00809-0200-5900, Rev AC November 2019 Contents 1Section 1: Introduction Section overview ............2 Service support. - Page 4 Contents Manual Supplement November 2019 00809-0200-5900, Rev AC 4Section 4: Operation Overview .............39 Safety messages .
-
Page 5: 1Section 1: Introduction
Reference Reflector that introduces a radar echo at a predefined position in the tank. Figure 1-1. The Rosemount 5900 can be equipped with an optional Reference Reflector that allows proof testing the gauge on a regular basis. -
Page 6: Section Overview
The sections in this reference manual supplement provide information on installing, operating, and maintaining the Rosemount 5900 Proof Test System. The sections are organized as follows: Section 1: Introduction gives a brief introduction to the Rosemount 5900 Proof Test function and the recommended installation procedure. -
Page 7: Installation Procedure
Wire the Rosemount 5900 gauge. Ensure covers and cable gland /conduit connections are tight. Configure the Rosemount 5900 for proof testing. Section 3: Configuration of Reference Reflector Verify operation. (1) See the Rosemount 5900S Reference manual (Document No. 00809-0100-5900 or the Rosemount 5900C Reference manual (Document No. - Page 8 Manual Supplement Section 1: Introduction 00809-0200-5900, Rev AC November 2019 Introduction...
-
Page 9: Overview
Installing the Reference Reflector for Array Antenna ......page 18 Overview The information in this section covers installation of Reference Reflector for proof testing the Rosemount 5900 Radar Level Gauge. Safety messages Procedures and instructions in this section may require special precautions to ensure the safety of the personnel performing the operation. -
Page 10: Installation Considerations
Manual Supplement Section 2: Installation 00809-0200-5900, Rev AC November 2019 Installation considerations Before you start installing the Reference Reflector, ensure that the following items are considered in order to fulfill the installation requirements for the Reference Reflector at the desired position: Maximum product level in the tank ... -
Page 11: Installing The Reference Reflector For Parabolic Antenna
The Reference Reflector is installed under the antenna. It is attached to a wire fixed to the Parabolic Antenna. The Reference Reflector introduces a radar echo that is used for proof testing the Rosemount 5900 Radar Level Gauge. Proof testing can be performed without the need to open the tank. - Page 12 Manual Supplement Section 2: Installation 00809-0200-5900, Rev AC November 2019 Figure 2-2. Reference Reflector Figure 2-3. Clamping Ring Clamping ring M6 cylinder nut M6 screw Installation...
-
Page 13: Tank Geometry - Parabolic Antenna
Section 2: Installation 00809-0200-5900, Rev AC November 2019 2.4.2 Tank Geometry - Parabolic Antenna Figure 2-4. Tank geometry for Rosemount 5900 with Parabolic Antenna and Proof Test Reference Reflector. Gauge Reference Point Reference Reflector (RR) Distance Minimum: 600 mm Maximum: 5000 mm Reference Reflector (RR) Position Max. - Page 14 5. Reference Reflector (RR) (1) See the Rosemount 5900 and 2410 Safety Manual (Document No. 00809-0200-5100) for information on how to install and con- figure the Rosemount 5900 Radar Level Gauge and 2410 Tank Hub in a Safety Instrumented System.
-
Page 15: Installing The Reference Reflector
Manual Supplement Section 2: Installation 00809-0200-5900, Rev AC November 2019 2.4.3 Installing the Reference Reflector The length of the wire that holds the Reference Reflector needs to be calculated before the Reference Reflector can be installed in the tank. The wire must be long enough to allow the Reflector to be properly positioned in the tank including the weight that is attached under the Reflector. - Page 16 Manual Supplement Section 2: Installation 00809-0200-5900, Rev AC November 2019 Calculate the required Wire Distance. See “Wire Distance calculation” on page Feed the wire through the weight and the Reference Reflector (RR). Wire Distance M6 x 2 Allen key size 3 Torque=2.5 Nm 1.
- Page 17 Manual Supplement Section 2: Installation 00809-0200-5900, Rev AC November 2019 Mount the clamping ring (see Figure 2-3 on page 8) on the Parabolic Antenna. Ensure that the Reference Reflector is directed towards the center of the tank as illustrated in Figure 2-4 on page Parabolic antenna A - A...
- Page 18 Manual Supplement Section 2: Installation 00809-0200-5900, Rev AC November 2019 Ensure that: the Reference Reflector is correctly aligned towards the center of the tank inclination of Reference Reflector is less than 2.5°. Figure 2-6. Align the Reference Reflector Tank wall Reference Reflector (RR) Tank center...
- Page 19 Manual Supplement Section 2: Installation 00809-0200-5900, Rev AC November 2019 Wire Distance calculation There are two different connections available for the Parabolic Antenna; the Welded and the Clamped versions. Since the vertical position of the flange will differ slightly for these two connections, you will have to use different formulas for calculating the proper Wire Distance in order to obtain the correct position (Reference Reflector Distance) of the Reference Reflector.
- Page 20 Manual Supplement Section 2: Installation 00809-0200-5900, Rev AC November 2019 Welded tank connection Use the following formula to calculate the required Wire Distance for the welded connection: Wire Distance=RR + Ga -W - 194 (mm) where W= see Figure 2-8 on page 16 Ga= thickness of the flange gasket (see Figure 2-8 on page RR= Reference Reflector Distance (see...
- Page 21 Manual Supplement Section 2: Installation 00809-0200-5900, Rev AC November 2019 Clamped tank connection Use the following formula to calculate the required Wire Distance for the clamped connection: Wire Distance=RR + Ga + T - 243 (mm) where T= flange thickness (see Figure 2-9) Ga= thickness of the flange gasket (see...
-
Page 22: Installing The Reference Reflector For Array Antenna
Installing the Reference Reflector for Array Antenna 2.5.1 Reference Reflector Kit The Reflector is delivered with all parts needed for proper installation on a Rosemount 5900 with Array Antenna. The Reference Reflector kit includes the following parts: Wire assembly ... - Page 23 Manual Supplement Section 2: Installation 00809-0200-5900, Rev AC November 2019 Figure 2-11. Reference Reflector Open space to allow hand dipping Note! The reflector may need to be removed for product sampling through the pipe. Figure 2-12. Safety Wire To secure the Reference Reflector during installation in Still-Pipe Figure 2-13.
-
Page 24: Tank Geometry - Array Antenna
Section 2: Installation 00809-0200-5900, Rev AC November 2019 2.5.2 Tank Geometry - Array Antenna Figure 2-14. Tank Geometry for Rosemount 5900 with Array Antenna Fixed Version and Proof Test Reference Reflector. Gauge Reference Point Reference Reflector (RR) Distance Minimum: 1000 mm... - Page 25 Manual Supplement Section 2: Installation 00809-0200-5900, Rev AC November 2019 Figure 2-15. Tank Geometry for Rosemount 5900 with Array Antenna Hatched Version and Proof Test Reference Reflector. Gauge Reference Point Reference Reflector (RR) Distance Minimum: 1000 mm Maximum: 8000 mm Reference Reflector (RR) Position Max.
- Page 26 Array antenna 12 inch: 2000 to 8000 mm (1) See Rosemount 5900 and 2410 Safety Manual (Document No. 00809-0200-5100) for information on how to install and configure the Rosemount 5900 Radar Level Gauge and 2410 Tank Hub in a Safety Instrumented System.
-
Page 27: Installing The Reference Reflector
Manual Supplement Section 2: Installation 00809-0200-5900, Rev AC November 2019 2.5.3 Installing the Reference Reflector You need to calculate the length of the wire that holds the Reference Reflector before the Reference Reflector can be installed in the tank. The wire must be long enough to allow the Reflector to be properly positioned in the tank including the weight that is attached under the Reflector. - Page 28 Manual Supplement Section 2: Installation 00809-0200-5900, Rev AC November 2019 Calculate the Wire Distance as described in “Wire Distance calculation” on page Feed the wire through the weight and Reference Reflector (RR). Bronze rod M6 x 2 Torque=2.5 Nm Cut the wire 0 - 150 mm 1.
- Page 29 Manual Supplement Section 2: Installation 00809-0200-5900, Rev AC November 2019 Install the Flexible Ring at the top of the Still-pipe. The ring can be adjusted to fit a wide range of Still-Pipe inner diameters according to Table 2-3. Ensure that the Flexible Ring fits tightly inside the pipe. Tighten the M6 nut to the specified torque value of 5 Nm.
- Page 30 Manual Supplement Section 2: Installation 00809-0200-5900, Rev AC November 2019 Fasten one end of the Safety Wire to the Bronze Rod and the other end to the tank. Lower the weight and reflector into the Still-pipe to the full length of the wire. Put the wire into the rod attachment through the slot.
- Page 31 Manual Supplement Section 2: Installation 00809-0200-5900, Rev AC November 2019 Wire Distance calculation Use the following formulas to calculate the required Wire Distance. Array Antenna hatch version: Wire Distance=RR - Ga - 362 (mm) Array Antenna fix version: Wire Distance=RR - 324 (mm) where Ga= thickness of the flange gasket RR= Reference Reflector Distance (see...
- Page 32 Manual Supplement Section 2: Installation 00809-0200-5900, Rev AC November 2019 Installation...
-
Page 33: 3Section 3: Configuration Of Reference Reflector
Manual Supplement Section 3: Configuration of Reference Reflector 00809-0200-5900, Rev AC November 2019 Section 3 Configuration of Reference Reflector Overview ..............page 29 Safety messages . -
Page 34: Configuration Using Tankmaster Winsetup
Introduction The Rosemount 5900 is configured by using the TankMaster Winsetup configuration program. WinSetup supports standard configuration of the Rosemount 5900 Radar Level Gauge as well as configuration of the Reference Reflector for Proof Test applications. See the Tank Gauging... -
Page 35: Configuration Procedure
Factor) and allowed deviations from the calibrated reflector position (Tolerance). This step needs to be done for physical as well as simulated reference reflectors. Ensure that a standard configuration of the Rosemount 5900 is performed prior to the proof test configuration. - Page 36 Manual Supplement Section 3: Configuration of Reference Reflector 00809-0200-5900, Rev AC November 2019 The Proof Test window appears. It lets you perform proof tests, view previous tests, and schedule future tests. There are two different versions: Option Proof Test Window SIL2 Model Code S and non-SIL SIL3...
- Page 37 Manual Supplement Section 3: Configuration of Reference Reflector 00809-0200-5900, Rev AC November 2019 In case no previous Proof Test configuration has been performed, or if the Proof Test calibration has been reset, the status message “ Not Calibrated” will be displayed. The Proof Test Configuration window lets you specify calibration parameters for the Reference Reflector.
- Page 38 Manual Supplement Section 3: Configuration of Reference Reflector 00809-0200-5900, Rev AC November 2019 In the Calibrate Reference Reflector pane, enter the actual position of the Reference Reflector (RR) in the RR Distance field. The RR Distance value will be used by the level gauge as a starting point when searching for the Reference Reflector.
- Page 39 For Safety Instrumented Systems (SIL) verify that the amplitude is within the following recommended range: Rosemount 5900 with Parabolic antenna: 600 to 1200 mV Rosemount 5900 with Array antenna (Still-Pipe): 1000 to 3500 mV Rosemount 5900 with simulated antenna: approximately 600 mV ...
- Page 40 Manual Supplement Section 3: Configuration of Reference Reflector 00809-0200-5900, Rev AC November 2019 Return to the Proof Test Configuration window and proceed with configuration of Reference Reflector Settings. Normally, the default settings of Min./Max. Amplitude Factors and Tolerance can be used without any changes.
- Page 41 00809-0200-5900, Rev AC November 2019 Example Table 3-1 shows an example of a proof test configuration for a Rosemount 5900 Radar Level Gauge with Reference Reflector. Table 3-2 shows the actual distance and amplitude as measured by the Rosemount 5900 gauge.
- Page 42 Distance to the Reference Reflector measured by the gauge during calibration. Distance Tolerance The region around the specified RR Distance within which the Rosemount 5900 searches for a radar echo when calibrating the Reference Reflector. Approved Amplitude Approved range of signal amplitudes during a proof test.
-
Page 43: Overview
Manual Supplement Section 4: Operation 00809-0200-5900, Rev AC November 2019 Section 4 Operation Overview ..............page 39 Safety messages . -
Page 44: Proof Test Operation
Proof Test In the TankMaster Winsetup workspace, click the right mouse button on the Rosemount 5900 device icon and choose the Proof Test option. The Proof Test window appears. It lets you perform various tasks such as performing Proof tests, viewing Proof Test history, and schedule future Proof Tests. - Page 45 Manual Supplement Section 4: Operation 00809-0200-5900, Rev AC November 2019 SIL2 MODEL CODE S AND NON-SIL SIL3 To perform a proof test, select the check box for Reference Reflector test, and click the Start Guided Proof Test button. For SIL3 gauges; in the Level Sensor (ATG) pane click the Test button.
- Page 46 Manual Supplement Section 4: Operation 00809-0200-5900, Rev AC November 2019 The following measurement data is presented: Parameter Description Level Distance from the Zero Reference Point to the product surface or the Reference Reflector, respectively Ullage Distance from the Gauge Reference Point to the product surface Distance Distance from the Gauge Reference Point to the Reference Reflector Amplitude...
-
Page 47: Proof Test Status
Manual Supplement Section 4: Operation 00809-0200-5900, Rev AC November 2019 4.3.1 Proof Test status Table 4-1. Proof Test Status Options Status options Proof Test Active Test Finished Test Ended by User RR Not Found RR not Calibrated Level Surface Too Close Proof Test Status not Available Operation... -
Page 48: Scheduling
Manual Supplement Section 4: Operation 00809-0200-5900, Rev AC November 2019 Scheduling You may specify a scheduling interval in order to be reminded when it is time for a new Proof Test. There are two reminder options available: e-mail pop-up window ... -
Page 49: Pop-Up Message
Manual Supplement Section 4: Operation 00809-0200-5900, Rev AC November 2019 4.4.1 Pop-up message The Reminder pop-up message will appear at the scheduled time. Figure 4-1. Pop-up Message with Reminder to Perform Proof Test In case you choose to accept, you will be directed to the Proof Test window in order to start the Proof Test procedure as described in Section 4: Proof Test operation“Proof Test operation”... -
Page 50: History
Manual Supplement Section 4: Operation 00809-0200-5900, Rev AC November 2019 History The Proof Test History function lets you view previously performed proof tests for a device. You can also view tests that were interrupted resulting in no report creation. Figure 4-3. Proof Test History Using Back and Forward buttons, or selecting the test date, you may navigate through the tests. -
Page 51: Reports
Manual Supplement Section 4: Operation 00809-0200-5900, Rev AC November 2019 Reports When a proof test is finished a report will be generated. For SIL3 you will have to fill in a questionnaire in order to create the report. When prompted, fill in the proof test report form. SIL2 MODEL CODE S AND NON-SIL SIL3 Click the Save button to store the proof test form. -
Page 52: Viewing A Report
Reports in Adobe Acrobat pdf format are available via the Proof Test History window. To view a report: In TankMaster WinSetup, click the Rosemount 5900 icon and select the Proof Test option to open the Proof Test window. In the Level Sensor (ATG) pane, click the History button. - Page 53 Manual Supplement Section 4: Operation 00809-0200-5900, Rev AC November 2019 The report includes device information and device status. There is also information regarding the result of the proof test, for example whether alarms did sound or if emergency shutdown was activated. Figure 4-4.
-
Page 54: Removing A Reference Reflector
There may be a situation when you would like to remove the Reference Reflector and disable the Proof Test function. Then you can use the Reset function to remove all Proof Test calibration data. This ensures that there is no data stored in the Rosemount 5900 database that may interfere with the current measurements. -
Page 55: 5Section 5: Service And Troubleshooting
Manual Supplement Section 5: Service and Troubleshooting 00809-0200-5900, Rev AC November 2019 Section 5 Service and Troubleshooting Safety messages ............page 51 Troubleshooting . -
Page 56: Troubleshooting
Manual Supplement Section 5: Service and Troubleshooting 00809-0200-5900, Rev AC November 2019 Troubleshooting Table 5-1 provides summarized troubleshooting suggestions for the most common operating problems. Table 5-1. Troubleshooting Chart Symptom Possible cause Action Check RR Distance Reference Reflector (RR) not Incorrect configuration ... -
Page 57: Tank Spectrum
Manual Supplement Section 5: Service and Troubleshooting 00809-0200-5900, Rev AC November 2019 Tank spectrum ™ The Tank Scan function is a useful tool to verify that the Rosemount 5900 level gauge is able to locate the product surface and the reference reflector. It lets you locate possible disturbing objects, and you may also check that amplitude thresholds are properly set so that the Reference Reflector echo is not filtered away. - Page 58 Manual Supplement Section 5: Service and Troubleshooting 00809-0200-5900, Rev AC November 2019 To open the Tank Scan window: In the WinSetup workspace, click the right mouse button on the device icon. Properties Choose the Properties option. Select the Advanced tab an click the Tank Scan button. Service and Troubleshooting...
- Page 59 Manual Supplement Index 00809-0200-5900, Rev AC November 2019 Index ......36 ....33 Amplitude Factors Proof Test Configuration window .
- Page 60 Manual Supplement Index November 2019 00809-0200-5900, Rev AC Index-2 Index...
- Page 62 P.O Box 20048 Emerson logo is a trademark and service mark of Emerson Electric Co. Manama Rosemount is a mark of one of the Emerson family of companies. All Bahrain other marks are the property of their respective owners. +973 1722 6610 +973 1722 7771 RFQ.RMTMEA@Emerson.com...
Need help?
Do you have a question about the Rosemount 5900 and is the answer not in the manual?
Questions and answers