Table of Contents
Advertisement
Quick Links
FOR QUALIFIED INSTALLER ONLY. This basic Installation Sheet is an initial release. If a complete Operations
Manual (for the unit being installed) is required or needed, please refer to the Lancer web site (lancercorp.com) for
immediate access, or for your convenience, scan this QR code with a mobile device (app required) for immediate
access Contact Lancer Customer Service for assistance as required.
ABOUT THIS MANUAL
This booklet is an integral and essential part of the product and
should be handed over to the operator after the installation and
preserved for any further consultation that may be necessary.
Please read carefully the guidelines and warnings contained
herein as they are intended to provide the user with essential
information for the continued safe use and maintenance of the
product. In addition, it provides GUIDANCE ONLY to the user on
the correct services and site location of the unit.
The installation and relocation, if necessary, of this product must be carried out by qualified personnel with
up-to-date safety and hygiene knowledge and practical experience, in accordance with current regulations.
IMPORTANT SAFETY INSTRUCTIONS
! Intended Use
The dispenser is for indoor use only. This unit is not a toy. Children should not be supervised not to play with appliance. It should
not be used by children or infirm persons without supervision. This appliance is not intended for use by persons (including children)
with reduced physical, sensory or mental capabilities, or lack of experience and knowledge, unless they have been given
supervision or instruction concerning use of the appliance by a person responsible for their safety. Cleaning and user maintenance
shall not be performed by children without supervision. The min/max ambient operating temperature for the dispenser is 40°F to
105°F (4°C to 41°C). Do not operate unit below minimum ambient operation conditions. Should freezing occur, cease operation of
the unit and contact authorized service technician. Service, cleaning and sanitizing should be accomplished only by trained
personnel. Applicable safety precautions must be observed. Instruction warnings on the product being used must be followed.
! Uso Previsto
El dispensador sólo debe usarse en interiores. Esta unidad no es un juguete. Los niños deben ser supervisados para no jugar con
aparato. No la deben usar niños ni personas discapacitadas sin supervisión. Esta unidad no está destinada al uso por parte de
personas (incluso niños) con capacidad física, sensorial o mental reducida, o sin experiencia y conocimientos suficientes, a menos
que una persona responsable de su seguridad les haya dado supervisión o capacitación en el uso de la unidad. Limpieza y
mantenimiento de usuario no deberá ser realizada por los niños sin supervisión. La temperatura ambiente operativa mínima /
máxima para el dispensador es de 40°F a 105°F (4°C a 41°C). No opere la unidad debajo de las condiciones de funcionamiento
ambientales mínimos. En caso de congelación se produce, cesar la operación de la unidad y el contacto técnico de servicio
autorizado. Servicio de limpieza y desinfección deben llevarse a cabo solamente por personal capacitado. Es necesario tomar
medidas de seguridad aplicables. Advertencias de las instrucciones sobre el producto utilizado se deben seguir.
! Utilisation Prévue
Le distributeur est destiné à un usage à l'intérieur seulement. Cet appareil n'est pas un jouet. Les enfants doivent être surveillés
afin de ne pas jouer avec l'appareil. Il ne devrait pas être utilisé par des enfants ou des personnes infirmes sans surveillance. Cet
appareil n'est pas destiné à un usage par des personnes (y compris les enfants) ayant des capacités physiques, sensorielles ou
mentales réduites, ou manquant d'expérience et de connaissances, à moins qu'elles obtiennent de la surveillance ou des
instructions au sujet de l'utilisation de l'appareil de la part d'une personne chargée de leur sécurité. Nettoyage et entretien de
l'utilisateur ne doivent pas être effectués par des enfants sans surveillance. La température de service ambiante minimum/
maximum pour le distributeur est de 40°F à 105°F (4°C à 41°C). Ne pas utiliser l'appareil dans des conditions de performance
environnementale minimale. En cas de gel, cesser l'exploitation de l'unité et contactez un technicien agréé. Nettoyage et
désinfection doivent être effectuées uniquement par du personnel qualifié. Vous devez prendre des mesures de sécurité.
Avertissements instructions sur le produit utilisé doivent être respectées.
4800
BEFORE GETTING STARTED
Each unit is tested under operating conditions and is thoroughly
inspected before shipment. At the time of shipment, the carrier
accepts responsibility for the unit. Upon receiving the unit,
carefully inspect the carton for visible damage. If damage exists,
have the carrier note the damage on the freight bill and file a
claim with carrier. Responsibility for damage to the dispenser lies
with the carrier.
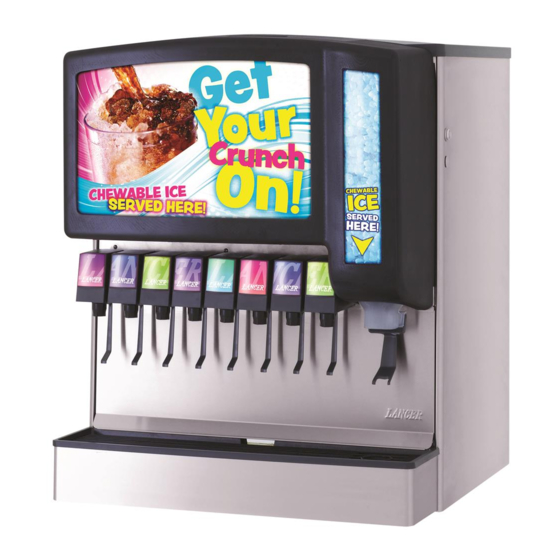
SENSATION
LANCER INSTALLATION GUIDE
LANCER PN: 28-0885/03
Advertisement
Table of Contents

Related Manuals for lancer SENSATION 4800


Summary of Contents for lancer SENSATION 4800
- Page 1 FOR QUALIFIED INSTALLER ONLY. This basic Installation Sheet is an initial release. If a complete Operations Manual (for the unit being installed) is required or needed, please refer to the Lancer web site (lancercorp.com) for immediate access, or for your convenience, scan this QR code with a mobile device (app required) for immediate access Contact Lancer Customer Service for assistance as required.
- Page 2 F Electrical Warning Check the dispenser name plate label, located behind the splash plate, for the correct electrical requirements of unit. Do not plug into a wall electrical outlet unless the current shown on the serial number plate agrees with local current available. Follow all local electrical codes when making connections.
- Page 3 ! Water Notice Provide an adequate potable water supply. Water pipe connections and fixtures directly connected to a potable water supply must be sized, installed, and maintained according to federal, state, and local laws. The water supply line must be at least a 3/8 inches (9.525 mm) pipe with a minimum of 25 PSI (0.172 MPA) line pressure, but not exceeding a maximum of 50 PSI (0.345 MPA).
-
Page 4: Specifications
This manual was developed by the Lancer Corporation as a reference for the owner/operator and installer of this dispenser. Please read this guide before installation and operation of this dispenser. If service is required please call your Lancer Service Agent or Lancer Customer Service. - Page 5 For more information about the NOTE customer’s legal requirements for the accessibility of installed equipment, refer to 2010 ADA Standards for Lancer does NOT recommend the use of shaved or Accessible Design - http://www.ada.gov. flake ice in the dispenser. The ice level should not exceed the height of the metal bin wall when filled manually.
- Page 6 Installing an Icemaker (if necessary) ! ATTENTION An adapter plate is required when installing an icemaker. Contact your Sales Representative or Lancer Customer When installing an icemaker on the dispenser, use a Service for more information. bin thermostat to control the ice level (see below). This will prevent damage to the dispensing mechanism. The A bin thermostat is required in order to control the level of ice in the dispenser (Refer to ATTENTION to the left).
-
Page 7: Dispenser Installation
Dispenser Installation 12. Route drain hose from designated open type drain to fitting Install unit to counter. on Drip Tray and connect hose to fitting. Remove the splash plate and top cover. ! CAUTION Remove the merchandiser by removing the two (2) screws Drain line must be insulated with a closed cell located on the faucet plate (from left to right) above the third insulation. - Page 8 Installing Remote Syrup Pumps - Bag in Box Installing CO Supply Install BIB rack and remote pumps according to Connect high pressure CO regulator assembly to CO cylin- manufacturers’ instructions. der or bulk system. ! ATTENTION Once pumps and BIB rack are installed, measure and cut tubing to length between the pump CO inlets, then connect Before installing regulator, assure that a seal (washer...
- Page 9 F AVERTISSEMENT Using a wrench, loosen lock nut on the regulator adjustment screw of the high pressure CO regulator connected to the La distributrice doit être mise à la terre électriquement source, then using a screwdriver back out lock nut screw all correctement pour éviter des blessures graves ou une the way.
-
Page 10: Adjust Water Flow Rate & Syrup/Water Ratio
B. Syrup Closed sample. Verify that the syrup level is even with the water Using a Lancer ratio cup verify water flow rate (5 oz. in 4 level. Use a screwdriver to adjust if needed. sec.). Use a screwdriver to adjust if needed. -
Page 11: Cleaning And Sanitizing
CLEANING AND SANITIZING General Information ! ATTENTION • Lancer equipment (new or reconditioned) is shipped from • Utilisez des gants sanitaires lors du nettoyage de the factory cleaned and sanitized in accordance with NSF l’appareil et respectez toutes les précautions de guidelines. -
Page 12: Daily Cleaning
Daily Cleaning Cleaning and Sanitizing Syrup Lines - Bag in Box Using the cleaning solution, clean Top Cover and all exterior Disconnect syrup lines from BIB’s stainless steel surfaces. Place syrup lines, with BIB connectors, in a bucket of warm Clean exterior of dispensing valves and ice chute. -
Page 13: Cleaning And Sanitizing Nozzles
Cleaning and Sanitizing Nozzles Ice Chute Cleaning Disconnect power, so as to not activate valve while cleaning. NOTE Remove nozzle by twisting counter clockwise and pulling It is recommended to perform this procedure monthly, down. or more often if desired. Use the cleaning solution described above. -
Page 14: Led Warnings
LED Warnings NOTE Light Emitting Diodes (LEDs) are provided on the PC Board to aid in troubleshooting electrical difficulties. Referring to the wiring diagram included in this manual (also affixed to the electrical box cover), the following information can be obtained from the LEDs. DESCRIPTION This light is on when the ice dispense switch is activated. If the chute is depressed and the light does not turn on, check to see if the wire harness is connected or if the dispense switch is defective. This light is used on units with lid interlock switches. -
Page 15: Dip Switch Legend
SW1 SWITCH 1: "LOW ICE" LED INDICATOR ENABLED 9 SECONDS SW1 SWITCH 2: "LOW ICE" ALARM ENABLED 7 SECONDS 5 SECONDS LANCER PN: 06-3289 Plumbing Diagram RECOMMENDED PLUMBING SYRUP LINES NOT SHOWN 3-1-1-3 CONFIGURATION FOR ASSISTANCE CALL 1-800-729-1500 PART NO: 06-2226 Dispenser Disposal ... - Page 16 Wiring Diagram - 115 Volt Lancer Corp. 800-729-1500 Technical Support/Warranty: 800-729-1550 custserv@lancercorp.com lancercorp.com...
Need help?
Do you have a question about the SENSATION 4800 and is the answer not in the manual?
Questions and answers