
Related Manuals for Belling Design BDC95IN2F


Summary of Contents for Belling Design BDC95IN2F
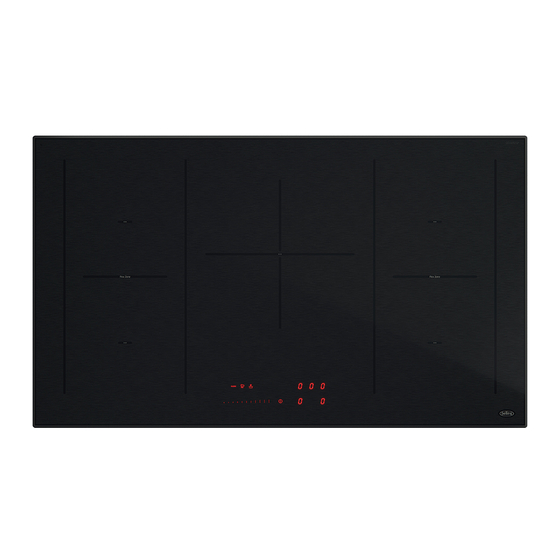
- Page 1 BDC95IN2F 60cm 5 Zone Induction Cooktop with 2 x Flex-Zones INSTRUCTION MANUAL PLEASE READ THE INSTRUCTION MANUAL CAREFULLY BEFORE USING THE UNIT. www.belling.com.au www.belling.co.nz...
-
Page 3: Table Of Contents
Summary SAFETY ............................. 4 ......................4 RECAUTIONS BEFORE USING ........................5 SING THE APPLIANCE ..............6 RECAUTIONS TO PREVENT DAMAGE TO THE APPLIANCE ..................7 RECAUTIONS IN CASE OF APPLIANCE FAILURE ........................7 THER PROTECTIONS DESCRIPTION OF THE APPLIANCE ....................8 ...................... -
Page 4: Safety
SAFETY Precautions before using • Unpack all the materials. • The installation and connecting of the appliance have to be done by approved specialists. The manufacturer can not be responsible for damage caused by building-in or connecting errors. • To be used, the appliance must be well-equipped and installed in a kitchen unit and an adapted and approved work surface. -
Page 5: Using The Appliance
Using the appliance • Switch the heating zones off after using. • Keep an eye on the cooking using grease or oils: that may quickly ignite. • Be careful not to burn yourself while or after using the appliance. • Make sure no cable of any fixed or moving appliance contacts with the glass or the hot saucepan. -
Page 6: Precautions To Prevent Damage To The Appliance
Precautions to prevent damage to the appliance • Raw pan bottoms or damaged saucepans (not enamelled cast iron pots,) may damage the ceramic glass. • Sand or other abrasive materials may damage ceramic glass. • Avoid dropping objects, even little ones, on the vitroceramic. •... -
Page 7: Precautions In Case Of Appliance Failure
Precautions in case of appliance failure • If a defect is noticed, switch on the appliance and turn off the electrical supplying. • If the ceramic glass is cracked or fissured, you must unplug the appliance and contact the after sales service. •... -
Page 8: Description Of The Appliance
DESCRIPTION OF THE APPLIANCE Technical characteristics Type BDC95IN2F Total power 10400 W Front left heating zone 190 x 210 mm Minimum detection Ø 90 mm Nominal power* 1600 W Booster power* 1850 W Rear left heating zone 190 x 210 mm Ø... -
Page 9: Control Panel
Control panel Pause/ Chef Keep Timer [ + ] Selection zone key Timer key Recal warm and [ - ] key Clean Power selection zone On / Off key “Slider” USE OF THE APPLIANCE Display Display Designation Description Zero The heating zone is activated. 1…9 Booster level Selection of the cooking level. -
Page 10: Starting-Up And Appliance Management
STARTING-UP AND APPLIANCE MANAGEMENT Before the first use Clean your hob with a damp cloth, and then dry the surface thoroughly. Do not use detergent which risks causing blue-tinted colour on the glass surface. Induction principle An induction coil is located under each heating zone. When it is engaged, it produces a variable electromagnetic field which produces inductive currents in the ferromagnetic bottom plate of the pan. -
Page 11: Starting-Up
Starting-up • Start up / switch off the hob: Action Control panel Display To start press key [ ] for 2 sec. [ 0 ] To stop press key [ ] for 2 sec. nothing or [ H ] • Start up / switch off a heating zone: Action Control panel... -
Page 12: Timer
• Start up / Stop Double Booster Action Control panel Display Start up the Booster Slide to the end of the “SLIDER” [ P ] Or press directly on the end of the “SLIDER” Start up Double Booster Re-press key [ P ] and P ] Stop the Double Booster Slide on the “SLIDER“... -
Page 13: Automatic Cooking
Automatic cooking All the cooking zones are equipped with an automatic cooking device. The cooking zone starts at full power during a certain time, and then reduces automatically its power on the pre-selected level. • Start-up: Action Control panel Display Power level selection slide on the “SLIDER“... -
Page 14: Recall Function
Pause function This function brakes all the hob’s cooking activity temporarily and allows restarting with the same settings. • Start up/stop the pause function: Action Control panel Display Engage pause press [ II ] 2s [ II ] and control light on Stop the pause press [ II ] 2s previous setti... -
Page 15: Bridge Function
Bridge Function This function allows the use of 2 cooking zones at the same time with the same features as a single cooking zone. With this function the Booster function is allowed on the left and center zones. Action Control panel Display Activate the hob Press key [... -
Page 16: Cooking Advices
COOKING ADVICES Pan quality Adapted materials: steel, enamelled steel, cast iron, ferromagnetic stainless-steel, aluminium with ferromagnetic bottom. Not adapted materials: aluminium and stainless-steel without ferromagnetic bottom, copper, brass, glass, ceramic, porcelain. The manufacturers should specify if their products are compatible for induction. To check if pans are compatibles: •... -
Page 17: Examples Of Cooking Power Setting
Examples of cooking power setting (the values below are indicative) 1 to 2 Melting Sauces, butter, chocolate, gelatine Reheating Dishes prepared beforehand 2 to 3 Simmering Rice, pudding, sugar syrup Defrosting Dried vegetables, fish, frozen products 3 to 4 Steam Vegetables, fish, meat 4 to 5 Water... - Page 18 4) Remove your fingers from the touch control, then push again on touch [ 0/I ] during few seconds, until blinking [ E ] symbols appear. 5) Wait until [ E ] symbols stop blinking. 6) After few seconds, [ E ] are automatically transformed in [ C ]. The existing setup has been cancelled.
-
Page 19: Environment Preservation
The control panel displays [ E6 ] : • Defective network. Control the frequency and voltage of the electrical network. The control panel displays [ E8 ] : • The air inlet of the ventilator is obstructed, release it. The control panel displays [ E C ] : •... -
Page 20: Installation Instructions
INSTALLATION INSTRUCTIONS The hob must be installed by suitably qualified people in accordance with local regulations. How to stick the gasket: The gasket supplied with the hob avoids all infiltration of liquids in the cabinet. The gasket supplied with the appliance also maintains the position of the appliance, it is not necessary to use another fixation system. -
Page 21: Electrical Connection
• The safety gap between the hob and the cooker hood placed above must respect the indications of the hood manufacturer. In case of absence of instructions respect a distance minimum of 600 mm. • Provide a ventilation opening from 4 mm just under the worktop over a width of min. 600 mm for sufficient cooling of the hob. - Page 22 Caution! Be careful that the cables are correctly engaged and tightened. We cannot be held responsible for any incident resulting from incorrect connection or which could arise from the use of an appliance which has not been earthed or has been equipped with a faulty earth connection.
- Page 23 5 years from the date the product is purchased as a brand- new product from a retailer located in Australia / New Zealand. b) In the case of Belling Design products used for purposes other than personal, domestic or household purposes (including business or commercial use), a period of 90 days from the date the product is purchased as a brand-new product from a retailer located in Australia / New Zealand.
- Page 24 b) The product requires repairs due to damage resulting from accident, misuse, incorrect installation, insect or vermin infestation, improper liquid spillage, cleaning or maintenance, unauthorised modification, use on an incorrect voltage, power surges and dips, voltage supply problems, tampering or unauthorised repairs by any persons, use of defective or incompatible accessories or exposure to abnormally corrosive conditions, events independent of human control which occurred after the goods left the control of Glen Dimplex;...
- Page 25 d) If required by us, provide us (or any person nominated by us) with access to the premises at which the product is located at times nominated by us (so that we can inspect the product). 5. Warranty claims If you make a valid claim under this warranty and none of the exclusions set out in section 2 apply, we will, at our election, either repair the product or replace the product with a product of identical specification (or where the product is superseded or no longer in stock, with a product of as close a specification as possible).
- Page 26 NOTES ______________________________________________________ ______________________________________________________ ______________________________________________________ ______________________________________________________ ______________________________________________________ ______________________________________________________ ______________________________________________________ ______________________________________________________ ______________________________________________________ ______________________________________________________ ______________________________________________________ ______________________________________________________ ______________________________________________________ ______________________________________________________ ______________________________________________________ ______________________________________________________ ______________________________________________________ ______________________________________________________ ______________________________________________________ ...
- Page 27 NOTES ______________________________________________________ ______________________________________________________ ______________________________________________________ ______________________________________________________ ______________________________________________________ ______________________________________________________ ______________________________________________________ ______________________________________________________ ______________________________________________________ ______________________________________________________ ______________________________________________________ ______________________________________________________ ______________________________________________________ ______________________________________________________ ______________________________________________________ ______________________________________________________ ______________________________________________________ ______________________________________________________ ______________________________________________________ ...
- Page 28 READ THE INSTRUCTION BOOKLET BEFORE INSTALLING AND USING THE APPLIANCE. The manufacturer will not be responsible for any damage to property or to persons caused by incorrect installation or improper use of the appliance. The manufacturer is not responsible for any inaccuracies, due to printing or transcription errors, contained in this manual.
Need help?
Do you have a question about the Design BDC95IN2F and is the answer not in the manual?
Questions and answers