
Related Manuals for Belling CFE60MFTi


Summary of Contents for Belling CFE60MFTi
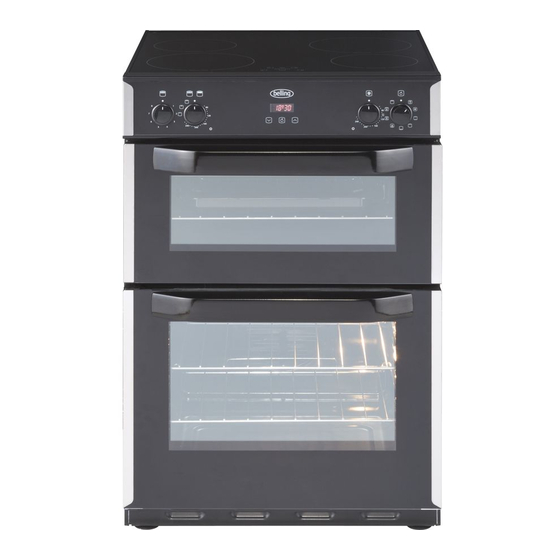
- Page 1 Users Guide & Installation Handbook Belling Freestanding Electric Induction MF B3 UK Part No 083486600 Date 06/05/2015...
- Page 2 CONTENTS & INTRODUCTION CONTENTS WARRANTY Your new appliance comes with our 12 • SAFETY month guarantee, protecting you against electrical and mechanical breakdown. To • USING THE PRODUCT register your appliance please call 0844 • CLEANING 481 0182, complete the registration form included or register online at the web •...
- Page 3 SAFETY safe way and understand BEFORE USING THE PRODUCT Make sure that you have removed all the hazards involved. packaging and wrapping. Some of the Children shall not play with items inside this appliance may have ad- ditional wrapping. the appliance. Cleaning It is advised that you turn the ovens and/ and user maintenance shall or grill on for a short while.
- Page 4 SAFETY WARNING! - There is a temperatures becoming hot and gas operated parts risk of electric shock, so not working efficiently. always make sure you have The cooling fan (if fitted) turned off and unplugged is designed to run on after your appliance before the control knob has been starting.
- Page 5 SAFETY ELECTRIC INDUCTION central on/off key if touch control) when you have finished cooking, do not WARNING:- Unattended rely upon the automatic cooking on a hob can pan detection system as be dangerous and may your means of switching result in fire. NEVER try “off” the appliance. This to extinguish a fire with induction hob complies water, but switch off the...
- Page 6 SAFETY cavity may be hot. hob. • Always use oven gloves when han- • Always position pans over the dling any utensils that have been in centre of the heat zone, and turn the oven as they will be hot. the handles to a safe position so they cannot be knocked or grabbed.
- Page 7 SAFETY you’re not around - take them off the or use a dry powder or carbon diox- cook zone ide extinguisher • Remember: never use water on an electrical or cooking oil fire. FIRE SAFETY ADVICE Most kitchen fires occur when people are distracted or leave things unattended, so remember: If you’re called away from the cooker - by the phone or someone at the door, either take pans off the heat, or switch off your hob.
- Page 8 USING THE HOB - INDUCTION Before using your hob Basic Control Functions It is recommended that you clean and wash the hob surface before using for the first time. Apply a thin coat of ceramic hob cleaner to the hob to maintain and protect it. See the customer care section for details of how to obtain all the avail- able cleaning products.
-
Page 9: Using The Hob
USING THE HOB To de-activate the child lock: normal brightness. 1) Select the On/Off Key. (L will be dis- 2) Select the required power setting using played on all Cook Zones). the up +/down – keys. Switching off an individual hob cook 2) Simultaneously touch the RHF cook zone zone and the down [-] key, the hob... - Page 10 USING THE HOB up [+] and down [-] keys. Pressing down To operate [-] first sets the timer to 30 minutes. This 1) Select the cook zone to be timed, can then be adjusted using the up [+] and ensuring power level is already set before down [-] keys. selecting timer.
- Page 11 USING THE HOB been selected. disconnected from the mains supply during use as this will seriously 2) Select the timer by pressing the up [+] affect the safety and performance, and down [-] keys simultaneously. particularly in relation to surface temperatures becoming hot and 3) Press the up [+] and down [-] keys component parts not working...
- Page 12 USING THE HOB detect, especially small pans (e.g. milk Approximate Glass Hob Action pans). We recommend that you buy pans Temperature that are marked/advertised as being suit- Cooking zone able for induction. switches off with the error message “E2” This problem is not with induction hob but with the pan type, they can have All cooking zones are bases which are magnetic but are not...
-
Page 13: Energy Saving Tips
USING THE HOB Pans make a noise during cooking Maximum Power Level Operation Time This is caused by vibration due to the pas- hours sage of energy from the hob to the pan. On a high setting this is quite normal for certain types of saucepan. - Page 14 USING THE GRILL - ELECTRIC Caution: Accessible parts may be Using aluminium foil hot when the grill is used - young Using aluminium foil to cover the grill pan, children should be kept away. or putting items wrapped in foil under the grill creates a fire hazard.
- Page 15 USING THE TOP OVEN - ELECTRIC (if fitted) When you are cooking keep children Preheat the oven until the indicator light away from the vicinity of the oven. switches off for the first time, this will take up to 15 minutes depending on the Caution: The top element gets temperature selected.
- Page 16 USING THE TOP OVEN - ELECTRIC (if fitted) TOP OVEN BAKING GUIDE Cooking temperatures Cooking times The temperature settings and time given in the Baking Guides are based on dishes These times are based on cooking in a made with block margarine. If soft tub preheated oven.
- Page 17 USING THE OVEN/GRILL - MULTI-FUNCTION MULTIFUNCTION OVEN (IF FITTED) FANNED OVEN (IF FITTED) The multifunction oven may be controlled Switching on the fanned oven by the programmer (see The Program- • Use the main oven control to turn mer/Clock for details). your oven on, and select your tem- The programmer, if fitted must be set to perature.
- Page 18 USING THE OVEN/GRILL - MULTI-FUNCTION Oven & Grill Functions Oven & Grill Functions Oven & Grill Functions Oven & Grill Functions Oven & Grill Functions Oven & Grill Functions Oven & Grill Functions Oven & Grill Functions Oven & Grill Functions Oven &...
- Page 19 USING THE OVEN/GRILL - MULTI-FUNCTION Before you start grilling..Before you use the grill, make sure you Warning: Accessible parts may have placed the grill shelf in the posi- become hot when the grill is in use. tion you need as once the grill is on you Children should be kept away.
- Page 20 USING THE OVEN/GRILL - MULTI-FUNCTION Fanned oven guide • When cooking chilled or frozen foods, use the recommended cooking times • Some adjustment will have to be and temperature on the packaging. made to conventional cooking tem- Always make sure the food is piping peratures.
- Page 21 USING THE OVEN/GRILL - MULTI-FUNCTION COOKING GUIDE OVEN FURNITURE Pre-heating Oven shelves To get the best results from your oven, The oven shelf must be positioned with Pre-heating Pre-heating Pre-heating we recommend pre-heating for around 5 the upstand at the rear of the oven and To get the best results from your oven, we recommend To get the best results from your oven, we recommend To get the best results from your oven, we recommend...
- Page 22 USING THE OVEN/GRILL - MULTI-FUNCTION Roasting Guide • Use of a trivet with the roasting tin will reduce fat splashing during open • Roasting times depend on the weight, roasting, and will help to keep the shape and texture of the meat and oven interior clean.
- Page 23 USING THE OVEN/GRILL - MULTI-FUNCTION Roasting Guide Turkey Roasting times. Roast turkey Most Turkeys are measured by the kilogram. Timing should be calculated • Roasting turkey perfectly involves in either of these ways: cooking two different types of meat - the delicate light breast meat, which 40 minutes per 1kg plus 10 minutes must not be allowed to dry out, and per 1/4 kg.
- Page 24 USING THE OVEN/GRILL - MULTI-FUNCTION General Baking Guide Trouble-shooting - fruit cakes PROBLEM POSSIBLE CAUSE Low oven temperature which may cause the cake to take longer to set, allowing the fruit to sink. Or, Fruit sinking to the bottom too much liquid, or raising agent. The fruit may not have been properly washed and dried.
- Page 25 USING THE OVEN/GRILL - MULTI-FUNCTION Cooling and Defrosting Function • To cool foods quickly straight after cooking, but before refrigerating or freezing, turn the oven control to the defrost position, and open the door. • To defrost frozen foods, turn the oven control to the defrost position, place the food in the centre of the oven and close the door.
- Page 26 USING THE CLOCK/PROGRAMMER-ELEC( if fitted THE ALTERNATIVE PROGRAMMERS There are two types of programmer cov- ered in this section - push button & touch control. Both programmers have the same symbol variants & functions but may vary in their method of operation. Symbols on the LED display.
-
Page 27: Setting The Minute Minder
USING THE CLOCK/PROGRAMMER-ELEC( if fitted Setting the minute minder This message and ‘A’ symbol appear when you are asked to enter in an end time, or when you would like the oven to switch itself off. To set the time of day •... - Page 28 USING THE CLOCK/PROGRAMMER-ELEC( if fitted Semi-automatic cooking For the instructions on how to use both of these functions, please see the following There are two types of semi automatic page. cooking available on this appliance. Fully automatic cooking The oven must be switched on, and in use to use either of these functions success- This function incorporates both a duration fully.
- Page 29 USING THE CLOCK/PROGRAMMER-ELEC( if fitted SEMI-AUTOMATIC COOKING The duration method • Press the Function button twice,(1) which will skip past the Minute Minder. • The LED display will flash the word ‘dur’, (2) and the ‘A’ will flash on the left hand side of the display. • Use the Up and Down buttons to set the length of time you want to cook for.(3) This must be done within 5 seconds or the time of day will show...
- Page 30 USING THE CLOCK/PROGRAMMER-ELEC( if fitted FULLY AUTOMATIC COOKING (EX- AMPLE) This programming method is best suited for when a delayed start time is required. Unlike the semi automatic methods this requires both the duration and the end time to be entered. The timer will work out the start time and begin cooking.
- Page 31 USING THE CLOCK/PROGRAMMER-ELEC( if fitted The touch control programmer The ‘function’ icon in the centre is used for setting the minute minder & setting up the There are three touch control icons for automatic cooking - see below for details. this timer - the table below shows you what the symbols look like, depending on the model type, &...
- Page 32 USING THE CLOCK/PROGRAMMER-ELEC( if fitted Setting the time of day Semi-automatic cooking Touch & hold the centre (function) icon for Method 1 - duration (switch off after a few seconds until the ● symbol between set time period): the numbers on the LED display flashes. Touch & hold the centre (function) icon; While the ● symbol is flashing, you can the bell will flash & you will hear a beep.
- Page 33 USING THE CLOCK/PROGRAMMER-ELEC( if fitted Use the plus & minus icons to select the To cancel the automatic programme at time the oven is required to switch off. any time, touch the plus & minus icons together. Once this is done the oven will switch itself off at the pre-selected time.
- Page 34 CLEANING General as they can contain salts, which will damage the metal. • It is important to clean the product regularly as a build up of fat can af- Enamel surfaces & parts fect its performance or damage it and may invalidate your guarantee.
- Page 35 CLEANING REMOVING OVEN PARTS FOR Shelf Runners CLEANING • Shelf runners can be removed to Inner Door Glass (glass doors only) enable you to clean them thoroughly. Make sure they are cool to touch and • Some models have a removable, in- then grasp the runners and slide out ner door glass.
- Page 36 CLEANING ELECTRIC HOB • You can restore the hotplates by us- ing a solid plate cleaner but take care Ceramic glass hobs to avoid the red spots on elements. • The ceramic hob top can be cleaned • To prime: Switch on each element in- using a clean, damp cloth or kitchen turn for a short while (with no pan on paper.
- Page 37 INSTALLATION Moving the cooker Dimensions Please note that the weight of this appli- All sizes are nominal, and some varia- ance is approximately 60kg (unpacked). tion is to be expected. The ‘depth’ of the Take care if the appliance needs to be cooker, as given below, is to the front lifted during installation - always use an of the door and excluding knobs and...
- Page 38 INSTALLATION CONNECT TO THE ELECTRICITY SUP- Your appliance will be fitted with one of the terminal blocks below, Block A, Block B, or Block C Warning: This appliance must be earthed. This appliance is not intended to be oper- ated by means of an external timer or separate remote control system.
-
Page 39: Technical Data
TECHNICAL DATA ELECTRIC PRODUCTS Warning: This appliance must be earthed. Electrical supply/load Databadge is located at the bottom of the 220 - 240V ~ 50Hz front frame, behind the door. • Load 9000-10700W with Ceramic Hoplate. • Load 9140 - 10880W with Solid Hotplate •... - Page 40 CUSTOMER CARE FAQs Why is there steam or smoke escap- ing from the oven? What parts of the appliance can be • Your oven is fitted with a steam vent washed in a dishwasher? at the top of the main oven. This is • Any enamelled parts such as the grill- to allow excessive steam out of the pan can be cleaned in a dishwasher, oven whilst cooking wet foods such...
- Page 41 CUSTOMER CARE CUSTOMER CARE CHANGING LIGHT BULBS (where fitted) Warning: There is a risk of electric shock, so always make sure you have turned off and unplugged your appliance before starting. Always allow the product to cool down before you change a bulb. Not all appliances have the same number and type of bulbs.
- Page 42 Please keep this handbook for future reference, or for anyone else who may use the appliance.
- Page 43 Please keep this handbook for future reference, or for anyone else who may use the appliance.
- Page 44 CUSTOMER CARE To contact Belling about your appliance, please call Warranty Registration 0844 481 0182 to register your appliance Customer Care Helpline 0844 815 3746 in case of difficulty within the UK Alternatively general, spares and service information is available from our website at www.belling.co.uk Please ensure that you have the product’s model no and serial no available when you call. These can be found on the silver data label on your product which is located:...
Need help?
Do you have a question about the CFE60MFTi and is the answer not in the manual?
Questions and answers