Table of Contents

Related Manuals for Optimum BF16 Vario


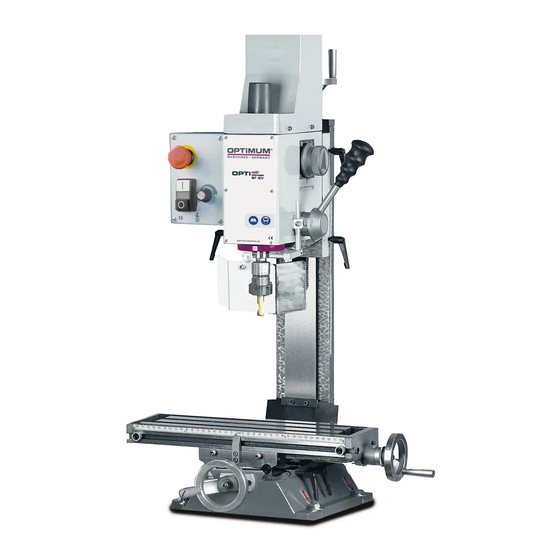
Summary of Contents for Optimum BF16 Vario
- Page 1 M A S C H I N E N - G E R M A N Y Modification instructions Version 1.4.7 Adapter kit CNC milling machine BF16 Vario / BF20 Vario / BF20L Vario Keep for future reference! 3 / 08 / 2006 Adapter kit BF20 Vario; BF20L Vario ; Version 1.4.7...
- Page 2 OPTIMUM M A S C H I N E N - G E R M A N Y Table of Contents Packing list Safety warnings (warning notes) Classification of hazards ......................5 Proper use ..........................6 Required auxiliary material...................... 6 Assembly Assembly X axis........................
- Page 3 OPTIMUM Packing list M A S C H I N E N - G E R M A N Y Packing list CNC - Anbausatz MK F 20 PD Bezeichnung Designation BF20 Vario; BF20L Vario Artikelnummer Anbausatz 357 0020 Item No. adapter kit...
- Page 4 OPTIMUM Packing list M A S C H I N E N - G E R M A N Y Bezeichnung Artikelnummer Teile Nr. Grösse Abbildung Stck. Description Item No. Part N Size Illustration Qty. Zahnriemenscheibe für Motor Z - Achse 18 Zähne/teeth,...
- Page 5 OPTIMUM Safety warnings (warning notes) M A S C H I N E N - G E R M A N Y Safety warnings (warning notes) Classification of hazards We classify the safety warnings into various levels. The table below gives an overview of the classification of symbols (pictograms) and warnings for the specific danger and its (possible) consequences.
- Page 6 If the adapter kit is used in any way other than described above or modified without approval of the company Optimum Maschinen Germany GmbH the adapter kit is no longer properly used. We do not take liability for any damage caused by improper use.
- Page 7 OPTIMUM Assembly M A S C H I N E N - G E R M A N Y Assembly CNC conversion kit MK F 20 PD Assembly X axis 3.1.1 Disassemble the self-locking nut and the shim of the left handwheel of the X axis.
- Page 8 OPTIMUM Assembly M A S C H I N E N - G E R M A N Y 3.1.5 Modify the axial deep groove ball bea- ring and the bushing. 3.1.6 Shift the assembly ring (No. 3) with the...
- Page 9 OPTIMUM Assembly M A S C H I N E N - G E R M A N Y 3.1.16 Horizontally aline the housing with a blow-back proof plastic tip hammer. housing X axis Allen screw Fig.3-6: Aline the housing 3.1.17...
- Page 10 OPTIMUM Assembly M A S C H I N E N - G E R M A N Y Assembly Y axis 3.2.1 Disassemble the self-locking nut and shim of the handwheel. handwheel self-locking nut Fig.3-9: Diemndwheel Y axis 1 3.2.2...
- Page 11 OPTIMUM Assembly M A S C H I N E N - G E R M A N Y CAUTION! Do not turn the shaft after loosening the screws. 3.2.5 Remove the screws for the pillow block of the handwheel.
- Page 12 OPTIMUM Assembly M A S C H I N E N - G E R M A N Y Assembly Z axis CAUTION! Imperatively clamp the Z axis, otherwise, the whole milling head will slide downward as soon as you remove the nut of the Z axis.
- Page 13 OPTIMUM Assembly M A S C H I N E N - G E R M A N Y 3.3.4 Remove the two nuts of the shaft with a sickle spanner. sickle spanner Fig.3-16: Disassemble nut 3.3.5 Unscrew the screws from the lid and remove the lid.
- Page 14 OPTIMUM Assembly M A S C H I N E N - G E R M A N Y 3.3.9 Mark the holes on the covering plate in a way that the assembled housing will be at an angle of 45° degrees to the...
- Page 15 OPTIMUM Assembly M A S C H I N E N - G E R M A N Y 3.3.13 Drill holes of 5 mm into the covering plate with a core hole drill. 3.3.14 When both holes are drilled deburr the diameter of the drill holes with a counter sink.
- Page 16 OPTIMUM Assembly M A S C H I N E N - G E R M A N Y 3.3.18 Grease the seat of bearing of the shaft with grease for bearings. Do not use any spray grease as this grease tends brush with to resinify.
- Page 17 OPTIMUM Assembly M A S C H I N E N - G E R M A N Y 3.3.21 Grease the thread of the shaft and pul- ley part 5, apply means of securing (join shaft) to the thread.
- Page 18 OPTIMUM Assembly M A S C H I N E N - G E R M A N Y 3.3.29 Remove screws and shims from the handwheel. Unscrew the four screws of the faste- position handwheel ning and remove the whole handwheel fixture.
- Page 19 OPTIMUM Installation of step motors M A S C H I N E N - G E R M A N Y Installation of step motors Wiring X / Y / Z axis 4.1.1 Open the lid of the step engine with a cross slot screwdrive.
- Page 20 OPTIMUM Installation of step motors M A S C H I N E N - G E R M A N Y INFORMATION ! The shielding will be conntected to the terminal block of the engine on one side. 4.1.5 The cables will be peeled off at a length of about 5 mm with insulation stripping tongs.
- Page 21 OPTIMUM Installation of step motors M A S C H I N E N - G E R M A N Y INFORMATION ! If the turning direction of one or several step motors for CNC operation via a CNC software is wrong, please exchange the respective connection on the step motor or on the CNC Controller.
- Page 22 OPTIMUM Installation of step motors M A S C H I N E N - G E R M A N Y 4.2.5 Fasten the pulley wheel with the hexa- gon socket screw item No. 16 (additio- nally lock with a small quantity of loctite screw 601.)
- Page 23 OPTIMUM Assembly and maintenance instruction ball bearing spind- M A S C H I N E N - G E R M A N Y Assembly and maintenance instruction ball bearing spindle Ball bearing spindle foot nuts without strippers) The delivery of the ball bearing nut with assembly bushing (ready-for-assembly) as well as the spindle are corrosion resistant.
- Page 24 OPTIMUM Assembly and maintenance instruction ball bearing spindle M A S C H I N E N - G E R M A N Y Installation with spindle The ball bearing spindle needs to be installed radial and without tension: When you tighten the bearing, the slide needs to be moved on the corresponding side to and fro.
- Page 25 OPTIMUM Assembly and maintenance instruction ball bearing spind- M A S C H I N E N - G E R M A N Y Packing list Axis Designation Item No Illustration Spindle nut Z - axis Spindle (458 mm)
- Page 26 OPTIMUM Modification BF20 to a ball bearing spindle M A S C H I N E N - G E R M A N Y Modification BF20 to a ball bearing spindle 6.0.1 Screw off hand wheels or step motors...
- Page 27 OPTIMUM Modification BF20 to a ball bearing spindle M A S C H I N E N - G E R M A N Y 6.0.2 Loosen nut and disassemble toothed wheel. Illustr.6-4: Loosen nut Toothed wheel Illustr.6-5: Disassemble toothed wheel 6.0.3...
- Page 28 OPTIMUM Modification BF20 to a ball bearing spindle M A S C H I N E N - G E R M A N Y 6.0.4 Pull off the feather key on both sides of the shaft. Feather key Illustr.6-7: Feather key right hand side 6.0.5...
- Page 29 OPTIMUM Modification BF20 to a ball bearing spindle M A S C H I N E N - G E R M A N Y 6.0.7 Loosen the V-ledge on the clamping screws and pull off the table to the side.
- Page 30 OPTIMUM Modification BF20 to a ball bearing spindle M A S C H I N E N - G E R M A N Y Table Illustr.6-13: Take off the table 6.0.8 Unscrew the cab screw of the spindle nut on the X-axis and remove the nut with the spindle.
- Page 31 OPTIMUM Modification BF20 to a ball bearing spindle M A S C H I N E N - G E R M A N Y 6.0.9 Pull off the V-ledge. V-ledge Illustr.6-16: Pull off V-ledge 6.0.10 Clean all guidances! 6.0.11 Disassemble expansion bellows and unscrew the rubber from the Y-axis.
- Page 32 OPTIMUM Modification BF20 to a ball bearing spindle M A S C H I N E N - G E R M A N Y Rubber Illustr.6-19: Unscrew rubber 6.0.12 Unscrew pillow block of the Y-axis. Pillow block Illustr.6-20: Unscrew pillow block 6.0.13...
- Page 33 OPTIMUM Modification BF20 to a ball bearing spindle M A S C H I N E N - G E R M A N Y 6.0.14 Loosen cylinder screws and loosen and remove the nut of the Y-axis. Cylinder screws Illustr.6-22: Loosen nut...
- Page 34 OPTIMUM Modification BF20 to a ball bearing spindle M A S C H I N E N - G E R M A N Y 6.0.16 Pull the slide off the Y-axis. Slide Illustr.6-25: Pull off the slide (Y-axis) 6.0.17 Clean all guideways.
- Page 35 OPTIMUM Modification BF20 to a ball bearing spindle M A S C H I N E N - G E R M A N Y Pillow block Spindle Illustr.6-28: Remove spindle 6.0.19 Assembly spindle nut: Remove the O-Ring on the flat side of the aluminum bushing.
- Page 36 OPTIMUM Modification BF20 to a ball bearing spindle M A S C H I N E N - G E R M A N Y Push the conical nipple with the flat side downward on the spindle. Spindle Conical nipple Illustr.6-31: Mount conical nipple...
- Page 37 OPTIMUM Modification BF20 to a ball bearing spindle M A S C H I N E N - G E R M A N Y CAUTION! Aluminum bushing If you do not press on the bushing with enough force, the balls may fall off the nut.
- Page 38 OPTIMUM Modification BF20 to a ball bearing spindle M A S C H I N E N - G E R M A N Y 6.0.20 Check the well-running of the spindle and if required re-adjust the clearance with the screw on the nut.
- Page 39 OPTIMUM Modification BF20 to a ball bearing spindle M A S C H I N E N - G E R M A N Y 6.0.23 Check if the fastener is rectangular after screwing it on the nut, rework it, if requi- red.
- Page 40 OPTIMUM Modification BF20 to a ball bearing spindle M A S C H I N E N - G E R M A N Y Spindle Illustr.6-43: Screw spindle Fastener Screws Illustr.6-44: Secure screws Screws Fastener Illustr.6-45: Screw fastener Page 41 Ball bearing spindle assembly and maintenance instruction ;...
- Page 41 OPTIMUM Modification BF20 to a ball bearing spindle M A S C H I N E N - G E R M A N Y 6.0.26 Oil guidances and remount the table. Mount the bearing block of the Y-axis and the V-ledges.
- Page 42 OPTIMUM Modification BF20 to a ball bearing spindle M A S C H I N E N - G E R M A N Y 6.0.28 Mount V-ledges. Table V-ledge Illustr.6-49: Mount V-ledge 6.0.29 Grease spindle. Spindle Illustr.6-50: Grease spindle 6.0.30...
- Page 43 OPTIMUM Modification BF20 to a ball bearing spindle M A S C H I N E N - G E R M A N Y 6.0.31 Mount bearing and bearing block. Bearing Bearing block Illustr.6-52: Mount bearing and bearing block 6.0.32...
- Page 44 OPTIMUM Modification BF20 to a ball bearing spindle M A S C H I N E N - G E R M A N Y 6.0.34 Attach the spindle to the X-axis. Oil gui- dances. Mount the fastener on the X- axis.
- Page 45 OPTIMUM Modification BF20 to a ball bearing spindle M A S C H I N E N - G E R M A N Y Table Cover plate Illustr.6-58: Mount cover plates 6.0.37 Reassemble rubber cover and screw on the limit stop again.
- Page 46 OPTIMUM Modification BF20 to a ball bearing spindle M A S C H I N E N - G E R M A N Y 6.0.38 Remount hand wheel or step motors as well as pulleys and housings (modifica- tion instruction CNC) onto the X and Y- axis.
- Page 47 OPTIMUM Modification BF20 to a ball bearing spindle M A S C H I N E N - G E R M A N Y 6.0.39 Move the milling head of the Z-axis fully upward and clamp it. Head of the Z-axis Illustr.6-64: Head of the Z-axis...
- Page 48 OPTIMUM Modification BF20 to a ball bearing spindle M A S C H I N E N - G E R M A N Y 6.0.41 Loosen the three screws or the nut of the milling head and remove the head.
- Page 49 OPTIMUM Modification BF20 to a ball bearing spindle M A S C H I N E N - G E R M A N Y CAUTION! Risk of crushing when removing the milling head. The milling head is very heavy! Head Illustr.6-70: Remove head...
- Page 50 OPTIMUM Modification BF20 to a ball bearing spindle M A S C H I N E N - G E R M A N Y 6.0.43 Screw the adapter on the shaft of the Z- axis. Apply securing mean at the end of thread.
- Page 51 OPTIMUM Modification BF20 to a ball bearing spindle M A S C H I N E N - G E R M A N Y 6.0.45 Mount the toothed wheel for the hand wheel from the old spindle to the new spindle.
- Page 52 OPTIMUM Modification BF20 to a ball bearing spindle M A S C H I N E N - G E R M A N Y 6.0.48 Screw the fastener on the nut of Z-axis. Fastener Illustr.6-79: Screw fastener Fastener Illustr.6-80: Screw fastener 6.0.49...
- Page 53 OPTIMUM Modification BF20 to a ball bearing spindle M A S C H I N E N - G E R M A N Y 6.0.50 Mount bushing and cover on the Z-axis. Cover Bushing Illustr.6-82: Mount bushing and cover 6.0.51...
- Page 54 OPTIMUM Modification BF20 to a ball bearing spindle M A S C H I N E N - G E R M A N Y 6.0.53 Mount milling head and refasten it with the three screws respectively nuts. Head Illustr.6-85: Mount head CAUTION! Risk of crushing when mounting the milling head.
- Page 55 The company reserves the right to make technical alterations without prior notice. Warranty Within the term of warranty, the company Optimum warrants for a perfect quality of its products and will reimburse any cost for overhaul or exchange of defective parts in case of construction error, fault in material and/or defect of fabrication.
- Page 56 We would be grateful if you could send us the following information: modified settings, experiences with the ball bearing spindle, which could be important to other users, repeated failures. Optimum Maschinen Germany GmbH Dr.-Robert-Pfleger-Str. 26 D-96103 Hallstadt Phone +49 (0) 951 - 96 822 - 0 Fax +49 (0) 951 - 96 822 - 22 E-Mail: info@optimum-maschinen.de...
- Page 57 Appendix M A S C H I N E N - G E R M A N Y EC Declaration of Conformity The manufacturer / Optimum Maschinen Germany GmbH Dr.-Robert-Pfleger-Str. 26 retailer: D-96103 Hallstadt hereby declares that the following product,...
- Page 58 OPTIMUM Appendix M A S C H I N E N - G E R M A N Y Appendix Copyright © 2006 The documentation is copyright. All derived rights are also reserved, especially those of transla- tion, re-printing, use of figures, broadcast, reproduction by photo-mechanical or similar means and recording in data processing systems, neither partial nor total.
- Page 59 M A S C H I N E N - G E R M A N Y Warranty Within the term of warranty, the company Optimum warrants for a perfect quality of its products and will reimburse any cost for overhaul or exchange of defective parts in case of construction error, fault in material and/or defect of fabrication.
- Page 60 BF20 Vario; BF20L Vario Adapter Kit , which could be important for other users recurring failures Optimum Maschinen Germany GmbH Dr.-Robert-Pfleger-Str. 26 D-96103 Hallstadt Fax: +49 (0) 951 - 96 822 - 22 E-Mail: info@optimum-maschinen.de Page 61 Appendix Adapter kit BF20 Vario;...
Need help?
Do you have a question about the BF16 Vario and is the answer not in the manual?
Questions and answers