
Related Manuals for Optimum BF20L


Summary of Contents for Optimum BF20L
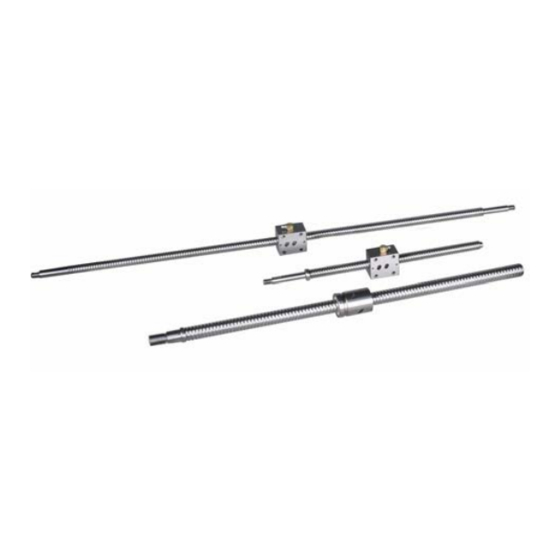
- Page 1 OPTIMUM M A S C H I N E N - G E R M A N Y Assembly and maintenance instruction Version 2.0 BF20/ BF20L Recirculating ball screw Keep for future reference! 5. Dezember 2007 Recirculating ball screw assembly and maintenance instruction ; Version 2.0...
- Page 2 OPTIMUM Assembly and maintenance instruction recirculating ball M A S C H I N E N - G E R M A N Y Assembly and maintenance instruction recirculating ball screw Recirculating ball screw The delivery of the ball screw nut and spindle is performed corrosion-proof and ready-for-assembly.
-
Page 3: Technical Data
OPTIMUM Assembly and maintenance instruction recirculating ball screw M A S C H I N E N - G E R M A N Y 1.2.1 Greases This list is a recommendation without engagement. Quan- Lubricant Classification Quality Manufacturer / Type... - Page 4 OPTIMUM Assembly and maintenance instruction recirculating ball M A S C H I N E N - G E R M A N Y Packliste - Packing list Achse Bezeichnung Artikelnummer Abbildung Stck. Axis Designation Item No Illustration Z - Achse...
- Page 5 M A S C H I N E N - G E R M A N Y Converting to a recirculating ball screw INFORMATION When assembling the BF20 and BF20L from trapezoidal threads to recirculating ball screws, it is possible that the travels of the X-, Y- and Z-axis are changing. 1.6.1...
- Page 6 OPTIMUM Assembly and maintenance instruction recirculating ball M A S C H I N E N - G E R M A N Y Loosen and unscrew hexagon nut, then disassemble the toothed wheel. Hexagon nut Fig.1-4: Loosen nut Toothed wheel Fig.1-5: Disassemble toothed wheel...
- Page 7 OPTIMUM Assembly and maintenance instruction recirculating ball screw M A S C H I N E N - G E R M A N Y Drag the feather key from the spindle. Feather key Fig.1-7: Disassemble feather key Remove pillow block, if necessary strike with a plastic tip hammer.
- Page 8 OPTIMUM Assembly and maintenance instruction recirculating ball M A S C H I N E N - G E R M A N Y Unscrew the indicator and the two clamping levers of the X-axis. Indicator Clamping lever Fig.1-10: Unscrew indicator and clamping...
- Page 9 OPTIMUM Assembly and maintenance instruction recirculating ball screw M A S C H I N E N - G E R M A N Y Drag the feather key from the spindle. Feather key Fig.1-14: Disassemble feather key Remove pillow block, if necessary strike with a plastic tip hammer.
- Page 10 OPTIMUM Assembly and maintenance instruction recirculating ball M A S C H I N E N - G E R M A N Y Drag the table (X-axis) off-centre. CAUTION! Risk of crushing when dragging the Table (X-axis) table. The table is very heavy!
- Page 11 OPTIMUM Assembly and maintenance instruction recirculating ball screw M A S C H I N E N - G E R M A N Y Remove the spindle with the spindle nut from the cross table. Spindle Spindle nut Fig.1-20: Remove spindle...
- Page 12 OPTIMUM Assembly and maintenance instruction recirculating ball M A S C H I N E N - G E R M A N Y Unscrew the hexagon socket screws from the cross table. Remove the rubber covering on the cross table.
- Page 13 OPTIMUM Assembly and maintenance instruction recirculating ball screw M A S C H I N E N - G E R M A N Y Loosen hexagon socket screws. Remove the two clamping levers on the cross table. Hexagon socket...
- Page 14 OPTIMUM Assembly and maintenance instruction recirculating ball M A S C H I N E N - G E R M A N Y Separate the spindle nut of the Y- axis from the cross table. Drag the cross table out of the gui- deways.
- Page 15 OPTIMUM Assembly and maintenance instruction recirculating ball screw M A S C H I N E N - G E R M A N Y 1.6.3 Disassemble Z-axis Remove hexagon socket screw. Drag the drill chuck protection from the fixture to the bottom in order to protect it from possible damages.
- Page 16 OPTIMUM Assembly and maintenance instruction recirculating ball M A S C H I N E N - G E R M A N Y Remove the hexagon socket screw at the drilling-milling head. Unscrew the hexagon nut. While doing this, hold the drilling-milling head.
- Page 17 OPTIMUM Assembly and maintenance instruction recirculating ball screw M A S C H I N E N - G E R M A N Y Remove the hexagon socket screws as well as the protective covering of the Z-axis. Protective covering...
- Page 18 OPTIMUM Assembly and maintenance instruction recirculating ball M A S C H I N E N - G E R M A N Y Loosen and disassemble the hexa- gon socket screws on the pillow block of the Z-axis. For CNC conversion, disassemble...
- Page 19 OPTIMUM Assembly and maintenance instruction recirculating ball screw M A S C H I N E N - G E R M A N Y Drag the slide out of the guideways. Slide Z-axis Fig.1-40: Drag out the slide (Z-axis) Drag the fixture out of the spindle nut.
- Page 20 OPTIMUM Assembly and maintenance instruction recirculating ball M A S C H I N E N - G E R M A N Y 1.6.4 Cleaning the guideways Clean all guideways. Guideway Y-axis Guideway Z-axis Fig.1-44: Cleaning guideways 1.6.5 Assembly Y-axis...
- Page 21 OPTIMUM Assembly and maintenance instruction recirculating ball screw M A S C H I N E N - G E R M A N Y Shift the pillow block of the Y-axis to the beginning of the recirculating ball screw.
- Page 22 OPTIMUM Assembly and maintenance instruction recirculating ball M A S C H I N E N - G E R M A N Y Slide the spindle on the Y-axis. Put the plastic bushing with the spindle nut on the spindle of the Y- Spindle nut axis.
- Page 23 OPTIMUM Assembly and maintenance instruction recirculating ball screw M A S C H I N E N - G E R M A N Y Oil all guideways. Re-assemble cross table. Guideways Slide the V-ledge on the cross table. Clamp or adjust it using the lock screw.
- Page 24 OPTIMUM Assembly and maintenance instruction recirculating ball M A S C H I N E N - G E R M A N Y INFORMATION Pillow blockY-axis For older versions of the BF 20, the pil- (old version) low block of the Y-axis is a little smaller.
- Page 25 OPTIMUM Assembly and maintenance instruction recirculating ball screw M A S C H I N E N - G E R M A N Y Put the support of the Y-axis on the spindle nut. Fix the support to the spindle nut using the hexagon socket screws.
- Page 26 OPTIMUM Assembly and maintenance instruction recirculating ball M A S C H I N E N - G E R M A N Y 1.6.6 Assembly X-axis Assemble the support of the X-axis on the spindle nut of the recircula-...
- Page 27 OPTIMUM Assembly and maintenance instruction recirculating ball screw M A S C H I N E N - G E R M A N Y Check if the table is even and free from soiling before assembling the X-axis. Example soiling If there are any soilings, remove them.
- Page 28 OPTIMUM Assembly and maintenance instruction recirculating ball M A S C H I N E N - G E R M A N Y Re-assemble the table X-axis. Slide the V-ledges into the cross table. Clamp or adjust them using Table Y-axis the lock screw.
- Page 29 OPTIMUM Assembly and maintenance instruction recirculating ball screw M A S C H I N E N - G E R M A N Y Start assembling the pillow blocks at the right side of the milling-drilling table. Table X-axis Apply a sealing agent.
- Page 30 OPTIMUM Assembly and maintenance instruction recirculating ball M A S C H I N E N - G E R M A N Y Then assemble the left pillow block to the X-axis of the drilling-milling machine. Table X-axis Fix the pillow block using the hexagon socket screws.
- Page 31 OPTIMUM Assembly and maintenance instruction recirculating ball screw M A S C H I N E N - G E R M A N Y Clamp the fixture of the X-axis on the cross table. Before clamping it you should once turn the cross table...
- Page 32 OPTIMUM Assembly and maintenance instruction recirculating ball M A S C H I N E N - G E R M A N Y Fix the limit stops as well as the indicator of the X-axis using the Limit stops hexagon socket screws.
- Page 33 OPTIMUM Assembly and maintenance instruction recirculating ball screw M A S C H I N E N - G E R M A N Y 1.6.7 Assembly Z-axis Disassemble the old spindle from the pillow block of the Z-axis. To do Spindle so, use a sickle spanner.
- Page 34 OPTIMUM Assembly and maintenance instruction recirculating ball M A S C H I N E N - G E R M A N Y Disassembly of the support (part 2) from the support (part 1) of the Z- axis. Support (part 1)
- Page 35 OPTIMUM Assembly and maintenance instruction recirculating ball screw M A S C H I N E N - G E R M A N Y Re-assemble the slide of the Z-axis. Shift the V-ledge on the slide of the Z-axis. Clamp or adjust it using the Slide Z-axis lock screw.
- Page 36 OPTIMUM Assembly and maintenance instruction recirculating ball M A S C H I N E N - G E R M A N Y Insert the spindle into the Z-axis. Mount the support (part 1) on the support (part 2).
- Page 37 OPTIMUM Assembly and maintenance instruction recirculating ball screw M A S C H I N E N - G E R M A N Y Position the slide above the sup- port. Fix the slide of the Z-axis using the two hexagon sokket screws.
- Page 38 OPTIMUM Assembly and maintenance instruction recirculating ball M A S C H I N E N - G E R M A N Y Assemble the housing of the Z-axis using the fixing material. Mount the attached covering of the...
- Page 39 OPTIMUM Assembly and maintenance instruction recirculating ball screw M A S C H I N E N - G E R M A N Y Align the drilling-milling head before fixing it to the limit stop of the Z-axis. Secure the drilling-milling head Limit stop Z-axis using the lock screw.
- Page 40 OPTIMUM Assembly and maintenance instruction recirculating ball M A S C H I N E N - G E R M A N Y Production drawings Page 40 Recirculating ball screw assembly and maintenance instruction ; Version 2.0 5. Dezember 2007...
-
Page 41: Warranty
The company reserves the right to make technical alternations without prior notice. Warranty Within the term of warranty, the company Optimum warrants for a perfect quality of its products and will reimburse any cost for overhaul or exchange of defective parts in case of construction error, fault in material and/or defect of fabrication. -
Page 42: Product Follow-Up
We would be grateful if you could send us the following information: Modified settings Experiences with the recirculating ball screw, which could be important for other users Recurring failures. Optimum Maschinen Germany GmbH Dr.-Robert-Pfleger-Str. 26 D-96103 Hallstadt Fax +49 (0) 951 - 96 822 - 22 E-Mail: info@optimum-maschinen.de...
Need help?
Do you have a question about the BF20L and is the answer not in the manual?
Questions and answers