Roborock H6M1A Instruction Manual
Hide thumbs
Also See for H6M1A:
- Instruction manual (33 pages) ,
- Instruction manual (65 pages) ,
- User manual
Table of Contents
Advertisement
版本号:v2.0
修改点:文案信息
修改人:刘超
版本号:
修改点:
修改人:
172 mm
版本号:v3.0
修改点:认证
修改人:刘超
版本号:
修改点:
修改人:
版本号:v4.0
版本号:v5.0
修改点:认证
修改点:认证
修改人:刘超
修改人:刘超
版本号:
版本号:
修改点:
修改点:
修改人:
修改人:
石头科技产品包装图纸
模 切
标 注
图纸
提供
北京石头世纪科技有限公司
单位
材质:105 克哑粉,骑钉
成品尺寸:172*130mm,出血 3mm
材
参考色:Pantone Cool Gray 11 C
质
工
Pantone 185C
艺
尺寸偏差:±0.5mm
要
印刷偏位:±1mm
求
130 mm
备
注
项目名称
mace 说明书(CE 版)
料号
4.03.0167
版本号
V 5.0
设计时间
2019.12.19
设计师
刘超
设计师
比例
1:1
版本号:
修改点:
修改人:
版本号:
修改点:
修改人:
单位
mm
Advertisement
Table of Contents

Related Manuals for Roborock H6M1A


Summary of Contents for Roborock H6M1A
- Page 1 石头科技产品包装图纸 模 切 标 注 图纸 172 mm 提供 北京石头世纪科技有限公司 单位 材质:105 克哑粉,骑钉 成品尺寸:172*130mm,出血 3mm 材 参考色:Pantone Cool Gray 11 C 质 工 Pantone 185C 艺 尺寸偏差:±0.5mm 要 印刷偏位:±1mm 求 130 mm 备 注 项目名称 mace 说明书(CE 版) 料号 4.03.0167 版本号...
- Page 2 Roborock handheld cordless vacuum cleaner instruction manual Read this user manual carefully before using this product and store it properly for future reference.
-
Page 3: Safety Information
Safety Information Read this manual carefully before use, and retain it for future reference. Usage Restrictions ・ Do not use this vacuum in outdoor, commercial, or industrial environments. It is intended for home and in-car use only. ・ Do not store the vacuum anywhere in the car to avoid high or low tempera- tures affecting its ba ery life. -
Page 4: Battery And Charging
Safety Information brush heads to avoid injury. ・ Do not touch the power supply, nor operate the product with wet hands to pre- vent injuries. ・ Do not vacuum any liquids (such as water, cola). ・ Do not vacuum any burning or smoking substances (such as non-extinguished cigare e bu s). - Page 5 Safety Information in humid areas (such as radiators or bathrooms). ・ Do not wipe the adapter or the docking station with a wet cloth, nor touch them with wet hands. ・ If the power cord is damaged or broken, immediately stop using it and contact a er-sales service.
-
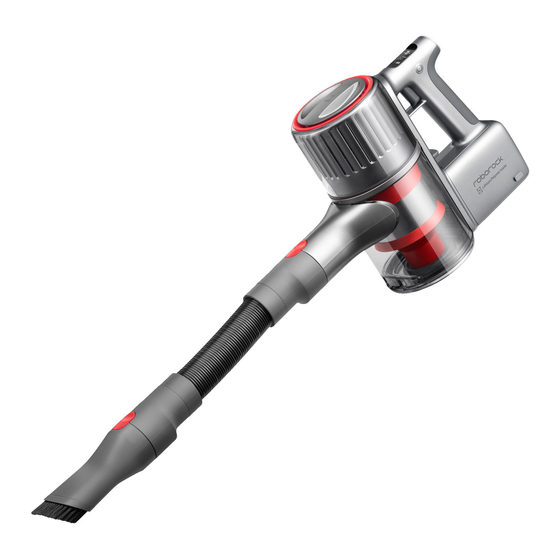
Page 6: Product Introduction
Product introduction Vacuum Rear Filter Screen Mode Button Press the Mode button to change vacuum mode Notes: In MAX mode, the fan will run at full speed. Battery life will shorten and hot air may be emitted. Sustain Button Squeeze the Trigger to start vacuuming. Press the Sustain button with the Trigger squeezed to enter Sustain mode. -
Page 7: Parts List
Parts List Crevice Tool Dusting Brush Power Supply Carpet Brush Motorized Mini-Brush Baton Flex Tube... -
Page 8: Screen Display
Screen display This Roborock cordless vacuum is equipped with a �.�-inch OLED display that shows relevant information in real-time. Standby and operating modes Active Standby Sustain mode indicator Displays the remaining run time for current mode when in use Displays the remaining power when in standby mode... -
Page 9: Sustain Button
Buttons Sustain Button Press the Sustain button to enter Sustain mode. The Sustain icon will appear on screen. Squeeze the trigger while in Sustain mode to start the vacuum and enable it to run continuously. In Sustain mode, the vacuum will not stop when the trigger is released. Press the Sustain button again to disengage Sustain mode and stop vacuuming. -
Page 10: Installation
Installation Vacuum and accessories setup Option � Connect the Baton to the vacuum, then attach an accessory. To disconnect, press the lock Click Click Option � Connect the vacuum directly to an accessory Option � Connect the flex tube to the vacuum, then attach an accessory. *Motorized accessories such as the motorized mini-brush or Carpet brush cannot be used with the flex tube. - Page 11 Charging When the battery is charging, a charging animation will show alongside the current battery level. The screen will turn off automatically after � minute of inactivity. Notes: �. When charging, the screen image faces the user for easy viewing. �.
-
Page 12: Auto Shut Off
Using the vacuum �. When using the Carpet brush or motorized mini-brush on the vacuum cleaner, the surfaces of some fabrics may pill or be difficult to vacuum. If this occurs, it is recommended that you use the dusting brush or crevice tool to vacuum these surfaces. �. - Page 13 Brush Accessory Uses �. Crevice Tool: Narrow crevices, including skirting boards, corners, �. Motorized Mini-Brush: Cleaning dust from beds, sofas, and soft and stairs. furnishings to avoid mites. �. Dusting Brush: Dusting sofas, chairs, and other soft furnishings, and flat surfaces such as desks and shelves. Tip: The Dusting Brush can also be used on its own to dust the vacuum and other items around the house.
- Page 14 Brush Accessory Uses �. Carpet Brush: Connect to the Baton for cleaning short and �. Flex Tube: Connect to Dusting Brush or Crevice Tool to clean small or narrow spaces such as drawers and car interiors. medium-pile carpets. Carpet Brush can also be used on easily scratched floor surfaces.
-
Page 15: Maintenance
Maintenance Product Warranty �. Only use original parts. The use of non-original parts may affect �. To empty the dustbin, push the Dustbin Opener on the front of the your eligibility for warranty services. handle in the direction of the arrow to open it, then empty it into a bin. -
Page 16: Cleaning The Dustbin
Maintenance Cleaning the dustbin �. Push the Dustbin Removal Latch next to the dustbin after emptying it to remove the dustbin for cleaning. Charging Contacts Note: Do not clean the dustbin with detergents, polishes, or air fresheners. Do not put the dustbin in a dishwasher or any similar appliance. �. - Page 17 Maintenance Dustbin Installation Cleaning the Front Filter and Multi-Cyclone Assembly *Front Filter and Multi-Cyclone Assembly should be cleaned at least once a month �. Disconnect the vacuum from power before cleaning it, and avoid squeezing the Power Trigger during cleaning. �.
- Page 18 Maintenance Removing the Front Filter and Multi-Cyclone Assembly �. Rotate Multi-Cyclone Assembly counterclockwise as shown �. Rinse the Front Filter and Multi-Cyclone Assembly with cold water until clean, then allow to dry. �. Leave �� hours for the Front Filter and Multi-Cyclone Assembly Multi-Cyclone Assembly to dry thoroughly.
- Page 19 Maintenance Front Filter and Multi-Cyclone Assembly Installation �. Align the Multi-Cyclone Array and the vacuum as shown then turn them �. Position the Front Filter, as shown. clockwise to lock them in place. �. Tilt the dustbin and slot it back onto the vacuum. �.
- Page 20 Maintenance Front Filter and Multi-Cyclone Assembly Installation �. Rinse the inside of the Rear Filter with water, rotating it while �.Gently push the dustbin in the direction shown until you hear a click rinsing to clean between all gaps. Lightly tap the filter against the signaling that it is secured.
- Page 21 Maintenance Cleaning Rear Filter Cleaning the Rollers *Washing the Rear Filter every two months is recommended Follow these instructions when inspecting and cleaning the Rollers to ensure optimum performance. Inspection and �. When dry, reinstall the filter by aligning it with the unlock cleaning should be performed regularly.
- Page 22 Maintenance Cleaning the Motorized Mini-Brush �. Hold the brush so that the locking mechanism faces you. �. Clean and wash the roller Use a coin to turn the lock counterclockwise and remove the mechanism. �. After removing the locking mechanism, remove the roller. �.
- Page 23 Maintenance Cleaning the Motorized Mini-Brush Cleaning the Carpet Brush �. When the roller is thoroughly dry, reinstall it. �. Hold the brush so that the locking mechanism faces you. Use a coin to turn the lock counterclockwise and remove the mechanism. �.
- Page 24 Maintenance Cleaning the Carpet Brush �. Take the End Cap off the roller and remove any fibers �. Reinstall the roller, as shown. wrapped around either part. Roller End Cap �. Hold the brush, so the locking mechanism faces you. Place the roller in position then use a coin to turn the lock counterclockwise and lock it in place.
-
Page 25: Basic Parameters
Basic parameters Vacuum Name Parameters Model H�M�A Dimensions ���mm x ���mm x ���mm Battery ��.�V/����mAh(TYP) Lithium battery Weight Approx. �.�kg ��.�V Rated Voltage Rated Power ���W Power Supply Name Parameters Model BTC��RR Dimensions ��.�mm x ��.�mm x ���.�mm Rated Input ���-���V ~ �.�A Rated Output ��.�V... -
Page 26: Troubleshooting
Troubleshooting Error messages displayed onscreen If the vacuum is not operating properly, the screen will display an error message. Check the screen and then read the table below to resolve any issues. Error Severity Screen Solution Low battery. Recharge before use. General Errors Low battery. -
Page 27: Eu Declaration Of Conformity
EU Declaration of Conformity EU Declaration of Conformity Hereby we: Manufacturer Beijing Roborock Technology Co., Ltd. Floor 6, Suite 6016, 6017, 6018, Building C, Kangjian Baosheng Plaza, Address No.8 Heiquan Road, Haidian District, Beijing P.R. CHINA declare that this DoC is issued under our sole responsibility and that the products:... - Page 28 EU Declaration of Conformity 1. Electromagnetic Compatibility-Requirements for household appliances, electric tools and similar EMC Directive 2014/30/EU apparatus Part 1: Emission 1.EN 55014-1:2006+A1+A2 2. Electromagnetic compatibility – Requirements for household appliances, electric tools and similar EN 55014-1:2017 apparatus Part 2: Immunity – Product family standard 2.EN 55014-2: 2015 3.
- Page 29 EU Declaration of Conformity Low Voltage Directive 2014/35/EU 1.Safety of power transformers, power supplies, reactors and similar products –Part 1: General 1.EN 61558-1:2005+A1:2009 requirements and tests 2.EN 61558-2-16:2009+A1:2013 2.Safety of transformers, reactors, power supply units and similar products for supply voltages up to 1 100 V –...
-
Page 30: Weee Information
WEEE Information Correct Disposal of this product . This marking indicates that this product should not be disposed with other household wastes throughout the EU. To prevent possible harm to the environment or human health from uncontrolled waste disposal, recycle it responsibly to promote the sustainable reuse of material resources. -
Page 31: Warranty Information
Warranty Information The seller provides warranty in accordance with the legislation of the customer's own country of residence, with a minimum of 1 year,starting from the date on which the appli- ance is sold to the end user. The warranty only covers defects in material or workmanship. The repairs under warranty may only be carried out by an authorized service centre. - Page 33 Address of Manufacturer: Floor �, Suite ����, ����, ����, Building C, Kangjian Baosheng Plaza, No.� Heiquan Road, Haidian District, Bejing, P.R.CHINA For more product information, visit our website: www.roborock.com For after-sales support, email our after-sales service team: US/Non-Europe Support: support@roborock.com...
Need help?
Do you have a question about the H6M1A and is the answer not in the manual?
Questions and answers