Roborock H6M1A Instruction Manual
Hide thumbs
Also See for H6M1A:
- Instruction manual (34 pages) ,
- Instruction manual (65 pages) ,
- User manual
Table of Contents
Advertisement
Advertisement
Table of Contents

Subscribe to Our Youtube Channel
Related Manuals for Roborock H6M1A


Summary of Contents for Roborock H6M1A
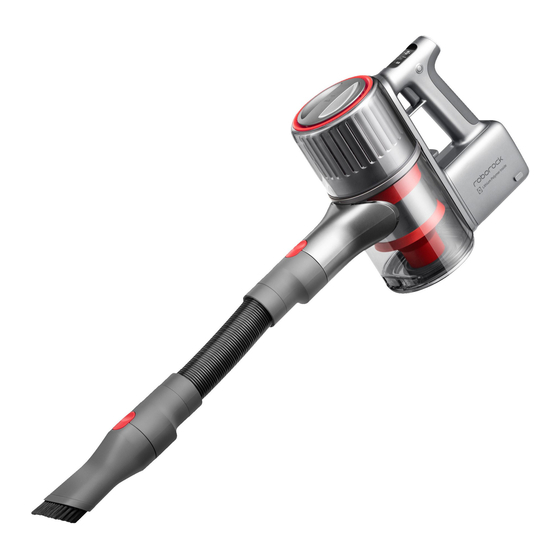
- Page 1 Roborock handheld cordless vacuum cleaner instruction manual...
-
Page 2: Safety Information
Safety Information IMPORTANT SAFETY INSTRUCTIONS When using an electrical appliance, basic precautions should always be followed, including the following: • READ ALL INSTRUCTIONS BEFORE USING (THIS APPLIANCE). • Failure to follow the warnings and instructions may result in electric shock, fire and/or serious injury. WARNING To reduce the risk of fire, electric shock or injury:... - Page 3 Safety Information • When battery pack is not in use, keep it away from other metal objects, like paper clips, coins, keys, nails, screws or other small metal objects, that can make a connection from one terminal to another. Shorting the battery terminals together may cause burns or a fire.
- Page 4 Safety Information IMPORTANT SAFETY INSTRUCTIONS L’utilisation d’un appareil électrique demande certaines précautions: • LIRE TOUTES LES INSTRUCTIONS AVANT DE FAIRE FONCTIONNER (CET APPAREIL). • Le non-respect des mises en garde et des instructions peut causer des chocs électriques, des incendies et/ou des blessures graves.
- Page 5 Safety Information • Ne pas utiliser l’appareil si le sac à poussière ou le filter n’est pas en place. • Emêcher une mise en marche accidentelle. S’assurer que l’interrupteur est à la position arrêt avant de lever ou de déplacer l’appareil. Transporter l’appareil en gardant un doigt sur l’interrupteur, ou mettre sous tension un appareil dont l’interrupteur est à...
-
Page 6: Battery And Charging
Safety Information CONSERVER CES INSTRUCTIONS Usage Domestique seulement Battery and Charging • Please keep the power supply and docking station away from heat (such as heating plates). • For connection to a supply not in the U.S.A., use an attachment plug adapter of the proper configuration for the power outlet, if needed. -
Page 7: Batterie Et Chargement
Batterie et chargement • Conservez l'alimentation électrique et la station de chargement à l'écart de toutes sources de chaleur (des plaques chauffantes, par exemple). • Pour un branchement à une alimentation à l'extérieur des États-Unis, utilisez un adaptateur de fiche de branche- ment d'une configuration adéquate à... -
Page 8: Fcc Statement
FCC Statement Compliance Information Product Name Handheld Vacuum Cleaner with Power Supplyr Handheld Vacuum Cleaner Model: H6M1A Produce Model Power Supply Model: BTC03RR This device complies with part 15 of the FCC Rules. Operation is subject to the following two conditions:... - Page 9 FCC Statement Warning Any changes or modifications to this unit not expressly approved by the party responsible for compliance could void the user's authority to operate the equipment. Note: This equipment has been tested and found to comply with the limits for a Class B digital device, pursuant to part 15 of the FCC Rules.
- Page 10 IC Statement This device contains licence-exempt transmitter(s)/receiver(s) that comply with innovation, Science and Economic Development Canada’s licence-exempt RSS(s). Operation is subject to the following two conditions: (1) This device may not cause interference, and (2) This device must accept any interference, including interfer- ence that may cause undesired operation of the device.
-
Page 11: Product Introduction
Product introduction Vacuum Rear Filter Screen Mode Button • Press the Mode button to change vacuum mode * In MAX mode, the fan will run at full speed. Battery life will shorten and hot air may be emitted. Sustain Button •... -
Page 12: Parts List
Parts List Power Supply Crevice Tool Dusting Brush Carpet Brush Motorized Mini-Brush Baton Flex Tube... -
Page 13: Screen Display
Screen display This Roborock cordless vacuum is equipped with a 1.3-inch OLED display that shows relevant information in real-time. Standby and operating modes Active Standby Sustain mode indicator Displays the remaining run time for current mode when in use Displays the remaining power when in standby mode... -
Page 14: Sustain Button
Buttons Sustain Button Press the Sustain button to enter Sustain mode. The Sustain icon will appear on screen. Squeeze the trigger while in Sustain mode to start the vacuum and enable it to run continuously. In Sustain mode, the vacuum will not stop when the trigger is released. -
Page 15: Installation
Installation Vacuum and accessories setup Option 1 Connect the Baton to the vacuum, then attach an accessory. To disconnect, press the lock Click Click Option 3 Connect the flex tube to the vacuum, then attach an accessory. * Motorized accessories such as the motorized mini-brush or Carpet brush cannot be Option 2 Connect the vacuum directly to an accessory used with the flex tube. - Page 16 Charging When the battery is charging, a charging animation will show alongside the current battery level. The screen will turn off automatically after 1 minute of inactivity. Notes: 1. When charging, the screen image faces the user for easy viewing. 2. When charging, the vacuum will enter Charging mode and stop all other functions. 3.
-
Page 17: Auto Shut Off
Using the vacuum 1. When using the Carpet brush or motorized mini-brush on the vacuum cleaner, the surfaces of some fabrics may pill or be difficult to vacuum. If this occurs, it is recommended that you use the dusting brush or crevice tool to vacuum these surfaces. 2. - Page 18 Brush Accessory Uses 3. Motorized Mini-Brush: Cleaning dust from beds, sofas, and soft furnishings to 1. Crevice Tool: avoid mites. Narrow crevices, including skirting boards, corners, and stairs. 2. Dusting Brush: Dusting sofas, chairs, and other soft furnishings,and flat surfaces such as desks and shelves. Tip: The Dusting Brush can also be used on its own to dust the vacuum and other items around the house.
- Page 19 Brush Accessory Uses 5. Flex Tube: Connect to Dusting Brush or Crevice Tool to clean small or 4. Carpet Brush: narrow spaces such as drawers and car interiors. Connect to the Baton for cleaning short and medium-pile carpets. Carpet Brush can also be used on easily scratched floor surfaces.
-
Page 20: Maintenance
Maintenance Product Warranty 2. To empty the dustbin, push the Dustbin Opener on the front of the handle in the direction of the arrow to open it, 1. Only use original parts. The use of non-original parts may then empty it into a bin. The dustbin should be emptied at affect your eligibility for warranty services. -
Page 21: Cleaning The Dustbin
Maintenance Cleaning the dustbin 3. Push the Dustbin Removal Latch next to the dustbin after emptying it to remove the dustbin for cleaning. Charging Contacts Note: Do not clean the dustbin with detergents, polishes, or air fresheners. Do not put the dustbin in a dishwasher or any similar appliance. 5. - Page 22 Maintenance Dustbin Installation Cleaning the Front Filter and Multi-Cy- clone Assembly * Front Filter and Multi-Cyclone Assembly should be cleaned at least once a month 1. Disconnect the vacuum from power before cleaning it, and avoid squeezing the Power Trigger during cleaning. 2.
- Page 23 Maintenance Removing the Front Filter and Multi-Cyclone Assembly 2. Rotate Multi-Cyclone Assembly counterclockwise as shown. 4. Rinse the Front Filter and Multi-Cyclone Assembly with cold water until clean, then allow to dry. 5. Leave 24 hours for the Front Filter and Multi-Cyclone Assembly to dry thoroughly.
- Page 24 Maintenance Front Filter and Multi-Cyclone Assembly Installation 1. Position the Front Filter, as shown. 3. Align the Multi-Cyclone Array and the vacuum as shown then turn them clockwise to lock them in place. 2. Place the Front Filter from the right side of the multi-cy- clone assembly and lightly push it to the left to disengage the “No Filter Protection Lock”.
- Page 25 Maintenance Front Filter and Multi-Cyclone Assembly Installation 2. Rinse the inside of the Rear Filter with water, rotating it 5.Gently push the dustbin in the direction shown until you hear a click signaling that it is secured. while rinsing to clean between all gaps. Lightly tap the filter against the sink after rinsing to dislodge any remaining dirty water.
- Page 26 Maintenance Cleaning Rear Filter Cleaning the Rollers Follow these instructions when inspecting and cleaning the * Washing the Rear Filter every two months is recommended 5. When dry, reinstall the filter by aligning it with the unlock Rollers to ensure optimum performance. Inspection and mark, slotting it into the vacuum, then turning clockwise to cleaning should be performed regularly.
- Page 27 Maintenance Cleaning the Motorized Mini-Brush 3. Clean and wash the roller 1. Hold the brush so that the locking mechanism faces you. Use a coin to turn the lock counterclockwise and remove the mechanism. 4. Place the roller vertically and leave it to dry for at least 24 hours.
- Page 28 Maintenance Cleaning the Motorized Mini-Brush Cleaning the Carpet Brush 5. When the roller is thoroughly dry, reinstall it. 1. Hold the brush so that the locking mechanism faces you. Use a coin to turn the lock counterclockwise and remove the mechanism. 2.
- Page 29 Maintenance Cleaning the Carpet Brush 5. Reinstall the roller, as shown. 3. Take the End Cap off the roller and remove any fibers wrapped around either part. Roller End Cap 6. Hold the brush, so the locking mechanism faces you. Place the roller in position then use a coin to turn the lock counterclockwise and lock it in place.
-
Page 30: Power Supply
Basic parameters Vacuum Name Parameters Model H6M1A Dimensions 284mm x 111mm x 221mm Battery 22.2V/3610mAh(TYP) Lithium battery Weight Approx. 1.4kg 22.2V Rated Voltage Rated Power 420W Power Supply Name Parameters BTC03RR Model Dimensions 65.2mm x 36.3mm x 83.1mm 100-240V ~ 0.6A... -
Page 31: Troubleshooting
Troubleshooting Error messages displayed onscreen If the vacuum is not operating properly, the screen will display an error message. Check the screen and then read the table below to resolve any issues. Error Severity Screen Solution Low battery. Recharge before use. Low battery. - Page 32 Address of Manufacturer: Floor 6, Suite 6016, 6017, 6018, Building C, Kangjian Baosheng Plaza, No.8 Heiquan Road, Haidian District, Bejing, P.R.CHINA For more product information, visit our website: www.roborock.com For after-sales support, email our after-sales service team: US/Non-Europe Support: support@roborock.com...
Need help?
Do you have a question about the H6M1A and is the answer not in the manual?
Questions and answers