Table of Contents
Advertisement
Available languages
Available languages
Advertisement
Table of Contents

Subscribe to Our Youtube Channel
Related Manuals for Roborock H6


Summary of Contents for Roborock H6
- Page 1 מדריך הוראות לשואב אבק BTC03RR לשימוש אך ורק עם מטען/ספק הכוח המקורי שמספרו...
- Page 2 ידע בטיחותי ידע בטיחותי .קראו מדריך זה בקפידה טרם השימוש במוצר, ושמרו אותו אצלכם לעיון בעתיד .הגבלות לגבי השימוש במוצר • אין לעשות שימוש בשואב אבק זה בסביבה פתוחה, מסחרית או תעשייתית. מוצר זה נועד .לשימוש ביתי ובתוך מכונית בלבד •...
- Page 3 ידע בטיחותי • בעת השימוש בראש מברשת חשמלית, הרחיקו גפיים וחיות מחמד מראשי המברשת .המסתובבת על מנת למנוע פגיעה .• אין לגעת בספק הכוח, או להפעיל את המוצר בידיים רטובות וזאת על מנת למנוע פגיעות .(• אין לשאוב נוזלים מכל סוג שהוא )כגון מים, קולה .(•...
- Page 4 ידע בטיחותי • אין לנגב את המתאם או את תחנת העגינה בעזרת מטלית רטובה ואין לגעת בהם בידיים .רטובות • במידה וכבל החשמל פגום או שבור, הפסיקו מיד את השימוש בו וצרו קשר עם מרכזי .שירות הלקוחות לאחר מכירה • במידה ואין בכוונתכם לעשות שימוש בשואב האבק למשך פרק זמן ארוך, אנא הטעינו אותו...
- Page 5 שואב אבק מסך לחצן מצבים :לחצו על לחצן המצבים לשינוי מצב השאיבה. הערות , המאוורר יפעל במהירות מרבית. חייMAX במצב .הסוללה יתקצרו ואוויר חם עשוי להיפלט החוצה לחצן החזקה לחצו על הדק ההפעלה לתחילת השאיבה. לחצו על לחצן ההחזקה בזמן שהדק ההפעלה לחוץ לכניסה .למצב...
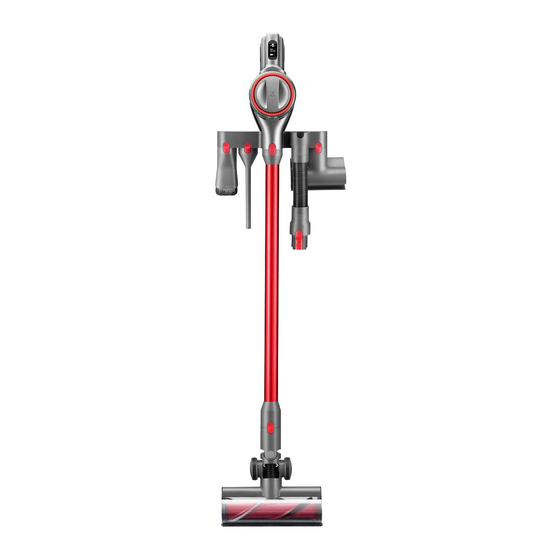
- Page 6 רשימת חלקים כלי בקיע צר מברשת להסרת אבק ספק כוח צינור גמיש ��...
- Page 7 תצוגת מסך . אינץ' המציג מידע רלוונטי בזמן אמתOLED 1.3 זה מצויד במסךRoborock שואב אבק אלחוטי מצבי הכן ומצבי הפעלה במצב פעיל במצב הכן חיווי מצב החזקה מציג את זמן ההפעלה שנותר עבור המצב הנוכחיכאשר בשימוש מציג את הספק הסוללה שנשאר כאשר במצב הכן...
- Page 8 לחצנים לחצן החזקה לחצו על לחצן ההחזקה לכניסה למצב החזקה. סמל ההחזקה יופיע על גבי המסך. לחצו על הדק ההפעלה בזמן שהמכשיר מכוון על מצב החזקה לתחילת השאיבה ואפשרו לו לפעול ברציפות. במצב החזקה, שואב האבק לא יפסיק לפעול עם שחרור ההדק.
- Page 9 התקנה התקנת שואב אבק ואבזרים .אפשרות 1: חברו את המטה לשואב האבק ולאחר מכן חברו אבזר לניתוק לחצו על המנעול .אפשרות 3: חברו את הצינור הגמיש לשואב האבק, לאחר מכן חברו אבזר אפשרות 2: חברו את שואב האבק ישירות *לא ניתן לעשות שימוש באבזרים ממונעים כגון המברשת המזערית לאבזר...
- Page 10 שימוש טעינה בזמן שהסוללה נטענת, הנפשה של טעינה תוצג לצד גובה הספק הסוללה הנוכחי. המסך ייכבה באופן אוטומטי לאחר .דקה של היעדר פעילות :שימו לב 1. בזמן טעינה, תמונת המסך פונה לכיוון המשתמש על מנת לאפשר צפייה .פשוטה וקלה 2. בזמן טעינה, שואב האבק ייכנס למצב טעינה ויפסיק את כל הפונקציות .האחרות...
- Page 11 שימוש שימוש בשואב האבק 1. בעת השימוש במברשת הרצפה או במברשת מזערית ממונעת מחוברת לשואב האבק, המשטחים של חלק מהאריגים עשויים להתקלף או להקשות על פעולת השאיבה. במקרה כזה, אנו ממליצים לכם לעשות שימוש במברשת להסרת אבק או בכלי בקיע .צר...
- Page 12 שימוש שימושים באבזר מברשת :2. כלי בקיע צר :1. מברשת מזערית ממונעת .בקיעים צרים, כולל לוחות פנלים, פינות ומדרגות לניקוי אבק ממיטות, ספות ורהיטים רכים לשם מניעת .הצטברות של קרדית האבק :4. מברשת להסרת אבק ,מיועדת להסרת אבק מספות, כיסאות ורהיטים רכים אחרים .וממשטחים...
- Page 13 שימוש שימושים באבזר מברשת :5. צינור גמיש מתחבר למברשת להסרת אבק או לכלי בקיע צר לניקוי חללים קטנים או צרים כגון מגירות וחללים פנימיים של .מכונית ��...
- Page 14 תחזוקה אחריות על המוצר 2. לריקון פח האשפה, לחצו על פותח פח האשפה שבקדמת הידית בכיוון החץ לפתיחתו, לאחר מכן רוקנו 1. השתמשו בחלקים מקוריים בלבד. השימוש בחלקים לא אותו לתוך פח. את פח האשפה יש לרוקן פעם בשבוע לכל מקוריים...
- Page 15 תחזוקה ניקוי פח האשפה 3. לחצו על הלשונית להוצאת פח האשפה הצמוד לפח .האשפה לאחר ריקונו לשם הוצאת פח האשפה לניקויו מגעי טעינה :שימו לב .אין לנקות את פח האשפה בתכשירי ניקוי, בחומרי הברקה או במטהרי אוויר .אין להכניס את פח האשפה לתוך מדיח כלים או מכשיר חשמלי דומה אחר לשונית...
- Page 16 תחזוקה התקנת פח אשפה ניקוי מכלול המסנן הקדמי והמולטי ציקלון .*את מכלול המסנן הקדמי והמולטי ציקלון יש לנקות לכל הפחות פעם בחודש 1. נתקו את שואב האבק ממקור החשמל טרם ניקויו והימנעו מללחוץ על הדק .ההפעלה במהלך הניקוי 2. בדקו ונקו את המסנן הקדמי בהתאם למדריך באופן סדיר על מנת להבטיח .איכות...
- Page 17 תחזוקה הוצאת מכלול המסנן הקדמי והמולטי 4. שטפו את מכלול המסנן הקדמי והמולטי ציקלון במים .קרים עד שהוא נקי ותנו לו להתייבש ציקלון 2. סובבו את מכלול המולטי ציקלון כנגד כיוון השעון כמוצג .באיור 5. השאירו בצד למשך 42 שעות על מנת לאפשר למכלול .המסנן...
- Page 18 תחזוקה 3. יישרו את מערך המולטי ציקלון ואת שואב האבק כמוצג .באיור וסובבו אותם בכיוון השעון לנעילתם במקום .1. מקמו את המסנן הקדמי, כמוצג 2. מקמו את המסנן הקדמי מצד ימין של מכלול המולטי ציקלון ודחפו אותו קלות לצד שמאל לשחרור פונקציית "נעילת הגנה .4.
- Page 19 תחזוקה התקנת מכלול המסנן הקדמי והמולטי 2. שטפו את החלק הפנימי של המסנן האחורי במים, תוך שאתם מסובבים אותו בזמן ניקוי בין המרווחים. הקישו ציקלון קלות את המסנן כנגד הכיור לאחר שטיפתו וזאת על מנת .לשחרר שאריות של מים מלוכלכים 5.
- Page 20 תחזוקה ניקוי מברשת הרצפה ניקוי מסנן אחורי .1. כוונו את סמל מברשת הרצפה לעצמכם, כמוצג באיור .*מומלצת שטיפה של המסנן האחורי בכל חודשיים השתמשו במטבע לסיבוב המנעול ב-09 מעלות בכיוון 5. כאשר המסנן יבש, התקינו אותו באמצעות יישור שלו עם .השעון...
- Page 21 תחזוקה ניקוי מסנן אחורי ,5. לאחר התקנה חוזרת של מכסה הקצה כמוצג באיור התקינו את הרולר וסובבו את מכסה הקצה חזרה למצב .3. הוציאו סיבים שנכרכו סביב הרולר ומכסה הקצה .סגור רולר מכסה קצה 6. סובבו את המנעול 09 מעלות בכיוון השעון למצב נעול .לאבטחת...
- Page 22 תחזוקה ניקוי המברשת המזערית הממונעת 3. נקו ושטפו את הרולר 1. החזיקו את המברשת כך שמנגנון הנעילה פונה לכיוון שלכם. השתמשו במטבע לסיבוב המנעול כנגד כיוון השעון .והוציאו את המנגנון 4. מקמו את הרולר בצורה אנכית והשאירו אותו .לייבושלמשך 42 שעות לכל הפחות .2.
- Page 23 תחזוקה ניקוי המברשת המזערית הממונעת .5. ברגע שהרולר יבש לחלוטין, התקינו אותו חזרה למקומו רולר מנעול 6. החזיקו את המברשת כך שמנגנון הנעילה פונה לכיוון שלכם. מקמו את הרולר במקום ולאחר מכן השתמשו .במטבע לסיבוב המנעול כנגד כיוון השעון לנעילתו במקום ��...
- Page 24 מדדים שם H6M1A דגם 122מ"מX 111מ"מX 482מ"מ מידות ( סוללת ליתיוםTYP) 3610 mAh /2.22 וולט סוללה כ-4.1 ק"ג משקל 2.22 וולט מתח מדורג 024 וואט הספק מדורג מדדים שם BTC03RR דגם 3.301מ"מX 3.63מ"מX 2.56מ"מ מידות 042-001 וולט ~ 6.0 אמפר כניסה...
- Page 25 איתור תקלות ופתרון בעיות הודעות שגיאה מוצגות על גבי המסך במידה ושואב האבק אינו פועל בצורה תקינה, המסך יציג הודעת שגיאה. בדקו את המסך .ולאחר מכן קראו את הטבלה שלהלן לפתרון בעיות פתרון מסך חומרת השגיאה .סוללה חלשה. הטעינו מחדש לפני השימוש .סוללה...
- Page 26 :אנו מצהירים בזאת בע"מBeijing Roborock Technology חברת היצרן ,Heiquan , מספר 8 כבישKangjian Baosheng , כיכרC קומה 6, חדר 6106, 7106, 8106, בניין כתובת סיןP.R , בייג'יןHaidian מחוז :שהצהרת תאימות זאת ניתנת באחריותנו הבלעדית, ושהמוצרים שואב אבק ידני ואבזרים...
- Page 27 1. תאימות אלקטרומגנטית – דרישות עבור מכשירי חשמל ביתיים, כלי עבודה חשמליים ומכשירים דומים אחרים חלק 1: פליטה 2014/30 תקןEMC 2. תאימות אלקטרומגנטית – דרישות עבור מכשירי חשמל ביתיים, כלי עבודה חשמליים ומכשירים EN 55014-1:2006+A1+A2 .1 .דומים אחרים חלק 2: חסינות – תקן משפחת מוצר EN 55014-1:2017 ( –...
- Page 28 1. בטיחות של שנאים חשמליים, ספקי כוח, ריאקטורים ומוצרים דומים – חלק 1: דרישות כלליות 2011/65 תקן של מתח נמוך ובדיקות 1100 , ספקי כוח ומוצרים דומים עבור מתחים חשמליים של עדreactors ,2. בטיחות של שנאים EN 61558-1:2005+A1:2009 .1 וולט - חלק 61-2: דרישות מסוימות ובדיקות עבור ספקי כוח עם מצב מתג ושנאים עבור ספקי כוח EN 61558-2-16:2009+A1:2013 .2 .עם...
- Page 29 ( EU ) יחידה ערך ודיוק מידע שפורסם .Beijing Roborock Technology Co., Ltd , : כתובתFloor 6, Suite 6016, 6017, 6018 Building C, Kangjian Baosheng Plaza, No. 8 Heiquan Road, Haidian District, Beijing P.R. CHINA 06276460380101119 : מספר רישום מסחריB :דגם...
- Page 30 מידע אודות WEEE .EU -השלכה נכונה של מוצר זה. סימון זה מציין כי אין להשליך מוצר זה ביחד עם פסולת ביתית אחרת ברחבי מדינות ה למניעת נזק אפשרי לסביבה או לבריאות האדם כתוצאה מהשלה בלתי מבוקרת של פסולת, מחזרו אותו בצורה אחראית לשם קידום...
- Page 31 :הוראות בטיחות לספק כוח / מטען .מנעו חדירת מים או לחות. הרחיקו אותו מטמפרטורות קיצוניות כגון ליד רדיאטור או תנור חם או מקום הפתוח לשמש .'הרחיקו אותו מנרות דולקים, סיגריות וסיגרים דלוקים, להבה גלויה וכו מנעו נפילת עצמים או התזות נוזלים כולל חומצות כלשהן על המטען. חברו אותו רק לשקע המספק את רמת מתח המסומן על המטען.
- Page 32 :בכל שאלה נוספת ולצרכי שירות במידה ורכשתם את השואב ברשת באג אנא פנו לשירות הלקוחות של רשת באג בדוא"ל ' או בטלsupport@bug.co.il 1-700-707-202 במידה ורכשתם את השואב ברשת אחרת אנא פנו למוקד השירות של מודן אלקטרוניקה בטל' 2772226-80 או בדוא"ל support@modan.co.il ��...
- Page 33 Roborock handheld cordless vacuum cleaner instruction manual...
- Page 35 Safety Information Read this manual carefully before use, and retain it for future reference. Usage Restrictions • Do not use this vacuum in outdoor, commercial, or industrial environments. It is intend- ed for home and in-car use only. • Do not store the vacuum anywhere in the car to avoid high or low temperatures affect- ing its battery life.
- Page 36 Safety Information heads to avoid injury. • Do not touch the power supply, nor operate the product with wet hands to prevent injuries. • Do not vacuum any liquids (such as water, cola). • Do not vacuum any burning or smoking substances (such as non-extinguished ciga- rette butts).
- Page 37 Safety Information • Do not charge the vacuum or install the docking station near heat sources or in humid areas (such as radiators or bathrooms). • Do not wipe the adapter or the docking station with a wet cloth, nor touch them with wet hands.
- Page 38 Product introduction Vacuum Rear Filter Screen Mode Button • Press the Mode button to change vacuum mode * In MAX mode, the fan will run at full speed. Battery life will shorten and hot air may be emitted. Sustain Button •...
- Page 39 Parts List Power Supply Crevice Tool Dusting Brush Floor Brush Motorized Mini-Brush Baton Flex Tube ��...
- Page 40 Screen display This Roborock cordless vacuum is equipped with a 1.3-inch OLED display that shows relevant information in real-time. Standby and operating modes Active Standby Sustain mode indicator Displays the remaining run time for current mode when in use Displays the remaining power when in standby mode...
- Page 41 Buttons Sustain Button Press the Sustain button to enter Sustain mode. The Sustain icon will appear on screen. Squeeze the trigger while in Sustain mode to start the vacuum and enable it to run continuously. In Sustain mode, the vacuum will not stop when the trigger is released.
- Page 42 Installation Vacuum and accessories setup Option 1 Connect the Baton to the vacuum, then attach an accessory. To disconnect, press the lock Click Click Option 2 Connect the vacuum directly to an accessory Option 3 Connect the flex tube to the vacuum, then attach an accessory.
- Page 43 Charging When the battery is charging, a charging animation will show alongside the current battery level. The screen will turn off automatically after 1 minute of inactivity. Notes: 1. When charging, the screen image faces the user for easy viewing. 2. When charging, the vacuum will enter Charging mode and stop all other functions. 3.
- Page 44 Using the vacuum 1. When using the Floor brush or motorized mini-brush on the vacuum cleaner, the surfaces of some fabrics may pill or be difficult to vacuum. If this occurs, it is recommended that you use the dusting brush or crevice tool to vacuum these surfaces. 2.
- Page 45 Brush Accessory Uses 1. Crevice Tool: 3. Motorized Mini-Brush: Narrow crevices, including skirting boards, corners, Cleaning dust from beds, sofas, and soft furnishings to and stairs. avoid mites. 2. Dusting Brush: 4. Floor Brush: Dusting sofas, chairs, and other soft furnishings, and flat Connect to the Baton for cleaning parquet, tiles, and other surfaces such as desks and shelves.
- Page 46 Brush Accessory Uses 5. Flex Tube: Connect to Dusting Brush or Crevice Tool to clean small or narrow spaces such as drawers and car interiors. ��...
- Page 47 Maintenance Product Warranty 2. To empty the dustbin, push the Dustbin Opener on the front of the handle in the direction of the arrow to open it, 1. Only use original parts. The use of non-original parts may then empty it into a bin. The dustbin should be emptied at affect your eligibility for warranty services.
- Page 48 Maintenance Cleaning the dustbin 3. Push the Dustbin Removal Latch next to the dustbin after emptying it to remove the dustbin for cleaning. Charging Contacts Note: Do not clean the dustbin with detergents, polishes, or air fresheners. Do not put the dustbin in a dishwasher or any similar appliance. 5.
- Page 49 Maintenance Dustbin Installation Cleaning the Front Filter and Multi-Cy- clone Assembly * Front Filter and Multi-Cyclone Assembly should be cleaned at least once a month 1. Disconnect the vacuum from power before cleaning it, and avoid squeezing the Power Trigger during cleaning. 2.
- Page 50 Maintenance Removing the Front Filter and Multi-Cyclone Assembly 2. Rotate Multi-Cyclone Assembly counterclockwise as shown. 4. Rinse the Front Filter and Multi-Cyclone Assembly with cold water until clean, then allow to dry. 5. Leave 24 hours for the Front Filter and Multi-Cyclone Assembly to dry thoroughly.
- Page 51 Maintenance Front Filter and Multi-Cyclone Assembly Installation 1. Position the Front Filter, as shown. 3. Align the Multi-Cyclone Array and the vacuum as shown then turn them clockwise to lock them in place. 2. Place the Front Filter from the right side of the multi-cy- clone assembly and lightly push it to the left to disengage the “No Filter Protection Lock”.
- Page 52 Maintenance Front Filter and Multi-Cyclone Assembly Installation 5.Gently push the dustbin in the direction shown until you 2. Rinse the inside of the Rear Filter with water, rotating it while rinsing to clean between all gaps. Lightly tap the filter hear a click signaling that it is secured.
- Page 53 Maintenance Cleaning Rear Filter Cleaning the Floor Brush * Washing the Rear Filter every two months is recommended 1. Point the Floor Brush icon towards yourself, as shown. 5. When dry, reinstall the filter by aligning it with the unlock Use a coin to turn the lock 90 degrees clockwise to unlock.
- Page 54 Maintenance Cleaning Rear Filter 5. After reinstalling the End Cap as shown, install the roller and Rotate End Cap back to the closed position. 3. Remove any fibers wrapped around the roller and the End Cap. Roller End Cap 6. Turn the lock clockwise 90° to the locked position to secure the roller.
- Page 55 Maintenance Cleaning the Motorized Mini-Brush 3. Clean and wash the roller 1. Hold the brush so that the locking mechanism faces you. Use a coin to turn the lock counterclockwise and remove the mechanism. 4. Place the roller vertically and leave it to dry for at least 24 hours.
- Page 56 Basic parameters Maintenance Cleaning the Motorized Mini-Brush Vacuum 5. When the roller is thoroughly dry, reinstall it. Name Parameters Model H�M�A Dimensions ���mm x ���mm x ���mm Battery ��.�V/����mAh(TYP) Lithium battery Weight Approx. �.�kg Rated Voltage ��.�V Roller Lock Rated Power ���W 6.
- Page 57 Troubleshooting Error messages displayed onscreen If the vacuum is not operating properly, the screen will display an error message. Check the screen and then read the table below to resolve any issues. Error Severity Screen Solution Low battery. Recharge before use. Low battery.
- Page 58 EU Declaration of Conformity Hereby we: Manufacturer Beijing Roborock Technology Co., Ltd. Floor 6, Suite 6016, 6017, 6018, Building C, Kangjian Baosheng Plaza, Address No.8 Heiquan Road, Haidian District, Beijing P.R. CHINA declare that this DoC is issued under our sole responsibility and that the products:...
- Page 59 EU Declaration of Conformity 1. Electromagnetic Compatibility-Requirements for household appliances, electric tools and similar apparatus Part 1: Emission EMC Directive 2014/30/EU 2. Electromagnetic compatibility – Requirements for household appliances, electric tools and 1.EN 55014-1:2006+A1+A2 similar apparatus Part 2: Immunity – Product family standard EN 55014-1:2017 3.
- Page 60 EU Declaration of Conformity 1.Safety of power transformers, power supplies, reactors and similar products –Part 1: General requirements and tests Low Voltage Directive 2014/35/EU 2.Safety of transformers, reactors, power supply units and similar products for supply 1.EN 61558-1:2005+A1:2009 voltages up to 1 100 V – 2.EN 61558-2-16:2009+A1:2013 Part 2-16: Particular requirements and tests for switch mode power supply units and transformers for switch mode power supply units...
- Page 61 EU Declaration of Conformity ( (EU) 2019/1782 ) Information published Value and precision Unit Beijing Roborock Technology Co., Ltd. Address: Floor 6, Suite 6016, 6017, 6018, Building C, Kangjian Baosheng Plaza,No. 8 Heiquan Road, Haidian District, Beijing P.R. CHINA commercial registration number:...
- Page 62 WEEE Information Correct Disposal of this product . This marking indicates that this product should not be disposed with other household wastes throughout the EU. To prevent possible harm to the environment or human health from uncontrolled waste disposal, recycle it responsibly to promote the sustainable reuse of material resources.
- Page 63 Warranty Information The warranty period depends on the laws of the country in which the product is sold, and the warranty is the responsibility of the seller. The warranty only covers defects in material or workmanship. The repairs under warranty may only be carried out by an authorized service centre. When making a claim under the warranty, the original bill of purchase (with purchase date) must be submitted.
- Page 64 Address of Manufacturer: Floor �, Suite ����, ����, ����, Building C, Kangjian Baosheng Plaza, No.� Heiquan Road, Haidian District, Bejing, P.R.CHINA For more product information, visit our website: www.roborock.com For after-sales support, email our after-sales service team: US/Non-Europe Support: support@roborock.com...
Need help?
Do you have a question about the H6 and is the answer not in the manual?
Questions and answers