Table of Contents
Advertisement
Advertisement
Table of Contents

Subscribe to Our Youtube Channel
Related Manuals for Analytik Jena PlasmaQuant PQ 9000


Summary of Contents for Analytik Jena PlasmaQuant PQ 9000
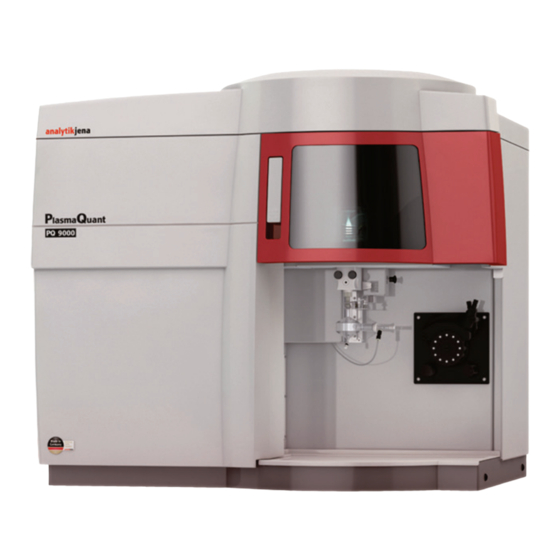
- Page 1 PlasmaQuant PQ 9000 High-Resolution Array ICP OES Operating manual...
- Page 2 Copyrights and trademarks PlasmaQuant is a registered trademark of Analytik Jena AG. Microsoft, Windows 7, MS Excel are registered trademarks of Microsoft Corp. The identification with ® or TM is omitted in this manual. Documentation number: 13-5850-002-23 Edition –...
-
Page 3: Table Of Contents
Safety instructions General notes......................9 Symbols and signal words used ................9 Safety markings on the PlasmaQuant PQ 9000 ............. 9 Requirements for the operating personnel ............10 Safety instructions, transport and commissioning ..........11 Safety instructions - operation ................11 2.6.1... - Page 4 Initial operation of the automatic sampler ............. 37 Operation Switching on the PlasmaQuant PQ 9000 and igniting the plasma ....... 40 Switching off the PlasmaQuant PQ 9000 ............. 41 Using the plasma deactivation switch in the event of faults ......... 42 Starting a measurement routine................
- Page 5 Fault removal ......................63 Equipment faults and analytical problems ............66 Transport and storage 10.1 Preparing the PlasmaQuant PQ 9000 for transport ..........70 10.2 Ambient conditions for transport and storage ............71 10.3 Recommissioning after transport or storage ............71 10.4...
- Page 6 Connections for cooling water and gases ............31 Figure 12 Plug-in connectors for gas connections ............31 Figure 13 Ventilation openings and air filter on the rear of the PlasmaQuant PQ 9000 .. 32 Figure 14 Data on the type plate ..................32 Figure 15 Serial number of the device in the plasma compartment ........
- Page 7 Summaries Summary 1 Environmental conditions for operation ............20 Summary 2 Power supply ..................... 21 Summary 3 Gas supply ......................21 Summary 4 Exhaust unit requirements ................22 Summary 5 Cooling circuit requirements ................22 PlasmaQuant PQ 9000 Edition 05/2014...
- Page 8 Summaries Edition 05/2014 PlasmaQuant PQ 9000...
-
Page 9: Basic Information
The PlasmaQuant PQ 9000 is intended for operation by qualified specialist personnel observing this user manual. The user manual informs about the design and function of the PlasmaQuant PQ 9000 and provides the necessary know-how for the safe handling of the device and its components to personnel familiar with analysis. -
Page 10: Warranty And Liability
PlasmaQuant PQ 9000 other than intended improper commissioning, operation and servicing of the device modifications to the equipment without prior consultation with Analytik Jena AG operation of the device with faulty safety equipment or improperly fitted safety and ... -
Page 11: Safety Instructions
Safety instructions General notes For your own safety and to ensure error-free and safe operation of the PlasmaQuant PQ 9000, please read this chapter carefully before using the appliance. Observe all safety notes listed in this user manual and all messages and notes displayed by the control and analysis program on the monitor. -
Page 12: Requirements For The Operating Personnel
The following notice sign is attached to the rear of the PlasmaQuant PQ 9000: Requirements for the operating personnel The PlasmaQuant PQ 9000 must only be operated by qualified specialist personnel instructed in the use of the device. -
Page 13: Safety Instructions, Transport And Commissioning
2.6.3 Safety instructions - electrical equipment Work on the electrical components of the PlasmaQuant PQ 9000 may only be performed by a qualified electrical technician according to applicable electro-technical regulations. Lethal voltages may occur in the device! Contact with live components may cause death, serious injury or painful electrical shock. -
Page 14: Hazards Caused By Plasma Operation
(→ section "Energy supply" p.20). The PlasmaQuant PQ 9000 and its system components must always be switched off before being connected to the mains. -
Page 15: Behavior In Case Of Ring Plasmas
Additionally, toxic byproducts may escape from the samples and during sample processing. Observe the following notes: The PlasmaQuant PQ 9000 may only be operated with an active exhaust unit. The exhaust unit must be switched on before igniting the plasma. -
Page 16: Handling Of Samples, Auxiliary And Operating Materials
This list is in so far incomplete that other solvents could also come into consideration for use in the PlasmaQuant PQ 9000. In cases of uncertainty about an unnamed fluid, this may only be used when the manufacturer has confirmed that there is no danger to safety. -
Page 17: Safety Instructions - Maintenance And Repair
Therefore, the operator may only carry out the tasks listed in the chapter "Service and care". The exterior of the PlasmaQuant PQ 9000 may only be cleaned with a damp, not dripping, cloth. Use only water and, if required, commercial surfactants. -
Page 18: Specification
Specification Specification Technical data 3.1.1 PlasmaQuant PQ 9000 data Optical system Monochromator Echelle grating double-monochromator with a focal length of F=380 mm and variable gap; pre-monochromator with quartz prism, wavelength selection via additional reflected neon radiator Wavelength range 160 – 900 nm Wavelength accuracy <... - Page 19 Temperature: -40°C to +70°C Use desiccant Dimensions and weights Mass 170 kg Dimensions (WxDxH) 987 mm x 853 mm x 937 mm Analytic data Type of sample Liquid Type of nebulizer Concentric nebulizer Spray chamber Cyclone chamber PlasmaQuant PQ 9000 Edition 05/2014...
-
Page 20: Control Computer Data
510 mm x 285 mm x 490 mm Mass 15 kg Supply voltage 100 - 240 V AC Frequency 50/60 Hz Fuse Typical average power consumption 75 VA Racks 3 for sample cups Sample cups 2 for special cups Wash bottle Edition 05/2014 PlasmaQuant PQ 9000... -
Page 21: Guidelines And Standards
EC directives The PlasmaQuant PQ 9000 is built and tested according to standards that fulfill the requirements stipulated by the EC directives 2006/95/EC and 2004/108/EC. Each device leaves the manufacturer in a pristine and technically safe state. To maintain this condition and to ensure safe operation, the operator must strictly observe the safety and operating instructions contained in this manual. -
Page 22: Installation Conditions
The mains connection must be protected on the input (building) side with a 35 A slow-blow fuse and is required to be installed prior to delivery of the PlasmaQuant PQ 9000 near the assembly point. The instrument cable is 3 m long. The CEE surface socket (2 pole + E Blue 5UR 3 206-2 220/32) is supplied according to the terms of delivery. -
Page 23: Gas Supply
If the gas is supplied by pressure cylinders, these must be secured to the wall in an upright position with cylinder mounts outside the laboratory space. The following gases are used in conjunction with the PlasmaQuant PQ 9000 Argon as the gas for the torch (plasma gas, additive gas, nebulizer gas) ... -
Page 24: Exhaust Unit
Switch on the exhaust unit prior to igniting the plasma. Direct the waste air into the atmosphere and avoid blockages! Correct exhaustion requires the connection of an extraction hose to the PlasmaQuant PQ 9000 smokestack. The exhaust unit is meant to remove hazardous gases generated during plasma operation, such as ozone or nitrous gases. -
Page 25: Device Layout And Space Requirements
Installation conditions Device layout and space requirements The PlasmaQuant PQ 9000 is a compact device conceived for table-top operation. The space required is a function of all components needed for the measurement. The automatic sampler is installed next to the base instrument. Additional space may be required for a PC and possibly a printer. -
Page 26: Figure 1 Dimensions Of The Plasmaquant Pq 9000 - Front View
Installation conditions Figure 1 Dimensions of the PlasmaQuant PQ 9000 - front view Figure 2 Dimensions of the PlasmaQuant PQ 9000 - top view Edition 05/2014 PlasmaQuant PQ 9000... -
Page 27: Function And Setup Of The Plasmaquant Pq 9000
The exhaust heat of the plasma is dissipated partly by the recirculating chiller and partly by the exhaust unit. Setup of the PlasmaQuant PQ 9000 Essentially the PlasmaQuant PQ 9000 consists of the following components − Components for plasma generation (HF generator, induction coil, torch) −... -
Page 28: Figure 3 Sampling Compartment And Plasma Compartment In The Plasmaquant Pq 9000
Sampling compartment and plasma compartment in the PlasmaQuant PQ 9000 HF generator The PlasmaQuant PQ 9000 uses a free-running 40 MHz HF generator (High-Frequency Generator). The HF generator transfers power ranging from 700 to 1700 W into the plasma assisted by the high-performance coil. Fully automated matching of the power output to the actual sampling loads in the plasma enables ultimate consistency of plasma conditions. -
Page 29: Figure 4 Concentric Nebulizer And Spray Chamber
Function and setup of the PlasmaQuant PQ 9000 Figure 4 Concentric nebulizer and spray chamber Torch The torch has a three-shell construction and comprises an outer tube, an inner tube and the inner injector tube. The outer tube, in conjunction with the bonnet inserted into the coil, electrically insulates the plasma from the induction coil and shields the plasma from the ambient air. -
Page 30: Figure 6 Demountable Torch
Optical system In the PlasmaQuant PQ 9000, analyte emission in plasma is observed from two directions, axial and radial (DualView PLUS). The emission radiation is selectively coupled via the transfer optics from one of the two directions to the monochromator. The working range is increased by attenuating both directions of observation. -
Page 31: Automatic Sampler
Function and setup of the PlasmaQuant PQ 9000 Automatic sampler Figure 8 Automatic sampler The automatic sampler allows fully automated routine analysis. It can be equipped with three sample racks and two racks each with 6 special samples, e.g., standards. The following sample... -
Page 32: Installation And Commissioning
The green power switch and the red plasma deactivation switch are located on the left-hand side of the PlasmaQuant PQ 9000. Also on the left side, under a cover plate, there are the connections for PC and accessories as well as the media connections for gas and the cooling water inlet and outlet. -
Page 33: Figure 10 Interfaces And Fuses On The Plasmaquant Pq 9000
Connections for cooling water and gases In the PlasmaQuant PQ 9000, argon is used as a gas for the torch, the nebulizer and for purging the spectrometer. The purge gas is then directed via the cone for axial observation as a counter gas to avoid a heavy load being placed on the cone and plasma window by the plasma torch. -
Page 34: Figure 13 Ventilation Openings And Air Filter On The Rear Of The Plasmaquant Pq 9000
Air filter Exhaust vent Figure 13 Ventilation openings and air filter on the rear of the PlasmaQuant PQ 9000 The electrical connection data can be found on the type plate on the terminal strip. Device type Voltage... -
Page 35: Connections In The Plasma Compartment And In The Sampling Compartment
Waste hose connector on the spray chamber Sample aspiration hose on the nebulizer Argon hose Hose pump Spray chamber with nebulizer connected Figure 17 Sampling compartment with torch holder, spray chamber, nebulizer and hose pump PlasmaQuant PQ 9000 Edition 05/2014... -
Page 36: Installing The Plasmaquant Pq 9000
Installation and commissioning Installing the PlasmaQuant PQ 9000 The PlasmaQuant PQ 9000 is delivered directly to the final instrument location by a transportation company. The delivery by this company requires the presence of a person responsible for instrument installation. It is imperative that all persons designated to operate the device are present during the briefing by the service technician. - Page 37 Adjust the torch with the manual height adjustment (2) so that the tip of the injector in the torch (1) is situated approx. 1 – 2 mm below the lowermost winding of the induction coil. PlasmaQuant PQ 9000 Edition 05/2014...
- Page 38 1.5 times as wide as the sample pump hose to ensure that the sample solution separated from the aerosol is evacuated quickly and the spray chamber does not fill up. Pump hose Inside diameter Designation (stopper) Sample supply 0.762 mm/0.03 inch black/black Waste 1.143 mm/0.045 inch red/red Edition 05/2014 PlasmaQuant PQ 9000...
-
Page 39: Initial Operation Of The Automatic Sampler
Figure 19 Connections on the right side of the automatic sampler For the use of the automatic sampler on the PlasmaQuant PQ 9000, only the connections described in Figure 19 are required. All other connections and displays are for service purposes or not in use. - Page 40 Clamp the hose between two stoppers in the hose block of the pump. Attention! Note the pump direction! The pump moves in a clockwise direction. Fasten the clamping bracket with the locking arm (3) over the pump hose. Edition 05/2014 PlasmaQuant PQ 9000...
- Page 41 12. Connect the hose to the sample hose of the PlasmaQuant PQ 9000. 13. Connect the PlasmaQuant PQ 9000 and the automatic sampler to the interface cable ("Autosampler" on the PlasmaQuant PQ 9000 and "Host" on the automatic sampler.
-
Page 42: Operation
Operation Operation Switching on the PlasmaQuant PQ 9000 and igniting the plasma Switch on the PlasmaQuant PQ 9000 as follows: Switch on the PlasmaQuant PQ 9000 at the power switch. Switch on the PC at the power switch and start the operating system. -
Page 43: Switching Off The Plasmaquant Pq 9000
Before the next ignition attempt, verify that the sample hose is immersed in the wash solution and that the gas supply and the recirculating chiller are working properly. The plasma ignites and the hose pump starts. The PlasmaQuant PQ 9000 is ready for measurement after a brief plasma warm-up period. -
Page 44: Using The Plasma Deactivation Switch In The Event Of Faults
No communication with the PC Wait 2 min. for the device to cool down before switching off the PlasmaQuant PQ 9000 at the power switch. After the plasma has been switched off manually or an automatic shut-down caused by one of the device safety circuits, check if all switch-on conditions are met before reigniting the plasma. - Page 45 If you use an automatic sampler, the measurement runs automatically. In the case of manual sample feed without an automatic sampler, follow the instructions for the provision of samples displayed on the screen. PlasmaQuant PQ 9000 Edition 05/2014...
-
Page 46: Maintenance And Care
PlasmaQuant PQ 9000. CAUTION! Electric shock! It is mandatory to switch off the PlasmaQuant PQ 9000 and pull the mains plug prior to all maintenance and care work. The safe disconnection of the PlasmaQuant PQ 9000 from the mains can only be achieved by pulling out the mains plug. -
Page 47: Maintenance Intervals
If there are residues in the tray tray Sample hose/ Check that they are free of Daily cannulae sediment build-up Sediments can falsify measurement results Wash cup Clean Weekly Pump hose Check for flexibility and Daily, tightness replace if necessary PlasmaQuant PQ 9000 Edition 05/2014... -
Page 48: Base Device Maintenance
Pull out the spring bolt at the height adjustment and allow the carriage with the torch on the adjusting rail to slide carefully down. Remove the fork clamp and take off the spray chamber. Carefully place the spray chamber to one side. Edition 05/2014 PlasmaQuant PQ 9000... - Page 49 Push the O-ring (2) about 1 cm onto the wide side of the injector. 10. Push the injector (4) in the holder (3) and screw the connecting piece (1) on as far as it will go. This will seal and adjust the injector properly. PlasmaQuant PQ 9000 Edition 05/2014...
-
Page 50: Replacing The Torch Body
Unscrew both connections for the argon gas supply at the rear of the holder. Pull the torch body from the holder. Remove any shards if necessary. Edition 05/2014 PlasmaQuant PQ 9000... - Page 51 The upper edge of the closure must be flush with the surface of the holder. Do not screw the screw any further under any circumstances! PlasmaQuant PQ 9000 Edition 05/2014...
-
Page 52: Cleaning The One-Piece Torch
Carefully place the spray chamber to one side. Unscrew the torch from the carriage (see the section "Cleaning the demountable torch" p. 46). Unscrew the clamp screw from the torch holder. Unscrew the stopper from the gas connection. Edition 05/2014 PlasmaQuant PQ 9000... - Page 53 12. Insert the O-ring into the gas connection of the holder and press it lightly against the torch wall. PlasmaQuant PQ 9000 Edition 05/2014...
-
Page 54: Cleaning The Nebulizer
O-ring. Screw the nebulizer holder on the syringe. Push the nebulizer with the tip first into the holder until the lateral carrier gas connection comes to rest in the holder groove. Edition 05/2014 PlasmaQuant PQ 9000... -
Page 55: Cleaning The Sampling Compartment And The Plasma Compartment
Select 3 lines, one line each in the low UV range, in the medium and in the high wavelength range. For a QC sample, determine the intensities at these 3 wavelengths and record the results in a QC card or a table. PlasmaQuant PQ 9000 Edition 05/2014... - Page 56 Only slide the window as close to the torch as possible if you want to achieve the lowest possible detection limits in the vacuum UV with radial observation. There is then a risk of the window fogging up more quickly, causing a drift as a result. Edition 05/2014 PlasmaQuant PQ 9000...
- Page 57 This requires the deflection mirror to be dismantled. Unscrew the two cover retaining screws. Remove the cover and set it aside. Unscrew the 4 screws on the deflection mirror. PlasmaQuant PQ 9000 Edition 05/2014...
-
Page 58: Checking The Gas System For Leaks
Checking the gas system for leaks Check for leak tightness in the scope of the weekly safety check or before placing the PlasmaQuant PQ 9000 into operation if the device has been previously disconnected from the gas supply system. For this purpose, close the shut-off valve of the gas supply system and check the pressure at the downstream manometer. -
Page 59: Changing Fuses
Reattach the cover. Place the cover plate on the bolts on the floor plate and press it into the mounting at the top. Switch on the PlasmaQuant PQ 9000 at the power switch. In case of repeated fuse failure, inform the service department at Analytik Jena AG. PlasmaQuant PQ 9000 Edition 05/2014... -
Page 60: Replacing The Air Filter Of The Pq 9000
8.2.10 Replacing the air filter of the PQ 9000 The air inlet filter of the PlasmaQuant PQ 9000 is located at the rear of the device. Replace the filter if it is very dirty. Pull the dirty filter from the holder and insert a new filter. -
Page 61: Maintenance Of The Automatic Sampler
Switch off the automatic sampler at the power switch. Disconnect the connection between the sample hoses of the automatic sampler and the PlasmaQuant PQ 9000. Carefully pull the sample hose from the hose guides on the automatic sampler. Unscrew the cannula from the holder on the automatic sampler. -
Page 62: Clean-Up After Cup Overflow
Pull out the fuse holder. To do so, insert a screwdriver blade into the slot in the fuse holder and carefully pry out the holder. Replace defective mains fuses. Use only fuses of the type T 5A H 250V, 5 x 20mm. Edition 05/2014 PlasmaQuant PQ 9000... -
Page 63: Maintenance Of The Recirculating Chiller
Switch on the recirculating chiller again and allow to run until the coolant flow ends and only spray comes out. − Reconnect the hose to the inlet connection on the recirculating chiller. − Unscrew the sealing cap from the filler opening of the tank and insert the funnel. PlasmaQuant PQ 9000 Edition 05/2014... - Page 64 Remove the funnel and seal the filling opening with the screw cap. − Confirm the closing step in the wizard. Wait for the message in the wizard indicating that the coolant has been changed. Exit the wizard. Edition 05/2014 PlasmaQuant PQ 9000...
-
Page 65: Fault Removal
If such problems occur frequently, the service department of Analytik Jena AG must always be informed. System monitoring takes place as soon as the PlasmaQuant PQ 9000 is switched on. Any errors that occur are displayed in a window after start-up. - Page 66 Ar via − The plasma is flickering and unstable nebulizer gas due to the sample matrix − Dilute the sample matrix − Adjust the plasma conditions Edition 05/2014 PlasmaQuant PQ 9000...
- Page 67 Cooling water stopped because temp. is too low (<20 °C out). Please wait and try again. Cause Remedy − The cooling temperature setting at the − Set the recirculating chiller to a cooling recirculating chiller is too low temperature of min. 16°C, wait briefly and repeat ignition PlasmaQuant PQ 9000 Edition 05/2014...
-
Page 68: Equipment Faults And Analytical Problems
Check with Na solution (1 g/L) – if no plasma coloring (orange) is observed: − Check the injector tip for deposits and clean it − Increase the distance between the injector and plasma (move the torch down on the height adjustment or increase auxiliary gas flow) Edition 05/2014 PlasmaQuant PQ 9000... - Page 69 The pump hose is new − Wait until hose delivery is stable − The spray chamber is filled − Empty the spray chamber − Check the pump hose for drainage; if necessary, select a larger cross-section PlasmaQuant PQ 9000 Edition 05/2014...
- Page 70 If the argon nozzle is clogged dilute the measurement solutions or use an argon humidifier − The nebulizer gas flow is not − Optimize the nebulizer gas flow optimal − There are leaks in the argon − Seal the leaks supply Edition 05/2014 PlasmaQuant PQ 9000...
- Page 71 Thermostatically control the spray chamber or ensure air conditioning in the laboratory − The transparency in the UV − Check whether the argon purging of the spectrometer is vacuum is not sufficient complete (activate the purge gas flow long enough) PlasmaQuant PQ 9000 Edition 05/2014...
-
Page 72: Transport And Storage
ATTENTION! Use suitable transport packaging! Unsuitable packaging material and cooling water residues may cause damage to the device! Only transport the PlasmaQuant PQ 9000 in its original packaging! Ensure that the device is completely empty! Equipment: 4 handles Switch on the PlasmaQuant PQ 9000 and start ASpect PQ. -
Page 73: Ambient Conditions For Transport And Storage
Temperature range: -40°C to +70°C If the PlasmaQuant PQ 9000 and add-on devices are not installed immediately after delivery or are not required for a prolonged period of time, they should best be stored in their original packaging. A suitable desiccant should be added to the packaging to prevent damage from moisture. -
Page 74: Installing The Recirculating Chiller
Installing the recirculating chiller CAUTION Observe the operating manual of the recirculating chiller! Connect the PlasmaQuant PQ 9000 and the recirculating chiller with the cooling water hoses: Mobile cooling unit "Outlet" PlasmaQuant PQ 9000 "In" Mobile cooling unit "Inlet" PlasmaQuant PQ 9000 "Out"... -
Page 75: Index
Extinguish 40 Change 56 Faults 41 Ignite 39 Plasma compartment 24 Clean 52 Gas connection 30 Clean windows 52 Gas flows 26 Connections 32 Gas supply 20 Replace windows 52 Gas system Plasma gas 26 PlasmaQuant PQ 9000 Edition 05/2014... - Page 76 Sampling compartment 24 Use 5 Clean 52 User manual conventions 5 Connections 33 UV permeability 52 Serial number 31 Space requirement 22 Spray chamber 25 Symbols Device 8 V Shuttle Torch 27 Manual 8 Warranty 7 Edition 05/2014 PlasmaQuant PQ 9000...
Need help?
Do you have a question about the PlasmaQuant PQ 9000 and is the answer not in the manual?
Questions and answers