Table of Contents
Advertisement
INSTALLATION AND OPRATING INSTRUCTIONS
INSTALLATION AND OPERATING INSTRUCTIONS
WARNING: If the supply cord is damaged, it must only be replaced by AstralPool, its service agent or
sales@astralpool.com.au
a similarly qualified person, in order to avoid a hazard.
www.astralpool.com.au
11/08/2020
I
INSTALLATION AND OPERATINGINSTRUCTIONS
Bolero ND Cleaner
Connect LITE+
Astral Pool
Controller
Advertisement
Table of Contents

Related Manuals for Astralpool Connect LITE+


Summary of Contents for Astralpool Connect LITE+
- Page 1 INSTALLATION AND OPRATING INSTRUCTIONS INSTALLATION AND OPERATINGINSTRUCTIONS Astral Pool Bolero ND Cleaner Connect LITE+ Controller INSTALLATION AND OPERATING INSTRUCTIONS WARNING: If the supply cord is damaged, it must only be replaced by AstralPool, its service agent or sales@astralpool.com.au a similarly qualified person, in order to avoid a hazard.
-
Page 2: Table Of Contents
4.6 Connecting an Internet Gateway to a Connect LITE+ 4.7 Registering “Pool Owner” and authorized “Users” of the pool App 4.8 Downloading the “ConnectMyPool App to your Smart Phone or Tablet 4.9 Internet Gateway Troubleshooting Inst.419 Astral Pool Connect LITE+ Instructions V08-20... -
Page 3: Introduction
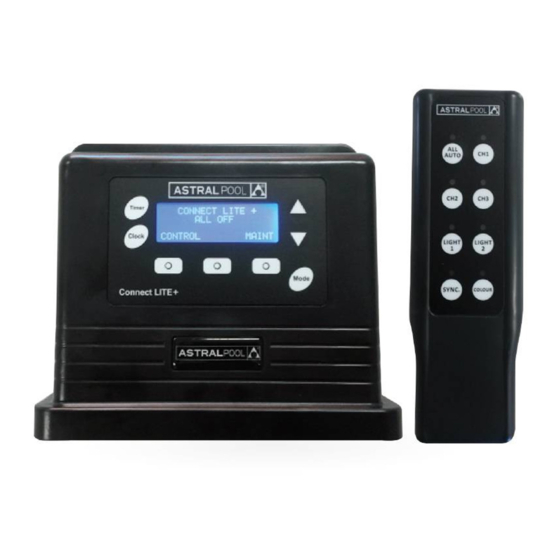
1.1 Kit Contents Quantity Item SLX Connect LITE+ Controller 240 VAC GPO outlets *2 12 VAC Light outputs *4 8 Button RF Remote Control Light power supply plug Screw 8G*3/4 Masonry plug 8G*25mm Inst.419 Astral Pool Connect LITE+ Instructions V08-20... -
Page 4: Basic Installation Instructions
Power Outlets. 7. Connect any RJ12 cables that are required for communicating to other Astral Pool equipment 8. Ensure that all wiring and connected equipment is safe and ready to start, then turn mains power on to the Controller. -
Page 5: Connection To A Viron Or Eq Chlorinator
From here you can either install Equipment such as Pumps and Lights etc or RF devices. As the RF Transceiver is factory set, the RF menu will be covered in Section 4.2 Advanced Installation Instructions. Inst.419 Astral Pool Connect LITE+ Instructions V08-20... -
Page 6: Using Your Controller
(Auto Mode) then you can use the arrow buttons to change it to Timers Disabled. Press ACCEPT to store this setting “USE 3 SPEED PUMP?” Use the arrow keys to select Yes if an Astral Pool 3 speed pump is being used otherwise select No. Press ACCEPT to store this setting. -
Page 7: Controlling Your Connect Lite+ Using The Rf Remote Control
ON, OFF or AUTO. The “NEXT” button can be used to move to the next piece of equipment and the “EXIT” button is then used to return to the home screen. Inst.419 Astral Pool Connect LITE+ Instructions V08-20... -
Page 8: Advanced Installation Instructions
Press “NEXT” and you will be asked what Light Type you have. The default is Astral Pool “SLX” Lights, however if Spa Electric Lights are fitted then you can use the Arrow Keys to select “SPA ELECTRIC” which will enable correct colour control and Light colour synchronisation of Spa Electric Lights After selecting the Light type, if you press “NEXT”... -
Page 9: Connecting A Connect Lite To A Connect Lite
Prior to commencing the installation, the location of the home Wi-Fi transmitter (or host computer if using an Ethernet connection) must be determined along with the Wi-Fi Network name and Wi-Fi Password or Passcode. Inst.419 Astral Pool Connect LITE+ Instructions V08-20... - Page 10 Wi-Fi settings. On this page the Internet Serial Number is also displayed. If the serial number is shown as ‘???’, then the Touchscreen cannot communicate with the Internet Gateway. (Refer to troubleshooting before continuing) Inst.419 Astral Pool Connect LITE+ Instructions V08-20...
- Page 11 (Wi-Fi) The Wi-Fi signal strength should be 29 or greater. If it is less than 29 the Internet Gateway should be moved closer to the Home Wi-Fi source to ensure reliable and stable connection. If the Wi-Fi signal strength is 29 or greater, the Internet Gateway can be mounted in position. Inst.419 Astral Pool Connect LITE+ Instructions V08-20...
-
Page 12: Registering "Pool Owner" And Authorized "Users" Of The Pool App
This is found on the registration sticker inside the box and must be kept by the pool owner. This information has been included as an adhesive label for convenience to consumer and also for Inst.419 Astral Pool Connect LITE+ Instructions V08-20... - Page 13 This feature allows the Pool Owner to grant user access to specific features only. For example if the pool has heating, the pool owner can restrict a user from changing the temperature etc. Inst.419 Astral Pool Connect LITE+ Instructions V08-20...
-
Page 14: Downloading The "Connectmypool App To Your Smart Phone Or Tablet
App. Enter the user name/email address and password you registered as the Pool Owner or authorised ‘User’. Click on the ConnectMyPool icon and the application will start. Log in using the username and password that was set up during registration Inst.419 Astral Pool Connect LITE+ Instructions V08-20... -
Page 15: Internet Gateway Troubleshooting
Gateway has a proper network connection, the following is required for either the Ethernet or Wireless connection: The ‘Linked’ field for the appropriate connection method must be ‘Yes’; and, The IP address must NOT be ‘0.0.0.0’. Inst.419 Astral Pool Connect LITE+ Instructions V08-20... - Page 16 Return to the main Internet Gateway Diagnostics screen by pressing ‘Back’. Press the ‘View Server Connection Status’ button. This page shows you that status of the connection between the Internet Gateway and the connectmypool server. Inst.419 Astral Pool Connect LITE+ Instructions V08-20...
- Page 17 AstralPool for support. Others There are other status codes that won’t be detailed here. If the Internet Gateway gets “stuck” on one of them, call AstralPool for more details. Inst.419 Astral Pool Connect LITE+ Instructions V08-20...
- Page 18 Ethernet network. The status for the connection to the ConnectMyPool servers is still given by the ‘Connected’ indicator. The green indicator blinks when there is data being sent or received on the Ethernet network. Inst.419 Astral Pool Connect LITE+ Instructions V08-20...
- Page 19 Important note: Regular maintenance is important to ensure long life and trouble free performance of your pool equipment. If unable to perform the maintenance yourself, contact your local AstralPool office who will arrange a trained service technician to perform the maintenance for you. Inst.419 Astral Pool Connect LITE+ Instructions V08-20...
- Page 20 Fluidra Group Australia Pty Ltd 219 Woodpark Road, Smithfield. N.S.W. 2164 ABN 087 002 641 965 Inst.419 Astral Pool Connect LITE+ Instructions V08-20...
Need help?
Do you have a question about the Connect LITE+ and is the answer not in the manual?
Questions and answers