Advertisement
Quick Links
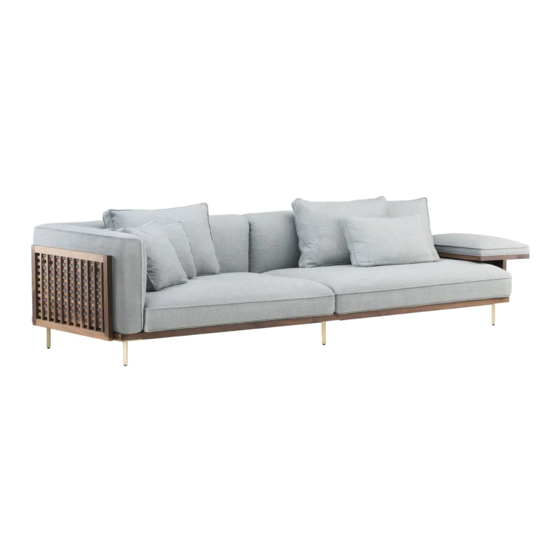
ASSEMBLY INSTRUCTIONS
BELLE REEVE SOFA BY LUCA NICHETTO
NOTE: Belle Reeve is a sofa system with numerous possible
configurations and options. These instructions provide guidance
on assembling all possible parts to assist you in assembling
your unique configuration.
PARTS
Parts and quantities vary according to configuration, and may
include:
Panels - lattice or upholstered
Metal legs
Sofa bases
Upholstered seat pads
Upholstered backrests (corner or flat)
Flat armrests
Marble tables
Scatter cushions
HARDWARE
Hardware type and quantity varies according to configuration and
may include the following. Refer to instructions to see where
each is used.
M6x16 Button Cap Screws
M6x25 Countersunk Screws
M6x45 Countersunk Screws
Metal Connection Plates
YOU WILL NEED
5mm heavy duty Allen Key
6mm heavy duty Allen Key
The help of one or two friends, depending on size of sofa
NOTES
NOTE 1: Be certain that all assembly is carried out on a flat
and stable surface. This will ensure a good final re
sult. Reverse the steps to disassemble the piece.
NOTE 2: Your furniture arrives packed in numerous layers that
protect it during transport. It is important that you remove
the packaging carefully to avoid damaging your furniture. Refer
to our information sheet "Unpacking Your Furniture" for further
details.
NOTE 3: Great care is required when assembling our products as
they can mark very easily if banged or dropped. Use blankets
to soften the assembly surface - hard surfaces such as wood or
stone flooring may damage the furniture if in direct contact.
NOTE 4: We advise that assembly and disassembly of De La Espada
furniture is undertaken by a minimum of 2 people.
NOTE 5: When screwing in bolts, tighten well, but be sure
NOT TO OVERTIGHTEN. This can cause the thread to strip thus
resulting in a poor connection.
SALES@DELAESPADA.COM
DELAESPADA.COM
0
1
L
U
C
A
N
I
C
H
E
T
T
O
Advertisement

Related Manuals for De La Espada LUCA NICHETTO BELLE REEVE SOFA


Summary of Contents for De La Espada LUCA NICHETTO BELLE REEVE SOFA
- Page 1 - hard surfaces such as wood or stone flooring may damage the furniture if in direct contact. NOTE 4: We advise that assembly and disassembly of De La Espada furniture is undertaken by a minimum of 2 people.
- Page 2 ASSEMBLY INSTRUCTIONS CONTINUED BELLE REEVE SOFA: METAL LEGS NOTE 6: While you work, be sure all connections are flush with no gaps. INSTRUCTIONS 1) ATTACH METAL LEGS TO SOFA BASE a) Place each sofa base face down onto a softened surface on the floor.
- Page 3 ASSEMBLY INSTRUCTIONS CONTINUED BELLE REEVE SOFA: LEGS c) The attached legs should look like this: d) Flip the sofa base assembly over into its natural upright position.
- Page 4 ASSEMBLY INSTRUCTIONS CONTINUED BELLE REEVE SOFA: PANELS 2) ATTACH PANELS TO SOFA BASE ASSEMBLY a) Place each panel onto the sofa base, aligning the holes in the hardware with the pre-drilled holes in the base. For side panels, locate the correct holes by aligning the pre- drilled holes at the front of the sofa base with the three holes in the corresponding hardware.
- Page 5 ASSEMBLY INSTRUCTIONS CONTINUED BELLE REEVE SOFA: PANELS b) Insert an M6 x 16 Button Cap Screw into each of the holes in the panel hardware where it meets the sofa base. Tighten firmly with an Allen Key.
- Page 6 ASSEMBLY INSTRUCTIONS CONTINUED BELLE REEVE SOFA: PANELS c) On the underside of the assembly, insert an M6 x 16 Button Cap Screw into each of the holes in the panel hardware where it meets the sofa base. Tighten firmly with an Allen Key. NOTE: You may find it easier to place the sofa on its side to more easily access the hardware on the underside of the sofa base.
- Page 7 ASSEMBLY INSTRUCTIONS CONTINUED BELLE REEVE SOFA: FLAT ARMREST (IF RELEVANT) 3) CONNECT FLAT ARMREST/S (IF RELEVANT) a) Place the flat armrest onto the sofa base, aligning the holes in the hardware with the pre-drilled holes in the sofa base. Locate the correct holes by aligning the pre-drilled holes at the front of the sofa base with the three holes in the corre- sponding hardware.
- Page 8 ASSEMBLY INSTRUCTIONS CONTINUED BELLE REEVE SOFA: FLAT ARMREST (IF RELEVANT) c) On the underside of the assembly, insert an M6 x 16 Button Cap Screw into each of the holes in the flat armrest hardware where it meets the sofa base. Tighten firmly with an Allen Key. d) Once attached, the flat armrest will appear like this:...
- Page 9 ASSEMBLY INSTRUCTIONS CONTINUED BELLE REEVE SOFA: MARBLE TABLE (IF RELEVANT) 4) CONNECT MARBLE TABLE/S (IF RELEVANT) a) Gently lower the marble table onto the sofa base, making a note of where the pre-drilled holes are located, and aligning these. NOTE: If you are uncertain of the placement of the table in the configuration ordered, you may wish to assemble the rest of the sofa first, then add the table at the end to avoid misplacement.
- Page 10 ASSEMBLY INSTRUCTIONS CONTINUED BELLE REEVE SOFA: CONNECTING BASES (IF RELEVANT) 5) CONNECT SOFA BASES TO ONE ANOTHER (IF RELEVANT) a) Place the sofa assemblies into the relevant configuration then push them together until they meet flush. b) On the underside of the assembly, place metal plates where the sofa assemblies meet.
- Page 11 ASSEMBLY INSTRUCTIONS CONTINUED BELLE REEVE SOFA: BACKREST MODULES 6) ATTACH BACKREST MODULES a) Place the backrest modules one at a time into position on the sofa assembly. The toggles located on the backs of the mod- ules will be used to attach them to the panels. NOTE: If the backrest is a corner, make sure the front of the arm aligns with the front of the sofa base.
- Page 12 ASSEMBLY INSTRUCTIONS CONTINUED BELLE REEVE SOFA: BACKREST MODULES c) Next, rotate each toggle so it is in an upright position.
- Page 13 ASSEMBLY INSTRUCTIONS CONTINUED BELLE REEVE SOFA: BACKREST MODULES UPHOLSTERED PANELS: b) If your sofa has upholstered panels, then feed the toggles through the loops located on the inner faces of the panels, then rotate to secure in place.
- Page 14 ASSEMBLY INSTRUCTIONS CONTINUED BELLE REEVE SOFA: SEAT PADS 7) ATTACH SEAT PADS NOTE: Seat pads are intentionally larger than the sofa base to allow for a slight doming effect that provides increased com- fort. As such, it is important to align seat pads flush with key points of the sofa base.
- Page 15 ASSEMBLY INSTRUCTIONS CONTINUED BELLE REEVE SOFA: FINISHING TOUCHES 8) LEVEL SOFA a) Once the sofa is fully assembled, level it using the level- lers on the bottom of the feet. 9) PLACE SCATTER CUSHIONS ONTO SOFA (IF RELEVANT) a) If your sofa has scatter cushions, then place them onto the sofa now.
Need help?
Do you have a question about the LUCA NICHETTO BELLE REEVE SOFA and is the answer not in the manual?
Questions and answers