
Related Manuals for Pfeiffer Vacuum DUO 11 ATEX


Summary of Contents for Pfeiffer Vacuum DUO 11 ATEX
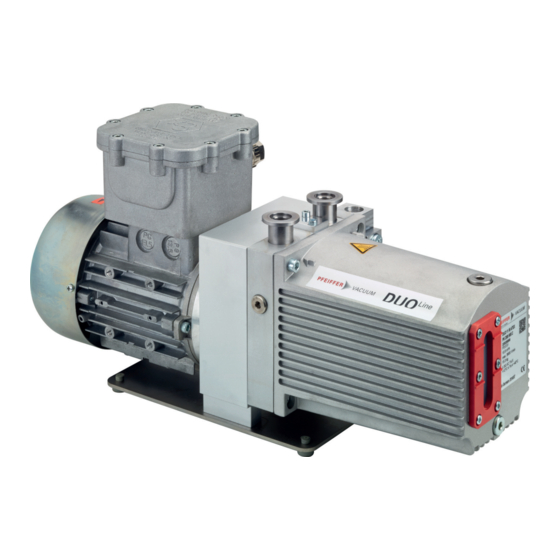
- Page 1 OPERATING INSTRUCTIONS Translation of the Original DUO 11 ATEX Rotary vane pump...
- Page 2 Dear Customer, Thank you for choosing a Pfeiffer Vacuum product. Your new rotary vane pump is designed to support you by its performance, its perfect operation and without interfering your individual application. The name Pfeiffer Vacuum stands for high-quality vacuum technology, a comprehensive and complete range of top-quality products and first-class service.
-
Page 3: Table Of Contents
Product usage limits Proper use Foreseeable improper use Personnel qualification 2.8.1 Ensuring personnel qualification 2.8.2 Personnel qualification for maintenance and repair 2.8.3 Advanced training with Pfeiffer Vacuum Product description Function Operating principle Scope of delivery Identifying the product Transportation and Storage... - Page 4 Recycling and disposal General disposal information Dispose of rotary vane pump Malfunctions Service solutions by Pfeiffer Vacuum Spare parts 12.1 Maintenance kit 1 – maintenance level 1 12.2 Maintenance kit 2 – maintenance level 2, cleaning and dismantling 12.3 Overhaul kit – Maintenance level 3 12.4 Coupling set for versions with magnetic coupling...
- Page 5 Tbl. 7: Current values for fuse layout Tbl. 8: Maintenance intervals Tbl. 9: Troubleshooting for rotary vane pumps Tbl. 10: Spare parts pack Duo 11 ATEX Tbl. 11: Content of maintenance kit 1 Tbl. 12: Ordering accessories Tbl. 13: Consumables Tbl.
- Page 6 Filling the operating fluid Fig. 15: Draining the operating fluid Fig. 16: Removing/fitting the cap Fig. 17: Valve with inert gas connection Fig. 18: Content of maintenance kit 1 – maintenance level 1 Fig. 19: Dimension diagram Duo 11 ATEX 6/58...
-
Page 7: About This Manual
Keep the manual for future consultation. 1.1 Validity This operating instructions is a customer document of Pfeiffer Vacuum. The operating instructions de- scribe the functions of the named product and provide the most important information for the safe use of the device. The description is written in accordance with the valid directives. The information in this op- erating instructions refers to the product's current development status. -
Page 8: Pictographs
VACUUM The rating plate of the rotary vane pump is located on the front right- D-35641 Asslar hand side next to the sight glass. Mod. DUO 11 ATEX PK D59 905 C 23679713 Motor rating plate (not shown) P3 0.5 l S(N2) max. -
Page 9: Abbreviations
About this manual Fig. 1: Position of the labels on the product 1 Rating plate of the rotary vane vacuum pump Motor rating plate 2 Attention! Check the direction of rotation of the rotary vane pump Arrow indicating direction before filling with operating fluid of rotation 3 Fill rotary vane pump with operating fluid before commissioning Closure seal... -
Page 10: Safety
Safety 2 Safety 2.1 General safety information The following 4 risk levels and 1 information level are taken into account in this document. DANGER Immediately pending danger Indicates an immediately pending danger that will result in death or serious injury if not observed. ►... - Page 11 Safety WARNING Risk of serious injury from swinging, toppling or falling objects During transport, there is a risk of crushing and impact on swinging, toppling or falling objects. There is a risk of injuries to limbs, up to and including bone fractures and head injuries. ►...
- Page 12 Safety CAUTION Risk of injury from entrapment of body parts During installation and maintenance, the motor may start up uncontrolled. There is a risk of minor in- jury to fingers and hands (e.g. hematoma), from direct contact with the vacuum flange. ►...
- Page 13 Safety WARNING Danger of injury from impermissibly high inert gas pressure Increased inert gas pressure compromises the operational reliability due to increasing power con- sumption of the vacuum pump and potentially causes the temperature class threshold to be exceed- ed. There is a danger of bursting if there is a potentially explosive atmosphere. This leads to injuries caused by flying fragments, the escaping of high pressure, and damage to the unit.
- Page 14 Safety WARNING Health hazard through poisoning from toxic contaminated components or devices Toxic process media result in contamination of devices or parts of them. During maintenance work, there is a risk to health from contact with these poisonous substances. Illegal disposal of toxic sub- stances causes environmental damage.
-
Page 15: Safety Precautions
Safety 2.3 Safety precautions Duty to provide information on potential dangers The product holder or user is obliged to make all operating personnel aware of dangers posed by this product. Every person who is involved in the installation, operation or maintenance of the product must read, understand and adhere to the safety-related parts of this document. -
Page 16: Potential Hazards
ATEX designations 2.4.2 Potential hazards The ignition hazard assessment for the Duo 11 ATEX was performed in accordance with the harmon- ized standard ISO 80079-36 (Non-electrical equipment for explosive atmospheres - Basic method and requirements). This assessment includes the identification of hazards described as follows which will not occur if the system is operated properly with the respective safety measures. -
Page 17: Safety Measures
Safety Potential Occurrence due to Safety measures hazard Electrical Electric motor Application of an explosion-proof electric motor. Observe sparks the labeling (refer to rating plate) of the electric motor and the operating instructions. Static elec- Rotary vane pump is not Rotary vane pump is to be integrated in the equipotential tricity earthed... -
Page 18: Product Usage Limits
Safety 2.5 Product usage limits Parameter Duo 11 ATEX Installation location ● Indoors, protected against: ─ dust deposits ─ falling objects ─ fire-fighting water ● Outdoors, protected against: ─ falling objects ─ direct influence of weather such as rain, splash water, strong drafts and sunlight ─... -
Page 19: Foreseeable Improper Use
● using the vacuum pump as a climbing aid ● painting the vacuum pump, motor and accessories ● using operating fluids that have not been approved by Pfeiffer Vacuum ● using mineral-based operating fluids such as P3, with an oxygen concentration > 21 %. -
Page 20: Personnel Qualification For Maintenance And Repair
─ Customer with Pfeiffer Vacuum service training ─ Pfeiffer Vacuum service technician 2.8.3 Advanced training with Pfeiffer Vacuum For optimal and trouble-free use of this product, Pfeiffer Vacuum offers a comprehensive range of courses and technical trainings. For more information, please contact Pfeiffer Vacuum technical training. -
Page 21: Product Description
M version with non-contact and wear-proof drive with magnetic coupling. The pump housing is her- metically sealed. The rotary vane pump Duo 11 ATEX is a vacuum pump designed for special applications in low and medium vacuum, observing the application limits. A magnetic coupling allows contactless and wear-free operation of the drive, thus ensuring a hermetically sealed and fully enclosed pump housing. -
Page 22: Operating Principle
● Optional accessories 3.4 Identifying the product ► To ensure clear identification of the product when communicating with Pfeiffer Vacuum, always keep all of the information on the rating plate to hand. ► Observe the motor-specific data on the motor rating plate attached separately. -
Page 23: Transportation And Storage
► Never stack products. ► Wear protective equipment, e.g. safety shoes. Preparations for transport Pfeiffer Vacuum recommends keeping the transport packaging and original protective cov- General information regarding safe transport 1. Observe the weight specified on packaging. 2. Use a transport aid if necessary (trolley, lift truck). -
Page 24: Storing The Vacuum Pump
– Keep the eye bolts for future use. 4.2 Storing the vacuum pump Storage Pfeiffer Vacuum recommends storing the products in their original transport packaging. Procedure 1. Fill the vacuum pump with operating fluid up to the upper edge of the sight glass. -
Page 25: Installation
Installation 5 Installation DANGER Risk of explosion when carrying out installation and maintenance work in potentially explo- sive areas There is a risk of explosion if unsuitable tools are used in potentially explosive areas. Ignition can cause very serious injuries. ► Transport, installation and maintenance work may not be performed in potentially explosive at- mospheres. -
Page 26: Connecting The Exhaust Side
Installation Fig. 6: Vacuum connection with flange connection 1 Circlip Intake line 2 Centering ring with cone sieve and O-ring Blank flange Connecting the vacuum side 1. Remove the blank flange from the vacuum flange. 2. Make sure that the centering ring with cone sieve and the O-ring are in the vacuum flange. 3. -
Page 27: Grounding The Vacuum Pump
8. Route process gases safely. 9. Use a suction device to prevent zone entrainment. Condensate separator Pfeiffer Vacuum recommends installing a condensate separator, with condensate drain at the lowest point of the exhaust line. 5.4 Grounding the vacuum pump A suitable grounding cable must be connected to eliminate any applicative disruptive influences. -
Page 28: Establishing Mains Connection
Installation Fig. 8: Connecting the grounding cable Procedure 1. Connect the ground terminal to the base plate of the vacuum pump with the local equipotential bonding of the potentially explosive area. 2. Route the connection in accordance with locally applicable provisions. 3. -
Page 29: Choosing The Cable Bushing
► Route the mains connection in accordance with locally applicable provisions. ► Always provide a suitable mains fuse to protect the motor and supply cable in the event of a fault. – Pfeiffer Vacuum recommends the circuit breaker type "K" with slow tripping characteristic. 5.5.1 Choosing the cable bushing Selection of the correct cable bushings is entirely the responsibility of the user. -
Page 30: Selecting On-Site Fuse Protection
Installation The ends of the 3 phases are connected in the star point. The terminal voltage is √3 times the phase voltage, the mains current is equal to the phase current. The star circuit is marked with the Y symbol. 5.5.3 Selecting on-site fuse protection The magnetic coupling does not offer an overload protection. -
Page 31: Checking The Direction Of Rotation
Installation F1 - F3 AC 220 ... 240 V T1...T3 Fig. 11: Connection example with PTC thermistor tripping unit Control voltage T1 – T3 PTC resistor sensor OFF button Tripping indicator ON button Motor, 3-phase RESET button For devices with two relay outputs only Contactor For MSR type (model) only F1 –... -
Page 32: Fig. 12: Filling The Operating Fluid
Product-specific performance data are not achieved. All liability and warranty claims against Pfeiffer Vacuum are also excluded. ► Only use approved operating fluids. ► Only use other application-specific operating fluids after consultation with Pfeiffer Vacuum. Approved operating fluid ● P3 (standard operating fluid) Fig. -
Page 33: Operation
Operation 6 Operation 6.1 Putting the vacuum pump into operation WARNING Risk of explosion in the medium to be pumped as a result of increased pressure With installation on the exhaust side, there is a risk of the exhaust pressure of the vacuum pump ex- ceeding the atmospheric conditions. -
Page 34: Operating The Vacuum Pump With Inert Gas
Operation CAUTION Danger of burns on hot surfaces Depending on the operating and ambient conditions, the surface temperature of the vacuum pump can increase to above 70 °C. ► Provide suitable touch protection. Operating Conditions ● The optimal operating condition of the vacuum pump is continuous operation. ●... -
Page 35: Fig. 13: Gas Ballast Valve With Inert Gas Connection
7. Fit the hose clamp. 8. Select the type and quantity of the inert gas used according to the process. 9. Consult Pfeiffer Vacuum if necessary. Adjusting inert gas flow The gas ballast quantity is regulated with the valve spindle. -
Page 36: Refilling Operating Fluid
Operation 6.4 Refilling operating fluid WARNING Risk of injury from reactive, potentially explosive or otherwise hazardous gas/air mixtures Uncontrolled exchange of gases when opening the housing could potentially generate a potentially explosive mixture of gas and air in the vacuum system or even outside of the vacuum pump. Ignition can cause very serious injuries. - Page 37 ► Shut off the intake line with an additional shut-off valve, after the vacuum pump is switched off during longer venting operations. Pfeiffer Vacuum rotary vane pumps have an integral vacuum safety valve on the intake side. The vac- uum safety valve automatically closes from a differential pressure of ≥250 hPa between the exhaust and intake sides, when the vacuum pump is switched off, and vents the vacuum pump.
-
Page 38: Maintenance
► Secure the motor against re-start. NOTICE Damage from incorrect maintenance work Unprofessional work on the vacuum pump will lead to damage for which Pfeiffer Vacuum accepts no liability. ► Ensure that only the following categories of persons are authorized to perform servicing tasks: –... -
Page 39: Checklist For Inspection And Maintenance
Service. If the required intervals listed below are exceeded, or if maintenance work is carried out improperly, no warranty or liability claims are accepted on the part of Pfeiffer Vacuum. This also applies if original spare parts are not used. -
Page 40: Changing The Operating Fluid
● It is possible to detect thermal aging of the operating fluid from its color identification number (ap- plies to mineral oils only). Safety data sheets You can obtain the safety data sheets for operating fluids from Pfeiffer Vacuum on request, or from the Pfeiffer Vacuum Download Center. -
Page 41: Determine Degree Of Aging Of P3 Operating Fluid
You can determine the degree of aging of P3 operating fluid in clean processes using the color chart (in accordance with DIN 51578). The supplementary sheet with the document number PK0219 can be ob- tained from the Pfeiffer Vacuum Download Center. Prerequisites ●... -
Page 42: Rinsing And Cleaning The Rotary Vane Vacuum Pump
– Filler screw tightening torque: 3.0 Nm 7.3.3 Rinsing and cleaning the rotary vane vacuum pump Cleaning by changing the operating fluid Pfeiffer Vacuum recommends, in cases of heavy contamination with process residues, cleaning the inside of the vacuum pump with several operating fluid changes. 42/58... -
Page 43: Fig. 16: Removing/Fitting The Cap
Maintenance Required tools ● Allen key, 5 mm ● Allen key, 6 mm ● Calibrated torque wrench (tightening factor ≤ 2.5) Change operating fluid for cleaning 1. Operate the vacuum pump with the gas ballast open, until it is warm. 2. -
Page 44: Cleaning The Inert Gas Valve
Maintenance 7.4 Cleaning the inert gas valve Fig. 17: Valve with inert gas connection 1 Circlip Screw (2×) 2 Spindle O-ring 3 O-ring (2x) Hose connection 4 O-ring Screw cap 5 Valve housing O-ring 6 Valve flap Required tools ● Allen key, WAF 2.5 mm, WAF 5 mm ●... -
Page 45: Decommissioning
11. Please note, the vacuum pump may not be stored in the vicinity of machines, traffic routes, etc., as strong vibrations may damage the bearing. 12. For longer storage periods (> 2 years), Pfeiffer Vacuum recommends changing the operating fluid again prior to recommissioning. -
Page 46: Recycling And Disposal
– Fluoroelastomers (FKM) – Potentially contaminated components that come into contact with media 9.2 Dispose of rotary vane pump Pfeiffer Vacuum rotary vane pumps contain materials that you must recycle. 1. Fully drain the lubricant. 2. Dismantle the motor. 3. Decontaminate the components that come into contact with process gases. -
Page 47: Malfunctions
► Wear personal protective equipment if necessary. NOTICE Damage from incorrect maintenance work Unprofessional work on the vacuum pump will lead to damage for which Pfeiffer Vacuum accepts no liability. ► Ensure that only the following categories of persons are authorized to perform servicing tasks: –... -
Page 48: Tbl. 9: Troubleshooting For Rotary Vane Pumps
● Top up the operating fluid. ● Leak in system ● Locate and eliminate the leak. ● Vacuum pump is dam- ● Contact Pfeiffer Vacuum Service. aged Pumping speed of vacuum ● The intake line is not ● Make sure that connections are... -
Page 49: Service Solutions By Pfeiffer Vacuum
We are always focused on perfecting our core competence – servicing of vacuum components. Once you have purchased a product from Pfeiffer Vacuum, our service is far from over. This is often exactly where service begins. Obviously, in proven Pfeiffer Vacuum quality. - Page 50 Service solutions by Pfeiffer Vacuum 5. Prepare the product for transport in accordance with the provisions in the contamination declaration. a) Neutralize the product with nitrogen or dry air. b) Seal all openings with blind flanges, so that they are airtight.
-
Page 51: Spare Parts
PK E02 080 -T Coupling set PK E06 015 -T Tbl. 10: Spare parts pack Duo 11 ATEX 12.1 Maintenance kit 1 – maintenance level 1 Order no.: PK E01 050 CT Maintenance kit 1 contains: ● Filler and drain screw seals for one operating fluid change ●... -
Page 52: Maintenance Kit 2 - Maintenance Level 2, Cleaning And Dismantling
Spare parts 12.2 Maintenance kit 2 – maintenance level 2, cleaning and dismantling Maintenance kit 2 contains all relevant wear parts, that have to be replaced after dismantling and cleaning the vacuum pump: ● Set of seals ● Wear parts of the gas ballast valve ●... -
Page 53: Accessories
Accessories for Duo 11 ATEX Order no. OME 16 ATEX, Oil Mist Separator PK Z40 200 Oil Return Unit ODK from OME 16 ATEX to Duo 11 ATEX PK 006 081 -T Operations Monitoring Unit 1, sensor for Oil level PK 007 100 -T... -
Page 54: Technical Data And Dimensions
Technical data and dimensions 14 Technical data and dimensions 14.1 General Basis for the technical data of Pfeiffer Vacuum rotary vane pumps: ● Specifications according to PNEUROP committee PN5 ● ISO 21360-1: 2016: “Vacuum technology - Standard methods for measuring vacuum-pump per- formance - Part 1: General description”... -
Page 55: Technical Data
≤ 1 · 10 Pa m³/s Operating fluid amount 0.5 l Operating fluid Ambient temperature 12 – 40 °C Shipping and storage temperature -10 – 40 °C Weight 15.3 kg Tbl. 17: Technical data Duo 11 ATEX 14.4 Dimensions Dimensions in [mm] 55/58... -
Page 56: Fig. 19: Dimension Diagram Duo 11 Atex
Technical data and dimensions 50.5 (33.5) ±1 DN 16 ISO-KF ±1 (7.2) 33.5 ±1 ±1 Fig. 19: Dimension diagram Duo 11 ATEX 56/58... -
Page 57: Declaration Of Conformity
EN 61000-6-4: 2007 + A1: 2011 ISO 80079-36: 2016-12 EN ISO 2151: 2: 2008 The authorized representative for the compilation of technical documents is Mr. Wolf- gang Bremer, Pfeiffer Vacuum GmbH, Berliner Straße 43, 35614 Asslar, Germany. Signature: Pfeiffer Vacuum GmbH Berliner Straße 43... - Page 58 Notizen / Notes:...
Need help?
Do you have a question about the DUO 11 ATEX and is the answer not in the manual?
Questions and answers