Table of Contents
Advertisement
Available languages
Available languages
Advertisement
Chapters
Table of Contents

Related Manuals for Parkside PNTS 1500 C4


Summary of Contents for Parkside PNTS 1500 C4
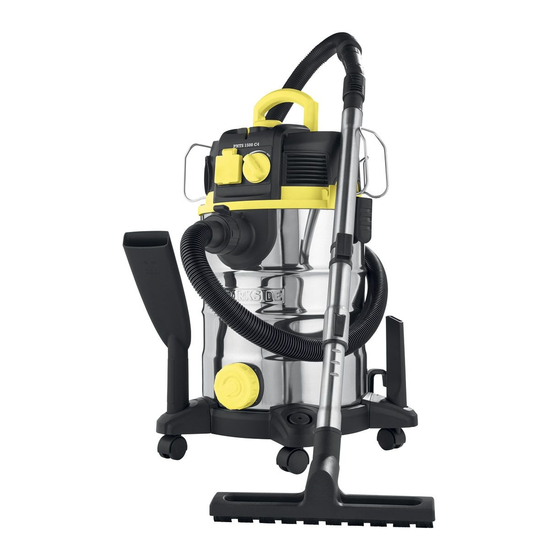
- Page 1 ASPIRAPOLVERE-LIQUIDI PNTS 1500 C4 ASPIRAPOLVERE-LIQUIDI ASPIRADOR DE LÍQUIDOS / PÓ Traduzione delle istruzioni d’uso originali Tradução do manual de instruções original WET AND DRY VACUUM CLEANER NASS- UND TROCKENSAUGER Translation of the original instructions Originalbetriebsanleitung IAN 284950...
- Page 2 Prima di leggere aprire la pagina con le immagini e prendere confidenza con le diverse funzioni dell’apparecchio. Antes de começar a ler abra na página com as imagens e, de seguida, familiarize-se com todas as funções do aparelho. Before reading, unfold the page containing the illustrations and familiarise yourself with all functions of the device.
- Page 4 ‚...
-
Page 5: Table Of Contents
Indice Introduzione Introduzione ....... 5 Congratulazioni per l’acquisto del Suo Utilizzo ........5 nuovo apparecchio. Ha scelto un prodotto Descrizione generale ....6 altamente pregiato. Contenuto della confezione ....6 Questo apparecchio è stato sottoposto a un Sommario ........6 controllo di qualità... -
Page 6: Descrizione Generale
Descrizione generale Sommario Stazione dell’apparecchio La figura dei principali compo- nenti funzionali si trovano sulla 1 Impugnatura di trasporto prima anteriore e posteriore del 2 Tasto per la pulizia del filtro pieghevole. 3 Carcassa del motore con vano inserimento accessori Contenuto della confezione 4 Regolatore del flusso d’aria 5 Clip di chiusura... -
Page 7: Descrizione Del Funzionamento
Dati tecnici Ugelli 24 Ugello del pavimento per aspira- Apparecchio ..... PNTS 1500 C4 zione a secco 25 Ugello del pavimento per aspira- Tensione di rete (U) ..220-240 V~, 50 Hz zione bagnata Potencia de entrada del motor (P) ..1500 W 26 Ugello per giunti Carico max. -
Page 8: Simboli E Pittogrammi
Simboli e pittogrammi Simboli relativi all‘uso di ugelli e filtri Simboli riportati nelle istruzioni Ugello per l‘aspirazione di tappeti. Simboli di pericolo con indi- Ugello per l‘aspirazione di superfici cazioni relative alla preven- lisce e pavimenti duri. zione di danni a cose e per- sone. -
Page 9: Indicazioni Di Sicurezza
Indicazioni di sicurezza non raggiungano l’altezza della testa, ci si può ferire. Attenzione! Durante l’uso di In questo modo evitate incidenti e utensili elettrici osservarle seguenti misure di sicurezza lesioni a causa di scosse elettriche: di base ai fini della protezio- •... -
Page 10: Montaggio
Montaggio una presa protetta con almeno 16 A. Estrarre la spina. • Collegare l’apparecchio a una Pericolo di scosse elettriche. presa protetta da interruttore differenziale (interruttore FI) con 1. Inserire i rulli pivotanti (8) con corrente di guasto nominale non supporti di accessori (8a) sulla superiore a 30 mA. -
Page 11: Messa In Esercizio
Messa in esercizio Regolatore del flusso d’aria Per lavorare, srotolare completa- Regolare il flusso dell’aria in modo conti- mente il tubo flessibile di aspirazio- nuo ruotando il regolatore della corrente ne ( 21). d’aria ( Accensione/spegnimento corrente d’aria minima MIN: corrente d’aria massima MAX: Inserire la spina. -
Page 12: Pulizia A Umido
Aspirazione con sacchetto di 2. Inserire il sacchetto in tessuto sul cestel- filtraggio di carta: lo di filtraggio. Aspirazione di polveri fini: Per evitare che il filtro pieghettato si sporchi troppo rapidamente, si raccomanda di utilizzarlo assieme Lo svolgimento di alcuni lavori (ad es. al sacchetto di filtraggio di carta levigatura di colori e vernici, fresatura o (bruno). -
Page 13: Soffiatura
quanto l’apparecchio non è stato pro- Il dispositivo di riduzione può an- gettato per conservare liquidi (si veda che essere applicato direttamente “Pulizia/manutenzione”). al tubo flessibile di aspirazione (21) (aspirazione di polvere senza Non immergersi nell’acqua da tubo flessibile powertool). aspirare. -
Page 14: Sistema Di Pulizia Del Filtro
Sistema di pulizia del porto dell’accessorio (3a) sulla testa filtro del motore (3). 4. Per conservare i piccoli componenti In caso di potenza di aspirazione in calo, accessori ci sono i supporti degli ac- cessori (8a) sui rulli pivotanti (8) e il con l’aiuto del sistema di pulizia del filtro, si può... -
Page 15: Pezzi Di Ricambio/Accessori
Pezzi di ricambio/accessori È possibile ordinare pezzi di ricambio e accessori all’indirizzo www.grizzly-service.eu Se non si dispone di una connessione Internet, contattare telefonicamente il centro di assistenza (ved. “Service-Center” a pag. 18). Tenere a portata di mano i numeri d’ordine riportati in basso. Position Position Denominazione... -
Page 16: Ricerca Di Guasti
Ricerca di guasti Guasto Possibile causa Soluzione Controllare la presa di corrente, Manca la tensione di ali- il cavo, la spina e il fusibile, se mentazione necessario far riparare l’apparec- chio da un’elettricista qualificato L’apparecchio non si L’interruttore ( 13) è avvia guasto. -
Page 17: Garanzia
Garanzia Volume di garanzia L’apparecchio è stato prodotto accurata- Gentile cliente, mente secondo severe direttive di qualità Su questo apparecchio Le viene concessa e controllato con coscienza prima della consegna. una garanzia di 3 anni a partire dalla data di acquisto. La prestazione di garanzia vale per difetti In caso di difetti di questo prodotto può... -
Page 18: Servizio Di Riparazione
Service-Center essere inviato con porto franco all’indi- rizzo di assistenza comunicato, previa Assistenza Italia consultazione del nostro servizio di assistenza tecnica, allegando la prova Tel.: 02 36003201 d‘acquisto (scontrini fiscali) e l’indica- E-Mail: grizzly@lidl.it IAN 284950 zione, in che cosa consiste il difetto e quando si è... -
Page 19: Índice Introdução
Índice Introdução Introdução ......... 19 Parabéns pela compra do seu novo apare- Utilização ........19 lho. Com a sua compra, decidiu-se por um Descrição Geral ......20 produto de alta qualidade. Material que acompanha o Este aparelho foi testado durante a produ- fornecimento ......... -
Page 20: Descrição Geral
Descrição Geral Esquema de descrição técnica Chassis Pode encontrar a ilustração das principais partes funcionais no 1 Asa de suporte verso e no reverso da página 2 Botão de limpeza do filtro destacável. 3 Caixa do motor com suporte para acessórios (3a) Material que acompanha o 4 Regulador do fluxo de ar fornecimento... -
Page 21: Descrição De Funcionamento
Dados técnicos Escovas 24 Bocal de chão para aspiração a Máquina ....PNTS 1500 C4 seco 25 Bocal de chão para aspiração Tensão nominal (U) ... 220-240 V~, 50 Hz molhada Potência de entrada do motor (P) .. 1500 W 26 Tubo estreito para cantos e zo- Carga máx. -
Page 22: Símbolos E Pictogramas
Símbolos e pictogramas Símbolos gráficos para utili- zação de bocais e filtros Símbolos colocados no manual Bocal para aspirar alcatifas. Símbolos de perigo com in- Bocal para aspirar superfícies lisas formações sobre a prevenção e pavimentos rígidos. de danos pessoais e mate- riais. -
Page 23: Medidas De Segurança
Medidas de segurança veis, explosivas ou perniciosas para a saúde. Entre estas con- Atenção! Ao utilizar as ferra- tam-se cinzas ardentes, gasoli- mentas eléctricas, ter em aten- na, solventes, ácidos ou lixívias. ção as medidas de segurança Perigo de lesões! fundamentais indicadas a se- •... - Page 24 • Desligue sempre o aparelho e Cuidado! Assim se evitam retire a ficha da tomada: danos as pessoas e ao apare- - sempre que o aparelho não lho: for utilizado; - antes de abrir o aparelho; • Certi ique-se de que o aparelho - em todos os trabalhos de ma- está...
-
Page 25: Montagem
Montagem Colocação em funcionamento Desenrole o cabo. Perigo de choque eléctrico. Desenrole, por completo, a mangueira de aspiração ( 21) para trabalhar. 1. Insira as rodas de direção (8) Ligar/Desligar com suportes para acessórios (8a) no lado inferior do re- cipiente (6) e fixe-as com os Ligue a ficha à... -
Page 26: Intervalos De Trabalho
Intervalos de trabalho 3. Abra completamente o saco filtrante de papel (15) e passe-o por cima do bocal Para armazenar o conjunto de aspiração de aspiração interior da conexão de montado durante uma pausa no trabalho, aspiração (10). O anel vedante na abertura do saco pode ... -
Page 27: Aspiração De Líquidos
Aspiração de líquidos 2. Para remover, pressione o engate (21a) e puxe o tubo de aspiração (21) Para a aspiração de líquidos ou de água, para fora. coloque o filtro de esponja (16) sobre o Aspiração Powertool cesto do filtro (3b), na cabeça do motor (3). -
Page 28: Sistema De Limpeza Do Filtro
Manutenção de escoamento ( • Limpe o reservatório ( 6) com um pano húmido. O aparelho não necessita de manutenção. • Lave o filtro de espuma ( 16) em Conservação água tépida com um detergente suave e deixe-o secar. • Sacuda o pó... -
Page 29: Peças Sobressalentes/Acessórios
Peças sobressalentes/Acessórios Pode obter as peças de reposição e os acessórios em www.grizzly-service.eu Caso não tenha internet entre em contacto, por telefone, com o centro de assistência (ver “Service-Center “ página 32). Mantenha os números de encomenda, em baixo mencionados, disponíveis. Pos. -
Page 30: Resolução De Problemas
Resolução de Problemas Problema Causa possível Resolução do problema Examinar a tomada, o cabo, a li- nha, a ficha e o fusível e, caso seja Não há tensão de rede necessário, levar o aparelho para reparação a um técnico especialis- ta em electricidade O aparelho não arranca... -
Page 31: Garantia
Garantia mente existentes verificados na altura da compra deverão ser comunicados imedia- Prezada cliente, prezado cliente, tamente após se ter desembalado o produ- Este aparelho tem uma garantia de 3 anos to. Após decorrido o período de garantia, as reparações necessárias estão sujeitas a a contar a partir da data da compra. -
Page 32: Serviço De Reparação
Serviço de reparação • Mantenha à mão o talão de com- pra e o número do artigo (por ex., IAN 284950), como comprovativo da As reparações que não sejam abrangidas compra. pela garantia podem ser efetuadas pelo • Pode consultar o número do artigo na nosso centro de serviço, mediante fatura- placa de identificação, na gravura, na ção. -
Page 33: Introduction
Contents Introduction Introduction ....... 33 Congratulations on the purchase of your Intended purpose ....... 33 new device. With it, you have chosen a General description ....34 high quality appliance. Extent of the delivery ...... 34 During production, this equipment has Overview ........ -
Page 34: General Description
General description Overview Housing The illustration of the principal functioning parts can be found 1 Carrying handle on the front and back foldout 2 Filter cleaning button pages. 3 Motor housing with accessory fitting (3a) Extent of the delivery 4 Air flow control 5 Sealing clip Carefully unpack the appliance and check 6 Container... -
Page 35: Description Of Operation
Symbols on the appliance Technical data Electrical machines must not be dis- Wet and dry vacuum cleaner ..PNTS 1500 C4 posed of with household refuse. Mains voltage (U) ..220-240 V~, 50 Hz Power consumption of motor (P) ...1500 W Switching between additional ap- Max. -
Page 36: Pictograms Regarding The Use Of Nozzles And Filters
Safety information Pictograms regarding the use of nozzles and filters Caution! When using power Nozzle to vacuum carpets. tools, observe the following basic safety measures for the Nozzle to vacuum smooth surfaces prevention of electric shocks and hard floor surfaces. and the risk of injury and fire: Nozzle to vacuum dust and dirt from joints and cracks. - Page 37 • Make sure that the mains volt- • Nozzles and suction tubes must age corresponds with the infor- not reach head level whilst in mation on the rating plate. use. Personal injury could occur. • Only plug the appliance into a To avoid accidents and injuries from socket which is safeguarded by electric shocks:...
-
Page 38: Assembly
Assembly Operation Pull out the mains plug. Fully unwind the suction hose ( Danger of electric shock. 21) before commencing work. Switching on/off 1. Attach the castors (8) with acces- sory holders (8a) to the under- side of the container (6) and fix Connect the mains plug. -
Page 39: Work Breaks
Work breaks suction fitting of the suction connection (10). If you want to store away the assembled The sealing ring on the filter bag open- suction equipment when you take a break, ing must completely enclosed the arm on the suction nozzle. you can push the telescopic suction tube (19) ... -
Page 40: Wet Vacuuming
Wet vacuuming Powertool vacuuming The Powertool hose can be used for For wet sucking or to suck up water, place the following: the foam filter (16) on the filter basket (3b) on the motor head (3). • Cleaning hard-to-reach places or sensi- tive equipment. -
Page 41: Filter Cleaning System
14) and clean it with a paint brush 3. Push the telescopic suction tube (19) or hand brush. together and insert the suction tube • Replace the paper filter bag ( holder (20) into the accessory holder when full (see “Replacement parts/Ac- (3a) on the motor head (3). -
Page 42: Replacement Parts/Accessories
Replacement parts/Accessories Spare parts and accessories can be obtained at www.grizzly-service.eu If you do not have internet access, please contact the Service Centre via telephone (see “Service-Center” Page 45). Please have the order number mentioned below ready. Item Item Description Product No. -
Page 43: Trouble Shooting
Trouble shooting Problem Possible cause Fault correction Check plug socket, cable, line, Mains voltage is not plug and fuse, where appropriate, present repair through electrical specialist Defective on/off switch Device does not start Repair through customer service Worn carbon brushes Defective motor Hose system ( 21/22) -
Page 44: Guarantee
Guarantee Guarantee Cover The equipment has been carefully pro- Dear Customer, duced in accordance with strict quality This equipment is provided with a 3-year guidelines and conscientiously checked prior to delivery. guarantee from the date of purchase. In case of defects, you have statutory rights against the seller of the product. -
Page 45: Repair Service
Service-Center • After consultation with our customer service, a product recorded as defec- Service Great Britain tive can be sent postage paid to the service address communicated to you, Tel.: 0871 5000 720 with the proof of purchase (receipt) (£ 0.10/Min.) and specification of what constitutes E-Mail: grizzly@lidl.co.uk IAN 284950... -
Page 46: Einleitung
Inhalt Einleitung Einleitung ........46 Herzlichen Glückwunsch zum Kauf Ihres Bestimmungsgemäße neuen Gerätes. Sie haben sich damit für ein Verwendung ......46 hochwertiges Gerät entschieden. Allgemeine Beschreibung ... 47 Dieses Gerät wurde während der Produktion Lieferumfang/Zubehör ....47 auf Qualität geprüft und einer Endkontrolle Übersicht ........ -
Page 47: Allgemeine Beschreibung
Allgemeine Übersicht Beschreibung Gehäuse Die Abbildungen finden Sie auf 1 Tragegriff der vorderen und hinteren Aus- 2 Filterreinigungstaste klappseite. 3 Motorkopf mit Zubehöraufnahme (3a) Lieferumfang/Zubehör 4 Luftstromregler 5 Verschlussclip Packen Sie das Gerät aus und kontrollieren 6 Behälter Sie, ob es vollständig ist: 7 Netzanschlussleitung Das Gerät wird mit aufgesetztem Motor- 8 5 Lenkrollen mit Zubehöraufnah-... -
Page 48: Funktionsbeschreibung
Technische Daten Düsen 24 Bodendüse zum Trockensaugen Gerät ......PNTS 1500 C4 25 Bodendüse zum Nass-Saugen 26 Fugendüse Netzspannung (U) ..220-240 V~, 50 Hz 27 Polsterdüse Bemessungs-Aufnahme 28 Autodüse des Saugers (P) ......1500 W 29 2 Haltebügel Max. zulässige Belastung der Gerätesteckdose (Pmax.) ..... -
Page 49: Symbole Und Bildzeichen
Symbole und Bildzeichen Bildzeichen zum Einsatz von Düsen und Filtern Bildzeichen in der Betriebs- anleitung Düse zum Saugen von Teppichen. Gefahrenzeichen mit Anga- Düse zum Saugen von glatten Flä- ben zur Verhütung von Perso- chen und Hartböden. nen- oder Sachschäden. Düse zum Saugen von Staub und Gebotszeichen mit Angaben zur Schmutz aus Fugen und Ritzen. -
Page 50: Sicherheitshinweise
Sicherheitshinweise • Düsen und Saugrohr dürfen beim Arbeiten nicht in Kopfhöhe kommen. Es besteht Verletzungs- Achtung! Beim Gebrauch von gefahr. Elektrowerkzeugen sind zum Schutz gegen elektrischen So vermeiden Sie Unfälle und Ver- Schlag, Verletzungs- und letzungen durch elektrischen Schlag: Brandgefahr folgende grund- sätzliche Sicherheitsmaßnah- •... -
Page 51: Montage
Montage • Achten Sie darauf, dass die Netzspannung mit den Angaben des Typenschildes übereinstimmt. Ziehen Sie den Netzstecker. • Schließen Sie das Gerät nur an Gefahr durch elektrischen Schlag. eine Steckdose an, die mit min- destens 16 A abgesichert ist. 1. Stecken Sie die Lenkrollen (8) mit •... -
Page 52: Bedienung
Bedienung Arbeitspausen Wickeln Sie den Saugschlauch ( Zur Aufbewahrung der zusammengesetzten 21) zum Arbeiten ganz ab. Sauggarnitur während einer Arbeitspause können Sie Ein-/Ausschalten das Teleskopsaugrohr (19) zusammen- schieben und den Saugrohr-Halter (20) Stecken Sie den Netzstecker des in die Zubehöraufnahme (3a) am Mo- Gerätes ein. -
Page 53: Nass-Saugen
3. Falten Sie den Papierfilterbeutel (15) optional erhältlich siehe „Ersatzteile/ komplett auf und stülpen Sie diesen Zubehör“), der anstelle des im Liefer- über den innen liegenden Einsaugstut- umfang enthaltenen Papierfilterbeutels zen des Sauganschlusses (10). (15) verwendet wird. Der Dichtungsring an der Filterbeutelöff- Nass-Saugen nung muss den Steg am Einsaugstutzen vollständig umschließen. -
Page 54: Blasen
Reinigung/Wartung Blasen 1. Zum Blasen schieben Sie den Saug- Ziehen Sie den Netzstecker. schlauch (21) in den Anschluss Blasen Gefahr durch elektrischen Schlag. (12), er rastet ein (Betrieb ohne Verwen- Allgemeine dung eines Filters). Reinigungsarbeiten 2. Zum Entnehmen drücken Sie die Raste (21a) und ziehen Sie den Saugschlauch Spritzen Sie das Gerät nicht (21) heraus. -
Page 55: Wartung
Entsorgung/ Stecken Sie den Netzstecker des Gerätes ein. Umweltschutz 1. Kippen Sie den Ein-/Ausschalter (13) in Führen Sie Gerät, Zubehör und Verpackung Position „I“. einer umweltgerechten Wiederverwertung 2. Drehen Sie den Luftstromregler (4) in die Position MAX. 3. Drücken Sie mit Hilfe des Handgriffes Elektrogeräte gehören nicht in den (18) die Filterreinigungstaste (2) nach Hausmüll. -
Page 56: Ersatzteile/Zubehör
Ersatzteile/Zubehör Ersatzteile und Zubehör erhalten Sie unter www.grizzly-service.eu Sollten Sie kein Internet haben, so wenden Sie sich bitte telefonisch an das Service-Center (siehe Seite 59). Halten Sie die unten genannten Bestellnummern bereit. Position Position Bezeichnung Einsatz Bestell-Nr. Betriebs- Explosions- anleitung zeichnung Verschlussclips, 2 Stück 91104545... -
Page 57: Fehlersuche
Fehlersuche Problem Mögliche Ursache Fehlerbehebung Steckdose, Netzanschlussleitung, Leitung, Stecker und Sicherung Netzspannung fehlt prüfen, ggf. Reparatur durch Elektro- fachmann Gerät startet nicht Ein-/Ausschalter ( defekt Reparatur durch Kundendienst Kohlebürsten abgenutzt Motor defekt Schlauchsystem Verstopfungen und Blockierungen 21/22) oder Düsen beseitigen 24-28) verstopft Luftregulierung am Handgriff Luftregulierung schließen... -
Page 58: Garantie
Garantie Garantieumfang Das Gerät wurde nach strengen Qualitäts- Sehr geehrte Kundin, sehr geehrter Kunde, richtlinien sorgfältig produziert und vor Sie erhalten auf dieses Gerät 3 Jahre Ga- Anlieferung gewissenhaft geprüft. rantie ab Kaufdatum. Im Falle von Mängeln dieses Gerätes Die Garantieleistung gilt für Material- oder stehen Ihnen gegen den Verkäufer des Fabrikationsfehler. -
Page 59: Reparatur-Service
Service-Center zunächst die nachfolgend benannte Serviceabteilung telefonisch oder per Service Deutschland E-Mail. Sie erhalten dann weitere In- formationen über die Abwicklung Ihrer Tel.: 0800 54 35 111 Reklamation. E-Mail: grizzly@lidl.de IAN 284950 • Ein als defekt erfasstes Gerät können Sie, nach Rücksprache mit unserem Service Österreich Kundenservice, unter Beifügung des Kaufbelegs (Kassenbons) und der... -
Page 60: Traduzione Della Dichiarazione Di Conformità Ce Originale
Con la presente dichiariamo che We hereby declare that the l‘aspirapolvere/liquid wet and dry vacuum cleaner serie PNTS 1500 C4 model series PNTS 1500 C4 Serial number Numero di serie 201704000001 - 201704076657 201704000001 - 201704076657 corrisponde alle seguenti direttive UE in... -
Page 61: Tradução Do Original Da Declaração De Conformidade Ce
CE erklärung Hiermit bestätigen wir, dass der Vimos, por este meio, declarar que o Nass- und Trockensauger Aspirador de liquidos/pó da série PNTS 1500 C4 Baureihe PNTS 1500 C4 Seriennummer Número de serie 201704000001 - 201704076657 201704000001 - 201704076657 corresponde às respectivas normas da UE... -
Page 63: Vista Esplosa
Vista en corte • Vista esplosa Exploded Drawing • Explosionszeichnung PNTS 1500 C4 informativo, informative, informativ 20170314_rev02_gs... - Page 64 GRIZZLY TOOLS GMBH & CO. KG Stockstädter Straße 20 DE-63762 Großostheim GERMANY Versione delle informazioni · Estado das informações · Last Information Update Stand der Informationen: 02 / 2017 Ident.-No.: 72079505022017-IT / PT IAN 284950...
Need help?
Do you have a question about the PNTS 1500 C4 and is the answer not in the manual?
Questions and answers