Yealink VP59 User Manual
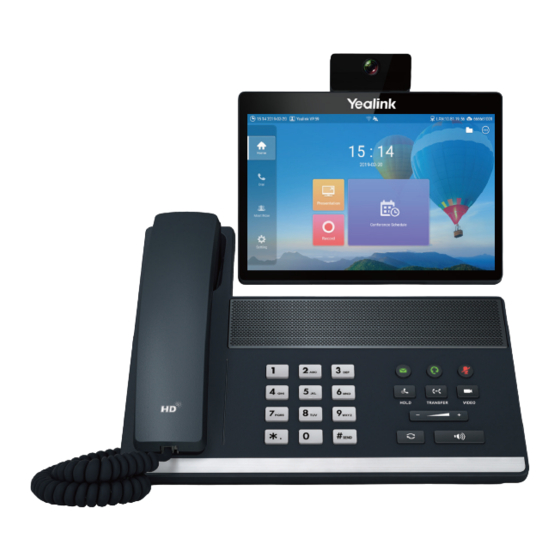
Flagship smart video phone
Hide thumbs
Also See for VP59:
- Administrator's manual (533 pages) ,
- User manual (191 pages) ,
- Auto provisioning manual (70 pages)
Table of Contents
Advertisement
Quick Links
Advertisement
Table of Contents

Related Manuals for Yealink VP59


Summary of Contents for Yealink VP59
-
Page 2: Table Of Contents
Turning off the Local Camera....................17 Controlling the Remote Cameras................... 17 Removing Participants from the Local Video Conference............18 Ending the Local Video Conference..................18 Using the Yealink Meeting Management Platform........18 Meet Now............................19 Viewing Scheduled Conferences.......................19 Joining Scheduled Conferences......................19 Joining a Scheduled Conference from a Conference Reminder..........19 Joining a Scheduled Conference from the Conference Schedule..........20... - Page 3 Controlling the Remote Cameras................... 25 Viewing the Message List...................... 25 Leaving the Conference......................26 Ending the Conferences......................26 Using Yealink Meeting Server..............26 Meet Now............................27 Viewing Scheduled Conferences.......................27 Joining Scheduled Conferences......................27 Joining a Scheduled Conference from a Conference Reminder..........27 Joining a Scheduled Conference from the Conference Schedule..........28...
- Page 4 Customizing the Time and Date Format................40 Setting the Time Zone......................40 Configuring the Audio Settings......................41 Adjusting the Volume......................41 Setting the Ring Tone for the VP59..................41 Configuring Key Tone......................41 Enabling Mute Mode.......................41 Setting the Extended Audio Input..................42 Setting the Extended Audio Output..................42...
- Page 5 | Contents | v Deleting All Call Records....................... 48...
-
Page 6: About This Guide
This guide can help you to quickly use VP59. Before you set up and use the phone, check with your system administrator that the IP network is ready for phone configuration and read the Quick Start Guide in the product package. -
Page 7: Hardware Overview
| Getting Started | 7 Hardware Overview Item Description Power Indicator LED Indicates the call status and the system status. Touch Screen Touch to select the desired item. Displays the time, the date, the call and other related information. -
Page 8: Screen Introduction
USB2.0 Port Allows you to connect a USB flash drive/WPP20/CPN10/USB Line output adapter. Screen Introduction When you register a Yealink Cloud account on the phone, the home page is as below:... - Page 9 Dial page. Dial Go to the Dial page. Meet Now When you register a Yealink Cloud account or a YMS account, you can initiate a Meet Now conference. Setting Configure the phone. File Manager It stores all the local images and videos.
-
Page 10: Icon Introduction
Wi-Fi mode is enabled, and the device is connected to the wireless network Wireless hotspot is enabled A SIP account is registered An H.323 account is registered A Yealink Cloud account/YMS account is registered A PSTN account is registered Log into the StarLeaf/Zoom/Pexip/BlueJeans/EasyMeet platform Auto answer... - Page 11 Received calls (H.323 account/SIP account/IP Call) Received calls (Cloud platform) Missed calls (H.323 account/SIP account/IP Call) Missed calls (Cloud platform) Local directory Yealink Cloud contacts or YMS contacts Virtual Meeting Room Third party devices Room system Place video calls Place voice calls...
-
Page 12: Entering Characters
| Getting Started | 12 Entering Characters The phone provides Android keyboard (AOSP) and Google Pinyin input methods. Android Keyboard (AOSP) – English (US) Input Method Number Key Tone Description 26 English Letters • Enter the letter. • Long tap a key, and then slide to choose an option. -
Page 13: Running The Setup Wizard
| Running the Setup Wizard | 13 Tap the key in the bottom-left corner to change the input method to Android Keyboard (AOSP)-English (United States). Running the Setup Wizard The setup wizard appears automatically at the first startup or when the device is reset to factory. You can configure the initiative settings according to the prompts, for example, the language, the network, and the account. -
Page 14: Editing Numbers Before Calling
3. Enter the number. 4. Tap Tip: If you register a SIP/H.323/YMS/Yealink Cloud account/PSTN account on the phone, you can select the desired one from the right side of the Home page to place calls. Editing Numbers Before Calling Editing numbers before calling allows you to edit the call history and dial it out, so that you do not need to enter the similar number again. -
Page 15: Redialing
| Calling | 15 Redialing The phone stores the dialed number , which can help you quickly dial the number again. Procedure 1. Press the REDIAL key. The dialed numbers are displayed on the screen. 2. Select the desired number. Tip: Press the REDIAL key twice to dial the latest dialed number. -
Page 16: Rejecting Incoming Calls
| Local Video Conference | 16 Rejecting Incoming Calls Procedure Tap Reject when receiving calls. Ending Calls Procedure Tap Hang up. first, and then tap Hang up. If you display the video image in the full screen, you need tap Local Video Conference The meeting contains at least three parties ans the following introduces how to initiate and manage local video conferences, besides, you can also use the wireless Presentation Pod software to manage local... -
Page 17: Initiating A Conference By Inviting Contacts
| Local Video Conference | 17 Initiating a Conference by Inviting Contacts You can invite contacts during a call to initiate a conference. Procedure 1. Tap New Call on the left side. If you display the video image in the full screen, you need to exit the full screen first. 2. -
Page 18: Removing Participants From The Local Video Conference
The Yealink Meeting Management Platform is a value-added and cloud-based service platform for Cloud systems. When you register a Yealink Cloud account, you can use the video conferencing features of Yealink Cloud. There are three types of Yealink Cloud video conferences: •... -
Page 19: Meet Now
If you have scheduled conferences or are invited to a scheduled conference, the conference schedule will be displayed on your device (with Yealink Cloud account registered), and the mailbox linked to the Yealink Cloud account will receive an email about the conference details. -
Page 20: Joining A Scheduled Conference From The Conference Schedule
Virtual Meeting Room (VMR) The VMR is created by the Yealink Cloud enterprise administrator on the Yealink Meeting Management Platform, so that the Yealink Cloud user can call into the VMR to initiate video conferences at any time. • Joining a VMR... - Page 21 | Using the Yealink Meeting Management Platform | 21 Organizer/Moderator Guest Lock/Unlock the conference Allow/Reject the participant to join the conference Move participants to the lobby Apply for speaking Manage the application Switch the roles between moderator and guest Switch between free speak and raise hand mode...
-
Page 22: Inviting Conference Participants
| Using the Yealink Meeting Management Platform | 22 Inviting Conference Participants During the Yealink Cloud video conference, any participants can invite other Yealink Cloud contacts to join the conference. Procedure 1. Tap New Call on the left side. If you display the video image in the full screen, you need to exit the full screen first. -
Page 23: Moving Participants To The Lobby
| Using the Yealink Meeting Management Platform | 23 bedside the desired participant. You can also tap All Allow /All Reject to manage all the participants in the lobby. Moving Participants to the Lobby To maintain the conference order, you can move the guest who has joined the conference to the lobby. -
Page 24: Switching Roles Between Moderator And Guest
2. Tap the Free Speak field, select the desired mode from the drop-down menu. Muting/Unmuting All Conference Participants In a Yealink Cloud video conference, the organizer or the moderator can mute or unmute all conference participants except for themselves. If the moderator enables Raise Hand mdoe, the participants muted by the moderator can not unmute by themselves, and they can only apply for speak. -
Page 25: Setting As Spotlight Video/Cancelling The Spotlight Video
| Using the Yealink Meeting Management Platform | 25 Setting as Spotlight Video/Cancelling the Spotlight Video If you are the moderator of the meeting, when you want to focus on a specific participant, or you want to be the focus in the meeting, you can set the corresponding participant or yourself as the spotlight video. The... -
Page 26: Leaving The Conference
| Using Yealink Meeting Server | 26 Leaving the Conference When some conference participants leave the conference, other participants keep going. Procedure Do one of the following according to your role: • If you are a moderator, tap Hang up and select Leave, others keep going. -
Page 27: Meet Now
7 days. Joining Scheduled Conferences After you schedule a conference on Yealink Meeting Server or Microsoft Outlook software, the conference will be pushed to the endpoint synchronously. You can join the conference 60 minutes before the scheduled conference starts by default. The time when to enter the conference in advance is set by the enterprise administrator. -
Page 28: Joining A Scheduled Conference From The Conference Schedule
Virtual Meeting Room (VMR) The VMR is created by the enterprise administrator on Yealink Meeting Server, and the YMS user can call into the VMR to initiate a video conference at any time, without a reservation. For more information, refer to Yealink Meeting Server User Guide. - Page 29 • Virtual Meeting Room (VMR): support training mode and discussion mode. (The conference mode can only be set by the enterprise administrator on Yealink Meeting Server.) Yealink YMS video conferences supports training mode conference and discussion mode conference. In the conferences, the participant roles are as follow: •...
-
Page 30: Inviting Conference Participants
| Using Yealink Meeting Server | 30 • Enabling/Disabling the Remote Camera • Controlling the Remote Cameras • Viewing the Message List • Leaving the Conference • Ending the Conferences Inviting Conference Participants During the YMS video conference, any participants can invite other YMS contacts to join the conference. -
Page 31: Allowing/Rejecting The Participant To Join The Conference
| Using Yealink Meeting Server | 31 Allowing/Rejecting the Participant to Join the Conference If the conference is locked by the moderator, the people who call into the conference will go to the lobby, and the moderator can allow them to join the conference or not. -
Page 32: Managing The Application
| Using Yealink Meeting Server | 32 Managing the Application In a training mode conference, the moderator can allow or reject the application. About this task Note: Managing the application is not applicable to the Meet Now conference. Procedure 1. Tap Participant on the left side. -
Page 33: Enabling/Disabling The Remote Camera
| Using Yealink Meeting Server | 33 Enabling/Disabling the Remote Camera The moderator can enable or disable the participant's camera to control whether other participants can see the video of the participant. Procedure 1. Tap Participant on the left side. -
Page 34: Ending The Conferences
About this task You can use Yealink WPP20 wireless presentation pod for content sharing. Before sharing the content, you need insert the WPP20 wireless presentation pod to the phone for pairing. For more information, refer to Yealink WPP20 Wireless Presentation Pod Quick Start Guide Note: If you connect a monitor to the phone, the shared content is displayed on the monitor rather than on the phone screen. -
Page 35: Sharing Content Via Wpp20
Start sharing. • On the Yealink Wireless Presentation Pod software, click Contents Share and choose the file you want to share, and then click Start sharing. The computer content is automatically projected to the device. -
Page 36: Starting/Closing Presentation
USB flash drive by default. To record videos to your computer, you need to purchase a WPP20 wireless presentation pod. For more information, refer to Yealink WPP20 Wireless Presentation Pod Getting Started Guide. -
Page 37: Viewing Recorded Videos
| Managing the Recorded Videos | 37 Viewing Recorded Videos You can view the recorded videos from the File Manager. Procedure On the Home page, tap 2. Tap Video from the Local Storage/USB Storage. 3. Do one of the following: •... -
Page 38: Changing The Local Layout
| Changing the Local Layout | 38 Changing the Local Layout The conference call on the phone can be divided into local conference and YMS/Cloud conference. The video images displayed on each conference layout are as below You can switch the local layout among 1+N, Selected Speaker and Equal N×N. 1+N: in this layout, the assigned image is given prominence in the largest pane, and other images are •... -
Page 39: Changing The Screen Layout
Related tasks Enabling HDMI Related information Changing the Local Layout Basic Settings • Setting the Language • Enabling/Disabling the Clock for the VP59 • Manually Configuring the Time and Date • Configuring the Audio Settings • Configuring Video Settings •... -
Page 40: Enabling/Disabling The Clock For The Vp59
2. Select the desired language. 3. Save the change. Enabling/Disabling the Clock for the VP59 After you enable the clock, the time and date are displayed at the center of the Home page. This feature is only available to VP59. -
Page 41: Configuring The Audio Settings
Related tasks Key Tone Setting the Ring Tone for the VP59 You can set the ring tone for VP59, and the ring tone is available to all accounts registered on VP59. Procedure 1. Tap Setting > Basic > RingTone. 2. Select the desired ring tone. -
Page 42: Setting The Extended Audio Input
You can specify an available audio output if you do not want to use the default audio output device. The phone can use the device connected via HDMI or USB Line output as the audio output device. If you select Auto, the phone automatically selects the audio output with the highest priority. The priority is VP59 Phone>HDMI>USB Line output. -
Page 43: Adjusting The Backlight And The Automatic Sleep Time
Procedure 1. Tap Setting > Basic > Screensaver. 2. Select the desired time. 3. Save the change. Managing the Directory Several types of directories are available on your VP59. • Managing Local Directory • Managing Local Favorites • Yealink Cloud Contacts •... -
Page 44: Adding A Local Contact
| Managing the Directory | 44 Adding a Local Contact You can add 500 local contacts to your device at most. Procedure Tap Dial > Local > 2. Select Add Local Contact from the drop-down menu. 3. Enter the contact name in the Name field. 4. -
Page 45: Adding Favorite Contacts From Local Contacts
| Managing the Directory | 45 Adding Favorite Contacts from Local Contacts Procedure 1. Tap Dial > Local. beside the desired contact. 3. Tap Add to favorite. The contact will be added to the local favorites list. Setting Contacts as Favorite Contacts by Searching Procedure Tap Dial >... -
Page 46: Yealink Cloud Contacts
Only the Yealink Cloud enterprise administrator can add, edit and delete Yealink Cloud contacts on the Yealink Meeting Management Platform. On your system, you can only search for and place calls to the Yealink Cloud contacts. For more information about Yealink Meeting Management Platform, refer to... -
Page 47: Managing The Call History
| Managing the Call History | 47 Managing the Call History The call history contains all calllog, missed calls, placed calls and received calls. • Viewing the Call History • Adding a Call Record to the Local Directory • Deleting History Records Viewing the Call History You can view up to 100 pieces of the call history. - Page 48 | Managing the Call History | 48 Deleting All Call Records Procedure 1. Tap Dial > Local CallLog. 2. At the bottom of all the call histories, tap Clear > Clear All.
Need help?
Do you have a question about the VP59 and is the answer not in the manual?
Questions and answers