
Related Manuals for VPI HW-40


Summary of Contents for VPI HW-40
- Page 1 VPI HW-40 Turntable Manual Setup and Instruction Manual VPI Industries, Inc., 77 Cliffwood Ave. #5D, Cliffwood, NJ 07721 http://www.vpiindustries.com...
- Page 3 HW-40 Turntable Packing List Serial #: ________________ HW-40 Chassis HW-40 Platter HW-40 Dust Cover Screws Signature Weight (Located in small plastic bag) Periphery Ring Clamp Counter Weight Finger Lift Power Cord Alignment Jig Force Gauge...
- Page 4 VPI staff members: http://vpiforum.com/ I also want to invite you to join the VPI fan group, “I love my VPI turntable” on Facebook where everyone shares pictures of their tables and what they are listening to: https://www.facebook.com/groups/VPIturntablegroup/...
-
Page 5: Safety Instructions
• Do not expose the HW-40 to rain or excessive moisture. • Do not turn your HW-40 motor on/off at high volumes. To be safe, it is always good practice to mute your system before turning any motor or electrical component on or off. - Page 6 Packaging and Repackaging Diagram Figure 1 – Packaging...
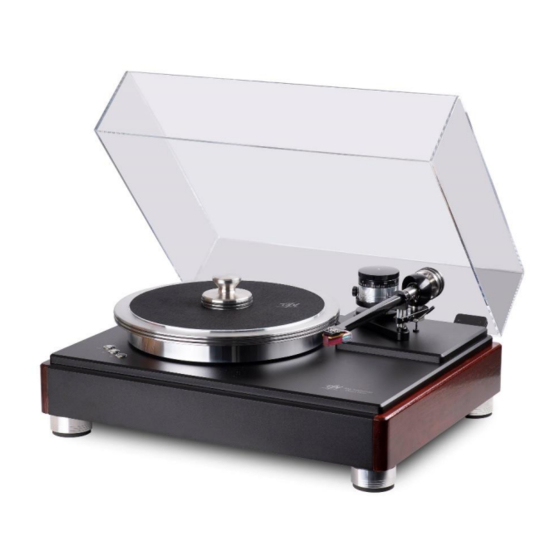
- Page 7 Anatomy of the HW-40 Turntable Figure 2 – HW-40 Anatomy Anatomy of the JMW Tonearm Figure 3 – Tonearm Anatomy...
-
Page 8: Unpacking The Box
✓ Counterweight ✓ Power cord • Having a clear space ready, remove the HW-40 Chassis from the box and place it carefully on an isolated platform. • Remove Platter from bottom of box, place on motor hub, with power off spin platter and verify it is properly seated on hub by observing the lower platter edge distance relative to the top plate. - Page 9 Be sure to use washers under the screw heads. • VPI provides 2 short and long screws for mounting your cartridge. If the provided screws do not work with your cartridge, we recommend you use the screws provided by the cartridge...
- Page 10 • The tonearm wires are color-coded as follows: Note: The Left Channel may sometimes be identified as black. If your phono section inverts phase, the hot color becomes the ground color. • It is recommended to use tweezers or needle nose plyers to connect the tonearm leads to the cartridge terminals.
- Page 11 • Look down at the cartridge and align it between the lines of the grid. You should have the diamond stylus on the white dot and the cantilever lined up with the lines on the grid. Use a flashlight to look from the front and line up the cantilever with the grid lines. The only alignment that matters is the cantilever lined up with the white lines, and the diamond on the white dot.
-
Page 12: Setting The Tracking Force And Tonearm Height
Setting the Anti-Skating – Two Solutions • VPI does not support the need to have anti-skate but does respect the customer’s interest in having it enabled. Therefore, we provide a mechanism for anti-skate and the option of engaging it. - Page 13 Possible Problems: • Noise in the system: a hum or buzz: The answer is to ground the motor and system properly. A line filter that floats the grounds will not allow proper grounding of the phono system, the phono system must be grounded! Phono is not like a CD player and if this is your first table or your return to vinyl after a decade or so you must remember that phono amplification can be 1,000 times higher than CD or streaming so any noise that gets into the system will be amplified much more.
- Page 14 (5) years from the date of purchase by the original retail purchaser. VPI’s sole obligation under this warranty is limited to the repair or replacement, at VPI’s option, of any part(s) found to be defective. VPI’s obligation to repair or replace defective parts is the purchaser’s sole and exclusive remedy, and VPI shall not be liable for any direct or indirect injury and/or property damage arising out of the use of the product or defect in or failure of the product.
Need help?
Do you have a question about the HW-40 and is the answer not in the manual?
Questions and answers