
Related Manuals for VPI Scout


Summary of Contents for VPI Scout
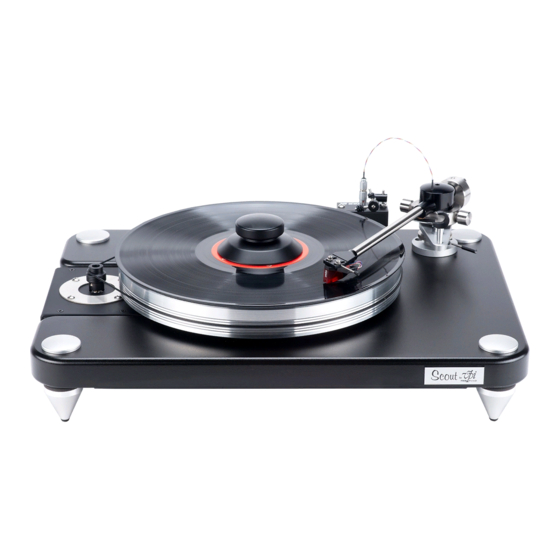
- Page 1 VPI Scout Turntable Manual Setup and Instruction Manual Scout 2 upgrade instructions included VPI Industries, Inc., 77 Cliffwood Ave. #5D, Cliffwood, NJ 07721 http://www.vpiindustries.com...
- Page 2 Scout Turntable Packing List Serial #:________________ Scout Chassis Record Clamp Azimuth Rod Gauge Cartridge Hardware Instruction Manual Drive Belt Power Cord (115V Only) Alignment Jig Platter Tonearm Date: __________ Final Check by: ________________________...
- Page 3 Save all packing materials. The Scout should only be moved or shipped in its original packaging to reduce the risk of damage in transit. The Scout must be placed on a flat, level surface. This will make setup easy, provide better sound quality, and put less strain on the main bearing.
-
Page 4: Safety Instructions
Scout. Remove the 2 foam side pieces and foam block in the center. Make space for the Scout and remove the chassis from the box. Put the chassis down on a solid surface. - Page 5 Place the turntable chassis, with the square cutout on the left, on the shelf or stand where it will be used. The better isolation you provide the Scout, the better it will sound. We highly recommend a 1 to 3 inch thick maple shelf sitting on rubber isolator feet for this purpose.
-
Page 6: Installing And Aligning The Cartridge
Installing and Aligning the Cartridge For cartridges with pass-through mounting holes, use the hardware supplied with the cartridge and follow the alignment procedure carefully (Denon, Miajimma, etc.) For all cartridges using 2.5mm standard metric mounting threads use the supplied Allen head screws and the 5/64”... - Page 7 Place the arm tube assembly on the male pivot point, using caution with the 4-color wire and Lemo connector. Set the arm in its rest. If the cartridge has a guard, remove it. MAKE SURE THE MALE POINT IS IN THE CENTER OF THE FEMALE CUP, IT SHOULD FEEL SOLID BUT YOU SHOULD BE ABLE TO SLIDE IT SIDEWAYS AND THE ARM RAISES AS YOU GO FROM THE CENTER TO THE SIDES OF THE FEMALE BEARING.
- Page 8 6.10 When the cartridge is properly positioned, tighten the cartridge mounting screws and remove the alignment jig. Do not make them overly tight, the Scout arm is self-damping and you can damage the surface by over tightening. VIEW OF CONICAL AND LINE CONTACT STYLI AND WHY ALIGNMENT MATTERS MORE WITH THE LINE CONTACT.
- Page 9 VPI has a unique solution to anti-skating: the coiled wire of the Scout arm acts as a spring and pushes the arm back without affecting the sound quality. You now have the option of installing a mechanical anti-skate for those that want it.
-
Page 10: Setting The Azimuth
If your cartridge is heavy and the counterweight is all the way back, you can order a heavier weight from your dealer. The Scout Tonearm does not have a built-in tracking force gauge. We recommend that you use a digital gauge. -
Page 11: Playing Records
Allow at least 20 hours of break-in time. 11.2 The motor will make some low-level noise. This will not get into the system. The motor and bearings will become quieter as you use your Scout. Place the motor on a mouse pad for better isolation. 11.3 If you notice hum in the system, remove the turntable to phono section interconnects and replace them with very cheap, standard VCR interconnects. -
Page 12: Additional Items Available From Your Dealer
Additional Items Available from Your Dealer The VPI Synchronous Drive System power supply provides a major increase in musicality by feeding the synchronous motor in your table a perfectly stable wave form at the frequency you choose. The SDS lets you change speed electronically. - Page 13 (3) years from the date of purchase by the original retail purchaser. VPI’s sole obligation under this warranty is limited to the repair or replacement, at VPI’s option, of any part(s) found to be defective. VPI’s obligation to repair or replace defective parts is the purchaser’s sole and exclusive remedy, and VPI shall not be liable for any direct or indirect injury and/or property damage arising out of the use of the product or defect in or failure of the product.
- Page 14 NOTES:...
Need help?
Do you have a question about the Scout and is the answer not in the manual?
Questions and answers