Sony UP-DR80MD Instructions For Use Manual
Digital
Hide thumbs
Also See for UP-DR80MD:
- Quick manual (17 pages) ,
- Quick reference manual (4 pages) ,
- Specifications (2 pages)

Related Manuals for Sony UP-DR80MD


Summary of Contents for Sony UP-DR80MD
- Page 1 4-118-614-18(1) 2018-07 Digital Color Printer Instructions for Use UP-DR80MD © 2008 Sony Corporation...
- Page 2 Indications for Use/Intended Use Symbols on the product The Sony UP-DR80MD printer is a compact, medical grade color printer that can accept digital signal input. It is Consult the instructions for use designed to be integrated into medical imaging systems...
- Page 3 – Connect the unit and the affected devices to different branch circuits. For customers in the U.S.A and Canada For more information, consult qualified Sony service When you use this product connected to 240 V single personnel. phase, be sure to connect this product to a center tapped (Applicable standard: IEC 60601-1-2) circuit.
- Page 4 Important EMC notices for use in medical environments • The UP-DR80MD needs special precautions regarding EMC and needs to be installed and put into service according to the EMC information provided in the instructions for use. • The UP-DR80MD is intended for use in a professional healthcare facility environment.
- Page 5 Guidance and manufacturer’s declaration – electromagnetic immunity The UP-DR80MD is intended for use in the electromagnetic environment specified below. The customer or the user of the UP-DR80MD should assure that it is used in such an environment. IEC 60601 Immunity test Compliance level Electromagnetic environment –...
- Page 6 Guidance and manufacturer’s declaration – electromagnetic immunity The UP-DR80MD is intended for use in the electromagnetic environment specified below. The customer or the user of the UP-DR80MD should assure that it is used in such an environment. IEC 60601 Immunity test Compliance level Electromagnetic environment –...
- Page 7 To assess the electromagnetic environment due to fixed RF transmitters, an electromagnetic site survey should be considered. If the measured field strength in the location in which the UP-DR80MD is used exceeds the applicable RF compliance level above, the UP-DR80MD should be observed to verify normal operation. If abnormal performance is observed, additional measures may be necessary, such as reorienting or relocating the UP-DR80MD.
- Page 8 Guidance and manufacturer’s declaration – electromagnetic immunity The UP-DR80MD is intended for use in an electromagnetic environment in which radiated RF disturbances are controlled. Portable RF communications equipment should be used no closer than 30 cm (12 inches) to any part of the UP-DR80MD.
- Page 9 Use a proper power cord for your local power supply. warranty for important information and complete terms 1. Use the approved Power Cord (3-core mains lead) / and conditions of Sony’s limited warranty applicable to Appliance Connector / Plug with earthing-contacts that this product.
-
Page 10: Table Of Contents
Table of Contents Introduction Features ..............11 System Configuration ........11 Location and Function of Parts and Controls ...11 Front ..............11 Rear ..............12 Preparation Supplied Accessories ..........13 Carrying the printer ..........13 Connections ............14 USB Port Connection ........14 Installing the Printer Driver ......14 Operation Before Printing .............15 Notes on Handling the Ink Ribbon and Paper ..15... -
Page 11: Introduction
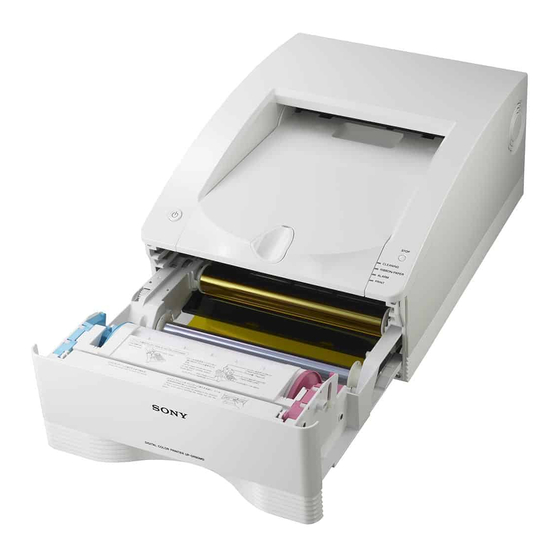
Parts and Controls Features Front The UP-DR80MD Digital Color Printer is a dye sublimation thermal transfer printer providing high quality and high resolution printing of computer image data on A4 or letter size paper in full color (256 gradations process and 16.7 million colors). -
Page 12: Rear
G Indicators Rear The indicators are as shown below: A TRAY LOCK indicator Lights when the media tray cannot be pulled out. B RIBBON/PAPER indicator Lights when an error involving the ink ribbon or paper occurs. Also, flashes while cleaning is in progress. A OPTION connector (type A) indicator C ALARM indicator Flashes if an unsupported device is connected. -
Page 13: Preparation
Paper holder Paper holder (pink) (1) (blue) (1) Note NEVER handle or lift the printer as shown. USB cable 1-824-211-41 (SONY) (1) Before Using this Printer (1) Quick Guide (1) CD-ROM (1) Cleaning ribbon (1) Software License Agreement (1) Service Contact List (1) -
Page 14: Connections
USB Port Connection UP-DR80MD Notes • Follow the connection procedures described in the computer manual. • Make sure that the USB cable is connected securely at both ends. -
Page 15: Operation
• Since, like other color dyes, the dyes used in this ink Operation ribbon may discolor over time, the product will neither be replaced nor be warranted against any color change. Handling paper rolls • Place the paper roll vertically on the stable place, when Before Printing opening the wrapping. -
Page 16: Loading The Ink Ribbon And Paper
Separate the two spools of the ink ribbon. Loading the Ink Ribbon and Paper When using the printer for the first time, it is necessary to first load the paper and ink ribbon. Caution Do not touch any unit circuitry and the patient at the same Load the ink ribbon in the media tray. - Page 17 The selector settings and paper rolls correspond as If the paper holder selector comes off follows. The selector could come off if you drop the blue paper • A4 (A4 size): UPC-R80MD holder. Follow the procedure described below to • LT (letter size): UPC-R81MD reattach the selector to the paper holder.
- Page 18 2 Place the paper roll in the media tray so that the Note arrow on the label points toward the ink ribbon side. You can load the paper roll in the correct Be certain to remove the labels completely. If the direction by matching the colors of the paper labels are not peeled off carefully, they can leave holders inserted into the paper roll with the colors...
-
Page 19: Replacing The Ink Ribbon And Paper
Open the cover of the media tray and remove the Leading edge of paper paper roll. Remove the paper holders from the paper roll. Leading edge of paper If the ink ribbon becomes torn while still in use Cellophane tape, etc., can be used to repair a torn ink Note ribbon so that the remainder of the ribbon can be used. -
Page 20: Printing
• Do not open the media tray while printing is in Printing progress. If the media tray is opened, printing stops and the PRINT, ALARM, RIBBON/PAPER, and TRAY Before printing LOCK indicators all light simultaneously. In such • Is the printer connected to a computer? (page 14) an event, press the 1 On/standby switch once to •... - Page 21 When removing and then reloading a partially used paper roll If the paper roll is not tightly rolled, roll it up more tightly before reloading it. Note When removing a partially used paper roll, be sure to place the media tray on a stable surface before beginning. If you drop the media tray while it contains a paper roll, it could cause personal injury.
-
Page 22: Miscellaneous
• If the unit malfunctions or if a foreign body falls into the cabinet, disconnect the power immediately and consult your Sony service facility or your Sony dealer. Note Before you clean the printer, be sure to press the 1 On/... -
Page 23: Cleaning The Internals Of The Printer
* Cleaning sheets (Cleaning Sheet 80) are supplied with printing packs. If you require additional cleaning sheets, contact your Sony service facility or your Sony dealer. (Cleaning Sheet Pack (10 Sheets) A-1737-055- ) Direction to The following describes the cleaning procedure. - Page 24 • Keep a scratched printout and remember the direction it Remove the backing paper 1 from the cleaning sheet and attach the cleaning sheet to the partially ejected was facing when ejected. You will need it later to paper, then remove the backing paper 2. confirm the position of the scratches.
-
Page 25: Ink Ribbon And Paper
When cleaning is completed, the paper is ejected and Ink Ribbon and Paper the TRAY LOCK indicator is extinguished. Notes Laminate Color Printing Pack UPC-R80MD • The cleaning sheet is ejected with the paper. Contains two color ink ribbons and two rolls of paper (A4- Discard the paper and do not reuse it. -
Page 26: Specifications
SOFTWARE, EXTERNAL STORAGE, OR OTHER yellow, magenta, and cyan EXTERNAL DEVICE. Maximum print size • SONY WILL NOT BE LIABLE FOR DAMAGES OF ANY A4 size: 202 × 287 mm KIND INCLUDING, BUT NOT LIMITED TO, Letter size: 208 × 269 mm... -
Page 27: Troubleshooting
If the problem persists, turn off the • The printer may not have been able to printer and consult with your Sony dealer. recover from an error. tPress the 1 On/standby switch to enter the standby state and then... -
Page 28: Explanation Of Indicators
Indicator Status Possible causes and remedies Explanation of Indicators Flashing One of the following causes. • A ribbon error occurred while The meanings of the indicators on the printer when they cleaning was in progress. tCheck that the cleaning ribbon are on or flashing are described below. -
Page 29: If A Paper Jam Occurs
If there is no printing on the paper If a Paper Jam Occurs Make sure that the leading edge of the paper is not creased or wrinkled. If the leading edge is creased or the paper is wrinkled, While the printer is printing, if the ALARM indicator cut off the leading edge or wrinkled portion with a lights and any of the following messages appears on the pair of scissors or the like. -
Page 30: License
License “The FreeType Project LICENSE” and “The Catharon Open Source LICENSE” software are provided in this unit. We provide this software based on license agreements with their owners of copyright. Based on requests by the owners of copyright of these software applications, we have an obligation to inform you of the following.
Need help?
Do you have a question about the UP-DR80MD and is the answer not in the manual?
Questions and answers