
Related Manuals for Sony UP-DP10


Summary of Contents for Sony UP-DP10
- Page 1 Digital Photo Printer Operating Instructions Page 2 UP-DP10 © 2000 Sony Corporation...
- Page 2 WARNING THIS APPARATUS MUST BE EARTHED. WARNING To prevent fire or shock hazard, do not expose the unit to rain or moisture. To avoid electrical shock, do not open the cabinet. Refer servicing to qualified personnel only.
-
Page 3: Table Of Contents
Table of Contents Introduction ................4 What the Digital Photo Printer Can Do ........4 Checking the Packing List ............4 Requirements ................5 Names of Parts ................ 6 Setup and Connection ............7 Attaching the Stands to the Printer ......... 7 Connecting the Printer to a Computer ........ -
Page 4: Introduction
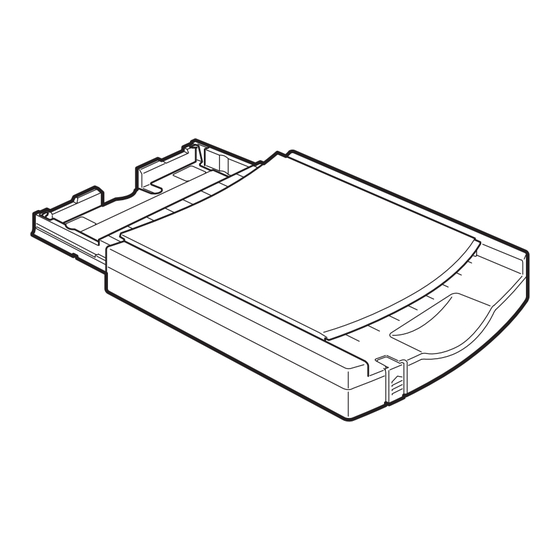
Introduction What the Digital Photo Printer Checking the Packing List Can Do Check the contents of the box against the packing list. High-quality Photo Printing Paper supply/eject tray (1) The sublimation printing process used by this printer makes it possible to print images with fine photographic quality. -
Page 5: Requirements
• At least 64MB of RAM The following environment is required in order to • At least 30MB of hard disk space use the UP-DP10. *Connection requires a USB cable with a male type A connector and a male type B connector. -
Page 6: Names Of Parts
Names of Parts <Front View> <Rear View> (8) (9) Operation switch Bottom cover Ribbon cartridge cover USB port Lamps Parallel port POWER lamp PRINT lamp AC power inlet PAPER lamp RIBBON lamp Ventilation holes ALARM lamp The lamps indicate the printer status by lighting or flashing. -
Page 7: Setup And Connection
Setup and Connection Attaching the Stands to the Connecting the Printer to a Printer Computer Notes The stands can be attached by screws. The • Before connecting the printer to a computer, be mounting of the stands depends on whether the certain to first turn off the power for the printer, printer is going to be used in the vertical position the computer, the monitor, etc. -
Page 8: Connecting The Power Supply
Setup and Connection When connecting to a printer port Turning the Power On/Off Press the Operation switch so that the POWER Printer cable lamp is on. To turn the printer off, press the (purchased separately) Operation switch again. To printer port Windows 95/98 computer To parallel port... -
Page 9: Installing The Printer Driver
Install the printer driver that is contained in the CD-ROM that is provided with the printer. The “printer driver” is the software that allows you to print on the UP-DP10, using the Print function of typical application software. Before installing the printer driver, turn the computer and the printer off, and then connect the printer to the computer. - Page 10 Installing the Printer Driver Click [Finish]. Select the [Specify a location] option, click The window changes as shown below. [Browse], specify the [Win98\English] folder in the CD-ROM, and then click [Next]. The window changes as shown below. Click [Next]. The window changes as shown below. Click [Next].
- Page 11 Turn the printer on first, and then turn the computer on. Once Windows 98 starts up, the “Add New Hardware Wizard” window appears. Place the “Printer Software UP-DP10” CD- ROM in the CD-ROM drive. Select the [Specify a location] option, click [Browse], specify the [Win98\English] folder If the “Add New Hardware Wizard”...
-
Page 12: With Windows 95
Install the printer driver that is contained in the CD-ROM that is provided with the printer. The “printer driver” is the software that allows you to print on the UP-DP10, using the Print function of typical application software. Before installing the printer driver, turn the computer and the printer off, and then connect the printer to the computer. -
Page 13: With The Macintosh Os
Double-click the “Chooser” icon to open the Click [Finish]. folder. The window changes as shown below. Double-click the “UP-DP10 Install-E” icon to start installation. Follow the instructions displayed on the screen in order to complete the installation process. After installation is complete, restart the Macintosh. -
Page 14: Preparing To Print
Preparing to Print Preparing a Print Pack In order to print, it is necessary to prepare a Sony Print Pack (printing paper and an ink ribbon cartridge, sold as a set). A Sony Print Pack must be purchased separately. The following table lists the types of Sony Print Packs available. - Page 15 • If photos taken with a digital camera that has a 2:3 aspect ratio (V:H) are printed on the paper in a UPC-10P34 Print Pack, the printed image may extend beyond the left and right perforations, or white border may appear at the top and bottom of the paper.
-
Page 16: Loading The Ink Ribbon Cartridge And Printing Paper
Preparing to Print Loading the Ink Ribbon Cartridge and Printing Paper Loading the Ink Ribbon Cartridge Note Do not touch the ink ribbon. Fingerprints on the ink ribbon may harm the image quality. Take up any slack in the ink ribbon by turning in the direction indicated by the arrow. -
Page 17: Loading The Printing Paper
Close the ribbon cartridge cover, and then make sure that the RIBBON lamp has turned off. Loading the Printing Paper Note Never touch the printing side (the blank, glossy side) of the paper. Doing so could leave fingerprints, which will harm image quality. Fan the paper thoroughly. - Page 18 Preparing to Print Notes • Do not place more than 25 sheets in the tray at one time. • When loading printing paper in the tray, make sure that all of the paper is completely inside of the tray. • Do not use paper that is significantly curled. •...
-
Page 19: Removing The Ink Ribbon Cartridge And The Printing Paper
Removing the Ink Ribbon Cartridge and the Printing Paper Removing the ink ribbon cartridge Open the ribbon cartridge cover. Grasp the handle and pull the cartridge out. Removing the printing paper Pull the paper supply/eject tray out of the printer. Lift the metal plate at the bottom of the paper supply/eject tray, and then pull out the printing paper. -
Page 20: Making Printer Setting From Your Computer
The printer properties can be displayed by means of either of the following methods: • Select [Start] → [Settings] → [Printers]. Select the UP-DP10 icon, and then select [File] → [Properties]. Settings made through this method become the initial printer settings for printing in all applications. - Page 21 [Copies] The number of copies can be set in a range from “1” to “25.” [Scaling] Specify the enlargement/reduction ratio. Any integer value ranging from “10%” to “400%” can be set for this ratio. [Border] If this checkbox is checked (on), prints are printed with a white border around the edges.
- Page 22 Making Printer Setting from your Computer [Graphics] tab settings This tab is used to make settings related to images, such as the printing color and brightness. Adjust these settings when you are not satisfied with the final results of printing or when you need to make advanced adjustments. Select either [Digital Camera Correction], [Color Balance], [Tone Curve], or [Sharpness] in the [Color Correction] list box.
- Page 23 [Color Balance] Use this screen to adjust the color balance of the printer, either by dragging the sliders left or right, clicking on [ ] or [ ], or by inputting a value directly through the keyboard. [Tone Curve] You can adjust values output by the printer with respect to values input by choosing a tone curve setting of [Hard] or [Soft].
- Page 24 Making Printer Setting from your Computer [Sharpness] Use this screen to adjust the contour emphasis of the image, either by dragging the sliders left or right, clicking on [ ] or [ ], or by inputting a value directly through the keyboard. Increasing the setting increases the contour emphasis of the image.
-
Page 25: With The Macintosh
Select the Chooser from the Apple menu. The Chooser window opens. Select the UP-DP10 icon from among the icons displayed on the left side of the Chooser window. The UP-DP10 printers that are connected are then listed in the listbox on the right side of the Chooser window. - Page 26 Making Printer Setting from your Computer Page Setup The “Page Setup” dialog box is used to make basic printing settings, such as the paper type, the printing quality, etc. Make sure these settings have been made before printing anything. To display the “Page Setup” dialog box, select “Page Setup” from the “File” menu.
-
Page 27: Printing Settings
Printing Settings The “Print” dialog box appears if “Print” is selected from the “File” menu. Select either “General” or “Color Correction” from the pop-up menu near the top of the dialog box to set various items. “General” settings “Copies” Set a value from 1 to 25. “Pages”... - Page 28 Making Printer Setting from your Computer “Digital Camera Correction” Select this screen when printing an image from a digital camera in order to correct the intensity and the saturation. • If you click the “Use Digital Camera Correction” checkbox so that it is in the checked (on) state, image correction processing that is suited for digital camera images is performed on the image.
- Page 29 “Tone Curve” You can adjust values output by the printer with respect to values input by choosing a tone curve setting of “Hard” or “Soft”. “Sharpness” Use the scroll bar on this screen to adjust the contour emphasis of the image.
- Page 30 Making Printer Setting from your Computer “ColorSync” The following items can be set if the “Use ColorSync” option is on: • In the “Profile” pop-up menu, specify the UP-DP10 profile. • In the “Intent” pop-up menu, select one of the following for color reproduction mapping:...
-
Page 31: Miscellaneous
Also checks. If it still doesn’t operate properly, please refer to the sections “Warning” (page 2). consult the store from which you purchased the printer or you Sony service center. Notes on Use Symptom Cause/Remedy •... - Page 32 Miscellaneous Status Indications Symptom Cause/Remedy Paper • Check whether you have loaded The printer status is indicated by the POWER, jams more than 25 sheets of paper in the PRINT, PAPER, RIBBON, and ALARM lamps paper supply/eject tray. → Load no more than 25 lighting or flashing.
-
Page 33: If The Paper Jams
Note service personnel. If you cannot remove the ink ribbon → Contact your dealer cartridge, contact your dealer or the nearest or the nearest Sony Service Center. Sony Service Center. Remove the jammed paper. If the Paper Jams If the paper jams while the printer is printing, the ALARM lamp will light. - Page 34 Cellophane tape Notes • If you cannot remove the jammed paper, contact your dealer or the nearest Sony Service Center. • Do not attempt to print again on the jammed paper that you removed. WARNING Never touch components inside the unit.
-
Page 35: Main Specifications
Ribbon cartridge Main Specifications Can print 25 sheets Inputs AC IN (power inlet) Power supply Thermal head 220 to 240 VAC (50 Hz/60 Hz) 11.6 dots/mm Current consumption Accessories 0.5 Amax. at 240 VAC Paper supply/eject tray (1) Operating temperature Power cord (1) 5 to 35 ˚C Stands (2) - Page 36 19-30 nInit nInit nReverseRequest nFault nDataAvail nPeriphRequest Not defined Not defined Not defined nSelectln IEEE 1284 Active IEEE 1284 Active Within the bi-directional parallel interface (IEEE STD 1284-1994) standard, the UP-DP10 supports Compatible mode, Reverse Nibble mode, and ECP mode.
- Page 37 Sony Corporation...
Need help?
Do you have a question about the UP-DP10 and is the answer not in the manual?
Questions and answers