
Related Manuals for KIESELMANN GEMBRA 5836


Summary of Contents for KIESELMANN GEMBRA 5836
- Page 1 Operating instruction Translation of the original GEMBRA Aseptic-Single seat valves Angle valve Type: 5836 T-valve Type: 5838 ENGLISH...
- Page 2 . k i e s e l m a n n . d e • i n f o @ k i e s e l m a n n . d e Copyright: © KIESELMANN FLUID PROCESS GROUP...
-
Page 3: Table Of Contents
KIESELMANN GmbH Table of contents T a b l e o f c o n t e n t s 1 General informations .............................. 4 Informations for your safety ............................... 4 Marking of security instructions............................ 4 General designated use .............................. 4 Personnel ..................................... 4 Modifications, spare parts, accessories .......................... 5 General instructions ................................ 5... -
Page 4: General Informations
We will be at your disposal also after expiration of the warranty. In addition, you will also find all necessary instructions and spare part data for maintenance in this instruction manual. If you don't want to carry out the maintenance by yourself, our KIESELMANN GmbH - service team will naturally be at your disposal. -
Page 5: Modifications, Spare Parts, Accessories
KIESELMANN GmbH | Operating instruction General informations | 1 1.5 Modifications, spare parts, accessories Unauthorized modifications, additions or conversions which affect the safety of the fitting are not permitted. Safety devices must not be bypassed, removed or made inactive. Only use original spare parts and accessories recommended by the manufacturer. -
Page 6: Safety Instructions
2 | Safety instructions Operating instruction | KIESELMANN GmbH 2 S a f e t y i n s t r u c t i o n s 2.1 Intended use The valve is utilised as a pneumatically controlled shut-off valve in food and beverage as well as in pharmaceutical, biotechnological and chemical industries. - Page 7 KIESELMANN GmbH | Operating instruction Safety instructions | 2 CAUTION Before starting the system, the entire pipeline system must be thoroughly cleaned. CAUTION Steps should be taken to ensure that no external forces are exerted on the fitting. 583x_GEMBRA_EN 7 / 35...
-
Page 8: Delivery, Transport And Storage
3 | Delivery, transport and storage Operating instruction | KIESELMANN GmbH 3 D e l i v e r y , t r a n s p o r t a n d s t o r a g e 3.1 Delivery... -
Page 9: Specification | 4
KIESELMANN GmbH | Operating instruction Specification | 4 4 S p e c i f i c a t i o n 4.1 Modular system KI-Top control head feedback unit Stainless steel hood Transparent hood Feedback unit with finger guard... -
Page 10: Function And Operation
5 | Function and operation Operating instruction | KIESELMANN GmbH 5 F u n c t i o n a n d o p e r a t i o n 5.1 Description of function Valve function: • Shut off fluid media in pipelines Operation: •... -
Page 11: Valve Basic Position
KIESELMANN GmbH | Operating instruction Function and operation | 5 5.3 Valve basic position: Basic positon: Valve closed Valve open Kind of actuation: Normally closed (NC) Normally open (NO) Type: 5836 Angle valve Line A - B closed Line A - B open... -
Page 12: Pneumatic Valve Activation
5 | Function and operation Operating instruction | KIESELMANN GmbH 5.4 Pneumatic valve activation Valve function Pneum. activation Pneum. activation via control head with via external solenoid valves solenoid valves (MV) (MV external) Antriebsart: normal closed (NC) Valve OPEN control air feed control air feed P ➟... -
Page 13: Commissioning, Service And Maintenance
KIESELMANN GmbH | Operating instruction Commissioning, service and maintenance | 6 6 C o m m i s s i o n i n g , s e r v i c e a n d m a i n t e n a n c e 6.1 Commissioning... -
Page 14: Service
6 | Commissioning, service and maintenance Operating instruction | KIESELMANN GmbH 6.2 Service RECOMMENDATION Replacement of seals To achieve optimal maintenance cycles, the following points must be observed! a) When replacement of seals, all product-contacting seals should be replaced. b) Only original spare parts may be installed. -
Page 15: Technical Data | 7
KIESELMANN GmbH | Operating instruction Technical data | 7 7 T e c h n i c a l d a t a 7.1 Angle valve 5836, T-valve 5838 Model: GEMBRA Aseptic-Single seat valve • Angle valve Type 5836 • T-valve Type 5838... -
Page 16: Disassembly And Assembly
8 | Disassembly and assembly Operating instruction | KIESELMANN GmbH 8 D i s a s s e m b l y a n d a s s e m b l y 8.1 Disassembly Mounting tools Tool kit ST4, ST10, ST20,... -
Page 17: Assembly Valve Insert Ve
KIESELMANN GmbH | Operating instruction Disassembly and assembly | 8 8.1.1 Assembly valve insert VE - air open- spring close (NC) - air open - air close (DA) • Remove the hood (H) from control head. • Connect control air to the air connection (P) and lift the piston (2) by actuating the slide switch (S). - Page 18 8 | Disassembly and assembly Operating instruction | KIESELMANN GmbH • Unscrew the piston plate (1), hold it against with a fork wrench at the piston (2). • Remove seal (D1). • Unscrew the stud bolt (4). • Turn the piston (2) 180 ° so that the hole (B) is in the slot (L) of the lantern (5).
- Page 19 KIESELMANN GmbH | Operating instruction Disassembly and assembly | 8 • Insert a round rod Ø8 into the hole (B) and unscrew the piston (2) with a fork wrench from the upper piston (3). • Dismount the membrane (D2). • Unscrew the screws (6).
- Page 20 8 | Disassembly and assembly Operating instruction | KIESELMANN GmbH • Unscrew piston (3) from piston rod (7). • Remove the retaining washer (D5). • Puncture the O-ring (D4) with a needle and remove them carefully from the groove of piston.
-
Page 21: Assembly
KIESELMANN GmbH | Operating instruction Disassembly and assembly | 8 8.2 Assembly • Before installation, thoroughly clean and slightly lubricate mounting areas and running sur- faces. • Assemble in reverse order. NOTICE Alternately press and roll the O-rings into the groove with round body. -
Page 22: Assembling K-Flex Seal (D-1)
8 | Disassembly and assembly Operating instruction | KIESELMANN GmbH 8.2.2 Assembling k-flex Seal (D-1) Seal D1 - k-flex Nominal diameter Item number Material: k-flex - seal DN40-DN50 5621 050 020-114 k-flex consists of DN65 5621 065 010-114 DN80 5621 080 010-114... - Page 23 KIESELMANN GmbH | Operating instruction Disassembly and assembly | 8 • Make a colored mark at the piston surfaces. • After then, unscrew the piston plate again. • Push the seal (D1) onto the piston plate (1) and screw the piston (2) into the piston plate (1) by hand.
-
Page 24: Mounting Diaphragm (D2) And Valve Insert (Ve)
8 | Disassembly and assembly Operating instruction | KIESELMANN GmbH 8.2.4 Mounting diaphragm (D2) and valve insert (VE) 8.2.4.1 Adjusting the mounting position Adjusting the installation position with mounting tool ST11 Mounting wrench A DN 40 - 65 5836000065-000 Mounting wrench B... - Page 25 KIESELMANN GmbH | Operating instruction Disassembly and assembly | 8 Adjusting the installation position without mounting tool • Unscrew cap (12). • Connect compressed air to the air supply at the trottle valve (LA1 ls-fö) or, (LA2 lö-ls / lö- fs).
- Page 26 8 | Disassembly and assembly Operating instruction | KIESELMANN GmbH • Adjust the piston to the mounting position. Proceed as described in section "Adjusting the mounting position [} 24] In this valve position the diaphragm (D2) is in its basic position and is optimally com- pressed between lantern (5) and housing (VG).
-
Page 27: Drawings
KIESELMANN GmbH | Operating instruction Drawings and dimensions | 9 9 D r a w i n g s a n d d i m e n s i o n s 9.1 Drawings 1 = Piston plate 2 = Piston lower... -
Page 28: Control Units
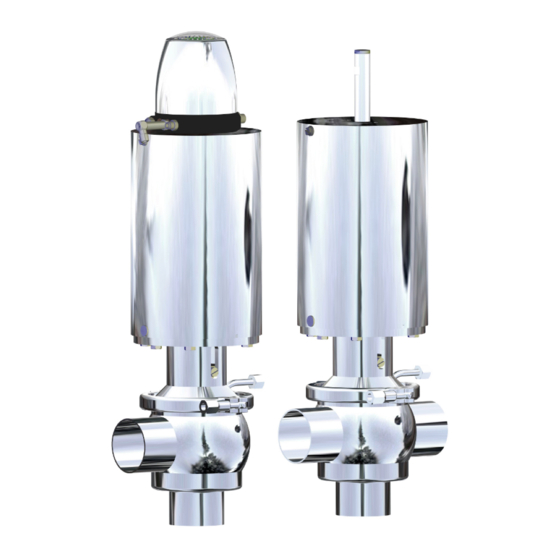
9 | Drawings and dimensions Operating instruction | KIESELMANN GmbH 9.2 Control units Control head KI-TOP with plastic hood - transparent with stainless steel hood Ø 105 Ø 105 Feedback unit with finger guard (E) • E1 = Cap • E2 = Angle bracket •... -
Page 29: Dimensions
KIESELMANN GmbH | Operating instruction Drawings and dimensions | 9 9.3 Dimensions Nominal diameter d1, d2 DN 25 Ø 29 x 1,5 Ø 129 ~ 520 1 Inch Ø 25,4 x 1,65 DN 40 Ø 41 x 1,5 Ø 129 ~ 540 1½... -
Page 30: Wearing Parts
10 | Wearing parts Operating instruction | KIESELMANN GmbH 1 0 W e a r i n g p a r t s 10.1 Wearing parts list GEMBRA Aseptic-Single seat valve Type: 5836 Angle valve Seal Pneum. actuator Item number... - Page 31 KIESELMANN GmbH | Operating instruction Wearing parts | 10 Valve inserts Pos. Description Material: DN 25 DN 40 DN 50 Valve insert NC /k-flex 5836 025 020-041 5836 040 020-041 5836 050 020-041 Valve insert NO /k-flex 5836 025 120-041...
-
Page 32: Wear Parts Kit
10 | Wearing parts Operating instruction | KIESELMANN GmbH 10.2 Wear parts kit Seal kit EPDM / PTFE • D1 Valve plate seal without Support ring Pos. Description Material: DN25 - DN 50 DN 65 DN 80 Seal kit EPDM /... -
Page 33: Classification | 11
KIESELMANN GmbH | Operating instruction Classification | 11 1 1 C l a s s i f i c a t i o n 11.1 Structure of Order Number 10 11 12 13 14 - Control system - Feedback unit... - Page 34 11 | Classification Operating instruction | KIESELMANN GmbH Control system and position indication , External surface 583x xxx xxx- xxxx Control system and position indicator Control head SPS (old version) Control head ASi-Bus (old version) Control head KI-Top SPS Control head KI-Top ASi-Bus...
-
Page 35: Appendix | 12
KIESELMANN GmbH | Operating instruction Appendix | 12 1 2 A p p e n d i x 12.1 Declaration of incorporation Declaration of incorporation Translation of the original Manufacturer / authorised representative: KIESELMANN GmbH Paul-Kieselmann-Str. 4-10 75438 Knittlingen Germany...
Need help?
Do you have a question about the GEMBRA 5836 and is the answer not in the manual?
Questions and answers