Table of Contents
Advertisement
Quick Links
Advertisement
Table of Contents

Related Manuals for Yardistry SENECA PRIVACY ARBOR SPA8 YM14126


Summary of Contents for Yardistry SENECA PRIVACY ARBOR SPA8 YM14126
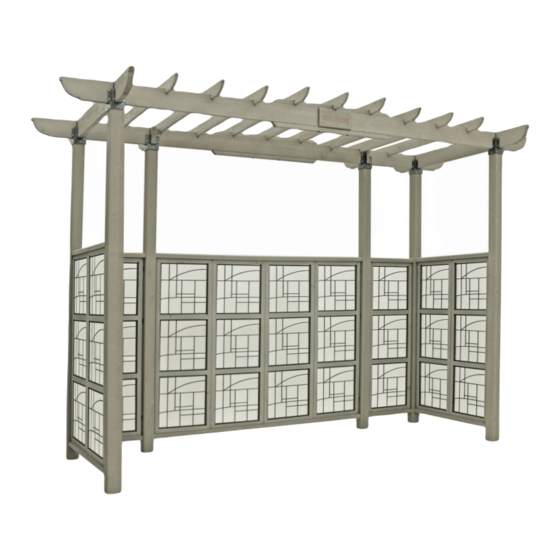
- Page 1 Installation Manual SENECA PRIVACY ARBOR - SPA8 YM14126 (1.99m) (0.51m) (0.51m) Yardistry - North America (1.00m) (1.18m) Toll Free Customer Support: 1.888.509.4382 info@yardistrystructures.com (3.37m) www.yardistrystructures.com Revised April 12, 2018 Y40000-126...
-
Page 2: Important Safety Notice
Wood is NOT flame retardant and will burn. Grills, fire pits and chimineas are a fire hazard if placed too close to a Yardistry structure. Consult user’s manual of the grill, fire pit or chimnea for safe distances from combustible materials. -
Page 3: Limited Warranty
Limited Warranty Yardistry warrants that this product is free from defect in materials and workmanship for a period of one year from the original date of purchase. In addition, all lumber is warranted for 5 years against rot and decay. This warranty applies to the original owner and registrant and is non-transferable. -
Page 4: Instructions For Proper Maintenance
Instructions for Proper Maintenance Your Yardistry structure is designed and constructed of quality materials. As with all outdoor products it will weather and wear. To maximize the enjoyment, safety and life of your structure it is important that you, the owner, properly maintain it. -
Page 5: Material List
(1) 1 x 6 x 11" Y50100-019 1 x 6 5/8 x 5 3/8" Y50100-022 5/4 x 4 1 x 3 1/2" YARDISTRY 2 x 2 1 1/2 x 1 1/2" 2 x 6 1 1/2 x 5 1/2" (2) 2 x 6 x 16¾"... - Page 6 Material List (10) Three High Faux Glass Panel #10 x 1” Pan Head Screw (10) Top and Bottom Rail (Lengths Vary) #10 x 1 1/2” Pan Head Screw #8 x 2 1/4” Wood Screw (6) 4x4 Post #8 x 1 1/2” Wood Screw...
- Page 7 Inventory Parts - Read This Before Starting Assembly STOP STOP STOP STOP This is the time for you to inventory all your hardware, wood and accessories, referencing the parts identification sheets. This will assist you with your assembly. • Each step indicates which bolts and/or screws you will need for assembly, as well as any flat washers, lock washers, t-nuts or lock nuts.
- Page 8 Step 1- Assemble Main Wall Instructions de base 1. Assemble panels together in Cut and attach Top and Bottom Rails. Pautas básicas para Fig. 1 pour l'assemblage configuration shown. (Fig.1). Ensure delines el ensamblado de Corte y fije los rieles superior e inferior. des panneaux panels are flush along the bottom los paneles...
- Page 9 Step 2- Assemble Side Wall Fig. 1 1. Assemble panels together in configuration shown. (Fig.1) 2. Secure Panels with 3 (S4) #8 x 2 1/4” wood screws provided in pre-drilled holes as indicated by the circles. (Fig.1) 3. Secure R-Top and Bottom Rail to Panel Assembly with 4 (S4) #8 x 2 1/4”...
- Page 10 Step 3- Assemble Single Panel tions de base Cut and attach Top and Bottom Rails. assemblage Fig. 1 Corte y fije los rieles superior e inferior. nneaux 1. Secure R-Top and Bottom Rail to bottom of single Panel with 2 ages illustrés comportent des (S4) #8 x 2 1/4”...
- Page 11 Step 4 - Attach Panel Clips to Back Posts 1. On a flat surface place P- 4x4 Post on its side and position Panel Clips in Fig. 2 locations indicated in Figures 1 and 1A. Ensure Panel Clips are oriented as shown in Diagrams! 2.
- Page 12 Step 5 - Attach Panel Clips to Side Posts 1. On a flat surface place P- 4x4 Post on its side and position Panel Clips in Fig. 2 locations indicated in Figures 1 and 1A. Ensure Panel Clips are oriented as shown in Diagrams! Use posts A and D from previous step.
- Page 13 This identifies information that requires special Check that set or assembly is properly level Step 6- Attach Panels to Posts attention. Improper assembly could lead to an before proceeding. unsafe or dangerous condition. Pre-drill 1/8” & 3/16” Bit Where this is shown, 2 or 3 NOTE: Panel type may not be as shown Help Help...
- Page 14 This identifies information that requires special Check that set or assembly is properl 20" 78½" 20" Step 7- Layout Posts and Connectors attention. Improper assembly could lead to an before proceeding. 20" unsafe or dangerous condition. 20" Installer le Poteau 4 x 4 po et le Connector de Poteau 4 x 4 po. L’espace entre Poteau 4 x 4 po et la direction de Poteau Pre-drill 1/8”...
- Page 15 Step 8- Assemble Front and Back Beams 1. Secure two Z-2 x 6 x 66 5/8” Beams together with (H0) 1/4" x 1 1/4" Hex Bolts as shown in Figure 1. 2. Attach Y-1 x 6 x 11" Plaque with (S1) #8 - 1 1/2" Wood Screws as shown in Fig. 1. 3.
- Page 16 Step 9 - Mounting Beams to Connectors 6 Posts 4 Posts 6 Postes 4 Postes 6 Poteaux 4 Poteaux 6 Posts 1. Attach two B- 2 x 6 x 71 5/8" Beams to 6 Postes Post Top Connectors with (WH) 7/16" 6 Poteaux Hex Bolt as shown in Fig.
- Page 17 Step 10- Installing Pergola Roof 6 Posts (32cm) Fig. 2 6 Postes Fig. 1 6 Poteaux 6 Posts 6 Postes 6 Poteaux 1. Layout nine C-5/4 x 4 x 59 3/4" Trellis on the beams, centering the middle beam as shown in figure 1.
- Page 18 Atención a: Servicio de Atención al Cliente À l’attention de: Service à la clientèle Yardistry would like to say “Thank you” for your time and feedback. Yardistry quiere “Agradecerle” por su tiempo y su opinión. Yardistry aimerait vous remercier d’avoir pris le temps de répondre au sondage.
Need help?
Do you have a question about the SENECA PRIVACY ARBOR SPA8 YM14126 and is the answer not in the manual?
Questions and answers