Table of Contents
Advertisement
Quick Links
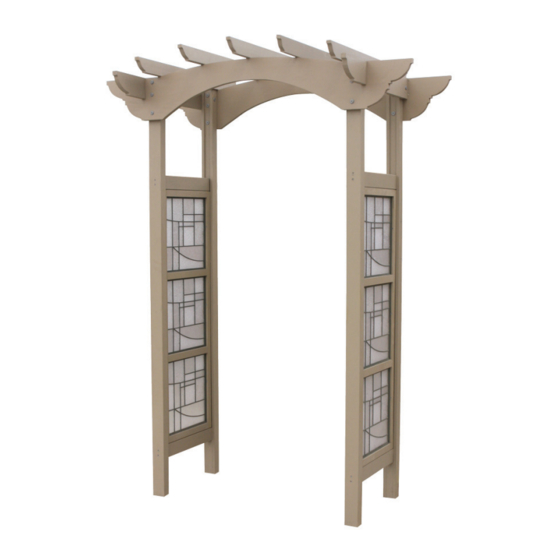
Garden Arbor - Faux Glass
Installation and Operating Instructions – YM11629
Revised 01/28/2013
Yardistry – North America
Toll Free Customer Support: 1.888.509.4382
info@yardistrystructures.com
www.yardistrystructures.com
Yardistry / Selwood Products – Europe
Customer Support: +44 1284 852569
parts@selwoodproducts.com
www.selwoodproducts.com
1
support@yardistrystructures.com
Advertisement
Table of Contents

Related Manuals for Yardistry YM11629


Summary of Contents for Yardistry YM11629
- Page 1 Garden Arbor - Faux Glass Installation and Operating Instructions – YM11629 Revised 01/28/2013 Yardistry – North America Toll Free Customer Support: 1.888.509.4382 info@yardistrystructures.com www.yardistrystructures.com Yardistry / Selwood Products – Europe Customer Support: +44 1284 852569 parts@selwoodproducts.com www.selwoodproducts.com support@yardistrystructures.com...
-
Page 2: Important Safety Notice
Wood in NOT flame retardant and will burn. Grills, fire pits and chimineas are a fire hazard if placed too close to a Yardistry structure. Consult user’s manual of the grill, fire pit or chimnea for safe distances from combustible materials. -
Page 3: Limited Warranty
As with all wood, some checking and small cracks in grain is normal If you dispose of your Yardistry structure: Please disassemble and dispose of your unit so that it does not cre- ate any unreasonable hazards at the time it is discarded. Be sure to follow your local waste ordinances. -
Page 4: Part Identification
Part Identification ( Dimensions are approximate and are shown to assist in the identification of parts for assembly. Actual dimensions may be smaller or larger. 4pc. (208) - Arbor Ends 25.4 x 114.3 x 254mm 2pc. (204) - Arbor Side 25.4 x 114.3 x 582.1mm 2pc. -
Page 5: Hardware Identification
Hardware Identification ( Dimensions are approximate and are shown to assist in the identification of parts for assembly. Actual dimensions may be smaller or larger. #8 x 3" 32pc. - Wood Screw - (Y06416-530) #10 x 4" 10pc. - Wood Screw - (Y06416-940) 16pc. - Page 6 • Please retain this information for future reference. You will need this information if you contact the Consumer Relations Department. PRODUCT NUMBER: YM11629 CARTON I.D. STAMP: __ __ __ __ __ ___ (Box 1) CARTON I.D. STAMP: __ __ __ __ __ ___ (Box 2) CARTON I.D.
- Page 7 Step 1: Assemble Panels A: Lay both (206) Engineered Panel Posts on edge so the grooved sides face each other, on a level surface. B: Place one (209) Cross Brace in between the posts tight to the top of the ledge of the (206) Engineered Panel Posts and attach with two (YS4) #8 x 3”...
- Page 8 Step 2: Assemble Panels A: Insert into the grooves of both (206) Engineered Panel Posts, one (316) Window Triple Panel flush to top of previously installed (209) Cross Brace and attach with two (YS4) #8 x 3” Wood Screws per side as shown in fig.
- Page 9 Step 3: Attach Arbor Side A: Place one (204) Arbor Side flush to the top and outside edge of (206) Engineered Panel Post, and attach with two (H4) 1/4 x 4” Hex Bolts (with flat washer, lock washer and t-nut) per side as shown in fig. 3.1. Repeat for second assembly.
- Page 10 Step 4: Assemble Arch Beam Assemblies A: Attach two (208) Arbor Ends flush to the top of (200) Arbor Arch Beam and centred over holes, using two (YS4) #8 x 3” Wood Screws per side. Ensure that you are using the outside holes as shown in fig. 4.1. Repeat for second assembly.
- Page 11 Step 5: Attach Arch Beam Assemblies A: Attach one Arch Beam Assembly, with (208) Arbor Ends facing out (fig. 5.1), flush to the top of and into (206) Engineered Panel Post assembly using 3 (H11) 1/4 x 2-3/4” Hex Bolts per side. (fig. 5.1) Repeat for second assembly.
- Page 12 Step 6: Attach Arbor Trellis A: Attach one (203) Arbor Trellis centred on the top of both Arch Beam Assemblies, with two (YS24) #10 x 4” Wood Screws, as shown in fig. 6.1. Fig. 6.1 x 2 per YS24 Arbor Trellis B: Place two (203) Arbor Trellis on the outside edges of the arches.
- Page 13 NOTES support@yardistrystructures.com...
- Page 14 NOTES support@yardistrystructures.com...
- Page 15 NOTES support@yardistrystructures.com...
- Page 16 Would you recommend the purchase of our products to friends and family? Comments: MAIL TO: Yardistry c/o Solowave Design 375 Sligo Road W. Mount Forest, Ontario, Canada Yardistry would like to say Thank You for your time and feedback. N0G 2L0 Attention: Customer Service REVISION: 10/18/11 support@yardistrystructures.com...
Need help?
Do you have a question about the YM11629 and is the answer not in the manual?
Questions and answers