Table of Contents
Advertisement
Available languages
Available languages
Quick Links
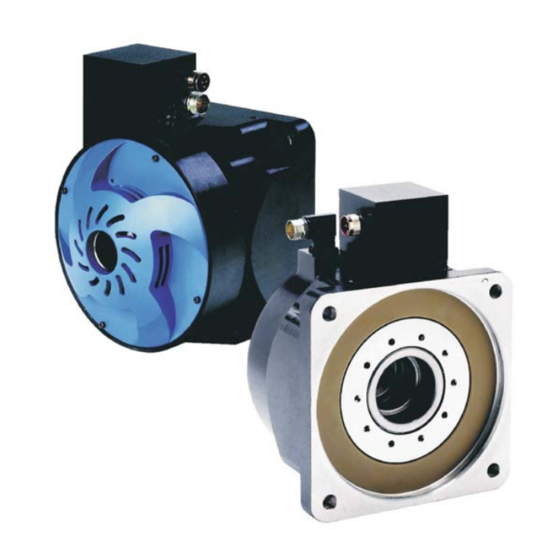
Cartridge DDR
Deutsch
Synchron Servomotor für Direktantriebe
English
Synchronous Servomotors for Direct Drives
Italiano
Servomotori Sincroni per gli azionamenti diretti
Español
Servomotores Sincronos para las impulsiones directas
Produkthandbuch / Product Manual / Manuale del Prodotto/ Manual del producto
Edition 06/2015
Originalsprache Deutsch
European Version
Bewahren Sie das Handbuch als Produktbestandteil während
der Lebensdauer des Produktes auf. Geben Sie das Handbuch
an nachfolgende Benutzer oder Besitzer des Produktes weiter.
Conservare il manuale per l'intera durata del prodotto. In caso di
cambio di proprietà il manuale deve essere fornito al nuovo uti-
lizzatore quale parte integrante del prodotto.
File ddc_deis.***
Keep the manual as a product component during the life span of
the product. Pass the manual to future users / owners of the
product.
Conserve el manual durante toda la vida útil del producto.
Entregue el manual a posteriores usuarios o propietarios del
producto.
Advertisement
Table of Contents

Related Manuals for Kollmorgen C04


Summary of Contents for Kollmorgen C04
- Page 1 Cartridge DDR Deutsch Synchron Servomotor für Direktantriebe English Synchronous Servomotors for Direct Drives Italiano Servomotori Sincroni per gli azionamenti diretti Español Servomotores Sincronos para las impulsiones directas Produkthandbuch / Product Manual / Manuale del Prodotto/ Manual del producto Edition 06/2015 Originalsprache Deutsch European Version Bewahren Sie das Handbuch als Produktbestandteil während...
- Page 2 Tutti i diritti riservati. Nessuna parte di questo documento può essere rielaborata, riprodotta in qualsiasi forma (stampa, fotocopia, microfilm o altro processo) o diffusa mediante l'uso di sistemi elettronici senza l'ap- provazione scritta della ditta Kollmorgen Europe GmbH o rielaborata, riprodotta o diffusa mediante l’uso di sistemi elettronici.
-
Page 3: Table Of Contents
Typen C04/CH04, C05/CH05 und C06/CH06 ........ - Page 4 15.2 Types C04/CH04, C05/CH05 and C06/CH06 ........
- Page 5 24.2 Modelli C04/CH04, C05/CH05 e C06/CH06 ........
- Page 6 33.2 Tipos C04/CH04, C05/CH05 y C06/CH06 ........
- Page 7 37.2 Technical Data C04/CH04 ........
- Page 8 Kollmorgen 06/2015 Diese Seite wurde bewusst leer gelassen. Deutsch - 8 Servomotoren Cartridge DDR...
-
Page 9: Allgemeines
Über dieses Handbuch Dieses Handbuch beschreibt die Synchron-Servomotoren der Serie Cartridge DDR (Standardausführung). Die Motoren werden im Antriebssystem zusammen mit den Kollmorgen Servoverstärkern betrieben. Beachten Sie daher die gesamte Dokumentation des Systems, bestehend aus: — Betriebsanleitung des Servoverstärkers — Installations-/Inbetriebnahmeanweisung einer vorhandenen Erweiterungskarte —... -
Page 10: Sicherheit
Sicherheit Kollmorgen 06/2015 Sicherheit Sicherheitshinweise Der Maschinenhersteller muss eine Gefahrenanalyse für die Maschine erstel- len und geeignete Maßnahmen treffen, dass unvorhergesehene Bewegungen nicht zu Schäden an Personen oder Sachen führen können. Stellen Sie die ordnungsgemäße Erdung des Motorgehäuses mit der PE-Schiene im Schaltschrank als Bezugspotential sicher. -
Page 11: Bestimmungsgemäße Verwendung
Kollmorgen Sicherheit 06/2015 Bestimmungsgemäße Verwendung Synchron-Servomotoren der Serie Cartridge DDR sind insbesondere als Antrieb für Walzen in Druckmaschinen, Textilmaschinen, Folienbearbeitungsmaschinen, Verpa- ckungsmaschinen und ähnliche mit hohen Ansprüchen an die Dynamik konzipiert. Sie dürfen die Motoren nur unter Berücksichtigung der in dieser Dokumentation de- finierten Umgebungsbedingungen betreiben. -
Page 12: Handhabung
Gehäusereinigung mit Isopropanol o.ä., nicht tauchen oder absprühen Reparatur Reparaturen des Motors darf nur der Hersteller durchführen, Öffnen der Geräte bedeutet Verlust der Gewährleistung. Schicken Sie den Motor zur Reparatur an: Kollmorgen Europe GmbH Pempelfurtstraße 1 D-40880 Ratingen Entsorgung Gemäß der WEEE-2002/96/EG-Richtlinien nehmen wir Altgeräte und Zubehör zur fach- gerechten Entsorgung zurück, sofern die Transportkosten vom Absender übernommen... -
Page 13: Produktidentifizierung
Kollmorgen Produktidentifizierung 06/2015 Produktidentifizierung Lieferumfang ® Sie erhalten einen Karton mit Instapak -Ausschäumung. Enthalten ist: Motor der Serie Cartridge DDR Produkthandbuch gedruckt, mehrsprachig Typenschild Legende: MODEL Typenbezeichnung STALL CONT (Stillstandsstrom) 0rms STALL PEAK (Spitzenstrom) peak VOLTS Nennspannung MAX SPEED Spitzendrehzahl... -
Page 14: Typenschlüssel
Produktidentifizierung Kollmorgen 06/2015 Typenschlüssel C 09 1 A - 1 1 - 2 1 0 5 S - xxx Bauart Ausführung 230 VAC fortlaufende Nummer für 400/480VAC Sonderausführungen Baugröße 108mm Zertifizierung 138mm UL / CE 188mm 246mm 350mm Abdichtung Rotorlänge... -
Page 15: Technische Beschreibung
Kollmorgen Technische Beschreibung 06/2015 Technische Beschreibung Allgemeine technische Daten Umgebungstemperatur 5...+40°C bei Aufstellhöhe bis 1000m über NN (bei Nenndaten) Sprechen Sie bei Umgebungstemperaturen über 40°C und bei gekapseltem Einbau der Motoren unbedingt mit unserer Applikationsabteilung. Zulässige Luftfeuchte 95% relative Feuchte, nicht betauend... -
Page 16: Schutzart
Technische Beschreibung Kollmorgen 06/2015 5.1.3 Schutzart Ausführung für Wellenzapfen (2, 3): IP65 bei abgedichtetem Maschinenflansch Ausführung mit Hohlwelle (1): IP64 bei abgedichtetem Maschinenflansch 5.1.4 Isolierstoffklasse Die Motoren entsprechen der Isolierstoffklasse F nach IEC 60085 (UL 1446 class F). 5.1.5 Oberfläche Die Motoren sind mattschwarz mit Polyester pulverbeschichtet, eine Beständigkeit gegen... -
Page 17: Mechanische Installation
Kollmorgen Mechanische Installation 06/2015 Mechanische Installation Maßzeichnungen finden Sie im Kapitel "Dimension Drawings" ab S. 97. Wichtige Hinweise Nur Fachleute mit Maschinenbau-Kenntnissen dürfen den Motor montieren. Die Montageseite des Motors ist magnetisch und zieht Eisen an. Decken Sie das Ende des Motors ab, wenn der Motor nicht montiert ist, um Verschmutzung zu ver- hindern. -
Page 18: Typen C04/Ch04, C05/Ch05 Und C06/Ch06
Mechanische Installation Kollmorgen 06/2015 Typen C04/CH04, C05/CH05 und C06/CH06 6.2.1 Anforderungen an Montageflansch und Welle Baugröße (C/CH) 041 042 043 051 052 053 054 061 062 063 Material der Welle Stahl oder Edelstahl Streckgrenze der Welle N/mm² (A) Ø Welle (-0.015mm) (B) Ø... -
Page 19: Montage
Kollmorgen Mechanische Installation 06/2015 6.2.2 Montage Fehlerhafte Montage kann Motor und Maschine beschädigen. Status vor der Montage Wenn der Motor nicht montiert ist, befindet sich in Bohrung "A" eine schwarze Kreuzschlitzschraube und in Bohrung "B" eine silbrige Innen- sechskantschraube. Montage des Motors an den Maschinenflansch Wischen Sie Wellenzapfen und Hohlwellenbohrung sauber. -
Page 20: Demontage
Mechanische Installation Kollmorgen 06/2015 6.2.3 Demontage Status vor der Demontage Wenn der Motor nicht montiert ist, befindet sich in Bohrung "B" eine schwarze Kreuzschlitzschraube und in Bohrung "A" eine silbrige Innen- sechskantschraube. Klemmkupplung lösen Entfernen Sie die Innensechskantschraube "A". Verwenden Sie einen Sechskantschlüssel und lösen Sie die Klemm- schraube in "A". -
Page 21: Typen C09/Ch09 Und C13/Ch13
Kollmorgen Mechanische Installation 06/2015 Typen C09/CH09 und C13/CH13 6.3.1 Anforderungen an Montageflansch und Welle Baugröße (C/CH) Material der Welle Kaltgewalzter Stahl mit 0.3% Kohlenstoffanteil Streckgrenze der Welle N/mm² (A) Ø Welle (-0.012mm) (B) Ø Welle (-0.012mm) (C) Ø Passring (±0.02mm) 232.94... -
Page 22: Montage
Mechanische Installation Kollmorgen 06/2015 6.3.2 Montage Fehlerhafte Montage kann Motor und Maschine beschädigen. Montage des Motors an den Maschinenflansch Wischen Sie Wellenzapfen und Hohlwellenbohrung sauber. Ein dünner Ölfilm ist akzeptabel, Fett und andere Verunreinigungen müssen ent- fernt werden. Wenn eine Passfeder verwendet wird: Schieben Sie die Passfeder in die Nut der Welle mit dem Punkt Richtung Wellenende. -
Page 23: Demontage
Kollmorgen Mechanische Installation 06/2015 6.3.3 Demontage Abdeckung entfernen Entfernen sie die blaue hintere Abdeckung des Cartridge DDR (8 bzw. 12 Schrauben). C(H)13 C(H)09 Ausrichten des Motors Leuchten Sie mit einer Lampe in die Löcher "B". Drehen Sie die Welle von Hand bis eine Gewinde- bohrung direkt durch jede der 4 Bohrungen "B"... -
Page 24: Elektrische Installation
Anschluss der Motoren mit vorkonfektionierten Kabeln Führen Sie die Verdrahtung gemäß den geltenden Vorschriften und Normen aus. Verwenden Sie für Leistungs- und Rückführanschluss ausschließlich vorkonfektio- nierte, abgeschirmte Leitungen von Kollmorgen. Nicht korrekt aufgelegte Abschirmungen führen unweigerlich zu EMV-Störungen und Funktionsbeeintrachtigungen des Systems. -
Page 25: Leitfaden Für Die Elektrische Installation
Kollmorgen Elektrische Installation 06/2015 Leitfaden für die elektrische Installation Prüfen Sie die Zuordnung von Servoverstärker und Motor. Vergleichen Sie Nenn- spannung und Nennstrom der Geräte. Führen Sie die Verdrahtung nach dem An- schlussbild in der Betriebsanleitung des Servoverstärkers aus. Die Anschlüsse des Motors sind im Kapitel "Wiring Diagrams"... -
Page 26: Inbetriebnahme Sicherheitshinweise
Inbetriebnahme Kollmorgen 06/2015 Inbetriebnahme Sicherheitshinweise Nur Fachleute mit weitreichenden Kenntnissen in den Bereichen Elektrotech- nik /Antriebstechnik dürfen die Antriebseinheit Servoverstärker/Motor in Be- trieb nehmen. Es treten lebensgefährliche Spannungen bis zu 900V auf. Gefahr durch elektri- schen Schlag! Prüfen Sie, ob alle spannungsführenden Anschlussteile gegen Berührung sicher geschützt sind. -
Page 27: Beseitigen Von Störungen
Kollmorgen Inbetriebnahme 06/2015 Beseitigen von Störungen Abhängig von den Bedingungen in Ihrer Anlage können vielfältige Ursachen für die auf- tretende Störung verantwortlich sein. Beschrieben werden vorwiegend die Fehlerursa- chen, die den Motor direkt betreffen. Auftretende Auffälligkeiten im Regelverhalten haben meist ihre Ursache in fehlerhafter Parametrierung des Servoverstärkers. Informieren Sie sich hierzu in der Dokumentation des Servoverstärkers und der Inbetriebnahmesoftware. -
Page 28: Technische Daten
Technische Daten Kollmorgen 06/2015 Technische Daten Technische Daten zu jedem Motortyp finden Sie im Kapitel "Technical Data" ab Sei- te 90. Alle Angaben bei 40°C Umgebungstemperatur und 100K Wicklungsübertemperatur. Die Daten können eine Toleranz von +/- 10% aufweisen. Begriffsdefinitionen Stillstandsdrehmoment M [Nm] Das Stillstandsdrehmoment kann bei Drehzahl 0<n<100 min... -
Page 29: General
About this manual This manual describes the Cartridge DDR series of synchronous servomotors (standard version). The motors are operated in drive systems together with Kollmorgen servo amplifiers. Please observe the entire system documentation, consisting of: — Instructions manual for the servo amplifier —... -
Page 30: Safety
Safety Kollmorgen 06/2015 Safety 11.1 Safety Notes The manufacturer of the machine must generate a hazard analysis for the ma- chine, and take appropriate measures to ensure that unforeseen movements cannot cause injury or damage to any person or property. -
Page 31: Use As Directed
Kollmorgen Safety 06/2015 11.2 Use as directed Synchronous servomotors of the Cartridge DDR series are predominantly designed to be used as drives for rollers in printing presses, textile, foil processing and packa- ging machines, as well as similar machines that make high demands on dynamics. -
Page 32: Handling
12.5 Repair Repair of the motor must be done by the manufacturer. Opening the motor invalidates the warranty. Send the motor to: Kollmorgen Europe GmbH Pempelfurtstraße 1 D-40880 Ratingen 12.6 Disposal In accordance to the WEEE-2002/96/EG-Guidelines we take old devices and accessories back for professional disposal, if the transport costs are taken over by the sender. -
Page 33: Package
Kollmorgen Package 06/2015 Package 13.1 Delivery package Motor from the Cartridge DDR series Product manual (multi language) 13.2 Nameplate Legend: MODEL Motor type STALL CONT (standstill current) 0rms STALL PEAK (peak current) peak VOLTS Rated voltage MAX SPEED Maximum speed... -
Page 34: Model Number Description
Package Kollmorgen 06/2015 13.3 Model number description C 09 1 A - 1 1 - 2 1 0 5 S - xxx Voltage Specials 230 VAC Numbers for customer 400/480VAC specials Size 108mm Certificates 138mm UL / CE 188mm no UL... -
Page 35: Technical Description
Kollmorgen Technical Description 06/2015 Technical Description 14.1 General technical data Ambient temperature 5...+40°C for site altitude up to 1000m amsl (at rated values) It is vital to consult our applications department for ambient temperatures above 40°C and encapsulated mounting of the motors. -
Page 36: Protection Class
Technical Description Kollmorgen 06/2015 14.1.3 Protection class Version for shaft pegs: IP65 for sealed machine flange Version with hollow shaft:IP64 for sealed machine flange 14.1.4 Insulation material class The motors come up to insulation material class F according to IEC 60085 (UL 1446 class F). -
Page 37: Mechanical Installation
Kollmorgen Mechanical Installation 06/2015 Mechanical Installation Dimension drawings can be found in chapter "Dimension Drawings" from p. 97. 15.1 Important Notes Only qualified staff with knowledge of mechanical engineering are permitted to as- semble the motor. The mounting end of the motor is magnetized and will attract magnetic material. If the motor is not mounted, this end of the motor must be covered to insure proper cleanliness. -
Page 38: Types C04/Ch04, C05/Ch05 And C06/Ch06
Mechanical Installation Kollmorgen 06/2015 15.2 Types C04/CH04, C05/CH05 and C06/CH06 15.2.1 Mounting flange and shaft requirements Frame size (C/CH) 041 042 043 051 052 053 054 061 062 063 Steel or stainless steel Shaft material Shaft yield point N/mm² (A) Ø Shaft (-0.015mm) (B) Ø... -
Page 39: Mounting
Kollmorgen Mechanical Installation 06/2015 15.2.2 Mounting Improper mounting may damage the motor and machine. Status prior to mounting When the motor is not mounted to a machine, there is a black Philips screw in the hole labeled “A” and there is a silver hex alignment screw in the hole labeled “B”. -
Page 40: Dismounting
Mechanical Installation Kollmorgen 06/2015 15.2.3 Dismounting Statusprior to mounting When the motor is mounted to a machine, there is a black Philips screw in the hole labeled “B” and there is a silver hex alignment screw in the hole labeled “A”. -
Page 41: Types C09/Ch09 And C13/Ch13
Kollmorgen Mechanical Installation 06/2015 15.3 Types C09/CH09 and C13/CH13 15.3.1 Mounting flange and shaft requirements Frame size (C/CH) Cold-rolled steel with 0.3% carbon content Shaft material Shaft yield point N/mm² (A) Ø Shaft (-0.012mm) (B) Ø Shaft (-0.012mm) (C) Ø Pilot (±0.02mm) 232.94... -
Page 42: Mounting
Mechanical Installation Kollmorgen 06/2015 15.3.2 Mounting Improper mounting may damage the motor and machine. Secure Motor to Machine Frame Wipe down shaft and motor's rotor hub bore. Light oil residue is accep- table, but remove grease and other contaminates. If key is required: Insert the provided key into the keyway in the shaft with the point toward the end of the shaft. -
Page 43: Dismounting
Kollmorgen Mechanical Installation 06/2015 15.3.3 Dismounting Remove Cover Remove the blue rear cover of the Cartridge DDR (8 or 12 screws). C(H)13 C(H)09 Align Motor Use a flashlight to look into the holes labeled “B”. Turn the Motor shaft by hand until there is a threaded hole directly behind each of the four holes labeled “B”. -
Page 44: Electrical Installation
Connection of the motors with preassembled cables Carry out the wiring in accordance with the valid standards and regulations. Only use Kollmorgen preassembled shielded cables for the feedback and power connections. Incorrectly installed shielding leads to EMC interference and has an adverse effect on system function. -
Page 45: Guide For Electrical Installation
Kollmorgen Electrical Installation 06/2015 16.3 Guide for electrical installation Check that the servo amplifier and motor match each other. Compare the rated vol- tage and rated current of the unit. Carry out the wiring according to the wiring dia- gram in the instructions manual of the servo amplifier. The connections to the motor are shown in chapter "Wiring Diagrams"... -
Page 46: Setup
Setup Kollmorgen 06/2015 Setup 17.1 Safety notes Only specialist personnel with extensive knowledge in the areas of electrical engineering / drive technology are allowed to commission the drive unit of ser- vo amplifier and motor. Deadly voltages can occur, up to 900V. Risk of electric shock! Check that all live connection points (terminal boxes) are safe against accidental contact. -
Page 47: Trouble Shooting
Kollmorgen Setup 06/2015 17.3 Trouble Shooting The following table is to be seen as a “First Aid” box. There can be a large number of dif- ferent reasons for a fault, depending on the particular conditions in your system. The fault causes described below are mostly those which directly influence the motor. -
Page 48: Technical Data
Technical Data Kollmorgen 06/2015 Technical Data Technical data for every motor type can be found in chapter "Technical Data" from p. 90. All data valid for 40°C environmental temperature and 100K overtemperature of the win- ding. The data can have a tolerance of +/- 10%. -
Page 49: Indicazoni Generali
Se i motori vengono utilizzati in un sistema di azionamento insieme ai servoamplificatori Kollmorgen. Attenersi pertanto alla documentazione dei prodotti composta da: — manuale di istruzioni del servoamplificatore — istruzioni per l'installazione/la messa in funzione di una scheda di espansione —... -
Page 50: Sicurezza
Sicurezza Kollmorgen 06/2015 Sicurezza 20.1 Indicazioni di sicurezza Il produttore è tenuto a realizzare un'analisi dei rischi per il macchinario e ad adottare le misure necessarie, affinché eventuali movimenti imprevisti non causino danni a persone o a cose. Assicurare la regolare messa a terra della carcassa del motore con la bandella PE all'interno dell'armadio di distribuzione come potenziale di riferimento. -
Page 51: Uso Conforme
Kollmorgen Sicurezza 06/2015 20.2 Uso conforme I servomotori sincroni della serie Cartridge DDR sono concepiti in particolare come azionamenti per cilindri di macchine da stampa, macchine tessili, macchine per la lavorazione di pellicole, macchine per imballaggio e similari, con requisiti elevati in termini dinamici. -
Page 52: Maneggiamento
21.5 Riparazioni Il motori può essere riparato unicamente dal fabbricante; l’apertura dell’apparecchio annulla automaticamente la garanzia. Mettere l’apparecchio fuori servizio e inviarlo al fabbricante: Kollmorgen Europe GmbH Pempelfurtstraße 1 D-40880 Ratingen 21.6 Smaltimento Nell’accordo al WEEE-2002/96/EG-Guidelines prendiamo i vecchi dispositivi ed acces- sori indietro per eliminazione professionale, se i costi del tansport sono y rilevato il mit- tente. -
Page 53: Identificazione Del Prodotto
Kollmorgen Identificazione del prodotto 06/2015 Identificazione del prodotto 22.1 Dotazione ® Imballaggio del cartone con rivestimento di Instapak Motore della serie Cartridge DDR Manuale Prodotto (multi linguale) 22.2 Targhetta di omologazione Legenda MODEL Sigla STALL CONT I0rms (corrente continuativa allo stallo) -
Page 54: Codici Dei Modelli
Identificazione del prodotto Kollmorgen 06/2015 22.3 Codici dei modelli C 09 1 A - 1 1 - 2 1 0 5 S - xxx Tipo Versione 230 VAC numerazione continua 400/480VAC per versioni speciali Dimensioni 108mm Certificazione 138mm UL / CE... -
Page 55: Descrizione Tecnizi
Kollmorgen Descrizione tecnizi 06/2015 Descrizione tecnizi 23.1 Dati tecnici generali Temperatura ambiente da 5 a +40°C ad un'altitudine d'installazione fino a (ai dati nominali) 1000 m sopra il livello del mare In caso di temperature ambiente superiori ai 40°C e di motori in esecuzione chiusa contattare il nostro settore applicazioni. -
Page 56: Grado Di Protezione
Descrizione tecnizi Kollmorgen 06/2015 23.1.3 Grado di protezione Versione per alberini (2, 3): IP65 per flangia macchina con chiusura a tenuta Versione con albero cavo (1): IP64 per flangia macchina con chiusura a tenuta 23.1.4 Classe di isolamento I motori sono conformi alla classe isolante F secondo IEC 60085 (UL 1446 class F). -
Page 57: Installazione Meccanica
Kollmorgen Installazione meccanica 06/2015 Installazione meccanica Le illustrazioni di dimensione possono essere trovate nel capitolo"Dimension Dra- wings" p.97. 24.1 Indicazioni importanti Solo personale tecnico con esperienza di montaggio meccanico può montare il motore. Si tratta di una parte magnetica che attira il ferro. Coprire l’estremità del motore per evitare che si sporchi. -
Page 58: Modelli C04/Ch04, C05/Ch05 E C06/Ch06
Installazione meccanica Kollmorgen 06/2015 24.2 Modelli C04/CH04, C05/CH05 e C06/CH06 24.2.1 Requisiti per flangia di montaggio e albero Dimensioni (C/CH) 041 042 041 051 052 053 054 061 062 063 Materiale dell’albero Stahl oder Edelstahl Limite di snervamento N/mm² dell’albero (A) Ø... -
Page 59: Montaggio
Kollmorgen Installazione meccanica 06/2015 24.2.2 Montaggio Un montaggio errato può danneggiare il motore e la relativa macchina. Stato prima del montaggio Se il motore non è montato, nel foro “A” si trova una vite con testa a croce di colore nero e nel foro “B” una vite ad esagono incassato color argento. -
Page 60: Smontaggio
Installazione meccanica Kollmorgen 06/2015 24.2.3 Smontaggio Stato prima dello smontaggio Se il motore non è montato, nel foro “B” si trova una vite con testa a croce di colore nero e nel foro “A” una vite ad esagono incassato color argento. -
Page 61: Modelli C09/Ch09 E C13/Ch13
Kollmorgen Installazione meccanica 06/2015 24.3 Modelli C09/CH09 e C13/CH13 24.3.1 Requisiti per flangia di montaggio e albero Dimensioni (C/CH) Materiale dell’albero Acciaio laminato a freddo con 0,3% di carbonio Limite di snervamento dell’albero N/mm² (A) Ø albero (-0.012mm) (B) Ø albero (-0.012mm) (C) Ø... -
Page 62: Montaggio
Installazione meccanica Kollmorgen 06/2015 24.3.2 Montaggio Un montaggio errato può danneggiare il motore e la relativa macchina. Montaggio del motore sulla flangia della macchina Pulire l’alberino e il foro dell’albero cavo. Si può lasciare un sottile velo d’olio, mentre grasso ed altre impurità vanno rimossi. -
Page 63: Smontaggio
Kollmorgen Installazione meccanica 06/2015 24.3.3 Smontaggio Togliere il coperchio Togliere la copertura posteriore di colore blu dal motore Cartridge DDR (8 o 12 viti). C(H)13 C(H)09 Allineamento del motore Illuminare con una lampada i fori “B”, Ruotare l’albero manualmente fino a che attraverso ognuno dei 4 fori “B”... -
Page 64: Installazione Elettrica
Eseguire il cablaggio in base alle disposizioni ed alle norme vigenti. Per il collegamento di potenza e di retroazione utilizzare esclusivamente cavi scher- mati preconfezionati di Kollmorgen. Schermature non posizionate correttamente possono portare a interferenze EMV e possono pregiudicare il funzionamento del sistema. -
Page 65: Guida Ad Installazione Elettrica
Kollmorgen Installazione elettrica 06/2015 25.3 Guida ad installazione elettrica Verificare l'abbinamento tra servoamplificatori e motore. Confrontare la tensione no- minale e la corrente nominale degli apparecchi. Eseguire il cablaggio in base allo schema di collegamento riportato sul manuale del servoamplificatore. I collegamenti del motore sono indicati da capitolo "Wiring Diagrams"... -
Page 66: Messa In Funzione
Messa in funzione Kollmorgen 06/2015 Messa in funzione 26.1 Indicazioni importanti Solo tecnici con ampie conoscenze di elettrotecnica/tecniche di movimenta- zione possono mettere in funzione l'unità di azionamento con servoamplifica- tore/motore. Presenza di tensioni letali fino a 900V. Pericolo di scossa elettrica! Verificare che tutti gli elementi di collegamento sotto tensione siano protetti in modo si- curo contro il contatto. -
Page 67: Eliminazione Dei Guasti
Kollmorgen Messa in funzione 06/2015 26.3 Eliminazione dei guasti La seguente tabella è da intendersi come una "cassetta di pronto soccorso". A seconda delle condizioni dell'impianto in uso diverse possono essere le cause di un'anomalia. Si descrivono prevalentemente le cause dei guasti che riguardano direttamente il motore. -
Page 68: Dati Tecnici
Dati tecnici Kollmorgen 06/2015 Dati tecnici Per i dati tecnici di ogni tipo di motore consultare il capitolo "Technical Data" da p. Tutti i dati con la temperatura ambientale 40°C e la temperatura della bobina 100K aumentano I dati possono avere una tolleranza di +/- 10%. -
Page 69: Generalidades
— Manual de accesorios — Descripción técnica de la serie de motores Cartridge DDR Más información de fondo se puede encontrar en nuestro “ Producto WIKI” , disponible en www.wiki-kollmorgen.eu. 28.2 Destinatarios Este manual está dirigido a personal especializado y establece los siguientes requisitos: Transporte: sólo a cargo de personal con conocimientos de manejo de elementos de montaje... -
Page 70: Seguridad
Seguridad Kollmorgen 06/2015 Seguridad 29.1 Instrucciones de seguridad El fabricante de la máquina elaborarár un análisis de riesgo de la máquina y adoptará las medidas adecuadas para que movimientos imprevistos no pue- dan causar daños personales ni materiales. Asegúrese de la adecuada puesta a tierra del bloque del motor con la barra colectora del armario de distribución como potencial de referencia. -
Page 71: Utilización Conforme
Kollmorgen Seguridad 06/2015 29.2 Utilización conforme Los servomotores síncronos de la serie Cartridge DDR están concebidos especial- mente como accionamientos de rodillos para máquinas de artes gráficas, textiles, laminadoras, envasadoras y embaladoras y similares que tengan requisitos de dinámica elevados. -
Page 72: Manipulación
Límpiese con isopropanol o producto similar no sumergir ni pulverizar 30.5 Reparación Sólo el fabricante debe ejecutar reparaciones en el motor; la apertura de los aparatos invalida la garantía. Ponga el aparato fuera de servicio y envíelo al fabricante: Kollmorgen Europe GmbH Pempelfurtstraße 1 D-40880 Ratingen 30.6 Eliminación... -
Page 73: Identificación Del Producto
Kollmorgen Identificación del producto 06/2015 Identificación del producto 31.1 Volumen de suministro Motor de la Serie Cartridge DDR Manual del producto (lengua multi) 31.2 Placa de identificación Leyenda MODEL Denominación de modelo STALL CONT I0rms (corriente de detención) STALL PEAK Ipeak (corriente máxima) -
Page 74: Codificación De Modelo
Identificación del producto Kollmorgen 06/2015 31.3 Codificación de modelo C 09 1 A - 1 1 - 2 1 0 5 S - xxx Tipo constructivo Versión 230 VAC Número correlativo para 400/480VAC versiones especiales Tamaño 108mm Certificaciones 138mm UL / CE... -
Page 75: Descripción Técnica
Kollmorgen Descripción técnica 06/2015 Descripción técnica 32.1 Datos técnicos generales Temperatura ambiente 5...+40°C con altura de emplaz. hasta 1000m sobre nivel del (con datos nominales) mar Con temperaturas ambiente superiores a 40°C y con montaje encapsulado de los motores, tome contacto siempre con nuestro Departamento de Aplicaciones. -
Page 76: Tipo De Protección
Descripción técnica Kollmorgen 06/2015 32.1.3 Tipo de protección Versión para gorrón de eje (2, 3): IP65 con brida de máquina estanca Versión con eje hueco (1): IP64 con brida de máquina estanca 32.1.4 Clase de material aislante Los motores cumplen con la clase F de materiales aislantes según IEC 60085 (UL 1446 class F). -
Page 77: Instalación Mecánica
Kollmorgen Instalación mecánica 06/2015 Instalación mecánica Los dibujos de la dimensión se pueden encontrar en capítulo "Dimension Dra- wings" p. 97. 33.1 Instrucciones importantes Solamente los profesionales con conocimientos de mecánica están autorizados a montar. El lado de montaje del motor es magnético y atrae el hierro. Cubra el extremo del motor para evitar que se ensucie. -
Page 78: Tipos C04/Ch04, C05/Ch05 Y C06/Ch06
Instalación mecánica Kollmorgen 06/2015 33.2 Tipos C04/CH04, C05/CH05 y C06/CH06 33.2.1 Requisitos de la brida de montaje y el eje Tamano (C/CH) 041 042 051 052 053 054 061 062 063 Material del eje Acero o acero inoxidable Límite elástico del eje N/mm²... -
Page 79: Montaje
Kollmorgen Instalación mecánica 06/2015 33.2.2 Montaje Un montaje incorrecto puede dañar el motor y la máquina. Estado previo al montaje Si el motor no está montado, en el orificio “A” hay un tornillo negro de cabeza ranurada en cruz y en el orificio “B”, un tornillo Allen plateado. -
Page 80: Desmontaje
Instalación mecánica Kollmorgen 06/2015 33.2.3 Desmontaje Estado previo al desmontaje Si el motor no está montado, en el orificio “B” hay un tornillo negro de cabeza ranurada en cruz y en el orificio “A”, un tornillo Allen plateado. Soltar el acoplamiento de manguito Retire el tornillo Allen “A”. -
Page 81: Tipos C09/Ch09 Y C13/Ch13
Kollmorgen Instalación mecánica 06/2015 33.3 Tipos C09/CH09 y C13/CH13 33.3.1 Requisitos de la brida de montaje y el eje Tamano (C/CH) Acero laminado en frío con un porcentaje de carbono del Material del eje 0,3% Límite elástico del eje N/mm²... -
Page 82: Montaje
Instalación mecánica Kollmorgen 06/2015 33.3.2 Montaje Un montaje incorrecto puede dañar el motor y la máquina. Montaje del motor en la brida de la máquina Limpie el gorrón del eje y el orificio del eje hueco. Se acepta una pelí- cula fina de aceite;... -
Page 83: Desmontaje
Kollmorgen Instalación mecánica 06/2015 33.3.3 Desmontaje Retirar la cubierta Retire la cubierta posterior azul del Cartridge DDR (8 ó 12 tornillos). C(H)13 C(H)09 Alineación del motor Ilumine los orificios “B” con una linterna. Gire el eje a mano hasta que pueda verse un agujero ros- cado a través de cada uno de los 4 orificios “B”. -
Page 84: Instalación Eléctrica
Realice el cableado cumpliendo los reglamentos y normas vigentes. Para las conexiones de potencia y de retorno, utilice exclusivamente los conduccio- nes preconfeccionadas y protegidas de Kollmorgen. Los apantallamientos mal colocados producen siempre a interferencias electromag- néticas y degradar el rendimiento del sistema. -
Page 85: Guía De Instalación Eléctrica
Kollmorgen Instalación eléctrica 06/2015 34.3 Guía de instalación eléctrica Compruebe la correspondencia entre el servoamplificador y el motor. Compare la tensión nominal y la corriente nominal de los aparatos. Realice el cableado confor- me al cuadro de conexiones de las Instrucciones de instalación y de puesta en fun- cionamiento del servoamplificador. -
Page 86: Puesta En Funcionamento
Puesta en funcionamento Kollmorgen 06/2015 Puesta en funcionamento 35.1 Instrucciones importantes Solamente los profesionales con amplios conocimientos de electrotecnia y de técnicas de accionamiento están autorizados a la puesta en funcionamiento del conjunto servoamplificador-motor. Se producen tensiones peligrosas de hasta 900V. Riesgo de descarga eléctri- ca! Compruebe que todas las piezas de conexión que conducen tensión estén... -
Page 87: Eliminación De Perturbaciones
Kollmorgen Puesta en funcionamento 06/2015 35.3 Eliminación de perturbaciones Interprete la siguiente tabla como un botiquín de "Primera Ayuda". Las condiciones en que se ha procedido a la instalación determinan las causas por las que se produce una avería. En primer lugar se describen las causas de fallos que pueden afectar directa- mente al motor. -
Page 88: Datos Técnicos
Datos técnicos Kollmorgen 06/2015 Datos técnicos A partir de la página 90 del capítulo "Technical Data" encontrará los datos técnicos correspondientes a cada tipo de motor. Todos los datos válidos para la temperatura ambientales de 40°C y la temperatura exce- siva de la bobina 100K . - Page 89 Kollmorgen Datos técnicos 06/2015 This page has been deliberately left blank Servomotores Cartridge DDR Español - 89...
-
Page 90: Technical Data
Technical Data Kollmorgen 06/2015 Technical Data 37.1 Dictionary for technical data tables English Deutsch Italiano Español Data Daten Dati Datos Symbol [Unit] Symbol [Einheit] Simbolo [unità] Símbolo [unidad] Electrical data Elektrische Daten Dati elettrici Datos eléctricos Standstill torque Stillstandsdrehmoment Coppia cont. allo stallo... -
Page 91: Technical Data C04/Ch04
Kollmorgen Technical Data 06/2015 37.2 Technical Data C04/CH04 All data for 40°C environment temperature and 100K winding overtemperature. Data tolerance field +/- 10% max. Symbol C04/CH04 Data [Unit] Electrical data Standstill torque* [Nm] 4.57 4.51 8.26 8.46 11.1 11.2 14.1 14.4 Standstill current 2.73 4.69 4.68 9.19 4.73 9.15 5.00 9.74... -
Page 92: Technical Data C05/Ch05
Technical Data Kollmorgen 06/2015 37.3 Technical Data C05/CH05 Symbol C05/CH05 Data [Unit] Electrical data Standstill torque* [Nm] 11.7 11.8 16.9 16.9 20.9 20.0 24.8 23.9 Standstill current 4.75 9.29 5.69 11.1 9.21 18.2 9.79 17.4 0rms max. Mains voltage [VAC]... -
Page 93: Technical Data C06/Ch06
Kollmorgen Technical Data 06/2015 37.4 Technical Data C06/CH06 Symbol C06/CH06 Data [Unit] Electrical data Standstill torque* [Nm] 33.4 32.3 46.0 47.3 59.0 61.8 Standstill current 9.89 19.5 20.6 11.5 19.8 11.3 0rms max. Mains voltage [VAC] 230 / 480 Rated speed... -
Page 94: Technical Data C09/Ch09
Technical Data Kollmorgen 06/2015 37.5 Technical Data C09/CH09 Symbol C09/CH09 Data [Unit] Electrical data Standstill torque* [Nm] 50.2 Standstill current 12.8 18.4 21.2 0rms max. Mains voltage [VAC] 230/480 Rated speed [min = 230V Rated torque* [Nm] 42.4 C-Type Rated power [kW] 2.66... -
Page 95: Technical Data C13/Ch13
Kollmorgen Technical Data 06/2015 37.6 Technical Data C13/CH13 Symbol C13/CH13 Data [Unit] Electrical data Standstill torque* [Nm] Standstill current 29.2 18.7 29.6 16.8 32.7 20.1 0rms max. Mains voltage [VAC] 230/480 Rated speed [min = 230V Rated torque* [Nm] C-Type... - Page 96 Technical Data Kollmorgen 06/2015 This page has been deliberately left blank. General - 96 Servomotors Cartridge DDR...
-
Page 97: Dimension Drawings
Kollmorgen Dimension drawings 06/2015 Dimension drawings 38.1 Dimensions C04/CH04 Prinzipdarstellung / drawing in principle / schema elementare / representación esquemática Servomotors Cartridge DDR General - 97... -
Page 98: Dimensions C05/Ch05
Dimension drawings Kollmorgen 06/2015 38.2 Dimensions C05/CH05 Prinzipdarstellung / drawing in principle / schema elementare / representación esquemática General - 98 Servomotors Cartridge DDR... - Page 99 Kollmorgen Dimension drawings 06/2015 38.3 Dimensions C06/CH06 Prinzipdarstellung / drawing in principle / schema elementare / representación esquemática Servomotors Cartridge DDR General - 99...
- Page 100 Dimension drawings Kollmorgen 06/2015 38.4 Dimensions C09/CH09 Prinzipdarstellung / drawing in principle / schema elementare / representación esquemática General - 100 Servomotors Cartridge DDR...
- Page 101 Kollmorgen Dimension drawings 06/2015 38.5 Dimensions C13/CH13 Prinzipdarstellung / drawing in principle / schema elementare / representación esquemática Servomotors Cartridge DDR General - 101...
- Page 102 Dimension drawings Kollmorgen 06/2015 This page has been deliberately left blank. General - 102 Servomotors Cartridge DDR...
- Page 103 Kollmorgen Wiring diagram Motor & Encoder 06/2015 Wiring diagram Motor & Encoder Servomotors Cartridge DDR General - 103...
- Page 104 Fax: +49 (0)2102 - 9394 - 3155 KOLLMORGEN European UK Website Product WIKI North America KOLLMORGEN Customer Support North America Internet www.kollmorgen.com E-Mail support@kollmorgen.com Tel.: +1 - 540 - 633 - 3545 Fax: +1 - 540 - 639 - 4162...
Need help?
Do you have a question about the C04 and is the answer not in the manual?
Questions and answers