Advertisement
Quick Links
Advertisement

Related Manuals for Spirit Commercial CSC900


Summary of Contents for Spirit Commercial CSC900
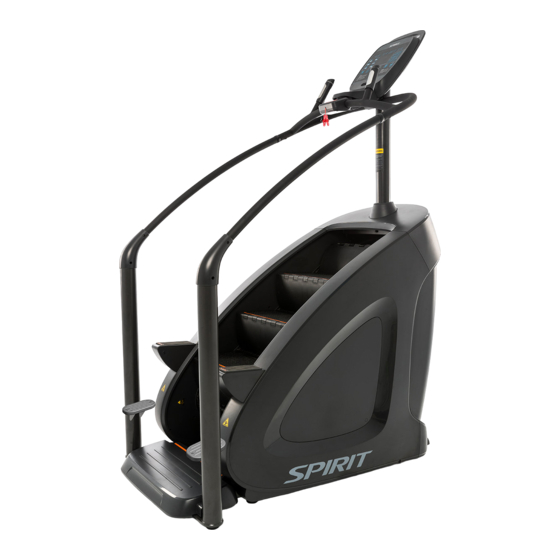
- Page 1 CSC900 StairClimber OWNER’S MANUAL...
-
Page 3: Table Of Contents
TABLE OF CONTENTS IMPORTANT SAFETY INSTRUCTIONS IMPORTANT ELECTRICAL INSTRUCTIONS IMPORTANT OPERATION INSTRUCTIONS PRODUCT REGISTRATION CSC900 ASSEMBLY INSTRUCTIONS CONSOLE OPERATION PROGRAMMABLE FEATURES GENERAL MAINTENANCE MANUFACTURER’S LIMITED WARRANTY Thank you for purchasing our product, please save these instructions. Please do not perform or attempt any... - Page 4 Congratulations on your new StairClimber and welcome to the Spirit Fitness family! Thank you for your purchase of this quality StairClimber from Spirit Fitness. Your new StairClimber was manufactured by one of the leading fitness manufacturers in the world and is backed by one of the most comprehensive warranties available.
-
Page 5: Important Safety Instructions
IMPORTANT SAFETY Maximum User Weight: 400 lbs / 180 kg. • This appliance is not intended for use by persons with INSTRUCTIONS • reduced physical, sensory or mental capabilities, or lack of experience and knowledge, unless they have WARNING been given supervision or instruction concerning use of the appliance by a person responsible for their Always unplug the machine from the electrical outlet •... - Page 6 manner as intended. In addition to instructing the buttons on the console. If you experience difficulties club members in the proper use of the equipment, during the workout, pushing the STOP button will the club member should obtain a complete physical bring the machine to a stop.
-
Page 7: Important Operation Instructions
the sole responsibility of the owner of this equipment and completely understanding the results of any to ensure that regular maintenance is performed. operational change you request from the computer Worn or damaged parts must be replaced console. immediately, or the equipment removed from service Understand that changes in resistance do not occur •... - Page 8 RECORD YOUR SERIAL NUMBER Please record the serial number of this fitness product in the space provided below. The serial number is located on the front of the StairClimber. SERIAL NUMBER: REGISTER YOUR PURCHASE The self-addressed product registration card must be completed in full and returned to Spirit Fitness. You can also go to www.spiritfitness.com/commercialwarrantyregistration.html under the Support tab to register online.
- Page 9 CSC900 PRE-ASSEMBLY UNPACKING TOOLS INCLUDED: ‰ 5mm Allen Wrench 1. Read all instructions before assembling. ‰ 6mm Allen Wrench 2. Assemble and operate the StairClimber on a hard, level surface in the area PARTS INCLUDED: intended for use. ‰ 1 Main Frame 3.
- Page 10 CSC900 STEP ONE Hardware for Step 1 TYPE DESCRIPTION CONSOLE MAST Console Mast M8 X 20L BOLT M6 X 65L BOLT BOLT M8 X 55L M8*20 Bolt 8 Flat Washer Ø8 WASHER M8*65 Bolt 8 Flat Washer Decorative Ring 1. Insert Console Mast wire through...
- Page 11 CSC900 STEP TWO Hardware for Step 2 TYPE DESCRIPTION STEP BASE M8 X 20L BOLT M8 X 30L BOLT ø8 WASHER 1. Attach the Step Base to the lower Main Frame using the M8*20 Bolts (2pcs), ø8 Flat Washers (2pcs) and M8*30 Bolt (1pc).
- Page 12 CSC900 STEP THREE M8 * 40 Bolt M8*30 Bolt 8 Flat Washer Handlebar Reinforcement M8*20 Bolts Handlebar Group Decorative Ring Decorative Ring Side Handlebar M8*20 Bolt 8 Flat Washer M8*20 Bolt 8 Flat Washer M8*20 Bolts Side Handlebar...
- Page 13 CSC900 STEP THREE - CONTINUED Hardware for Step 3 TYPE DESCRIPTION SIDE HANDLEBARS HANDLEBAR GROUP DECORATIVE RINGS REINFORCEMENT PLATE BOLT M8 X 20L M8 X 40L BOLT WASHER ø8 1. Connect wires with same terminal. 2. Attach Side Handlebars to the Handlebar Group and with the Decorative Rings using M8*20 Blots (4pcs), ø8 Flat Washers (4pcs).
- Page 14 CSC900 STEP FOUR Hardware For Step 4 Console TYPE DESCRIPTION CONSOLE HANDRAIL COVERS SETS M8 X 20L BOLT M4 X 25L SCREW SCREW ST4.2 X 15L ST4.2*16 Screw M8*20 Bolts ST4.2*15 Screw 1. Connect Console using M8*20L M4*25 Screw M4*25 Screws Bolts (4pcs).
-
Page 15: Console Operation
CSC900 CONSOLE OPERATION... - Page 16 Premium, ultra-bright Blue LED display Large LED Matrix window to track workout progress Program Direct Keys Resistance level Workout Results Key display window...
- Page 17 BASIC INFORMATION The Dot Matrix, or Profile Window, will display the workout Profile. The Message window displays pertinent exercise data. There are four windows to display a large variety of pertinent data during the workout. A Vertical window measures vertical height climbed along with Heart Rate and METS. Calories window measuring overall calories burned along with Calories/minute and WATTS.
- Page 18 ENTERING A PROGRAM & CHANGING SETTINGS A safety tether cord is provided with this unit. It is a simple switch design that should always be used. It is for your safety should you fall from the StairClimber when the Steps Per Minute (SPM) exceeds your capability.
- Page 19 DISPLAY The console display is separated into 4 separate display windows with thirteen total data points. Using the button below each window changes the display data point as shown. WINDOW ONE WINDOW TWO WINDOW THREE WINDOW FOUR VERTICAL DISTANCE CALORIES TIME ELAPSED STEPS PER MINUTES HEART RATE...
- Page 20 NUMBER KEYPAD When you are in the data set-up mode setting new data such as age, weight etc., you can use these buttons to enter the numbers quickly QUICK START This is the quickest way to start a workout. Press the Start button to begin. This will initiate the Quick Start mode.
- Page 21 PROGRAMMING THE CONSOLE Each of the programs can be customized with your personal information and changed to suit your needs. Some of the information asked for is necessary to ensure the readouts are correct. You will be asked for your Age and Weight. Entering your Weight aides in calculating a more correct Calorie reading. Although we cannot provide an exact calorie count we do want to be as close as possible.
- Page 22 WARM UP Level + or – keys or the Numerical Keypad or the Resistance + or – buttons at the contact 1. Press the WARM UP button. heart rate handle ends. 2. Console displays: Start Or Press OK To Set Up. Press OK.
- Page 23 FAT BURNING Level + or – keys or the Numerical Keypad or the Resistance + or – buttons at the contact 1. Press the FAT BURNING button. heart rate handle ends. 2. Console displays: Start Or Press OK To Set Up. Press OK.
- Page 24 TRAINING Level + or – keys or the Numerical Keypad or the Resistance + or – buttons at the contact 1. Press the TRAINING button. heart rate handle ends. 2. Console displays: Start Or Press OK To Set Up. Press OK. 3.
- Page 25 ROLLING HILLS Level + or – keys or the Numerical Keypad or the Resistance + or – buttons at the contact 1. Press the ROLLING HILLS button. heart rate handle ends. 2. Console displays: Start Or Press OK To Set Up. Press OK.
- Page 26 CHALLENGE Level + or – keys or the Numerical Keypad or the Resistance + or – buttons at the contact 1. Press the CHALLENGE button. heart rate handle ends. 2. Console displays: Start Or Press OK To Set Up. Press OK. 3.
- Page 27 INTERVAL Level + or – keys or the Numerical Keypad or the Resistance + or – buttons at the contact 1. Press the INTERVAL button. heart rate handle ends. 2. Console displays: Start Or Press OK To Set Up. Press OK. 3.
- Page 28 TARGET TRAINING The TARGET TRAINING Program allows the user to choose their own workout goal: Time, Vertical Dis- tance, or Calories. The Program counts down from the time goal or tracks up for both vertical distance or calories. 1. Press the TARGET button. 2.
- Page 29 USER PROGRAM The USER Program allows the user to create their own unique program design, customizing all 24 segments of the dot matrix display. 1. Press the USER PROGRAM button. 2. 30:00 minutes continually blinks in display window indicating Total Program Time. 3.
- Page 30 PAUSING OR ENDING A PROGRAM 1. Pressing the START/STOP button at anytime will pause the workout and lock the stairs from rotating. 2. Background color of the START button will change from green to red indicating that the machine has stopped. When the program restarts the color will revert to blue, or if the program is ended the color will change to blue indicating that the machine is ready.
-
Page 31: General Maintenance
GENERAL MAINTENANCE Wipe down all areas in the sweat path with a damp cloth after each workout. If a squeak, thump, clicking or rough feeling develops the main cause is most likely the following reason: The hardware was not sufficiently tightened during assembly. All bolts that were installed during assembly need to be tightened as much as possible. - Page 32 StairClimber WARRANTY EFFECTIVE DECEMBER 1, 2019 Spirit Fitness warrants this StairClimber for a period of time listed below from the date of sale, as determined by sale receipt, or in the absence of a sales receipt eighteen (18) months from the original factory shipping date.
- Page 33 EXCLUSIONS This warranty does not cover the following: 1. CONSEQUENTIAL, COLLATERAL, OR INCIDENTAL DAMAGES SUCH AS PROPERTY DAMAGE AND INCIDENTAL EXPENSES RESULTING FROM ANY BREACH OF THIS WRITTEN OR ANY IMPLIED WARRANTY. NOTE: Some states do not allow the exclusion or limitation of incidental or consequential damages, so this limitation or exclusion may not apply to you.
- Page 34 SERVICE Keep your bill of sale. Twelve (12) months from the date on the bill of sale or eighteen (18) months from the date of factory shipping as determined by the serial number establishes the labor warranty period should service be required. If service is performed, it is in your best interest to obtain and keep all receipts. This written warranty gives you specific legal rights.
- Page 36 800.258.4555 Spirit Fitness spiritservice@spiritfitness.com 3000 Nestle Road www.spiritfitness.com Jonesboro, AR 72401 CSC900 Owners Manual © 2019 All Rights Reserved Revision: 12.01.2019...
Need help?
Do you have a question about the CSC900 and is the answer not in the manual?
Questions and answers