Table of Contents
Advertisement
Quick Links
Advertisement
Table of Contents

Related Manuals for Spirit Commercial CRW900


Summary of Contents for Spirit Commercial CRW900
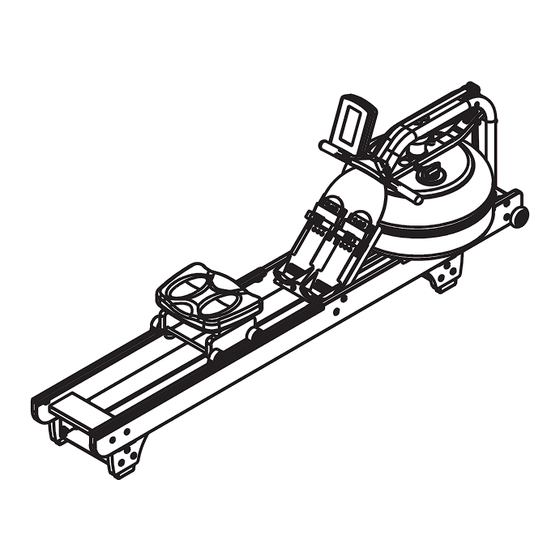
- Page 1 CRW900 Water Rower OWNER’S MANUAL...
- Page 2 Spirit Fitness...
-
Page 3: Table Of Contents
TABLE OF CONTENTS IMPORTANT SAFETY INSTRUCTIONS WARNING LABELS AND COMMUNICATION STICKERS SAFEGUARDS REGISTER YOUR PURCHASE CRW900 ASSEMBLY INSTRUCTIONS OPERATION INSTRUCTIONS TANK FILLING & WATER TREATMENT PROCEDURES ROWER BELT INSTRUCTIONS ROWING FORM CONSOLE OPERATION ENGINEERING MODE GENERAL MAINTENANCE TROUBLESHOOTING EXPLODED VIEWS MANUFACTURER’S LIMITED WARRANTY... - Page 4 Congratulations on your new CRW900 Water Rower and welcome to the Spirit Fitness family! Thank you for your purchase of this quality CRW900 Water Rower from Spirit Fitness. Your new CRW900 was manufactured by one of the leading fitness manufacturers in the world and is backed by one of the most comprehensive warranties available.
-
Page 5: Important Safety Instructions
IMPORTANT SAFETY DO NOT: Do not let unsupervised children operate the rower. • INSTRUCTIONS Do not use without proper athletic shoes. • WARNING Do not use in rainy weather outdoors, or in an enclosed • pool environment. This chapter includes precautions and fitness Do not drop or insert any object, hands, or feet into any safeguards for the installation and use of the Water •... - Page 6 VOORZORGSMAATREGELEN onder uw rower. Deze veiligheidsaantekeningen zijn aan u gericht Probeer geen omhulsels te verwijderen of uw rower te • wijzigen. als eigenaar van de Rower manufactured by Spirit Fitness. Gelieve uw gebruikers en uw per-soneel WAARSCHUWING: voor conditietraining volledig bekend te maken met deze veiligheidsinstructies.
- Page 7 PRÉCAUTIONS AVERTISSEMENT: Ces consignes de sécurités s’adressent aux Le Water Rower manufactured by Spirit Fitness • propriétaires du Water Rower manufactured by est conçu pour l’exercice aérobique dans un Spirit Fitness. Veuillez instruire tous vos utilisateurs et environnement commercial ou privé. instructeurs à...
- Page 8 VORSICHTSMASSNAHMEN Lassen Sie keine Gegenstände in irgendwelche • Öffnun- gen oder unter den rower fallen und halten Sie Die folgenden Vorsichtsmaßnahmen richten sich an Hände und Füße von diesen Bereichen fern. Sie als Besitzer des Water Rower manufactured by Unternehmen Sie keinen Versuch, irgendwelche Spirit Fitness.
- Page 9 PRECAUZIONI AVVERTENZE: Queste note precauzionali sono dirette a voi, come Lo Water Rower manufactured by Spirit Fitness è stato • proprietario dello Water Rower manufactured by realizzato per esercizi di aerobica in un ambiente pubblico o privato adeguato. Spirit Fitness. Siete pregati di istruire i vostri uten- ti e il vostro personale all’osservanza di queste Prima di iniziare un programma di esercizio fisico, •...
- Page 10 PRECAUÇÕES remover nenhum degrau nem modificar seu rower. ADVERTÊNCIA: Estas notas de segurança destinam-se a você, proprietário do Water Rower manufactured by Seu Water Rower manufactured by Spirit Fitness foi • projetado para exercícios aeróbicos em um ambiente Spirit Fitness. Treine todos os usuários e o pessoal comercial ou próprio do consumidor.
- Page 11 PRECAUCIONES No lo deje caer ni inserte objetos. manos o pies en • ninguna apertura de su rower ni debajo de él. Estas notas de seguridad están dirigidas a usted como el dueño de Water Rower manufactured by No intente quitar ninguna cubierta o recubrimiento ni •...
- Page 12 FÖRSIKTIGHETSÅTGÄRDER VARNINGAR: Dessa säkerhetsanmärkningar är riktade till dig i Din Roddmaskin manufactured by Spirit Fitness är • egenskap av ägare av Roddmaskin manufactured avsedd för aerobisk träning i kommersiella eller konsumentinriktade miljöer. by Spirit Fitness. Var god utbilda alla användare och all personal att följa dessa säkerhetsanvisningar.
- Page 13 注意事項 警告: 下述安全說明適用於您所擁有的由SPIRIT • 您所擁有的由Spirit Fitness製造之水阻式划船機,專 FITNESS製造之水阻式划船機。請培訓所有使用 為商業或消費環境中的運動而設計。 者與健身人員遵守下述安全說明。 • 在開始任何鍛煉計劃之前,請諮詢您的醫生。 • 請勿讓自己運動過量。 如果你感到昏厥,頭暈或疲 遵守事項: 憊,請停止使用。 使用此水阻式划船機時要運用一 般常識。 • 鼓勵您的每個使用者在使用此水阻式划船機前,與 專業的醫療保健專業人員討論他們的健康計劃或健 • 在使用此水阻式划船機之前,請完整閱讀使用者手 身方案。 冊。 • 如果您感到頭暈或虛弱,請停止使用此水阻式划船 • 不遵守上述警告可能導致人身傷害或死亡。 機。 • 請定期進行預防性維護。 • 請緩慢且循序漸進使用此水阻式划船機,直至達到 舒適程度。 禁止事項: • 請勿讓無人監管的兒童操作此水阻式划船機。 • 請勿在沒有穿著合適的運動鞋的狀況下使用此水阻 式划船機。...
- Page 14 注意事項 • フライホイールの開口部やその付近に物、手、 足、指等を落としたり、入れたり、触れたりしな これらの安全に関する注意事項は、SPIRIT いようにしてください。 FITNESS社が製造したROWERのオーナーとして • カバーや覆いを取り外したり、このエクササイズ お客様に向け示されています。これらの安全に バイクを改造しないでください。 関する指示や注意事項に従うように、すべての ユーザーやフィットネススタッフをトレーニン グしてください。 警告: 。 DO(行ってください): • このRowerはSpirit Fitness社によって製造された、 • 各ユーザーが各自の健康プログラムやフィットネ 業務使用目的または個人使用目的の有酸素運動用 スプログラムについて、必ず医療従事者や専門家 に設計されたエクササイズバイクです。 と相談する事を強く奨励します。 • エクササイズプログラムを始める前に必ず医師に • 使用前、使用中にめまいや気分が悪いと感じた場 ユーザー自身の健康状態を相談してください。 合は、直ちにバイクの使用をやめてエクササイズ • 自分自身のレベルを超えた過度なエクササイズは を中止してください。 避けてください。わずかでも、体調不良やめまい • エクササイズバイクの定期的な予防メンテナンス を感じたり、疲労を感じた場合は直ちにエクササ を行ってください。 イズを中止して、使用を止めてください。エクサ...
-
Page 15: Warning Labels And Communication Stickers
WARNING LABELS AND COMMUNICATION STICKERS The following pages show examples of Spirit Fitness warning labels and communication stickers placed ® on the equipment as part of the manufacturing process. It is critical that owners maintain the integrity and placement of these stickers. If you find any stickers missing or damaged contact your local dealer or distributor for a replacement. -
Page 16: Safeguards
SAFEGUARDS Do not use or permit use of any equipment that is • damaged and/or has worn or broken parts. For all The following fitness safeguards and operating equipment use only replacement parts supplied by precautions are directed to purchasers and users of Spirit Fitness. - Page 17 Do not allow users to wear loose fitting clothing WARNING • or jewelry while using equipment. It is also Do not fill past the calibration mark as indicated on the recommended to have users’ secure long hair back tank level sticker or water spillage can occur. and up to avoid contact with moving parts.
-
Page 18: Register Your Purchase
RECORD YOUR SERIAL NUMBER Please record the serial number of this fitness product in the space provided below (serial number is located on the center floor tube behind the crank). Serial Number: REGISTER YOUR PURCHASE The self-addressed product registration card must be completed in full and returned to Spirit Fitness. You can also go to https://www.spiritfitness.com/commercialwarrantyregistration.html under the "Support"... - Page 19 CRW900 PRE-ASSEMBLY Use the following procedures to unpack and assemble your water rower manufactured by Spirit Fitness: 1. Position the shipping carton so the heavy end is located at the bottom. 2. Cut the straps then lift the box over the unit and unpack. Remove foam inserts and all parts from the shipping carton, then use the parts list to verify that all parts are included in your shipment.
- Page 20 CRW900 BOX 1 & 2 CONTENTS Item DESCRIPTION MAINFRAME LEFT/RIGHT SIDE RAIL ROWER SEAT REAR BRACE BUNGEE HOOK MOUNT TRANSPORT WHEEL ASSEMBLY M8 WASHER M8 STANDARD NUT M8 NYLOC NUT M6 X 15MM BOLT M8 X 45MM BOLT 5MM ALLEN KEY...
- Page 21 CRW900 PARTS Item DESCRIPTION BUNGEE SHOCK CORD [Pre-installed on Mainframe] SEAT SPACERS FOOTBOARD [Pre-installed on Mainframe] FRONT AND REAR SUPPORT BRACKETS ELEVATED LEGS M6 X 20MM BOLT HEART RATE RECEIVER CABLE TIES CABLE TIE MOUNT ADJUSTMENT KNOB P.29 www.spiritfitness.com...
- Page 22 CRW900 1 - REAR BRACE, TRANSPORT WHEEL REQUIRED PARTS Towards the Rower SIDE RAIL LEFT / RIGHT [2] REAR BRACE [4] BUNGEE HOOK MOUNT [5] TRANSPORT WHEEL ASSEMBLY [6] Pre-Installed Bolt 4 X M6 X 15MM BOLTS [10] Rear Brace (Under-...
- Page 23 Bump Stops M8 x 60mm Bolt Washer Transport Wheel Rear Brace M8 Washer M8 Nylon Bungee Hook Mount towards the floor M6 x 15mm Bolts 1. Next, connect the Left/Right Side Rails [2] using 4pcs M6x15mm Bolts [10] and Rear Brace [4]. DO NOT TIGHTEN.
- Page 24 CRW900 2 - INSTALLING THE SEAT Seat Indentation Side Lower Seat Guides 1. To install the Rower Seat [3], spread the Left/Right Side Rails [2] slightly and drop the Rower Seat [3] into the track. Make sure to fit the lower seat guides into the track. It will be sitting somewhat loosely on the track until the Mainframe [1] is installed.
- Page 25 CRW900 OPTION FOR THE SEAT HEIGHT The Rower Seat [3] comes fully assembled, however the cushioned seat can be mounted at various heights for added comfort and usability. The use of Spacers [20] is optional. To mount the seat in a higher position,remove the pre-installed 4pcs of M8 x 130mm screws and the cushioned rower seat.
- Page 26 CRW900 3 - MAINFRAME Front Lower Brackets Footboard REQUIRED PARTS MAINFRAME [1] Footboard brackets SIDE RAILS ASSEMBLY [2] 16X M8 WASHERS [7] 8X M8 STANDARD NUTS [8] 8X NYLON NUTS [9] M8 x 45mm Bolt 8X M8 X 45MM BOLTS [11]...
- Page 27 CRW900 4 - ATTACHING THE BUNGEE CORD 1. Once the Bungee Shock Cord [19] is attached to the Rear Brace [4], tighten the bolts holding the Footboard [21], the Mainframe [1] to side rail bolts as they are Tighten frame easier to access from the vertical position.
- Page 28 CRW900 5 - BUMPERS AND ELEVATED BRACKETS Front and Rear Support Brackets [22] - 2pcs 1. Stand the Rower Vertically 2. Remove the M6x20mm Bolts [pre-installed] and the front and the rear bumpers from Left and Right Rail M6 x 20mm Bolt [2].
- Page 29 CRW900 5 - CONTINUED 1. Mount the Elevated Leg [23] as pictured. Elevated Leg [23] - 4pcs Align the Elevated Legs [23] with the bolt holes and secure them all with 12pcs M8x45mm Bolt [11], 24pcs M8 Washer [7], 12pcs M8 Nut [8 and 12pcs M8 Nylon Nut [9].
- Page 30 CRW900 HEART RATE INSTALLATION 3. Paste the Heart Rate REQUIRED PARTS Receiver [29] to the HEART RATE RECEIVER [29] location as indication 3PCS CABLE TIES [30] 3PCS CABLE TIE MOUNTS [31] label using double- sided tape, and 1. After confirming all please be aware parts are present.
- Page 31 CRW900 HEART RATE INSTALLATION • You will have an excess of wire which you can tuck out of the way behind the metal frame bracket. • Maintaining a consistent signal on a rower can be a challenge due to the varying distances experienced during the rowing stroke between the receiver/transmitter.
-
Page 32: Operation Instructions
OPERATION INSTRUCTIONS The CRW900 Rower's water tank offers a true multi-level experience. Water is moved between the "storage" and "active" chambers of the tank. Your new rower can adapt at the turn of a dial to the resistance preferred by each user in the home environment. -
Page 33: Tank Filling & Water Treatment Procedures
TANK FILLING & WATER TREATMENT PROCEDURES 1. Remove rubber fill plug from the top of the tank. 1 : This setting keeps a portion of 2. Place a large bucket of water next to the rower. Position the Siphon [17] the water in reserve creating light with rigid hose in the bucket, and flexible hose in the tank. - Page 34 REMOVING / CHANGING TANK WATER P.29 1. Set Adjuster Knob [32] to “1”. 2. Row at least ten strokes to fill the storage reservoir as completely as possible. Remove the tank plug. 3. Insert rigid end of siphon into the tank, and flexible hose into a large bucket. 4.
- Page 35 DETACHING THE ROWER BELT 1. To detach belt, simply pull beyond the range of the normal rowing stroke until the belt detaches from the belt bungee pulley. Note: You’ll hear the Velcro separating just before the belt detaches. 2. Unhook the Bungee Shock Cord [19] from the Rear Brace [4]. Then, push out the inner clip from the bungee hook.
- Page 36 REATTACHING THE ROWER BELT Velcro Facing Upwards STEP 1 Begin reattaching the rower belt by threading around the rower belt pulley with the Velcro side facing upward as illustrated. STEP 2 Next, thread the belt around the idle wheel as shown. Idle Wheel Once around the idle wheel, attach the rower belt to the belt/bungee pulley.
- Page 37 REATTACHING THE ROWER BELT - CONTINUED STEP 5 Recoil tension will decrease over time as the Bungee Shock Cord [19] stretches. To increase recoil tension, simply push the inner clip out of the bungee hook from behind, pull the required amount of bungee through the inner clip and replace the inner clip into the bungee hook as shown below.
- Page 38 ADJUSTING FOOTPLATES The footplate slider accommodates most foot sizes, and is designed to keep your feet securely in place as you row. The feet should be positioned so that the foot strap covers the section of the foot that naturally bends as you row. TO ADJUST: Lift the top of the footplate from the mounting peg and slide vertically between settings 1- 6 to suit your foot length.
-
Page 39: Rowing Form
ROWING FORM 1. Sit with straight legs and back, leaning forward slightly at the hips with arms out straight, hands level with the lower ribs. Pull back. 2. Legs and back straight, leaning slightly forward from the hips, arms out in front. Lean and slide forward. Note: Hands should now be around your knees, keeping legs straight. -
Page 40: Console Operation
CRW900 CONSOLE OPERATION Spirit Fitness... - Page 41 INTERVAL DISPLAY PANEL QUICK MODE BUTTONS QUICK MODE BUTTONS TIME, DISTANCE, CALORIES, WATTS, SPEED, RPM DISPLAY PANEL HEART RATE DISPLAY PANEL CONTROL KEYPAD BLUETOOTH BUTTON www.spiritfitness.com...
- Page 42 CONSOLE BUTTONS The Quick Mode buttons will go into the associated mode immediately The ▲/▼ Arrow buttons allow the user to increase or decrease console values Use the Reset button to Use the Bluetooth button clear a value, to pause to upload the workout your workout, end your summary to the App.
- Page 43 CONSOLE DISPLAY Bluetooth Symbol - Displays Resistance value displayed here. when BLUETOOTH key is pressed When "TARGET TIME" is selected, time selection will be displayed here. Total elapsed time or time count down will be displayed during exercise." Displays the time needed to row 500 meters according to current speed and average speed.
- Page 44 TARGET TIME, DISTANCE, CALORIES MODE The target panels will show Time, Distance, Calories and Strokes depending on operating mode. When the target symbol is displayed, it means that target mode is operating in that particular value. The TIME will alternate showing the remaining or elapsed time. The DISTANCE will count or countdown in meters.
- Page 45 HEART RATE DISPLAY This panel will show every user’s heart rate information. When console detects a signal from a wireless monitor, the BPM (beats-per-minute) will show in the large three-digit field and the heart icon will flash. However, if no signal is detected signal, three dashes "- - -" will display to indicate no heart rate detected. While in TARGET HEART RATE mode, the console helps the user maintain in a BPM range to build cardio- vascular endurance.
- Page 46 CONSOLE SETUP BATTERY INSTALLATION The console operates on 4 AA batteries. The battery compartment is on the back side of the console. Please dispose of batteries properly after use. CONSOLE MODES SLEEP MODE After 60 seconds of inactivity, the console will switch into the power-saving "Sleep Mode". The display will switch off. Rotating the pedals or pressing any button on the console will launch the "Ready Mode".
- Page 47 STOP MODE Press the RESET button to go into the "Stop Mode" while in the "Pause Mode", or if there is no input via the console for 30 seconds the console will automatically enter "Stop Mode". In "Stop Mode", the 7-segment display will show “STOP”, TIME will show total time, DISTANCE will show total distance, CALORIES will show total calories burned, STROKES will show the number of strokes for the workout, TOTAL STROKES will show the total number of strokes, TIME/500m and TIME/500m AVERAGE will be shown alternately for one minute.
- Page 48 CONSOLE PROGRAMS QUICK START As strokes are detected, the console will immediately launch QUICK START. TIME, DISTANCE, CALORIES, SPM, WATTS, STROKES, TOTAL STROKES will begin counting. TIME/500m and TIME/500m AVERAGE will be alternately displayed every 5 seconds. The 7-segment display will show level according to VR icon will stay lit, and the ♥...
- Page 49 TARGET HEART RATE PROGRAMS The Target Heart Rate program allows the maximum beats per minute (BPM) target to be customized to maximize cardiovascular training. The Heart Rate program calculates the maximum heart rate value based on the user's age to optimize the training target between 65% and 85% of the calculated or theoretical maximum heart rate.
-
Page 50: Engineering Mode
ENGINEERING MODE Press Reset and Enter buttons for 2 seconds to enter Engineering Mode. The console will also beep for 1 second. DISTANCE banner will blink first. Press ▲ or ▼ button to select setting section. (Sound → ODO → Sound) While in Engineering Mode if there is no activity for 30 seconds, the console will switch STANDBY Mode. -
Page 51: General Maintenance
GENERAL MAINTENANCE A regular preventative maintenance schedule with your fitness equipment ensures that products are working at an optimal condition without affecting the your exercise experience. To assist in the maintenance regimen, it is recommended to break service into daily, weekly, & monthly activities. Details on each activity can be found in the "Maintenance"... -
Page 52: Troubleshooting
TROUBLESHOOTING Issue Possible Cause Instructions Change rower location to reduce direct exposure to sunlight. Add Water changes Rower is in direct sunlight or has not water treatment or change tank water as directed in the Water color or becomes had water treatment Treatment Section [pg 33] of this manual. - Page 53 TROUBLESHOOTING CONTINUED Issue Possible Cause Instructions 1. Hold down ENTER+UP+DOWN buttons for 2 seconds. After entering VR settings mode, the buzzer will buzz for 1 second. 2. The 7-segment display will show “VR”. The time window will show “L”. 3. Adjust VR for the first increment, then press the ENTER KEY to confirm. Trouble with VR Setting 4.
-
Page 54: Exploded Views
EXPLODED VIEWS Assembly Overview UpperMain Frame Assembly A385 65931 A386 65921 65921 62822 66070 65931 62819 A1078 Footplate Assembly 65921 A387 62811 66924 65931 65921 62822 66557 62811 65921 62811 8 Dome Head Bolt M8x45 - B 65820 62812 1 Hex Head Bolt M6x15 - B 62819 2 Hex Head Bolt M8x60 - B 62812... - Page 55 Main Frame Assembly Main Frame Assembly 60123 60150 65960 66014 A159 Description 61066 10178 60125 65125 10052 10052 1 Grub Screws M4x6 - B 61010 4 Tank Bonding Strip 3M-V 10185 60126 24005 10090 1 End Cap 118x40mm 61066 1 Plastic Washer M5920.1x 10150 60120 11072...
- Page 56 A1078 - 10 Level Tank Complete Assembly Sliding Footplate Assembly 10176 Not Sold Separately 67988 63144 12188 65693 10220 69986 10100 65935 61001 62064 65997 62063 10100 Washer M6x16x1 - B Foot Strap & Buckle 10176 Counter Sunk Bolt M6x20 - B 10220 62063 Footplate Slider with Velcro #65997...
- Page 57 A159 Belt Bungee Pulley Complete A386 Plastic Handle Complete Bearings Velcro 65922 Bungee Pulley 66924 64504 64503 Belt Bungee Pulley Complete & Velcro & One 60900 Way Bearings #90136 66924 Bungee 8mm x 2230 & Inner Clip #65922 64516 64503 Belt Bush 64504 Belt...
- Page 58 A387 Side Rail Assembly L/R A385 Seat Assembly Complete 62814 2 Hex Head Bolt M4x20 - B 62815 4 Hex Head Bolt M6x20 - B Right 64753 1 Side Rail Black with Decal #64754 66039 2 Side Rail Bumper 66055 1 Velcro for Side Rail 20x345 66055 66323 66056 2 Bump Stop - Square 23x15x6.5...
- Page 59 EVK - Elevate Kit Assembly 62811 62811 65921 65921 62822 62822 65931 65931 66450 66450 66452 66452 62815 62815 62811 12 Dome Head Bolt M8x45 - B 62815 Hex Head Bolt M6x20 - B 62822 12 Nut M8 - B 65921 24 Washer M8.5x19x1.6t - B 65931 12 Nyloc Nut M8 - B 66450...
- Page 60 CRW900 WATER ROWER WARRANTY EFFECTIVE MAY 7, 2019 Spirit Fitness warrants all its fitness rower parts for a period of time listed below from the date of retail sale, as determined by sale receipt, or in the absence of a sales receipt eighteen (18) months from the original factory shipping date.
- Page 61 EXCLUSIONS This warranty does not cover the following: 1. CONSEQUENTIAL, COLLATERAL, OR INCIDENTAL DAMAGES SUCH AS PROPERTY DAMAGE AND INCIDENTAL EXPENSES RESULTING FROM ANY BREACH OF THIS WRITTEN OR ANY IMPLIED WARRANTY. Note: Some states do not allow the exclusion or limitation of incidental or consequential damages, so this limitation or exclusion may not apply to you.
- Page 62 SERVICE Keep your bill of sale. Twelve (12) months from the date on the bill of sale or eighteen (18) months from the date of • factory shipping as determined by the serial number establishes the labor warranty period should service be required. If service is performed, it is in your best interest to obtain and keep all receipts.
- Page 63 MANUFACTURER Dyaco Shanghai Dyaco Canada Dyaco Commercial & Medical Room 210, No.350 5955 Don Murie Street North America Hengren Road Niagara Falls, ON 18303 Bothell Everett Hwy. Yangpu District L2G 0A9 Suite 210 Shanghai, China 200438 Canada Bothell, WA 98012 TEL: 86 -21-65068300 TEL: +1 888-707-1880 TEL: +1-425-659-2401 (Local)
- Page 64 NOTES Spirit Fitness...
- Page 65 NOTES www.spiritfitness.com...
- Page 66 NOTES Spirit Fitness...
- Page 67 www.spiritfitness.com...
- Page 68 800.258.4555 Spirit Fitness Questions@spiritfitness.com 3000 Nestle Road www.spiritifitness.com Jonesboro, AR 72401 CRW900 Owners Manual © 2019 All Rights Reserved Revision 2: 06.20.2019...
Need help?
Do you have a question about the CRW900 and is the answer not in the manual?
Questions and answers