Advertisement
Quick Links
Advertisement

Related Manuals for Spirit Commercial CRW800H2O


Summary of Contents for Spirit Commercial CRW800H2O
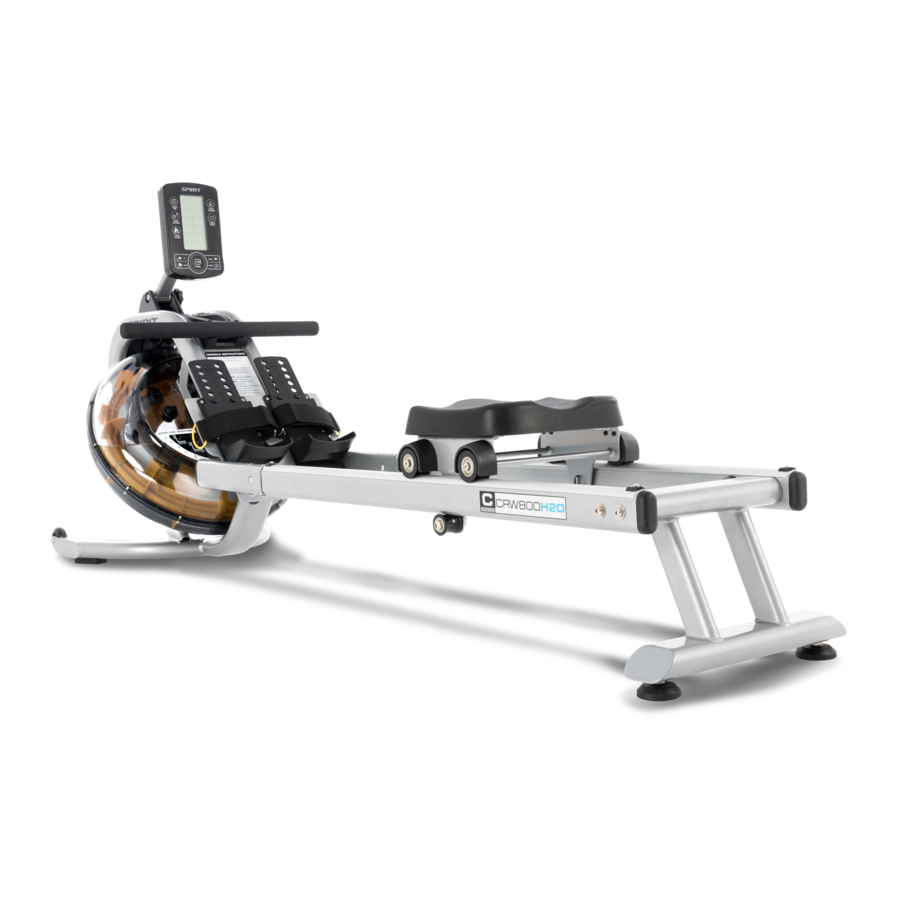
- Page 1 CRW800H2O Water Rower OWNER’S MANUAL...
- Page 2 Spirit Fitness...
-
Page 3: Table Of Contents
TABLE OF CONTENTS IMPORTANT SAFETY INSTRUCTIONS WARNING LABELS AND COMMUNICATION STICKERS SAFEGUARDS REGISTER YOUR PURCHASE CRW800H2O ASSEMBLY INSTRUCTIONS TANK FILLING & WATER TREATMENT PROCEDURES CONSOLE OPERATION ENGINEERING MODE GENERAL MAINTENANCE TROUBLESHOOTING MANUFACTURER’S LIMITED WARRANTY Thank you for purchasing our product, please save these instructions. Please do not perform or attempt any customizing, adjustments, repair or maintenance that is not described in this manual. - Page 4 Thank you for your purchase of this quality CRW800H2O Water Rower from Spirit Fitness. Your new CRW800H2O was manufactured by one of the leading fitness manufacturers in the world and is backed by one of the most comprehensive warranties available. Through your dealer, Spirit Fitness will do all we can to make your ownership experience as pleasant as possible for many years to come.
-
Page 5: Important Safety Instructions
IMPORTANT SAFETY Do not use without proper athletic shoes. • Do not use in rainy weather outdoors, or in an enclosed • INSTRUCTIONS pool environment. WARNING Do not drop or insert any object, hands, or feet into any • opening or within the area operation of the product. This chapter includes precautions and fitness Do not attempt to remove any shrouds or modify the •... -
Page 6: Warning Labels And Communication Stickers
WARNING LABELS AND COMMUNICATION STICKERS The image below shows an example of Spirit Fitness warning labels and communication stickers placed ® on the equipment as part of the manufacturing process. It is critical that owners maintain the integrity and placement of these stickers. If you find any stickers missing or damaged contact your local dealer or distributor for a replacement. -
Page 7: Safeguards
SAFEGUARDS damaged and/or has worn or broken parts. For all equipment use only replacement parts supplied by The following fitness safeguards and operating Spirit Fitness. precautions are directed to purchasers and users of Cables and belts pose an extreme liability if used •... - Page 8 Do not allow users to wear loose fitting clothing WARNING • or jewelry while using equipment. It is also Do not fill past the calibration mark as indicated on the recommended to have users’ secure long hair back tank level sticker or water spillage can occur. and up to avoid contact with moving parts.
-
Page 9: Register Your Purchase
RECORD YOUR SERIAL NUMBER Please record the serial number of this fitness product in the space provided below (serial number is located on the center floor tube behind the crank). Serial Number: REGISTER YOUR PURCHASE The self-addressed product registration card must be completed in full and returned to Spirit Fitness. You can also go to https://www.spiritfitness.com/commercialwarrantyregistration.html under the "Support"... - Page 10 CRW800H2O PRE-ASSEMBLY Use the following procedures to unpack and assemble your water rower manufactured by Spirit Fitness: 1. Position the shipping carton so the heavy end is located at the bottom. 2. Cut the straps then lift the box over the unit and unpack. Remove foam inserts and all parts from the shipping carton, then use the parts list to verify that all parts are included in your shipment.
- Page 11 CRW800H2O ASSEMBLY PARTS CHECKLIST Part No Description Q’ty Main Frame Rear Stabilizer NO.38 3R/3L Slide Rail NO.1 NO.2 Seat Assembly Computer Assembly Funnel NO.52 NO.53 NO.54 NO.3R L Pumping Siphon Water-Purification Note: Above parts are all needed to assemble this machine.
- Page 12 CRW800H2O PARTS Spirit Fitness...
- Page 13 SLIDE RAILS AND REAR STABILIZER 1. Turn over the Slide Rail (No. 3) as above. Attach the Seat’s Rollers (No. 39) to the Slide Rail making sure the plate touches the rollers. To secure the Slide Rails between the Rollers, you’ll need to insert it at an angle and rotate as shown in the diagram to the left.
- Page 14 CONNECTING THE SLIDE RAIL TO THE MAIN BODY 1. This step can be made easier with the use of another person to assist you. Be careful of the sliding Seat (No. 38) as it will move when placed upright. 2. Set the Main Frame (No. 1) in an upright position and connect the Slide Rails (No.3) using 4 Long Bolts (No.
- Page 15 ASSEMBLING THE CONSOLE TO THE # 67 M5*15 4pcs CONSOLE ARM. #94 S13-17 1. Connect the Console Wires (No. 96) together. 2. Remove the 4 Screws (No. 67) from the back of the Console (No. 54). Align the holes on the Console (No. 54) with the holes on the Support Plate (No.
- Page 16 ATTACHING THE CONSOLE 68 68 1. Place the 4 AA batteries into 68 68 the Console (No. 54). #68 M8*15 4pcs #68 M8*15 4pcs 2. Turn the Main Frame (No. #93 S5 1) upright. Connect the #93 S5 Sensor Wire (No. 56) to the Connection Wire (No.
- Page 17 How to Fill and Empty the Tank Fig. A 1. Remove the Fill Plug (No. 50) from the Upper Tank (No. 24). 2. To fill tank with water, refer to Fig. A. Insert the Funnel (No. 52) into the tank, then use a cup or the Siphon Pump (No. 53) and a bucket to fill the tank.
- Page 18 Adjustment Guides The pedal strap is adjustable and can be personalized to fit the user’s foot size. To adjust the pedal strap, remove the hook and loop end of the strap from the mesh side by pulling it upward and over to the side. Once removed, you may increase the opening of the pedal strap by pulling the mesh end up and to the side.
- Page 19 折叠步骤图 Storage CAUTION! Move the Seat (No. 38) to front of Slide Rail (No. 3) To move the machine, first or it will glide down when raising the rower up! lift up the rear stabilizer until the transportation wheels on the front stand touch the ground.
-
Page 20: Console Operation
CRW800H2O CONSOLE OPERATION Spirit Fitness... - Page 21 INTERVAL DISPLAY PANEL QUICK MODE QUICK MODE BUTTONS BUTTONS TIME, DISTANCE, CALORIES, WATTS, SPEED, RPM DISPLAY PANEL HEART RATE DISPLAY PANEL CONTROL KEYPAD WATER LEVEL BUTTON www.spiritfitness.com...
- Page 22 CONSOLE BUTTONS The Quick Mode buttons will go into the associated mode immediately The ▲/▼ Arrow buttons allow the user to increase or decrease console values Use the Reset button to Use the Level button to clear a value, to pause communicate the water your workout, end your level in the tank to the...
- Page 23 CONSOLE DISPLAY Resistance value displayed here. When "TARGET TIME" is selected, time selection will be displayed here. Total elapsed time or time count down will be displayed during exercise." Displays the time needed to row 500 meters according to current speed and average speed. When "TARGET DISTANCE"...
- Page 24 TARGET TIME, DISTANCE, CALORIES MODE The target panels will show Time, Distance, Calories and Strokes depending on operating mode. When the target symbol is displayed, it means that target mode is operating in that particular value. The TIME will alternate showing the remaining or elapsed time. The DISTANCE will count or countdown in meters.
- Page 25 HEART RATE DISPLAY This panel will show every user’s heart rate information. When console detects a signal from a wireless monitor, the BPM (beats-per-minute) will show in the large three-digit field and the heart icon will flash. However, if no signal is detected signal, three dashes "- - -" will display to indicate no heart rate detected. While in TARGET HEART RATE mode, the console helps the user maintain in a BPM range to build cardio- vascular endurance.
- Page 26 CONSOLE SETUP BATTERY INSTALLATION The console operates on 4 AA batteries. The battery compartment is on the back side of the console. Please dispose of batteries properly after use. WATER LEVEL BUTTON LEVEL Once you fill the tank to your desired resistance between 1 and 6 you can use the Button to communicate the resistance level to the console.
- Page 27 AVERAGE will be shown alternately for one minute. If heart rates is input, the "Stop Mode" will show current heart rate. If no heart rate monitor has been used, then no values will be displayed. WORKOUT SUMMARY The console provides a brief workout summary after completed the workout. Data displayed includes: Total Time, Total Distance and Total Watts.
- Page 28 CONSOLE PROGRAMS QUICK START As strokes are detected, the console will immediately launch QUICK START. TIME, DISTANCE, CALORIES, SPM, WATTS, STROKES, TOTAL STROKES will begin counting. TIME/500m and TIME/500m AVERAGE will be alternately displayed every 5 seconds. The 7-segment display will show level according to VR icon will stay lit, and the ♥...
- Page 29 TARGET HEART RATE PROGRAMS The Target Heart Rate program allows the maximum beats per minute (BPM) target to be customized to maximize cardiovascular training. Launch: Press the Target Heart Rate button. Setup: When operating a target program, the user enters the desired target heart rate (the default is 100). Adjust the value by pressing ▲...
-
Page 30: Engineering Mode
ENGINEERING MODE Press Reset and Enter buttons for 2 seconds to enter Engineering Mode. The console will also beep for 1 second. DISTANCE banner will blink first. Press ▲ or ▼ button to select setting section. (Sound → ODO → Sound) While in Engineering Mode if there is no activity for 30 seconds, the console will switch STANDBY Mode. -
Page 31: General Maintenance
GENERAL MAINTENANCE A regular preventative maintenance schedule with your fitness equipment ensures that products are working at an optimal condition without affecting the your exercise experience. To assist in the maintenance regimen, it is recommended to break service into daily, weekly, & monthly activities. All preventive maintenance activities must be performed on a regular basis. -
Page 32: Troubleshooting
TROUBLESHOOTING Issue Possible Cause Instructions Water changes Rower is in direct sunlight or has not Change rower location to reduce direct exposure to sunlight. Add color or becomes had water treatment water treatment or change tank water as directed on page 25 of this cloudy Local tap water is of poor quality manual. - Page 33 TROUBLESHOOTING CONTINUED Issue Possible Cause Instructions 1. Hold down ENTER+UP+DOWN buttons for 2 seconds. After entering VR settings mode, the buzzer will buzz for 1 second. 2. The 7-segment display will show “VR”. The time window will show “L”. 3. Adjust VR for the first increment, then press the ENTER KEY to confirm. Trouble with VR Setting 4.
- Page 34 CRW800H2O WATER ROWER WARRANTY EFFECTIVE SEPTEMBER 27, 2019 Spirit Fitness warrants all its fitness rower parts for a period of time listed below from the date of retail sale, as determined by sale receipt, or in the absence of a sales receipt eighteen (18) months from the original factory shipping date.
- Page 35 EXCLUSIONS This warranty does not cover the following: 1. CONSEQUENTIAL, COLLATERAL, OR INCIDENTAL DAMAGES SUCH AS PROPERTY DAMAGE AND INCIDENTAL EXPENSES RESULTING FROM ANY BREACH OF THIS WRITTEN OR ANY IMPLIED WARRANTY. Note: Some states do not allow the exclusion or limitation of incidental or consequential damages, so this limitation or exclusion may not apply to you.
- Page 36 SERVICE Keep your bill of sale. Twelve (12) months from the date on the bill of sale or eighteen (18) months from the date of • factory shipping as determined by the serial number establishes the labor warranty period should service be required. If service is performed, it is in your best interest to obtain and keep all receipts.
- Page 37 MANUFACTURER Dyaco Shanghai Dyaco Canada Dyaco Commercial & Medical Room 210, No.350 5955 Don Murie Street North America Hengren Road Niagara Falls, ON 18303 Bothell Everett Hwy. Yangpu District L2G 0A9 Suite 210 Shanghai, China 200438 Canada Bothell, WA 98012 TEL: 86 -21-65068300 TEL: +1 888-707-1880 TEL: +1-425-659-2401 (Local)
- Page 38 NOTES Spirit Fitness...
- Page 39 www.spiritfitness.com...
- Page 40 800.258.4555 Spirit Fitness Questions@spiritfitness.com 3000 Nestle Road www.spiritifitness.com Jonesboro, AR 72401 CRW800H2O Owners Manual © 2019 All Rights Reserved Revision 3: 09.27.2019...
Need help?
Do you have a question about the CRW800H2O and is the answer not in the manual?
Questions and answers