Advertisement
Quick Links
Important Safety Instructions
Specifications
Maintenance
Maintenance Parts
Troubleshooting
Console Setup Mode
Replacing the Console Assembly
Replacing the Static Handlebar Assembly
Removing the Upper and Lower Handlebar Arms
Replacing the Pedals and Legs
Important Safety Instructions - Before servicing or using this equipment, obey the following warnings:
This icon means a potentially hazardous situation which, if not avoided, could result in death or serious injury. Read and understand all Warnings on this machine.
• Read and understand the Service Manual before working on the machine. Failure to obey the instructions and safety warnings could cause injury to the service technician or by-
standers. • Keep bystanders and children away from the product being serviced at all times. • Make sure that the repair is done in an appropriate work space away from foot traffic
and exposure to bystanders. •
!
heavy or awkward. Enlist the service of a second person when you do maintenance steps involving these components. Do not try to do heavy or awkward steps on your own. • Use
only replacement parts and hardware that are supplied or approved by Nautilus. Failure to use Nautilus-approved replacement parts can adversely affect the safety and functionality
of the equipment creating a risk to users. • Be sure that all warning stickers and instructional placards applied to the product stay present and in good condition when doing main-
tenance or replacing components. If necessary request replacement warning stickers or placards from Nautilus
of the machine being serviced as this can adversely effect user safety. • Do not use the machine until all shrouds, instructions, warning labels and correct functionality have been
verified and tested for correct performance.
Nautilus, Inc., (800) NAUTILUS / (800) 605-3369, www.NautilusInc.com - Customer Service: North America (800) 605-3369,
All rights reserved. ™ and ® indicate a trademark or registered trademark. Nautilus, Inc. (www.NautilusInc.com) trademarks include NAUTILUS®, BOWFLEX®, SCHWINN® and UNIVERSAL® and respective logos. Other trademarks are
the property of their respective owners.
Maximum User Weight:
Power Requirements:
Operational Voltage:
Operating Current:
Regulatory Approvals:
AC Power Adapter:
This product, its packaging, and components contain chemicals known to the State of California to cause cancer, birth defects, or reproductive harm. This Notice is provided in
accordance with California's Proposition 65. If you would like additional information, please refer to our Web site at www.nautilus.com/prop65.
•
Keep children away.
•
Prior to use, read and understand the
Owners Manual.
•
Injury or death is possible if Caution is not
used while using this machine.
•
The maximum user weight for this
machine is 300 lbs (136 Kg).
•
Replace any "Caution" "Warning" or
"Danger" label that is illegible, damaged,
or removed.
This machine is for home use only.
•
•
•
•
•
300lbs. (136kg).
•
•
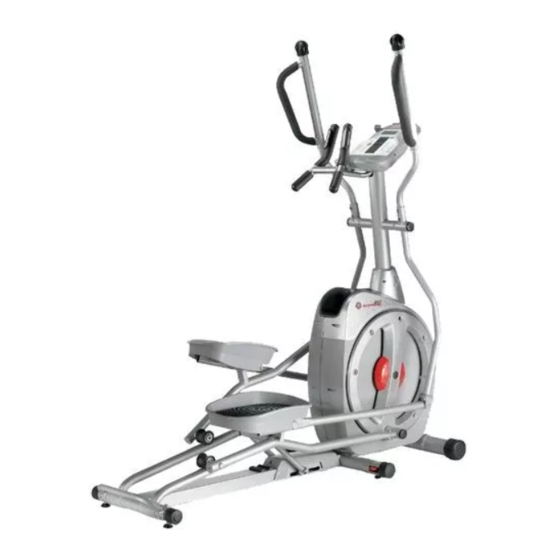
Schwinn
450 Elliptical Fitness Machine
®
1
1
2
3
4
5
6
7
8
9
Disconnect all power and allow to sit for 5 minutes before you service this machine. • Some components of the equipment can be
300 lbs. (136 kg)
Operational Voltage 9VDC
1500 mA
UL listed, CSA certified (or equivalent),
Rated 120V 60Hz Input, 9VDC, 1500mA
Output. Class 2 or LPS.
Replacing the Front Stabilizer
Replacing the Rail Assembly
Removing the Shrouds
Replacing the Tensioner Assembly
Replacing the Flywheel, Drive Belt and Drive Pulley
Replacing the Servo Motor
Adjusting the Servo Motor
Replacing the Brake Assembly
Replacing the Speed Sensor Assembly
Replacing the Power Inlet Assembly
customer service. • Do not try to change the design or functionality
®
tcinquiry@nautilus.com
| outside U.S. +01-360-859-5180, technics-APLA@nautilus.com | © 2011 Nautilus, Inc.,
Serial Number
AAAAAAA
BBB
PPPPPP
LL
CCCCCC
1
Service manual
004-4738-121511.A
10
11
13
14
15
16
18
19
21
22
Nautilus
part number (SKU)
®
Vendor Code
Purchase Order Number
Purchase Order Line Number
Unique Identifier
AAAAAAABBBPPPPPPLLCCCCCC
Advertisement

Related Manuals for Nautilus Schwinn 450


Summary of Contents for Nautilus Schwinn 450
- Page 1 | outside U.S. +01-360-859-5180, technics-APLA@nautilus.com | © 2011 Nautilus, Inc., All rights reserved. ™ and ® indicate a trademark or registered trademark. Nautilus, Inc. (www.NautilusInc.com) trademarks include NAUTILUS®, BOWFLEX®, SCHWINN® and UNIVERSAL® and respective logos. Other trademarks are the property of their respective owners.
-
Page 2: Maintenance
Maintenance To reduce the risk of electrical shock or unsupervised usage of the equipment, always unplug the power cord from the wall outlet and the machine and wait 5 minutes before cleaning, maintaining or repairing the machine. Place the power cord in a secure location. Read all maintenance instructions fully before you start any repair work. -
Page 3: Maintenance Parts
Maintenance Parts GG HH Console Roller Transport Roller Handlebar,Static Transport Handle Handlebar Arm, Lower Left Arm Pivot Rod Leveler Handlebar Arm, Upper Left Console Mast Rail Assembly Console Cable, Lower Shroud, Right Incline Assembly Console Cable, Upper Crank Assembly, Right Leg, Left Speed Sensor Magnet Handlebar Arm, Upper Right... -
Page 4: Troubleshooting
Troubleshooting Condition/Problem Things to Check Solution No display/partial display/unit will Check electrical (wall) outlet Make sure unit is plugged into a functioning wall outlet. not turn on Check connection at front of unit Connection should be secure and undamaged. Replace adapter or connection at unit if either are damaged. - Page 5 Condition/Problem Things to Check Solution Fan will not turn on or will not turn Check data cable integrity All wires in cable should be intact. If any are cut or crimped, replace cable. Check data cable Be sure cable is connected securely and oriented properly. Small latch on connector connections/orientation should line up and snap into place.
-
Page 6: Part Replacement
Part Replacement Replacing the Console Assembly To reduce the risk of electrical shock or unsupervised usage of the equipment, always unplug the power cord from the wall outlet and the machine and wait 5 minutes before cleaning, maintaining or repairing the machine. Place the power cord in a secure location. Tools Required: #2 Phillips Screwdriver 1. - Page 7 Replacing the Static Handlebar Assembly To reduce the risk of electrical shock or unsupervised usage of the equipment, always unplug the power cord from the wall outlet and the machine and wait 5 minutes before cleaning, maintaining or repairing the machine. Place the power cord in a secure location. Tools Required: #2 Phillips Screwdriver, 4 mm hex wrench, 10 mm wrench 1.
- Page 8 Replacing the Upper and Lower Handlebar Arms To reduce the risk of electrical shock or unsupervised usage of the equipment, always unplug the power cord from the wall outlet and the machine and wait 5 minutes before cleaning, maintaining or repairing the machine. Place the power cord in a secure location. Tools Required: 6 mm hex wrench, small Standard Screwdriver, 13 mm wrench 1.
- Page 9 Replacing the Pedals and Legs To reduce the risk of electrical shock or unsupervised usage of the equipment, always unplug the power cord from the wall outlet and the machine and wait 5 minutes before cleaning, maintaining or repairing the machine. Place the power cord in a secure location. Tools Required: 6 mm hex wrench, 13 mm wrench 1.
- Page 10 Replacing the Front Stabilizer To reduce the risk of electrical shock or unsupervised usage of the equipment, always unplug the power cord from the wall outlet and the machine and wait 5 minutes before cleaning, maintaining or repairing the machine. Place the power cord in a secure location. Tools Required: 6 mm hex wrench, static object (like a book or box) 1.
- Page 11 Replacing the Rail Assembly To reduce the risk of electrical shock or unsupervised usage of the equipment, always unplug the power cord from the wall outlet and the machine and wait 5 minutes before cleaning, maintaining or repairing the machine. Place the power cord in a secure location. Tools Required: 6 mm hex wrench, static object (like a book or box) 1.
- Page 12 6. Using a 6 mm hex wrench, remove the four bolts that attach the Rail As- sembly. Be aware that the Frame Assembly may be unstable and slightly top heavy. 7. Remove the Rail Assembly. 8. Installation is the reverse procedure. 9.
- Page 13 Removing the Shrouds To reduce the risk of electrical shock or unsupervised usage of the equipment, always unplug the power cord from the wall outlet and the machine and wait 5 minutes before cleaning, maintaining or repairing the machine. Place the power cord in a secure location. Tools Required: #2 Phillips screwdriver, Crank Puller, small Standard Screwdriver, 9/16”...
- Page 14 Replacing the Tensioner Assembly To reduce the risk of electrical shock or unsupervised usage of the equipment, always unplug the power cord from the wall outlet and the machine and wait 5 minutes before cleaning, maintaining or repairing the machine. Place the power cord in a secure location. Tools Required: 10 mm hex wrench, 13 mm wrench, large #2 Standard Screwdriver 1.
- Page 15 Replacing the Flywheel, Drive Belt and Drive Pulley To reduce the risk of electrical shock or unsupervised usage of the equipment, always unplug the power cord from the wall outlet and the machine and wait 5 minutes before cleaning, maintaining or repairing the machine. Place the power cord in a secure location. Tools Required: 13 mm wrench, 17 mm wrench, large #2 Standard Screwdriver, eye protection, rubber mallet (or wooden block and hammer), needle nose pliers 1.
- Page 16 Replacing the Servo Motor To reduce the risk of electrical shock or unsupervised usage of the equipment, always unplug the power cord from the wall outlet and the machine and wait 5 minutes before cleaning, maintaining or repairing the machine. Place the power cord in a secure location. Tools Required: 10 mm wrench 1.
- Page 17 9. Pull downward and release the Magnet Arm (Item F) enough to disengage it from the Motor Pulley Shaft (Item E). 10. Remove the two hex head bolts (Item G) from the Servo Motor (Item H) and the Spring Tension Arm (Item K). Note: To assist with reassembly, be sure to observe how the Spring Tension Arm (Item K) is oriented.
- Page 18 Adjusting the Servo Motor To reduce the risk of electrical shock or unsupervised usage of the equipment, always unplug the power cord from the wall outlet and the machine and wait 5 minutes before cleaning, maintaining or repairing the machine. Place the power cord in a secure location. Tools Required: hex wrench, 10 mm wrench If resistance has shifted out of the factory specification, the Servo Motor may need to be adjusted.
- Page 19 Replacing the Brake Assembly To reduce the risk of electrical shock or unsupervised usage of the equipment, always unplug the power cord from the wall outlet and the machine and wait 5 minutes before cleaning, maintaining or repairing the machine. Place the power cord in a secure location. Tools Required: 6 mm hex wrench , 10 mm wrench, (2) 13 mm (1/2”) wrench, 17 mm wrench 1.
- Page 20 10. Remove the bolt (Item I) from below the Flywheel. 11. Remove the Servo Motor/ Brake Assembly (Item J). Note: Do not crimp the cables. 12. Pull downward and release the Magnet Arm (Item L) enough to disengage it from the Motor Pulley Shaft (Item K). J K L 13.
- Page 21 Replacing the Speed Sensor Assembly To reduce the risk of electrical shock or unsupervised usage of the equipment, always unplug the power cord from the wall outlet and the machine and wait 5 minutes before cleaning, maintaining or repairing the machine. Place the power cord in a secure location. Tools Required: #2 Phillips screwdriver 1.
- Page 22 Replacing the Power Inlet Assembly To reduce the risk of electrical shock or unsupervised usage of the equipment, always unplug the power cord from the wall outlet and the machine and wait 5 minutes before cleaning, maintaining or repairing the machine. Place the power cord in a secure location. Tools Required: 15mm socket and ratchet 1.
Need help?
Do you have a question about the Schwinn 450 and is the answer not in the manual?
Questions and answers