Store It Cold CoolBot Manual
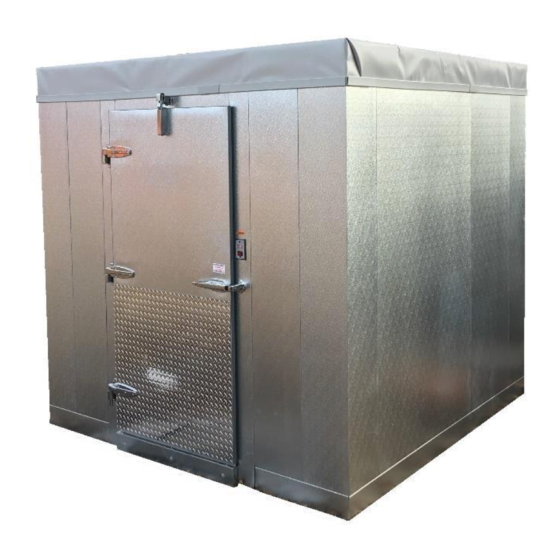
Walk-in cooler
Hide thumbs
Also See for CoolBot:
- Instruction manual and troubleshooting manual (20 pages) ,
- Instruction manual (16 pages) ,
- Setup (6 pages)

Related Manuals for Store It Cold CoolBot


Summary of Contents for Store It Cold CoolBot
- Page 1 SUPPORT@STOREITCOLD.COM WALK-IN COOLER MANUAL 2020 © Store It Cold, LLC. Rev 2020-8A. All Rights Reserved.
- Page 2 If in doubt, contact your concrete supplier, tile contractor, general contractor, etc. for the number of days for the concrete, grout, and other construction materials to have fully outgassed and install your walk-in cooler after this date. 2020 © Store It Cold, LLC. Rev 2020-8A. All Rights Reserved.
- Page 3 Please read carefully this section. It contains important information regarding your shipment and instructions on receiving, inspecting, and filing claims if necessary. • Your CoolBot Cooler System will be delivered in ONE shipment which includes: 1. A Cooler Enclosure (walk-in box) 2. An A/C unit 3.
- Page 4 IF THERE IS ANY DAMAGE TO THE COOLER, YOU ARE RESPONSIBLE FOR NOTING IT ON THE DELIVERY RECEIPT, TAKING PICTURES AND NOTIFYING US WITHIN 24HRS AFTER ACCEPTING THE DELIVERY. PLEASE DO NOT REFUSE SHIPMENTS! YOU ARE REQUIRED TO CONTACT US BEFORE REFUSING A SHIPMENT. 2020 © Store It Cold, LLC. Rev 2020-8A. All Rights Reserved.
-
Page 5: Warranty Information
ENCLOSURE, A/C UNIT, AND COOLBOT PRO DIGITAL CONTROLLER ENCLOUSURE 10 YEAR LIMITED WARRANTY Store It Cold, LLC., warrants to the original purchaser-user, that the prefabricated insulated boxes, panels or doors manufactured by the company are free from any defect in material or workmanship under the conditions of normal use and service, provided that it remains in the location where originally installed. - Page 6 CoolBot. User accepts all responsibility in the use of and monitoring of the CoolBot Pro and A/C. User assumes all risk of loss of property or product due to improper functioning of the CoolBot Pro (or A/C). User assumes all risk of injury and warrants that he/she will defend, indemnify and hold the seller harmless for any direct or consequential harm or damage that may result from the use of this product.
-
Page 7: Tools Needed
• Hammer or plastic mallet • Heavy duty work gloves • Safety glasses • Tape measure • Caulk Gun • Utility Knife ALWAYS WEAR GLOVES WHEN MOVING AND HANDLING WALK-IN COOLER PANELS 2020 © Store It Cold, LLC. Rev 2020-8A. All Rights Reserved. - Page 8 Don’t forget to lock your panel again after adjustments have been made. ATTENTION! Enclosed with the contents of your cooler, inside the hardware box, is a Set-up drawing, showing the identification and proper placement of your walk-in cooler panels. 2020 © Store It Cold, LLC. Rev 2020-8A. All Rights Reserved.
- Page 9 If not, using shims under the floor panels around the seams and perimeter and located under the position of the cam-locks is suggested to level the floor. 2020 © Store It Cold, LLC. Rev 2020-8A. All Rights Reserved.
- Page 10 If the wall panels have a stair-step appearance at the top, the floor is not level. In that case, stop immediately and follow the previous instructions on leveling the floor (Step 2). 2020 © Store It Cold, LLC. Rev 2020-8A. All Rights Reserved.
- Page 11 LEVEL and PLUMB before locking in position. Ensure it is flush at the top with all adjacent panels. If you have a cooler with a floor, DO NOT screw-in the door threshold yet. 2020 © Store It Cold, LLC. Rev 2020-8A. All Rights Reserved.
- Page 12 8. Proceed to install the rest of the wall panels in the same way the other wall panels where installed, leaving the front left or right corner for last. 2020 © Store It Cold, LLC. Rev 2020-8A. All Rights Reserved.
- Page 13 Ensure that it sits properly on all the tongue and groove edges and that it is flush with the corners and walls on the outside. 2020 © Store It Cold, LLC. Rev 2020-8A. All Rights Reserved.
- Page 14 Lock the panel to the adjacent panel first and then lock the panel to the walls. 2020 © Store It Cold, LLC. Rev 2020-8A. All Rights Reserved.
- Page 15 A door that is not closing properly is usually the result of unlevel set-up and/or improper installation. Please unlock the necessary panels and correct positioning and leveling until the door operates properly. 2020 © Store It Cold, LLC. Rev 2020-8A. All Rights Reserved.
- Page 16 16. Enclosure Set-up finished. 17. Last Steps on pages 17 (coolers with floor) & 18 (coolers with no floor). 2020 © Store It Cold, LLC. Rev 2020-8A. All Rights Reserved.
- Page 17 (illustration 1). Some thresholds may overhang in a 90° angle to the front. Ensure you fasten that side as well to the front side of the floor panel (illustration 2). 2020 © Store It Cold, LLC. Rev 2020-8A. All Rights Reserved.
- Page 18 Your cooler with no floor includes the following hardware to anchor your door frame to the floor inside: 2 Angle pieces – 16-gauge clips with 1/4” pre-drilled hole 8 Anchors – 3/16” x 1-3/4” Hex washer head Tapcon 2020 © Store It Cold, LLC. Rev 2020-8A. All Rights Reserved.
- Page 19 Make sure that the top of each wall adjacent panel is flush with each other and level. Use the wrench to secure the wall panels together to start the wall. See Pic on next page. 2020 © Store It Cold, LLC. Rev 2020-8A. All Rights Reserved.
- Page 20 Align, level, and lock to the adjacent wall panel. ALWAYS double check for alignment making sure panel is flush and level on all sides and on top with the adjacent panels. 2020 © Store It Cold, LLC. Rev 2020-8A. All Rights Reserved.
- Page 21 The door may not seal properly if the frame is twisted or out of plumb. See problems figure on next page. Step 7 & 8 on next page. 2020 © Store It Cold, LLC. Rev 2020-8A. All Rights Reserved.
- Page 22 WALK-IN WITH FLOOR OPTION” from step 8 (inclusive) through 16. 8. Please make sure to read the instructions on SECURING THE DOOR PANEL TO THE FLOOR on page 18. 2020 © Store It Cold, LLC. Rev 2020-8A. All Rights Reserved.
- Page 23 Align the top edge of the hood about 2” to 3” below the horizontal joint in between the ceiling panel and the wall panel. Make sure it’s center in position with respect to the A/C opening. Screw in place with the self-drilling metal screws. 2020 © Store It Cold, LLC. Rev 2020-8A. All Rights Reserved.
- Page 24 (see Fig. below). Caulk the joint with sealant (butyl or silicone) between cap and wall to prevent leaks (See Fig.) 2020 © Store It Cold, LLC. Rev 2020-8A. All Rights Reserved.
- Page 25 Work your way from front to back as you pull down tight and secure (See pic on next page). 2020 © Store It Cold, LLC. Rev 2020-8A. All Rights Reserved.
- Page 26 (tabs). 4. When you reach the first tab (closest and parallel to one side of the cooler) stop rolling or folding. 2020 © Store It Cold, LLC. Rev 2020-8A. All Rights Reserved.
- Page 27 Pull down tight and start securing the membrane to the wall panels following the same recommendations as before. Install the trimming at the same level as you 2020 © Store It Cold, LLC. Rev 2020-8A. All Rights Reserved.
- Page 28 A/C stand for a period of at least 24Hrs before installing. 2. DO NOT discard any of the contents inside the box. 2020 © Store It Cold, LLC. Rev 2020-8A. All Rights Reserved.
- Page 29 A/C cabinet to screw in place to the edge of the precut hole on the wall panel. Your cooler will not have a wood board as shown on the picture - it’s not needed. 2020 © Store It Cold, LLC. Rev 2020-8A. All Rights Reserved.
- Page 30 DO NOT USE SPRAY FOAM TO SEAL IN BETWEEN THE A/C ENCLOSURE AND THE WALL DO NOT USE THE FILTER OF THE A/C PLEAE REMOVE FILTER WHEN INSTALLING THE FRONT PANEL OF THE A/C UNIT 2020 © Store It Cold, LLC. Rev 2020-8A. All Rights Reserved.
-
Page 31: Electrical Installation
On outdoor coolers, electrical installations should be done ONLY AFTER your outdoor membrane has been installed. Make absolutely no roof penetrations for electricity or other services. All penetrations on outdoor coolers must go through the side walls on outdoor coolers. 2020 © Store It Cold, LLC. Rev 2020-8A. All Rights Reserved. - Page 32 A dedicated 120V 15-amp circuit required • The electrician will have to install: o One 120V surface mount outlet box to plug in the CoolBot Controller and the A/C, inside the cooler - on the right side of the A/C.
- Page 33 One 208/240V surface mount outlet box to plug in the A/C, inside the cooler - on the right side of the A/C. o One 120V surface mount outlet box to plug in the CoolBot Controller, inside the cooler - on the right side of the A/C.
- Page 34 Connect inside the box to the white, black, and ground cables. Wiring diagram of the door and light connection on next page for reference 2020 © Store It Cold, LLC. Rev 2020-8A. All Rights Reserved.
- Page 35 The light fixture serves as a junction box. Once appropriate 120V power has been provided to the light fixture (junction box) your light switch and thermometer should work. No extra wiring is needed! 2020 © Store It Cold, LLC. Rev 2020-8A. All Rights Reserved.
- Page 36 The next two indicate either degrees F, or C in the order left to right. COOLBOT PRO INSTALLATION For CoolBot Pro controller installation instructions please follow your Quick Start Guide included in the CoolBot Pro box. Please see our full CoolBot Pro Manual and App features at: https://www.storeitcold.com/support-library/...
- Page 37 Like any other refrigeration system or HVAC system, regular cleaning of your A/C is necessary and highly recommended. Cleaning your Air Conditioner should be a vital part of your cooler maintenance plan – it will save you lots of headaches! 2020 © Store It Cold, LLC. Rev 2020-8A. All Rights Reserved.
-
Page 38: Periodic Inspections
Check the door thermometer reading with another thermometer in the same location or by placing the probe in to a cup of water with ice; it should read 32°F (0°C). • Check for missing plugs and buttons and replace as necessary. 2020 © Store It Cold, LLC. Rev 2020-8A. All Rights Reserved.
Need help?
Do you have a question about the CoolBot and is the answer not in the manual?
Questions and answers