Advertisement
Quick Links
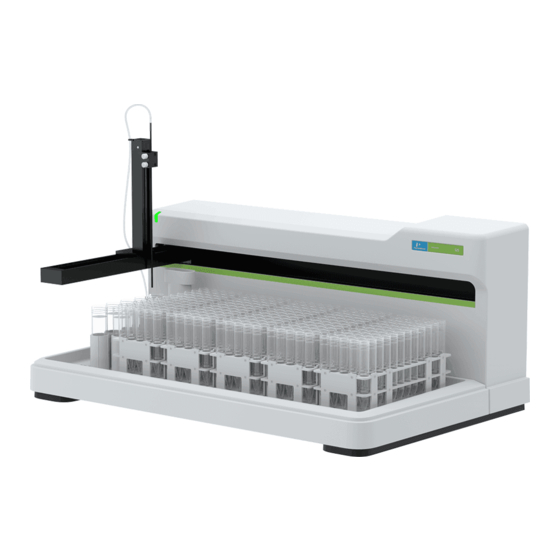
S20 Series Autosampler Installation Guide
1
Unpack and place the autosampler on the bench, as close as
possible to the analytical instrument. To lift, place one hand
under the back of the autosampler. Place the other hand along
the front of the top cover to steady the autosampler. Do not
lift by the removable tray.
3
(Optional) If you need to re-seat the removable tray, lower it
straight down then push it straight back.
5
Carefully press the tubing straight on to the fittings as shown below.
Connect the RINSE IN
tubing to channels 2 and 3
of the peristaltic pump on
the autosampler (2 mm I.D.
pump tubing).
Connect the WASTE tubing
to channel 1, closest to the
back of the autosampler
(3.2 mm I.D. pump tubing).
Ensure that the drain tubing
is not submerged in the
waste liquid.
A dual-rinse, pumped-drain tubing arrangement is shown. Your application may need a different arrangement—see the
2
Gently tug the front of the removable tray upward to verify
that it is firmly attached to the base of the autosampler.
4
Insert the dual rinse station in the holder at the back left
corner of the tray. Press straight down until it is fully seated.
TIP: If you find it difficult
to get a good connection
to the rinse station,
remove the rinse station
and press the tubing firmly
so that it completely covers
the barb of the fitting. It
helps to use your other
hand to apply counter-
pressure.
User's Guide
.
Advertisement

Related Manuals for PerkinElmer S20 Series


Summary of Contents for PerkinElmer S20 Series
- Page 1 S20 Series Autosampler Installation Guide Unpack and place the autosampler on the bench, as close as Gently tug the front of the removable tray upward to verify possible to the analytical instrument. To lift, place one hand that it is firmly attached to the base of the autosampler.
- Page 2 Install the sample probe: Route the sample tubing through the loop on the Z-drive. Raise the slider on the Z-drive to its highest position and guide the probe straight down until the tip of the probe is level with the bottom of the Y arm. Tighten the two thumbscrews. Connect the power supply to the back of the autosampler.