Hunter Douglas Silhouette Installation Operation Care
Window shadings hard-wired motorized operation
Hide thumbs
Also See for Silhouette:
- Installation operation care (28 pages) ,
- Installation operation and care (24 pages) ,
- Installation and care manual (24 pages)
Subscribe to Our Youtube Channel
Summary of Contents for Hunter Douglas Silhouette
- Page 1 Installation Operation Care • • Silhouette Window Shadings ® Hard-Wired Motorized Operation...
-
Page 2: Table Of Contents
Removing the Shading............. 14 Cleaning Procedures ............14 Warranty .............Back Cover Questions? Call Hunter Douglas Consumer Support at 1-888-501-8364. © 2018 Hunter Douglas. All rights reserved. All trademarks used herein are the property of Hunter Douglas or their respective owners. -
Page 3: Getting Started
GETTING STARTED GETTING STARTED Product View Installation Brackets Magnetic Hold-Down Brackets (Optional) Bottom Rail... -
Page 4: Tools And Fasteners Needed
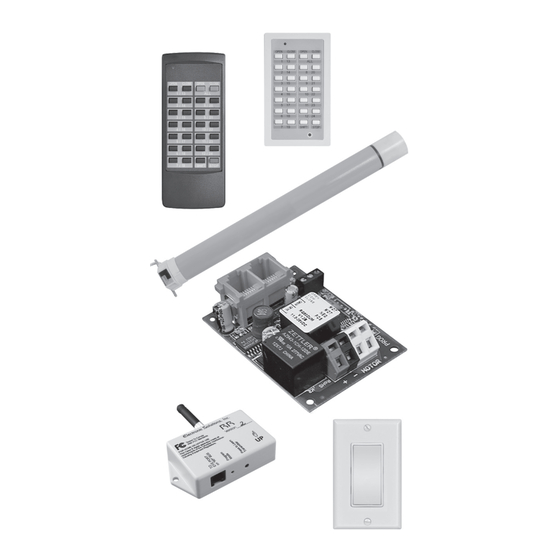
GETTING STARTED Hunter Douglas Silhouette Window Shadings with hard-wired motorization are recommended ® for professional installation only. Planning and wiring should be completed before the shadings are installed. Motorized shadings ship with the motor installed inside the headrail. All other components required for operation are ordered separately. -
Page 5: Installation
INSTALLATION Installation Overview Your order will include the correct number of installation brackets for your shading width, as ■ shown in the table below. Shading orders may also include spacer blocks or extension brackets, if they were specified ■ for added clearance. Installation Bracket For Added Clearance Shading Width... -
Page 6: Mount The Installation Brackets - Inside Mount
INSTALLATION Mount the Installation Brackets Inside Mount — Back Cover Bracket Prepare the Installation Brackets Top Tab The purpose of the back cover bracket is to provide an attachment for the optional back cover. Back Cover If using the optional back cover: ■... -
Page 7: Mount The Installation Brackets - Outside Mount
INSTALLATION Attach the installation brackets using the screws provided. ■ IMPORTANT: Do not overtighten the screws. Check to ensure the lever can be moved easily side to side. If not, loosen the screws in one-eighth turn increments until the lever can be moved easily. If using the optional back cover: Install the cover into ■... - Page 8 INSTALLATION Center the installation brackets or extension brackets on your marks and mark where to drill ■ the screw holes. A minimum 1" flat vertical surface is required for the installation brackets. Extension ➤ brackets require 1 ". The tops of the installation brackets or extension brackets should be at the desired ➤...
-
Page 9: Install The Shading
INSTALLATION If using extension brackets, attach an installation bracket ■ Speed Nuts to the underside of each extension bracket using the speed nuts and screws provided. Screws Install the Shading Connect the Wires WARNING! Do not plug the power supply into the outlet until you have completed all the electrical connections. - Page 10 INSTALLATION Firmly push the headrail into each bracket until it clicks and the lever snaps to the right side ■ of the bracket. CAUTION: Failure to snap the headrail securely into the installation brackets may cause the shading to release unexpectedly. IMPORTANT: Carefully pull on the headrail at each bracket to ensure it is installed securely.
-
Page 11: Operation
OPERATION Operate the Shading Lower and raise the shading using the control device(s) for your particular installation. ■ CAUTION: When raising the shading for the first time, observe how the fabric winds on the roll. It should wind evenly. If the fabric roll becomes uneven or starts to rub against one end of the headrail, immediately stop the shading. -
Page 12: Troubleshooting
OPERATION Troubleshooting If your shading is not operating correctly: First, refer to the table below for specific solutions for your shading. ■ Next, review any guides that came with your motor control devices. ■ If questions remain, please contact your fabricator motorization specialist. ■... - Page 13 OPERATION Problem The shading does not raise or lower completely. Solution Check that the shading fabric is not catching on any brackets or window components. Adjust the upper and/or lower bottom rail travel limits (see below). Problem The bottom rail stops before reaching the desired bottom or upper position, or the bottom rail keeps moving after reaching the desired bottom or upper position.
- Page 14 OPERATION Depress Yellow Button Solution Adjust Upper Travel Limit (continued) Push the black button in until it clicks into a ■ Depress recessed position. Black Button If the bottom rail stops before the desired ■ upper position: Raise the bottom rail to the desired upper position.
- Page 15 OPERATION Problem The shading raises or lowers unevenly, the fabric rubs against one end of the headrail, or the bottom rail is uneven when fully raised. Solution Check that the window is square by measuring the diagonals. Check that the installation brackets are level. Shim to level, if necessary. Adjust the bottom rail weight: Release the weight clips by inserting ■...
-
Page 16: Care
Disconnect the power wires to remove ■ the shading from the window. Cleaning Procedures Silhouette ® Window Shadings are made of 100% polyester, which means they are inherently durable and resilient. However, care must be taken to avoid wrinkling the fabric, particularly where the vanes meet the facings. - Page 17 These may stain or destroy the finish. A Note About Silhouette Fabrics As with all textiles, Silhouette fabrics are subject to some variations. Slight wrinkling, puckering, or bowing is inherent to this textile product and should be considered normal, acceptable quality.
- Page 18 Notes...
-
Page 20: Warranty
2. Visit hunterdouglas.com for additional warranty information, frequently asked questions and access to service locations. 3. Contact Hunter Douglas at (888) 501-8364 for technical support, certain parts free of charge, for assistance in obtaining warranty service or for further explanation of our warranty.


Need help?
Do you have a question about the Silhouette and is the answer not in the manual?
Questions and answers