Sign In
Upload
Download
Table of Contents
Contents
Add to my manuals
Delete from my manuals
Share
URL of this page:
HTML Link:
Bookmark this page
Add
Manual will be automatically added to "My Manuals"
Print this page
×
Bookmark added
×
Added to my manuals
Manuals
Brands
Hunter Douglas Manuals
Indoor Furnishing
Standard M
Installation operation care
Hunter Douglas Standard M Installation Operation Care
Hide thumbs
1
Table Of Contents
2
3
4
5
6
7
8
9
10
11
12
13
14
15
16
17
18
19
20
21
22
23
24
25
26
27
28
29
30
31
32
33
34
35
36
37
38
39
40
41
42
43
44
45
46
47
48
49
50
page
of
50
Go
/
50
Contents
Table of Contents
Troubleshooting
Bookmarks
Table of Contents
Table of Contents
Getting Started
Product View - Standard Shade
Product View - Cassette Shade
Product View - Fascia and Pocket Shades
Product View - Dual Roller Shade
Tools and Fasteners Needed
Installation
Installation Overview
STEP 1: Mount the Installation Brackets
Inside/End Mount - Standard Shades
Outside Mount - Standard Shades
Inside Mount - Cassette Shades
Outside Mount - Cassette Shades
Fascia Shades
Dual Roller Shades - Inside/End Mount
Dual Roller Shades - Outside Mount
Pocket Shades
STEP 2: Install the Battery Wand (if Applicable)
STEP 3: Install the Shade
STEP 4: Connect the Power Source
Deactivate Ship Mode - Internal Rechargeable Battery Only
Testing the Shade
Operation
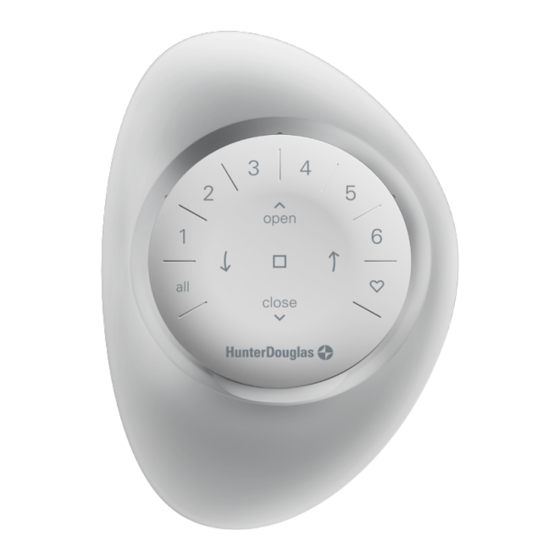
Operating the Powerview ® App and Gen 3 Remote
Resetting the Shade
Adjust Shade Limits (if Necessary)
Install the Standard Bracket Cover (if Applicable)
Install the Fascia Panel
Install the Pocket Bottom - Pocket Shades Only (Optional)
Troubleshooting
Care
Removing the Shade
Cassette Removal
Cleaning Procedures
Declarations
Advertisement
Quick Links
Download this manual
Installation
Operation
Care
•
•
Designer Roller & Designer
Screen Shades, and Alustra
®
Woven Textures
Roller Shades
®
PowerView
Gen 3 Automation
®
Standard, Cassette, Fascia, Pocket, and Dual Roller
Table of
Contents
Previous
Page
Next
Page
1
2
3
4
5
Advertisement
Table of Contents
Need help?
Do you have a question about the Standard M and is the answer not in the manual?
Ask a question
Questions and answers
Related Manuals for Hunter Douglas Standard M
Window Blinds Hunter Douglas Silhouette Duolite UltraGlide Instruction Manual
Window shadings (43 pages)
Indoor Furnishing Hunter Douglas Pirouette Installation Operation Care
Window shadings (32 pages)
Power Supply Hunter Douglas PowerView Gen 3 Automation Wiring Manual
16 shade dc power supply (19 pages)
Remote Control Hunter Douglas PowerView Gen 3 Automation Manual
(7 pages)
Indoor Furnishing Hunter Douglas Silhouette Installation Operation Care
Window shadings softtouch motorization (28 pages)
Indoor Furnishing Hunter Douglas Silhouette Installation And Care
Window shadings specialty shapes (20 pages)
Indoor Furnishing Hunter Douglas Silhouette Installation And Care Manual
Window shadings specialty shapes (24 pages)
Indoor Furnishing Hunter Douglas Silhouette Installation Operation And Care
Window shadings (24 pages)
Indoor Furnishing Hunter Douglas Silhouette Installation Operation Care
Window shadings hard-wired motorized operation (20 pages)
Indoor Furnishing Hunter Douglas Silhouette PowerView Installation Operation Care
Motorization window shadings (32 pages)
Indoor Furnishing Hunter Douglas Alustra Woven Textures Installation Operation Care
Roman shades (20 pages)
Indoor Furnishing Hunter Douglas Silhouette DuoLite Installation Operation Care
Ultraglide, softtouch, and powerview automation operating systems (44 pages)
Indoor Furnishing Hunter Douglas Designer Screen Series Installation Operation Care
Roller shades with powerview motorization for standard, cassette, fascia, and dual roller (36 pages)
Indoor Furnishing Hunter Douglas Standard Series Installation Operation Care
Roller shades with powerview motorization for standard, cassette, fascia, and dual roller (36 pages)
Indoor Furnishing Hunter Douglas Duette Owner's Manual
Duette honeycomb powerrise battery operated shades (28 pages)
Indoor Furnishing Hunter Douglas Duette Installation Operation Care
Honeycomb shades. literise lifting system (19 pages)
This manual is also suitable for:
Standard l
Cassette
Fascia
Pocket
Dual roller
Powerview gen 3
Table of Contents
Print
Rename the bookmark
Delete bookmark?
Delete from my manuals?
Login
Sign In
OR
Sign in with Facebook
Sign in with Google
Upload manual
Upload from disk
Upload from URL


Need help?
Do you have a question about the Standard M and is the answer not in the manual?
Questions and answers