Advertisement
Available languages
Available languages
Quick Links
IB515007EN
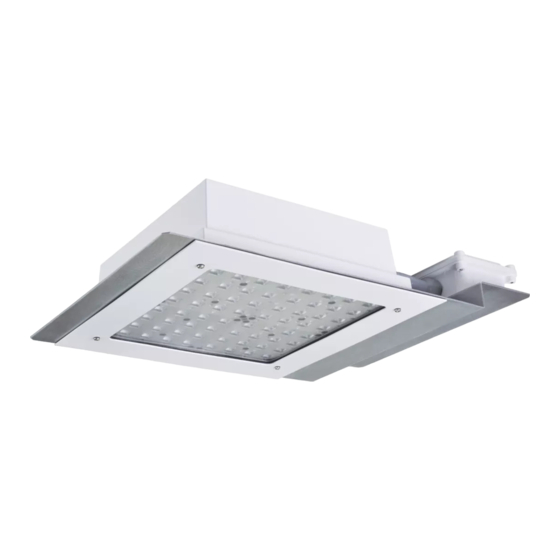
Installation instructions – LED Recessed Canopy
Instructions d'installation – Luminaire DEL pour voûte encastrée
Instrucciones de instalación – LED empotrada en fascia
Risk of Fire, Electrical Shock, Cuts or other Casualty Hazards- Installation and maintenance of this
product must be performed by a qualified electrician. This product must be installed in accordance
with the applicable installation code by a person familiar with the construction and operation of the
product and hazards involved.
Risk of Fire and Electric Shock- Make certain power is OFF before starting installation or attempting
any maintenance. Disconnect power at fuse or circuit breaker.
Risk of Fire- Refer to product label for specific minimum supply conductor requirements.
Risk of Burn- Disconnect power and allow fixture to cool before handling or servicing.
Risk of Personal Injury- Fixture may become damaged and/or unstable if not installed properly.
Failure to comply with these instructions may result in death, serious bodily injury and property damage.
DISCLAIMER OF LIABILITY: Eaton assumes no liability for damages or losses of any kind that may arise from the
improper, careless, or negligent installation, handling or use of this product.
NOTICE: Green ground wire provided in proper location. Do not relocate.
ATTENTION Receiving Department: Note actual fixture description of any shortage or noticeable damage on
delivery receipt. File claim for common carrier (LTL) directly with carrier. Claims for concealed damage must be
filed within 15 days of delivery. All damaged material, complete with original packing must be retained.
Safety: This fixture must be wired in accordance with the National Electrical Code and applicable local codes and
ordinances. Proper grounding is required to insure personal safety. Carefully observe grounding procedure under
installation section.
APPLICATIONS: This lighting fixture is designed for outdoor lighting services, and should not be used in area
of limited ventilation or inside high ambient temperature enclosures. It must be stored in a dry location prior to
installation. Do not expose lighting fixture to rain, dust or other environmental conditions prior to installation
and insertion of photo control or shorting cap (if so equipped). Best results will be obtained if installed and
maintained according to the following recommendations.
WARNING
Advertisement

Related Manuals for Eaton McGraw-Edison LRC LED Recessed Canopy


Summary of Contents for Eaton McGraw-Edison LRC LED Recessed Canopy
- Page 1 Failure to comply with these instructions may result in death, serious bodily injury and property damage. DISCLAIMER OF LIABILITY: Eaton assumes no liability for damages or losses of any kind that may arise from the improper, careless, or negligent installation, handling or use of this product.
- Page 2 Philips screw driver, electrical wiring tools (Not provided). Industrial strength sealant/adhesive silicone or acrylic latex caulk (Not provided). 9-1/2” Aim R90 Throw [241mm] Direction Figure 2. (4) Sheet Metal Screw Location 14-1/2” 14” [368mm] [356mm] 14” [356mm] Figure 3. Figure 1a. EATON IB515007EN Installation instructions...
- Page 3 Stud With Nut Provided 12. Insert fixture through the canopy opening diagonally (Figure 3) and rest it on top side of the canopy. Make sure the splice conduit does not get caught under the fixture during installation. Figure 6. EATON IB515007EN Installation instructions...
-
Page 4: Maintenance
Make dampened with vinegar based multi-surface cleaners sure to have at least 3” of wires through the grommet; (Windex multi-surface vinegar or similar). Avoid spraying on Push the grommet into the conduit opening. LEDs. EATON IB515007EN Installation instructions... - Page 5 La désobéissance aux instructions suivantes représente un risque de blessures graves ou mortelles et de dommages matériels. EXONÉRATION DE RESPONSABILITÉ : Eaton n’assume aucune responsabilité pour les dommages ou pertes de quelque nature que ce soit pouvant découler d’une installation, d’une manipulation ou d’une utilisation inappropriée, imprudente ou négligente de ce produit.
- Page 6 Scellant ou adhésif de silicone de qualité industrielle ou calfeutrage acrylique et latex (non fourni). Direction d’orientation vers déflecteur pour R90 241 mm (9 1/2 po) Figure 2. Emplacement des quatre (4) vis à tôle 368 mm 356 mm (14 1/2 po) (14 po) 356 mm (14 po) Figure 3. Figure 1a. EATON IB515007EN Instructions d’installation...
- Page 7 Fixez l’attache à un d’alignement des vis de à l’étape 11 (Figure 2). Au besoin, repérez l’étiquette montant avec l’écrou porte. d’orientation et dirigez le luminaire selon l’étiquette. fourni. La flèche doit pointer dans la direction du déflecteur. Figure 6. EATON IB515007EN Instructions d’installation...
- Page 8 Ne l’enlevez 14. Appliquez une pression manuelle sur le périmètre pour pas pour éviter d’endommager le pilote pendant assurer l’adhésion du scellant sur le dessus de la voûte. l’étape suivante. EATON IB515007EN Instructions d’installation...
- Page 9 Un nettoyage en profondeur peut être fait avec un linge imbibé d’un nettoyant multisurfarces à base de vinaigre (nettoyage multisurface à base de vinaigre Windex ou semblable). Évitez de vaporiser sur les DEL. EATON IB515007EN Instructions d’installation...
- Page 10 El incumplimiento de estas instrucciones puede provocar la muerte, lesiones corporales graves y daños materiales. RENUNCIA DE RESPONSABILIDAD: Eaton no asume ninguna responsabilidad por daños o pérdidas de ningún tipo que puedan derivarse de la instalación, manipulación o uso incorrecto, descuidado o negligente de este producto.
- Page 11 Destornillador Philips, herramientas de cableado eléctrico (No suministrado). Sellador/adhesivo de silicona para uso Dirección de 9-1/2" proyección a R90 [241mm] Figura 2. (4) Ubicación del tornillo para chapa de metal 14-1/2" 14” [368mm] [356mm] 14” [356mm] Figura 3. Figura 1a. EATON IB515007EN Instrucciones de instalación...
- Page 12 Solo para el reflector ancho vertical (LRC-VAT), antes ota: de puerta del paso 11, oriente correctamente la luminaria (figura Figura 6. EATON IB515007EN Instrucciones de instalación...
- Page 13 Retire la luminaria nueva de la caja y colóquela sobre muestra (Figura 5). una superficie limpia; quite la puerta de la caja del controlador aflojando cuatro tornillos de cabeza Philip. Ponga la puerta y los tornillos a un lado. EATON IB515007EN Instrucciones de instalación...
-
Page 14: Mantenimiento
(vinagre limpiador de superficies múltiples Windex o similar). Mantenimiento: Se debe seguir un programa de mantenimiento ota: regular para conservar la salida de luz y el rendimiento térmico óptimos. La limpieza del reflector óptico debe realizarse con un paño EATON IB515007EN Instrucciones de instalación... - Page 16 Warranties and Limitation of Liability Please refer to www.eaton.com/LightingWarrantyTerms for our terms and conditions. Garanties et limitation de responsabilité Veuillez consulter le site www.eaton.com/LightingWarrantyTerms pour obtenir les conditions générales. Garantías y Limitación de Responsabilidad Visite www.eaton.com/LightingWarrantyTerms para conocer nuestros términos y condiciones.
Need help?
Do you have a question about the McGraw-Edison LRC LED Recessed Canopy and is the answer not in the manual?
Questions and answers