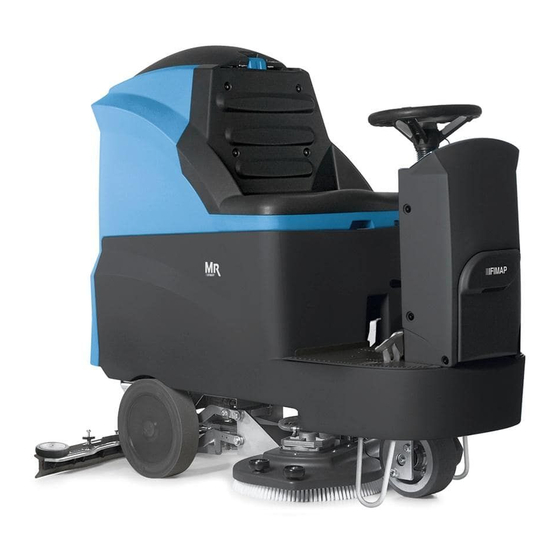
Download Print this page

Advertisement

Quick Links

VALIDITY
This document has validity since the serial number n° 211007724
Modification comparing to the previous document
Ref. Pag
2
7
13
14
ADJUSTMENT AND
INSPECTION
Update picture for chopper card.
New pictures and reference for MR 65-75-85
Update pictures for squeegee
MR60 65/75/85
Description
Doc.
10023982
Emesso Giugno 2011
Ver.
AB
Pag.
1 di 16

Advertisement

loading
Need help?

Need help?

Do you have a question about the MR60 and is the answer not in the manual?

Questions and answers

Summary of Contents for Fimap MR60

  • Page 1 Doc. 10023982 ADJUSTMENT AND Emesso Giugno 2011 MR60 65/75/85 Ver. INSPECTION Pag. 1 di 16 VALIDITY This document has validity since the serial number n° 211007724 Modification comparing to the previous document Ref. Pag Description Update picture for chopper card.
  • Page 2 Doc. 10023982 ADJUSTMENT AND Emesso Giugno 2011 MR60 65/75/85 Ver. INSPECTION Pag. 2 di 16 READ THE USE AND MAINTENANCE MANUAL CONSOLE CONFIGURATIONS AND SETTINGS Console Services The console allows you to: Program the chopper card to ensure the correct behaviour of the machine;...
  • Page 3: Alarm Table

    Doc. 10023982 ADJUSTMENT AND Emesso Giugno 2011 MR60 65/75/85 Ver. INSPECTION Pag. 3 di 16 ALARM TABLE Message Alarm What to do Put the potentiometer in idle position and ALARM A1 Forward micro-switch on check that the forward micro-switch is FW Switch ON in turning on.
  • Page 4 Doc. 10023982 ADJUSTMENT AND Emesso Giugno 2011 MR60 65/75/85 Ver. INSPECTION Pag. 4 di 16 CHOPPER CARD CONFIGURATION Console Code: 431320 To enter the parameter list: 1. Press the “MODE” button. 2. The first parameter description will appear, pressing up or down it is possible to scroll the parameter list.
  • Page 5 Doc. 10023982 ADJUSTMENT AND Emesso Giugno 2011 MR60 65/75/85 Ver. INSPECTION Pag. 5 di 16 PARAMETERS: PARAMETER DEFAULT DISABLE DISABLE RESET TO DEFAULT ACCELERATION RAMP REVERSE RAMP NEUTRAL RAMP FORWARD SPEED BACKWARD SPEED MINIMUM SPEED BATTERY VOLTAGE single-ended single-ended SPEED REFERENCE 50mV REF.
  • Page 6: Potentiometer Settings

    Doc. 10023982 ADJUSTMENT AND Emesso Giugno 2011 MR60 65/75/85 Ver. INSPECTION Pag. 6 di 16 POTENTIOMETER SETTINGS (Resister Settings) 1) Ensure the machine is TURNED OFF. 2) Connect the console to the machine. 3) Turn on the machine. 4) Enter into the parameter list using the “MODE” button.
  • Page 7 Doc. 10023982 ADJUSTMENT AND Emesso Giugno 2011 MR60 65/75/85 Ver. INSPECTION Pag. 7 di 16 Electric installation adjustment 1. Check the electric installation functionality: switches, MR 60 contactors, motors, solenoid valve, power fuses and thermal switches. MR 65/75/85...
  • Page 8 Doc. 10023982 ADJUSTMENT AND Emesso Giugno 2011 MR60 65/75/85 Ver. INSPECTION Pag. 8 di 16 2. Check the functionality and the potentiometer conditions and the conditions of the direction micro-switches. 3. Check that when the micro-switch is pressed there is about 0,5 mm of micro-switch lever movement clearance.
  • Page 9 Doc. 10023982 ADJUSTMENT AND ADJUSTMENT AND Emesso Giugno 2011 MR60 65/75/85 Ver. INSPECTION Pag. 9 di 16 Battery check card adjustment Battery check card adjustment 1. Check that when turning on the machine the battery check turning on the machine the battery check...
  • Page 10 Doc. 10023982 ADJUSTMENT AND Emesso Giugno 2011 MR60 65/75/85 Ver. INSPECTION Pag. 10 di 16 Battery charger with serial number from 470878. Under the plastic cover you can see the dip switches as the picture shows. The dip switches has to be setted up as follow: DP1 –...
  • Page 11 Doc. 10023982 ADJUSTMENT AND Emesso Giugno 2011 MR60 65/75/85 Ver. INSPECTION Pag. 11 di 16 Hydraulic installation 3. Check the cleanliness and functionality of the solution filter under the solution tank plug. 4. Check the cleanliness and sealing of the solution filter.
  • Page 12 Doc. 10023982 ADJUSTMENT AND ADJUSTMENT AND Emesso Giugno 2011 MR60 65/75/85 Ver. INSPECTION Pag. 12 di 16 4. To proceed to the chain tensioning adjustment act as To proceed to the chain tensioning adjustment act as follow: • Remove the plastic cover;...
  • Page 13 Doc. 10023982 ADJUSTMENT AND Emesso Giugno 2011 MR60 65/75/85 Ver. INSPECTION Pag. 13 di 16 Scrub deck adjustment 10. Adjust the brush deck enable micro-switch. Check that the lever is in the lowered position push the micro-switch to the left. The micro-switch lever should have 0.5mm of clearance.
  • Page 14 Doc. 10023982 ADJUSTMENT AND Emesso Giugno 2011 MR60 65/75/85 Ver. INSPECTION Pag. 14 di 16 Squeegee adjustment 1. Altering the adjuster for the blade inclination when the vacuum motor is on. The blade has to have an even inclination on all its length.
  • Page 15 Doc. 10023982 ADJUSTMENT AND Emesso Giugno 2011 MR60 65/75/85 Ver. INSPECTION Pag. 15 di 16 Adjust the squeegee movement wire using the adjusters the gauge in way that when the squeegee is on the floor it can move right and left for all its possible movement.
  • Page 16 Doc. 10023982 ADJUSTMENT AND Emesso Giugno 2011 MR60 65/75/85 Ver. INSPECTION Pag. 16 di 16 Functional check of the machine Check the functionality of switches and warning lamps; Check the functionality of the accelerator lever; Check the functionality of the brush base;...

This manual is also suitable for:

Mr65Mr75Mr85