Table of Contents
Advertisement
Quick Links
Advertisement
Table of Contents

Related Manuals for Akuvox IT81


Summary of Contents for Akuvox IT81
- Page 1 IT81 Usual Manual...
-
Page 2: Table Of Contents
Content 1 Production Overview........................4 1.1 Production Description......................4 1.2 Technical Specification......................6 1.3 Dimension..........................6 1.4 Equipment Appearance And Interface Description.............. 7 1.4.1 Interface Description....................9 1.4.2 Icons........................... 9 1.5 Installation...........................10 1.6 Equipment Packaging......................11 1.7 Connecting indoor Phone....................11 1.8 Installation Considerations....................12 2 Function............................ - Page 3 3.2.3 Time setting......................29 3.2.4 DND setting......................30 3.2.5 Language setting...................... 32 3.2.6 System setting......................32 3.2.6.1 Reboot......................32 3.2.6.2 Screen Clean....................32 3.2.7 Advance setting......................33 3.2.7.1 Network setting.....................33 3.2.7.2 SOS setting....................35 3.2.7.3 Sip Account setting..................36 3.2.7.4 Door Station setting..................37 3.2.7.5 Security setting.....................
-
Page 4: Production Overview
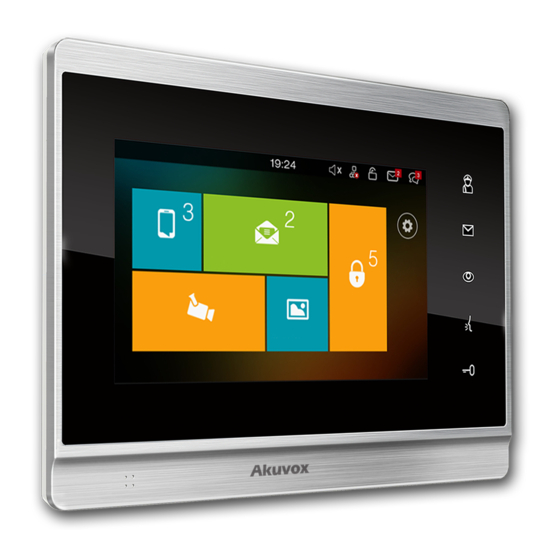
1 Production Overview 1.1 Production Description IT81 is a smart video indoor phone. It can be connected with Akuvox door phone for unlock and monitor. Residents can operate to communicate with visitors via audio and video, and unlock the door for the visitors. It is more convenient and safe for residents to check the visitor identity through its video preview function. - Page 5 television reception, which can be determined by turning the equipment off and on, the user is encouraged to try to correct the interference by one or more of the following measures: — Reorient or relocate the receiving antenna. — Increase the separation between the equipment and receiver. —...
-
Page 6: Technical Specification
1.2 Technical Specification Model IT81 7 inch capacitive touch screen TFT LCD, 800x480 pixels, 16:9 Graphic Display wide screen aspect ratio SIP RFC3261,TCP/UDP/IP,RTP Network Protocol G.711A/U, G.729, G.722 Voice Codec H.264 Video Codec Echo Canceller Audio Features ... -
Page 7: Equipment Appearance And Interface Description
1.4 Equipment Appearance And Interface Description Figure 1-1 IT81 Front View... -
Page 8: Interface Description
Figure 1-2 IT81 Rear View Figure 1-3 IT81 Profile View 1.4.1 Interface Description Interface Description Manage center button. Click to make a call with manage center. Message button. Click to direct access to message interface. Monitor button. Click to view the monitoring from outdoor... -
Page 9: Icons
Intercom button. Click to enter the dialing interface. Unlock sensor button. The physical Unlock key is only used for E10S now. 8 PIN connector For power supply and 485 connector 10PINconnector For 8 security connector Network interface can be connected to a hub, switch or other network Ethernet 1 access devices. -
Page 10: Equipment Packaging
Use a 5mm hand drill to Use the pencil to mark 4 make the 4 fixation holes fixation holes through on the wall wall dracket on the wall Once the fixation holes Use 4 ST4X20 screws to fix the are made, insert the four wall bracket in the wall expansion anchors provided... -
Page 11: Connecting Indoor Phone
Expansion anchor ST4x20 screw 1.7 Connecting indoor Phone Connection diagram Connecting to Network Use the matched network cable to connect the Ethernet 1 Port of the video phone to the Router or Switch. Viewing the top right corner of the screen, if the indicator light is on, network cable is connected properly. - Page 12 Do not use this product near water, such as: bath, washbasin, kitchen sink and other damp places and so on. Place the device in a place away from heat. Place the device away from traffic areas to prevent collisions. ...
-
Page 13: Function
2 Function 2.1 Main interface The default screen is shown as above. User can click the corresponding area to into the interface. 2.2 Make a call User can directly dial from the soft keypad, select from the contact list or from call log to call out the number. -
Page 14: Call Resident
2.2.2 Call Resident If you want to call room number, you can select Call Residet label. For example, if you want to call community 1, Building 1, Unit 1, Floor 1, Room1, you can input digits “001001010101”. Shown as below. 2.2.3 Call log User can enter the call log page to make a call. -
Page 15: Phonebook
Mode 2: In the dialing interface->click Call Log label-> select Missed Calls part. When got a missed call, the screen will display the missed call notification in above status column. If you want to make an audio call, click Audio Call icon . -
Page 16: Contacts Fuzzy Matching Query
2.2.4.1 Contacts Fuzzy Matching Query Phone supports contacts fuzzy matching queried, intuitive, concise dialing interface for the intelligent input, greatly reducing the number of buttons, achieve rapid, effective positioning search, avoid duplication of invalid operation, saving time. Click the gray space bar to enter the key character or number to search the contact. The result will be displayed on the left list. -
Page 17: Call Doorphone
After setup the door phone number, users can press Open Lobby label open the door during the call. Click Cancel label to end the call. Note: Akuvox phone usse DTMF code to unlock the door, IT81 default DTMF code is # 2.2.6 Call Center If you want to call management center (SDMC system), you can press make a call out. -
Page 18: Receive A Call
Incoming calls include audio and video calls. If the caller has been stored in the contacts, it will show the contact name, otherwise the caller number will be displayed. When IT81 received the video call, it can automatically get a screenshot and save it in the Album. -
Page 19: Reject A Call
Answer a video call When receiving an video call, click Audio label to establish the audio call, click Video label to establish the video call. Phone will automatically open the video preview so that resident can view the visitors identity. As shown below: 2.5 Reject a call If user want to reject a call, click Reject label in incoming interface. -
Page 20: Do Not Disturb
DND function. When enable DND function, the main screen shown as below. 2.7 Auto answer If enabled, IT81 phone will auto-answer when there is an incoming call. Configuration on the phone: Click Setting icon -> Advance( default password: 123456)-> click Sip Account->click icon... -
Page 21: No Answer Forward
Click Save label to save. Shown as below. 2.8 No answer forward The incoming calls will be forward to the specified number when the ringtone is time out without answer. Configuration on the phone: Click Setting icon -> Advance( default password: 123456)-> click Sip Account->click icon to enter the next page. -
Page 22: Sos Emergency
When need help, you can click SOS Emergency icon to dial out for emergency help. IT81 phone can call out for three predefined numbers in a loop, each number will be called for 60 seconds (by default). The more SOS setting information can refer to 3.2.7.2... -
Page 23: Configuration In The Phone
3 Configuration in the phone 3.1 Status Basic Status You can view the IP Address, MAC Address, Firmware information in the Basic Status page. Network To check the LAN Type, LAN IP, LAN Mask, Gateway, DNS1,DNS2 information in the Network status page. - Page 24 Phone View the Model, Hardware, Firmware information in the Phone status page. Account You can view the sip account status in the Account status page.
-
Page 25: Setting
3.2 Setting 3.2.1 Display setting 3.2.1.1 BrightNess Go to the path: Setting->Display Settings->BrightNess. Click the icon to adjust the brightness intensity for the phone screen. Click OK label to save the modify. Configuration interface shown as below. -
Page 26: Sleep
3.2.1.2 Sleep Go to the path: Setting->Display Settings->Sleep. Click the sleep time you want to set. If the phone without operation in this time will enter the standby mode. Setting interface shown as below. 3.2.1.3 Screen Saver The phone default screen saver is a black picture. SDMC system can set the different pictures for the phone. -
Page 27: Ring Volume
Select the ring tone you want to set. Then click icon to save the configuration. The configuration shown as below. 3.2.2.2 Ring Volume Go to the path: Setting->Sound->Ring Volume. Click icon to adjust the ring volume you want to set. Then click the label to save. -
Page 28: Talk Volume
3.2.2.3 Talk Volume go to the path: Setting->Sound->Talk Volume. Click icon to adjust the talk volume you want to set. Then click the label to save. The setting shown as below. 3.2.2.4 MIC Volume Go to the path: Setting->Sound->MIC Volume. Click icon to adjust the mic volume. -
Page 29: Touch Sounds
3.2.2.5 Touch Sounds Go to the path: Setting->Sound->Touch Sounds. The default is to enable the touch sound, you can click icon to disable the feature. 3.2.3 Time setting Go to the path: Setting->Time. The default is enable the Automatic date time(NTP). You can click icon to disable the automatic date time, then set date time by manual. -
Page 30: Dnd Setting
The Time Format is to set the phone display time format. 12Hour format and 24 Hour format can be supported. The date format is to set the phone display date format. You can check the time format and date format at the top of the screen. 3.2.4 DND setting You can enter the DND setting page by the following ways. - Page 31 Click the DND icon on the main screen. The setting page shown as below. You can click icon to enable the DND feature. Click icon to disable the whole day DND function. It will display Start Time and End Time column, you can click to edit the time for DND available.
-
Page 32: Language Setting
3.2.5 Language setting You can not change the phone language. Only support english now. 3.2.6 System setting 3.2.6.1 Reboot Go to the path: Setting->System->reboot. Click the Reboot column to pop up a prompt “ Do you want to reboot right now?”, click Confirm label to reboot the phone. -
Page 33: Advance Setting
Enter the above interface, you can clean the screen. The touch screen will automatically disable 30 seconds. 3.2.7 Advance setting Go to the path: Setting->Advance. Click the Advance, it will pop up the password input page. Dafault password: 123456. Then click OK label to enter the advance setting page. 3.2.7.1 Network setting You can set the phone to get IP address by two ways: DHCP and Static IP. - Page 34 DHCP mode The phone default network mode is DHCP. Go to the path: Setting->Advance(default password: 123456)->Network. Click LAN type column, select the DHCH mode. The interface shown as below. Static ip Go to the path: Setting->Advance( default password: 123456)->Network. Click LAN type column, select the Static IP mode.
-
Page 35: Sos Setting
3.2.7.2 SOS setting Go to the path: Setting->Advance( default password: 123456)->SOS. Enter the SOS number. Click OK label to save. Click the Call Timeout column, you can setup the timeout value. The dafault value is 60 seconds. The range value is 5 to 60 seconds. Click the Loop Times column, you can set the times to cycle call out when the call is no answered. -
Page 36: Sip Account Setting
3.2.7.3 Sip Account setting Go to the path: Setting->Advance( default password: 123456)->Sip Account. Enter the sip acccount value in the corresponding area. The more account information you can ask to the administrator for help. Click OK label to confirm the input value. Click the Save label to save the modify. -
Page 37: Door Station Setting
the server ip address. Click OK label to confirm the configuration. Click the Save label to save the modify. Click icon to back the previous pages. Click Active colume to enable the sip account. 3.2.7.4 Door Station setting Go to the path: Setting->Advance(defult password: 123456)->Door Station. Click the Door Station Number to type the number. -
Page 38: Security Setting
3.2.7.5 Security setting IT81 supports manage 8 alarm devices. In Security setting interface you can set the alarm device parameters. Go to the path: Setting->Advance( default password: 123456)->Security. For example, edit for the Alarm1. Click Place column, you can select the place for the alarm device. - Page 39 Click Type column to select the alarm type. There are many kinds of alarm type: Infrared, Drmagnet, Smoke, Gas, Urgency Click Trigger mode column, you can select the trigger mode. NC means No Connection, NO means No Open. You can select the suitable mode. Click Alarm delay column, you can select the alarm trigger delay time.
-
Page 40: Password Setting
Click Status column, you can select the alarm status. Two kinds of status can be selected: Closed, Opened. 3.2.7.6 Password setting Go to the path: Setting->Advance (default password: 123456)->Password. Click the New Password column to enter the new password, click Confirm Password column to enter the new password once more. -
Page 41: Reset Setting
When you enter the Advance setting interface next time, you need to input the new password. 3.2.7.7 Reset setting Go to the path: Setting->Advance(default password: 123456)->Reset. Click Reset to factory setting column, it will pop up the prompt “ Do you want to reset the phone to factory? The phone will reboot!”. -
Page 42: Add A New Contact
Delete a selected contact Delete all contacts Modify the contact information Click to audio call the contact Click to video call the contact 3.3.1 Add a new contact The following shown the ways to enter the add contact page. Click Contact icon click on the bottom of the screen. -
Page 43: Modify The Contact
3.3.2 Modify the contact Select the contact need to modify in the contact list. Click icon Enter contact edit page to modify the contact information. Click OK label to save. Note: Number 1 is room number, Number 2 is sip account. 3.3.3 Delete the contact Select the contact need to delete in the contact list. -
Page 44: Delete All Contacts
3.3.4 Delete all contacts Click icon . It will pop up the prompt “Clear All, Are you sure?”. Click Confirm label to clear all contacts. 3.4 Call log Missed call... - Page 45 Go to the path: Call-> Call Log->Missed Calls. Click one of missed call on the right list, the more detail information will be dispalyed on the left list. Click to establish audio call Click to establish video call Click to delete the missed call number Click to clear call missed call number Click to add the missed call number to contact list ...
-
Page 46: Message
Click to establish audio call Click to establish video call Click to delete the history number Click to clear call history number Click to add the history number to contact list 3.5 Message 3.5.1 Notice When received new messages, the digit icon will display on the right corner of the Message icon on the main screen. -
Page 47: View A Message
Icons Description New message Old message 3.5.1.1 View a message Go to the path: click Message icon ->click the icon to view the new message. -
Page 48: Reply A Message
3.5.1.2 Reply a message Mode 1: Click Message icon ->click the icon -> click Reply label. Click Message icon ouch and hold a message will pop up “Option Mode 2: ->t Selector” page-> select Reply column. The “send to” column shows the target number, you can click the empty place to input the content. -
Page 49: Delete A Message
3.5.1.3 Delete a message Click Message icon ouch and hold a message will pop up “Option Selector” ->t page-> select Delete column. Shown as below. Click Delete column to delete this message. Click Confirm label to detele this message. 3.5.1.4 Delete all messages Click Message icon lick icon ->... -
Page 50: Send Box
3.5.2 Send Box Go to the path: Message->Send Box. Click icon to enter the message edit page. Click “send to:” column to input the target number you want to send, click the empty place to input the message content. Click send label to send the text message. - Page 51 You can check the message status in the left list. Click icon can clecr all the message. Click Confirm label to delete all message.
-
Page 52: Maintenance
Light column, then click Confirm label to ask for help. 3.6 Album The album is used to storage the screenshots. When IT81 received the video call, it can automatically get a screenshot and save it in the album. Click the corresponding column to view the picture. - Page 53 Press and hold one column to delete the selected item. Click icon to delete all pictures.
- Page 54 Click the empty place on the picture. It will dispaly three icons. Shown as below. Click to back to the previous screenshot Click to back to the Capture Log page Clcik to enter the next screenshot...
-
Page 55: Sd Device
3.7 SD device IT81 phone can support external SD device to storage screenshots. You can view the screenshots from Album. 3.8 Monitor Press Monitor key or click Monitor icon to receive the video from indoor IPC or community IPC any time.
Need help?
Do you have a question about the IT81 and is the answer not in the manual?
Questions and answers