
Related Manuals for Emerson Metro MPS-4009


Summary of Contents for Emerson Metro MPS-4009
- Page 1 Metro™ Series Mobile Computing Workstations MPS-4009 Multi-Chemistry Power Supply Operations Manual Supplement L01-497 RevA Copyright © 2012 InterMetro Industries Corporation www.metro.com...
- Page 2 THIS PAGE INTENTIONALLY LEFT BLANK...
- Page 3 Notice: InterMetro Industries Corporation reserves the right to make improvements or changes in the products described in this manual at any time without notice. While reasonable efforts have been made in the preparation of this document to assure its accuracy, InterMetro Industries Corporation assumes no liability resulting from any errors or omissions in this document, or from the use of the information contained herein.
- Page 4 Symbol Explanations The product is TÜV certified with respect to electrical shock, fire and mechanical hazards only in accordance with UL 60601-1, CAN/CSA 22.2 No. 601.1 and IEC/EN 60601-1-1 as Type B Patient Care Medical Equipment suitable for use in patient vicinity.
- Page 5 Caution (USA 240 V): If an MPS-4009 Power Supply is connected to a 240 V supply system in the United States of America (USA), it shall be a center tapped single phase supply circuit. Electromagnetic Interference (EMI) Recommendations This equipment generates, uses and can radiate radio frequency energy and, if not installed and used in accordance with the instructions, may cause harmful interference to other devices in the vicinity.
- Page 6 Revision History REV/ Revision Description Date Approved Issue Initial Release 10-29-2012 Karl Haiden MPS-4009 Multi-Chemistry Power Supply Operations Manual Supplement InterMetro Industries Corporation...
-
Page 7: Table Of Contents
Table of Contents Table of Contents ......................7 References ........................9 Introduction ........................10 Mobile Rechargeable Power Supply ....................... 10 Power Supply Status ..........................11 Features ..............................12 Equipment Classification ........................13 Important Product Notices ........................13 Disposal .............................. - Page 8 Maintenance and Storage ..................... 36 Cleaning ..............................36 Connecting the Power Supply Batteries ....................36 Disassembly and Assembly Procedure of Power Supply Batteries ............39 Storage and Transport Conditions ......................44 Shipment of Power Supply ........................44 Troubleshooting ......................46 ...
-
Page 9: References
References Document Number Title 400210 Flo 1700 Series Mobile Computing Workstation Operations Manual 401504 Flo 1800 Series Mobile Computing Workstation Operations Manual MPS-4009 Multi-Chemistry Power Supply Operations Manual Supplement, Doc. No. L01-497 InterMetro Industries Corporation... -
Page 10: Introduction
Introduction Mobile Rechargeable Power Supply The Metro MPS-4009 Power Supply can consist of one the following chemistries: • Lithium Ion Nano-Phosphate (Li-Nano or LiFePO4) • Sealed Lead Acid (SLA) • LiFePO battery made by China Aviation Lithium Battery (CALB) These rechargeable power sources can all be utilized for the Metro Series Mobile Computing Workstations. -
Page 11: Power Supply Status
Power Supply Status The status of the MPS-4009 Power Supply is displayed by a remote Fuel Gauge display and optionally on the workstation monitor by the Metro BatteryPro software. Remote Fuel Gauge Display The remote Fuel Gauge is embedded in the Metro Series Mobile Computing Workstation monitor mount at eye level height and is connected to the power supply. -
Page 12: Features
Metro BatteryPro Power Properties Dialog Features The Metro MPS-4009 Multi-Chemistry Power Supply features: • Rugged steel construction – built to last. • Remote Fuel Gauge at the user’s eye level. • Multi-Chemistry, 512 to 540 Watt-hours (Wh) capacity rechargeable batteries. -
Page 13: Equipment Classification
Equipment Classification The Metro MPS-4009 Li-Nano Power Supply is TÜV certified with respect to electric shock, fire and mechanical hazards only in accordance with UL 60601-1, CAN/CSA 22.2 No. 601.1 and IEC/EN 60601-1-1 as Type B Patient Care Medical Equipment suitable for use in patient vicinities. -
Page 14: Getting Started
Getting Started Installation In general, the Metro MPS-4009 Multi-Chemistry Power Supply System is provided already installed on a Metro Mobile Computing Workstation and is ready for use after preparing and fully charging the batteries. The MPS-4009 Multi-Chemistry Power Supply System can be retrofitted or installed new on a Metro Mobile Computing Workstation. -
Page 15: Powering Up The Mps-4009 Multi-Chemistry Power Supply
Powering Up the MPS-4009 Multi-Chemistry Power Supply The MPS-4009 Multi-Chemistry Power Supply is controlled by the “ON/Extended Storage” Switch located on the side of the unit. ON/Extended In the “ON” position, the power supply provides power to the Metro Series Storage Switch Mobile Computing Workstation systems. -
Page 16: Starting Metro Batterypro
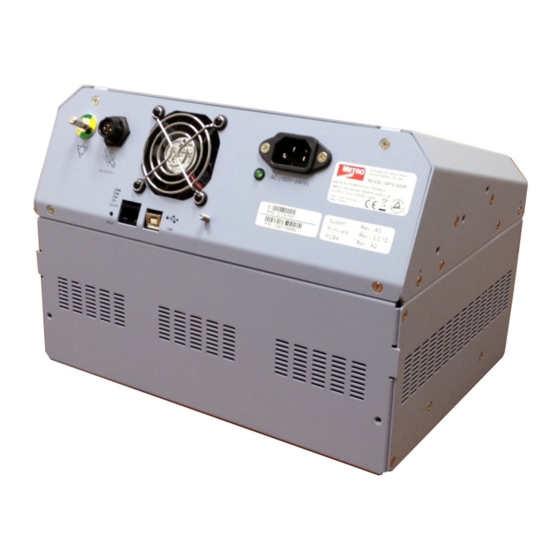
Starting Metro BatteryPro Metro BatteryPro Mobile Computing Workstation Power Supply Management Software is an optional application for monitoring the status of the MPS-4009 Multi-Chemistry Power Supply. When installed, Metro BatteryPro is typically configured to start automatically when the host computer starts up. No additional user action is required. Notice: Metro BatteryPro requires the workstation computer to be connected via USB to the MPS-4009 USB-B port. -
Page 17: Terminating Metro Batterypro
Metro BatteryPro Power Properties Dialog Terminating Metro BatteryPro Metro BatteryPro can be stopped by right-clicking on the Metro BatteryPro status tray icon, highlighting (with the mouse pointer) and selecting “Exit” with a left click. Right click on Metro BatteryPro status tray icon and select and left click on “Exit”... -
Page 18: Operation
Operation The following section describes the basic function and operation of the MPS-4009 Multi- Chemistry Power Supply System. Power Supply Location on the Metro Series Mobile Computing Workstation The MPS-4009 Multi-Chemistry Power Supply is located in the bottom of the Metro Series Mobile Computing Workstation under the Base Deck. -
Page 19: Powering Up The Mps-4009 Multi-Chemistry Power Supply
To turn on the Power Supply, flip the ON (Normal Operation)/Extended Storage switch located on the side of the power supply to the “ON” (up) position. Metro MPS-4009 Multi-Chemistry Power Supply “ON/Extended Storage” Switch Important Notice: If the MPS-4009 Multi-Chemistry Power Supply has been switched to “Extended Storage” for more than 1 week, connect the workstation to AC to wake up the power supply before switching it to “ON”. - Page 20 the Remote Fuel Gauge two green LEDs marked “AC” and “CH” turn on. Charge Status Seven (7) multi color LEDs (green, amber) located on the Remote Fuel Gauge display the charging status of the Multi-Chemistry power supply. Fuel Gauge Status Battery is discharging under normal, mobile operation.
- Page 21 Flashing LEDs Additional patterns with flashing of the LEDs indicate a problem with the MPS-4009 Power Supply. Please see “Troubleshooting” in “Maintenance and Storage” below for additional information. Charge Time Charge time for fully depleted batteries depends on the amount of load connected to the power supply.
-
Page 22: Starting Metro Batterypro Application
Starting Metro BatteryPro Application When installed, Metro BatteryPro is typically configured to start automatically when the host computer starts up. No additional user action is required. Notice: Metro BatteryPro requires the workstation computer to be connected via USB to the MPS-4009 USB-B port. -
Page 23: Metro Batterypro Status Indications
Metro BatteryPro Status Indications Metro BatteryPro has two ways of showing the status of the workstation power supply. Both are shown in the lower right-hand side of the computer display, in and above the status tray. 1. An icon in the status tray shows the state of the power supply batteries. 2. - Page 24 Discharging, Low Level. Power supply is not plugged into AC power and is running on batteries. Battery charge has dropped below threshold set for “Low Battery Alert” (see “Alarms” below). Battery icon is a thin dark blue line. Notice: A “Low Battery Alert” message may be displayed. Desktop Status Window The Metro BatteryPro Desktop Status Window normally appears above the status tray icon.
- Page 25 Hiding the Desktop Status Window The Desktop Status Window is hidden (disabled from display) in two ways: 1. Open the Metro BatteryPro Power Properties dialog, select the “Scheme” tab and left click on (to clear) the “Always Display Battery Status” box (see also “Scheme” under “Metro BatteryPro Configuration and Status”...
- Page 26 Discharging, Low Level. Power supply is not plugged into AC power and is running on batteries. Battery charge has dropped below threshold set for “Low Battery Alert” (see “Alarms” below). Battery icon is light blue to the battery charge level. Notice: A “Critical Battery Alert”...
-
Page 27: Metro Batterypro Configuration And Status
Metro BatteryPro Configuration and Status Metro BatteryPro settings are configured through the Metro BatteryPro Power Properties dialog. The Power Properties dialog also displays more detailed status and diagnostic information. The tabs in the Power Properties dialog may be selected to configure and view the various Metro BatteryPro settings and status: •... - Page 28 Opening the Metro BatteryPro Power Properties Dialog Window The Power Properties dialog is entered by right-clicking on the Metro BatteryPro status tray icon, highlighting (with the mouse pointer) and selecting “Open Power Properties” with a left click. Right click on Metro BatteryPro status tray icon and select left click on “Open Power Properties”...
- Page 29 Power Meter The “Power Meter” tab displays the current summary information about the power source and batteries. Power Meter Tab Display: On Batteries Select “Power Meter” tab in Metro BatteryPro Power Properties dialog. Shown at left is indication of running off battery. Display includes battery specifications, percent capacity of charge and calculated run time remaining.
- Page 30 Alarms Click on the “Alarms” tab to view or change low and critical battery alert levels and actions settings. Clicking on the “Alarm Action” buttons displays additional options for setting the messages and actions to be taken by Metro BatteryPro when the alarms occur. Alarms Tab Display Select “Alarms”...
- Page 31 Click on “OK” button to apply new value and exit the dialog. Click on “Cancel” button or “X” to exit dialog without saving change to settings. Alarm Action Setting Click check box to enable an Alarm action to be performed when the alarm occurs. Click on down arrow at right of setting to open drop down list.
- Page 32 Status Click on the “Status” tab to display RF Signal Strength, Battery Health and firmware information. Status Tab Display Select “Status” tab in Metro BatteryPro Power Properties dialog. Display includes: Power supply configuration information. Available disk space and required disk space for hibernation.
- Page 33 Diagnosis Tab Display When the “Diagnosis” tab is first revealed, the Metro BatteryPro Power Properties dialog defaults to its display. When available, select “Diagnosis” tab in Metro BatteryPro Power Properties dialog. In this display each battery pack may be individually monitored. The “Hide” button hides the “Diagnosis”...
-
Page 34: Mps-4009 Power Supply System Installation
MPS-4009 Power Supply System Installation In general, the Metro MPS-4009 Multi-Chemistry Power Supply is provided already installed on a Metro Mobile Computing Workstation and is ready for use. The MPS-4009 Multi-Chemistry Power Supply can be retrofitted, replaced or installed new on a Metro Mobile Computing Workstation. -
Page 35: Software Installation
Removing the MPS-4009 Power Supply Caution: For safety, only qualified service personnel should perform the following procedure to remove the MPS-4009 Power Supply from the Metro Mobile Computing Workstations. To remove the MPS-4009 Power Supply from the workstation base for replacement, perform the following steps: Notice: Save all handle brackets, screws and other hardware that are removed by this procedure for the replacement power supply to be mounted on the workstation. -
Page 36: Maintenance And Storage
Maintenance and Storage Cleaning Use 70 percent isopropyl alcohol (IPA) diluted with water for cleaning the power supply. You may also use one of these products to clean the power supply: • Cidex • Clorox Clean-Up • “Green soap” United States Pharmacopoeia (USP) •... - Page 37 • Ensure Normal Operation/Extended Storage switch of the Power Supply is in the Extended Storage (Standby: down) position. Power Supply switch down to Standby Open the Battery Notice: On some models Metro Series Mobile Computing Workstation Connector Access it may be necessary to access the Power Supply on the back Panel by opening a cover door at the bottom of the cart.
- Page 38 • Remove access panel to access the battery connector as shown in picture below. Battery Connector • At each connector, firmly grip the cable plug between thumb and Connect the Battery index finger. Line up the plug with the socket below it and insert it Cells downward all the way until the latch locks completely.
-
Page 39: Disassembly And Assembly Procedure Of Power Supply Batteries
Disassembly and Assembly Procedure of Power Supply Batteries SLA (Sealed Lead Acid Battery) Disassembly Procedure 1. Remove access panel to access the battery connector as shown in figure below. Removal of Access Panel 2. Firmly grip the cable plug between thumb and index finger as shown below. Press the tab on the battery terminal and remove it. - Page 40 4. Release the Velcro straps tray in order to remove the 3 SLA batteries. Remove Velcro Straps SLA (Sealed Lead Acid Battery) Assembly Procedure 1. Place battery tray with Velcro straps on a secure or grounded table as shown in figure below.
- Page 41 3. Place the third SLA with rubber band wrapped around it vertically next to the other two SLA batteries as shown below. Connect all positive and negative battery terminals to the SLA’s. Note: Check all positive and negative terminals for accuracy. Tighten the Velcro straps to secure the SLA batteries on the battery tray.
- Page 42 LiFe Mid-Grade (CALB) Battery Disassembly Procedure 1. Remove access panel to access the battery connector as shown in figure below. Removal of Access Panel 2. Firmly grip the cable plug between thumb and index finger as shown below. Press the tab on the battery terminal and remove it.
- Page 43 LiFe Mid-Grade (CALB) Battery Assembly Procedure 1. Align CALB battery with power supply enclosure and secure battery connector as shown in figure below. Align CALB Battery 2. Firmly grip the cable plug between thumb and index finger as shown below. Press the tab on the battery terminal and insert it.
-
Page 44: Storage And Transport Conditions
Storage and Transport Conditions Environmental conditions for shipping and storage are: • Ambient temperature range of -40°C to +70°C (-40°F to 160°F). • Relative humidity range of 10% to 100%. • Atmospheric pressure range of 14.76 in. Hg to 31.29 in. Hg. Shipment of Power Supply The MPS-4009 Power Supply is available in 3 battery chemistry options. - Page 45 Per battery pack: Battery weight: 2.75 kg Wh rating: 264 Wh Equivalent Li Content (ELC): 24 g LiFe Mid-grade Battery (CALB) The LiFe Mid-grade Battery can be connected or disconnected and requires a fully regulated Class 9 shipment in any shipping mode. The shipper must be certified for Li-Ion Class 9 shipments.
-
Page 46: Troubleshooting
Troubleshooting • If a problem occurs while you're working, stop immediately. If you General Tips continue, you may lose data and destroy problem-related information. • Observe what is happening. Write down what the power supply, workstation computer and other devices are doing as well as what actions you took immediately before the problem occurred. - Page 47 Warning 1: Power supply overheating, AC-DC module • Air flow in the power supply may be restricted due to cooling fan not working properly, fan blocked, or clogged ventilation slots around the power supply case. • Turn off computer equipment and then the power supply. •...
- Page 48 No Battery Warning • No battery packs are detected in the power supply. Battery packs most likely were not connected before the power supply was placed into service. Notice: The battery cells may not be connected during shipment due to USDOT AND IATA regulations.
-
Page 49: Technical Specifications
Technical Specifications Input Voltage 100 - 240 VAC, 50/60 Hz, 4.6 to 2.3 A Output Voltage 11 – 15 V Maximum Output Power 150 W Continuous, 200 W Peak • Battery Type Li-Nano (Lithium-Ion Nano Phosphate, LiFePO • LiFePO Mid-Grade CALB •... -
Page 50: Contacting Intermetro Industries Corporation
Contacting InterMetro Industries Corporation InterMetro Industries Corporation Contact Information InterMetro Industries Corporation 651 North Washington Street Wilkes-Barre, PA 18705 Phone: 1-800-992-1776 http://www.metro.com/support InterMetro Customer Service For all customer service related issues, or if you need technical assistance, please call our customer service department at: 1-800-992-1776 Americas 905 676 9890...
Need help?
Do you have a question about the Metro MPS-4009 and is the answer not in the manual?
Questions and answers