Table of Contents
Advertisement
Quick Links
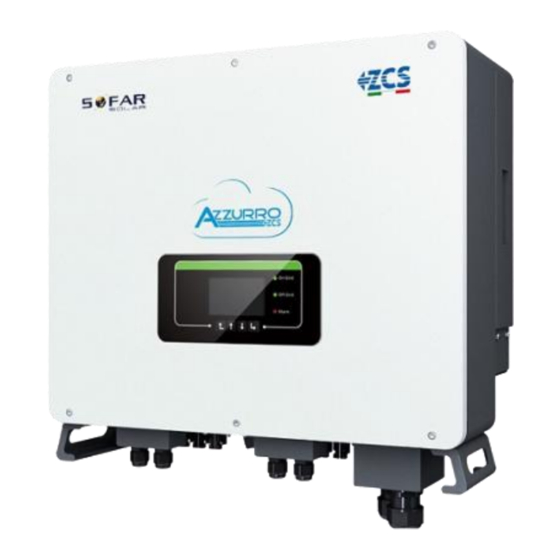
ZCS HYD 10-20K TL-3PH hybrid inverter
User Manual
Zucchetti Centro Sistemi S.p.A. - Green Innovation Division
Via Lungarno, 248 - 52028 Terranuova Bracciolini - Arezzo, Italy
tel. +39 055 91971 - fax. +39 055 9197515
innovation@zcscompany.com - zcs@pec.it – www.zcsazzurro.com
Reg. Pile IT12110P00002965 - Share capital € 100,000.00 fully paid up
AR Company Reg. no. 03225010481 - REA AR - 94189
ISO 9001 certified company - Certificate no. 9151 - CNS0 - IT-17778
Advertisement
Table of Contents

Related Manuals for ZUCCHETTI ZCS HYD 10KTL-3PH


Summary of Contents for ZUCCHETTI ZCS HYD 10KTL-3PH
- Page 1 ZCS HYD 10-20K TL-3PH hybrid inverter User Manual Zucchetti Centro Sistemi S.p.A. - Green Innovation Division Via Lungarno, 248 - 52028 Terranuova Bracciolini - Arezzo, Italy tel. +39 055 91971 - fax. +39 055 9197515 innovation@zcscompany.com - zcs@pec.it – www.zcsazzurro.com Reg.
-
Page 2: Table Of Contents
Table of Contents Introduction .................................... 6 Preliminary safety instructions ............................6 2.1. Safety Notes ................................... 6 2.2. Assembly and maintenance notes ........................7 2.3. Symbols on the inverter ............................8 Installation .................................... 10 3.1. Product overview ..............................10 3.2. Package contents ..............................12 3.3. - Page 3 7.3.2. Advanced settings ............................50 7.3.3. Event list ................................53 7.3.4. System interface information ........................53 7.3.5. Energy statistics .............................. 56 7.3.6. Software Update ............................. 58 Technical specifications ..............................59 Troubleshooting ................................. 60 10. Uninstalling ..................................68 10.1. Steps for uninstalling the inverter ....................... 68 10.2.
- Page 4 Copyright statement Copyright of this manual belongs to Zucchetti Centro Sistemi S.p.A. No part of this manual (including the software, etc.) may be copied, reproduced or distributed in any form or by any means without the permission of Zucchetti Centro Sistemi S.p.A.
- Page 5 Preface General information Please read this manual carefully before installation, operation or maintenance. This manual contains important safety instructions that must be followed during installation and maintenance of the system. This manual describes the installation, electrical connections, maintenance and troubleshooting of the following inverters: HYD 10KTL - 3PH / HYD 15KTL - 3PH / HYD 20KTL - 3PH ...
-
Page 6: Introduction
During installation, operation and maintenance, all operators must follow the local safety guidelines. Improper operation may result in electric discharges and/or damage to people and property, and will also void the Zucchetti Centro Sistemi S.p.A. warranty. -
Page 7: Assembly And Maintenance Notes
Transport of the equipment, especially by road, must be carried out with vehicles suitable to protect the components (in particular, the electronic components) against violent knocks, humidity, vibrations, etc. Zucchetti Centro Sistemi S.p.A. assumes no liability or responsibility for the destruction of property and personal injury resulting from improper use. 2.2. -
Page 8: Symbols On The Inverter
The inverters do not require any daily or periodic maintenance. The heat exchangers and cooling fans must not be obstructed or clogged by dust, dirt or other objects. Before cleaning, ensure that the DC switch is OFF, the battery is switched OFF and the switch between the inverter and mains grid is OFF; wait at least 5 minutes before cleaning. - Page 9 Comply with the European (EC) Conformity certification. Ground terminal Read this manual before installing the HYD 10-20KTL-3PH inverter. This value indicates the degree of protection of the equipment in accordance with the IEC 70-1 (EN 60529 June 1997) standard. Positive and negative poles of DC voltage (Photovoltaic and Battery) This side up.
-
Page 10: Installation
3. Installation The HYD-10-20KTL-3PH inverters undergo strict controls and inspection before packaging and delivery. Do not turn upside down during delivery. Carefully check the packaging and product fittings before installation. Caution Figure 3 - Installation process The HYD 10-20KTL-3PH inverter is a three-phase photovoltaic energy storage inverter that integrates the functionality of a PV inverter with battery energy storage system. - Page 11 Main product features: a. Double MPPT tracker with allowable DC overload of up to 1.5 times. b. Flexible and fast switching between on-grid and off-grid modes. c. Maximum efficiency of battery charging and discharging of 97.7% d. 2 battery input strings with maximum charge and discharge of 25A per string. e.
-
Page 12: Package Contents
3.2. Package contents Part Inverter Bracket PV+ clamp terminals PV- clamps Metal clamp terminals fixed to PV+ input power cables Metal clamp terminals fixed to PV- input power cables BAT+ clamp terminals BAT- clamp terminals Metal clamp terminals fixed to BAT+ input power cables User Manual for hybrid inverter HYD 10-20KTL-3PH - Rev. - Page 13 Metal clamp terminals fixed to BAT- input power cables 2 M6 hexagonal screws M8x80 expansion plugs to secure the bracket to the wall AC Grid Connector Critical load connector Connection port connector (for parallel function) DRMs connector 6-pin CT connector Current sensor User Manual for hybrid inverter HYD 10-20KTL-3PH - Rev.
-
Page 14: Requirements For The Installation Environment
16-pin COM connector Manual Warranty Registration form Table 3- Package contents 3.3. Requirements for the installation environment DO NOT install the HYD 10-20KTL-3PH on top of flammable materials. DO NOT install the HYD 10-20KTL-3PH in an area used for the storage of flammable or explosive materials Danger The casing and heat sink are very hot while the inverter is running, therefore... -
Page 15: Installation Tools
3.4. Installation tools Tool Model Function Drill (recommended: 6mm drill To make a hole in the wall bit) To screw in the electrical Screwdriver circuits To remove the AC terminal Star screwdriver screws Removal wrench To remove the PV terminals Wire stripper To strip the wires To connect the bracket... -
Page 16: Wall Installation Position
Tape measure To measure distances To make sure the support is Level level and aligned correctly For the operator's ESD gloves protection For the operator's Safety goggles protection For the operator's Dust mask protection Table 4 – Installation tools 3.5. Wall installation position The inverter must be placed in a dry and clean place for proper functioning. -
Page 17: Assembly Instructions
Figure 7 - Correct positioning of the inverter (2) 3.6. Assembly instructions To remove the inverter, open the packaging, insert your hands into the slots on both sides of the inverter and grasp the handles; lift the inverter out of the packaging and move it to the installation position. - Page 18 Position and fix the inverter to the rear panel. (OPTIONAL) install an anti-theft lock. Figure 8 - Positioning of the inverter on the wall User Manual for hybrid inverter HYD 10-20KTL-3PH - Rev. 1.0 of 25/08/2020 18/71 Identification: MD-AL-GI-00 Identification: MD-AL-GI-00 Rev.
-
Page 19: Electrical Connections
4. Electrical connections Before making any electrical connections, make sure that the DC circuit breaker is switched off. The stored electrical charge remains in the capacitor after the DC circuit breaker has been switched off, for safety reasons, wait 5 minutes for the capacitor to discharge completely. The HYD 10-20KTL-3PH inverter is intended for use in a photovoltaic system with battery storage;... - Page 20 1. Direct-insertion current sensors Figure 9 – Configuration with CT current sensor Meter + CT sensor Figure 10 – Configuration with meter + CT sensor User Manual for hybrid inverter HYD 10-20KTL-3PH - Rev. 1.0 of 25/08/2020 20/71 Identification: MD-AL-GI-00 Identification: MD-AL-GI-00 Rev.
- Page 21 Recommended cable Recommended cable Part Description type specifications + : connection of the positive electrode to the lithium battery Multi-core copper Conductor with cross- cable for outdoor use section 6mm - : connection of the negative electrode to the lithium battery + : connection of the positive electrode to the photovoltaic system...
-
Page 22: Connection Of Protective Ground Cables
Conductor with cross- Multi-core copper section: cable for outdoor use ~16mm 10mm Table 6 - Cable specifications 4.1. Connection of protective ground cables (PGND) Connect the inverter to the grounding electrode using protective ground cables (PGND). The inverter is transformerless, the positive and negative poles of the PV array must NOT be grounded;... -
Page 23: Connecting The Battery
using the hex key. NB: L3 is the length between the insulating layer of the ground cable, the L4 curved part and the core wires protruding from the secured part. NB: The cavity formed on the conductor just below the crimping strip must completely wrap the core wires, which must be in contact with the terminal. - Page 24 3. Insert the stripped positive and negative power cables into the positive and negative metal terminals respectively, and secure them using a suitable clamping tool. Make ensure that that the cables are crimped so that they cannot be pulled out with force of less than 400N. NB: As shown, the X region cannot be compressed.
-
Page 25: Photovoltaic Connection
6. Insert the positive and negative connectors into the corresponding battery and PV terminals of the inverter until you hear a “click” sound. Figure 18 - Insertion of connectors in the terminals To remove the positive and negative connectors from the inverter, insert a removal tool into the bayonet coupling and press the tool with adequate force. -
Page 26: Grid Connection
3. Connect the cable to the terminal, according to the identification on the terminal. Figure 21 - Connecting the cable to the terminal 4. Connect the terminal to the machine port and turn the clamp in a clockwise direction. Figure 22 - Terminal clamping 4.5. - Page 27 Figure 24 - Connecting the wire to the terminal 4. Connect the terminal to the machine port and turn the clamp in a clockwise direction. Figure 25 - Connecting the terminal to the machine User Manual for hybrid inverter HYD 10-20KTL-3PH - Rev. 1.0 of 25/08/2020 27/71 Identification: MD-AL-GI-00 Identification: MD-AL-GI-00...
-
Page 28: External Communication
External communication 5.1. USB/WIFI Figure 26 - External WiFi connection Definition Function Notes: GND.S Power Supply - USB The USB power supply is 5V/1A; It Data + USB cannot be used to charge external Data - USB devices VBUS Power Supply - USB Table 7 –... - Page 29 Figure 28 – Connecting the DRMs interface (2) 2) Pass the cable terminal through the cable gland, insert the communication cable into the RJ45 connector. The pins of the logical interface are defined according to the different standard requirements: a) Logical interface according to the VDE-AR-N 4105 standard: 2018-11, necessary for controlling and/or limiting the output power of the inverter.
- Page 30 Not connected Not connected Not connected Not connected Table 8 – Terminal description Active power Cos(φ) 100% Table 9 – Inverter preconfigured for the RRCR power levels (1 closed, 0 open) PIN name Description Connected to (RRCR) Input contact relay 1 K1 –...
-
Page 31: Com Communication - Multifunction
5.3. COM communication - Multifunction Figure 30 – COM interface Refer to Figure 31 for the RS485 connection if you want “cascade” monitoring of the inverters. Figure 31 - RS485 connection (monitoring between inverters) User Manual for hybrid inverter HYD 10-20KTL-3PH - Rev. 1.0 of 25/08/2020 31/71 Identification: MD-AL-GI-00 Identification: MD-AL-GI-00... - Page 32 Definition Function Notes: RS485A1-1 RS485 differential signal + RS485A1-2 RS485 differential signal + Wired or cascade monitoring of the inverter RS485B1-1 RS485 differential signal – RS485B1-2 RS485 differential signal – RS485A2 RS485 differential signal + Communication with three-phase meters RS485B2 RS485 differential signal –...
- Page 33 In the three-phase meter, which is supplied separately, PIN5 and PIN6 are used for the communication and correspond respectively to numbers 24 and 25. For more details, refer to the datasheets available at www.zcsazzurro.com. Figure 32 – Meter (1) Phases R, S, T must be connected with the respective PINs 2, 5, 8 and the neutral cable N with PIN 10. As regards the connections with the CTs, the terminals of the sensor positioned on phase R must be connected to PIN 1 (red wire) and PIN 3 (black wire).
-
Page 34: Port 0 & Port 1
5.4. Port 0 & Port 1 Figure 34 - Connection port Figure 35 - Cascade connection Definition Function Notes IN_SYN0 Signal synchronisation 0 CANL CAN negative pole SYN_GND0 Signal synchronisation GND0 CANH CAN positive pole The high signal level is 12 V IN_SYN1 Signal synchronisation 1 SYN_GND1... -
Page 35: External Current Sensor Ct
5.5. External current sensor CT Figure 36- CT interface Definition Function Notes: Ict_R- Negative R-phase sensor Used to connect the R-phase current sensor to the grid Ict_R+ Positive R-phase sensor Ict_S- Negative S-phase sensor Used to connect the S-phase current sensor to the grid Ict_S+ Positive S-phase sensor... -
Page 36: Buttons And Indicator Lights
6. Buttons and indicator lights Figure 37 – Screen The buttons on the screen have the following functions: “Back” - to go back to the previous screen or enter the main page; "Up" - to move up the menu or for the +1 function; “Down"... -
Page 37: Operation
7. Operation Check the following points and make sure the connections have been made before starting the inverter. 1. The inverter must be securely fixed to the wall bracket. 2. The PV+/PV- wires are securely connected with the correct polarity and voltage. 3. - Page 38 Caution NB: Zucchetti Centro Sistemi S.p.A. shall not be held responsible for any harmful consequences resulting from the incorrect setting of the country code. With reference to point *5 in Table 16. To set the battery parameters, refer (as shown in the example) to the configuration of the input channel.
-
Page 39: Main Menu
Item Default state Energy Storage Mode Self-use mode EPS Mode Disable Anti-Reflux Disable IV Curve Scan Disable Logic interface Disable Table 17 - Default values for other settings 7.3. Main menu Figure 38 - Main menu interface From the main interface, press the “Down” key to enter the page with the grid/battery settings. Main interface Grid Output Information Down... - Page 40 AC Current S....**.**A AC Current T....**.**A Down Frequency.....**.**Hz ↓ Battery Information (1) Batt1 (V)......****.*V Batt1 Curr......**.**A Batt1 Power....**.*KW Batt1 Temp......*℃ Batt1 SOC......**% Batt1 SOH......**% Batt1 Cycles......*T Down Battery Information (2) ↓ Batt2 (V)......****.*V Batt2 Curr......**.**A Batt2 Power....**.*KW Batt2 Temp......*℃ Batt2 SOC......**% Batt2 SOH......**% Batt2 Cycles......*T...
- Page 41 Main interface PV Information Up↑ PV1 Voltage....****.*V PV1 Current....**.**A PV1 Power....**.**KW PV2 Voltage....****.*V PV2 Current....**.**A PV2 Power....**.**KW Inverter Temp......*℃ From the main interface, press the “Back” key to enter the main menu, which has the following 5 options. Main interface 1.System Settings Back 2.Advanced Settings...
-
Page 42: Basic Settings
The user can modify the safety parameters of the machine via a USB stick, and must copy and modify the values on the USB stick beforehand. To enable this option, contact Zucchetti Centro Sistemi S.p.A. User Manual for hybrid inverter HYD 10-20KTL-3PH - Rev. 1.0 of 25/08/2020... - Page 43 4. Storage mode 4.Energy Storage Mode 1.Self-use Mode 2.Time-of-use Mode 3.Timing Mode 4.Passive Mode Self-consumption mode The inverter automatically charges and discharges the battery. If the PV generation (kW) = consumption (kW), with ∆P < 100W, the inverter does not charge or discharge the battery Figure 39a).
- Page 44 Figure Figure 40 - Inverter display in self-consumption mode (2) If the PV generation + battery (kW) < consumption (kW), the inverter draws power from the grid. Figure 41 - Inverter display in self-consumption mode (3) Usage times For a more rational management of the energy (especially in winter, where the photovoltaic system cannot effectively charge the battery), it may be necessary to set a date range for recharging the battery from the grid;...
- Page 45 16 h 00m Discharge 02500 W Power Passive Use For more detailed information on passive operation, please contact Zucchetti Centro Sistemi S.p.A. 5. Self-test (only for the Italian market) 5.Self-Test 1.Fast Self-test 2.STD Self-test The fast self-test gives the same results as the STD (standard) self-test, but takes less time.
- Page 46 ↓ Wait Testing 27.S1... ↓ Wait Test 27.S1 OK! ↓ Wait Testing 27.S2... ↓ Wait Test 27.S2 OK! ↓ Wait Testing 81>S1... ↓ Wait Test 81>S1 OK! ↓ Wait Testing 81>S2… ↓ Wait Test 81>S2 OK! ↓ Wait Testing 81<S1... ↓...
- Page 47 ↓ Press “Ok” Self-Test OK! ↓ Press “Down” 59.S1 threshold 253V 900ms ↓ Press “Down” 59.S1: 228V 902ms ↓ Press “Down” 59.S2 threshold 264.5V 200ms ↓ Press “Down” 59.S2: 229V 204ms ↓ Press “Down” 27.S1 threshold 195.5V 400ms ↓ Press “Down” 27.S1: 228V 408ms ↓...
- Page 48 ↓ Press “Down” 81>.S2 49.9Hz 107ms ↓ Press “Down” 81<.S1 threshold 49.5Hz 100ms ↓ Press “Down” 81<.S1 50.0Hz 105ms ↓ Press “Down” 81<.S2 threshold 47.5Hz 100ms ↓ Press “Down” 81<.S2 50.1Hz 107ms 7. Configuration of input channel 6.Input Channel Config Input Channel Config Input Battery input 1...
- Page 49 Disable 7. EPS Mode 7.EPS Mode 1. EPS Mode 1.Enable Control Mode 2.Disable Mode If the PV generation (kW) > consumption (kW), with ∆P < 100W, the inverter charges the battery (Figure 42a). If the PV generation (kW) = consumption (kW), the inverter does not charge or discharge the battery (Figure 42 b).
-
Page 50: Advanced Settings
2.Baud Rate 9. Setting of forced charge time 9.Set ForceChargeTime Charge Start Charge End 7.3.2. Advanced settings 2.Advanced Settings Input 0001 1.Battery Parameters 2.Anti Reflux 3.IV Curve Scan 4.DRM0 Control 5.Factory Reset 6.Parallel settings 1. Battery parameters A. Internal BMS 1.Battery Parameters 1.Battery Type 5.Max Charge (A) - Page 51 2.Battery Address 5.Discharge Depth 3.Max Charge (A) 6.Save Depth of Discharge (DOD) e.g. DOD = 50% and EPS = 80% While the grid is connected, the inverter will not discharge the battery as long as the SOC is less than 50%.
- Page 52 3.IV Curve Scan Enable 1.Scan Control Disable 2.Scan Period ***min 3.Force Scan 4. Logic Interface Control Enable or disable logic interfaces Refer to the chapter on the connections between logic interfaces (Section 0, page 28). 4.Logic interface Control Enable Disable 5.
-
Page 53: Event List
4.Save 7.3.3. Event list The event list shows the events in real time, and with a progressive number, date and time and type of error. The list of errors can be checked through the main menu to monitor the details of the event history in real. - Page 54 Power Level Country Energy Storage Mode Down Inverter Info (3) ↓ Input Channel1 Input Channel2 Input Channel3 Input Channel4 Down Inverter Info (4) ↓ RS485 Address EPS Mode IV Curve Scan Anti-Reflux Down Inverter Info (5) ↓ Logic interface Control PF Time Setting QV Time Setting Power Factor...
- Page 55 Depth of Discharge Max Charge (A) Down Inverter1/2 Info (2) ↓ Over (V) Protection Max Charge (V) Max Discharge (A) Min Discharge (V) Down Inverter1/2 Info (3) ↓ Low(V)Protection Nominal Bat Voltage 3.Safety Param. Safety Param.(1) OVP 1 OVP 2 UVP 1 UVP 2 Down...
-
Page 56: Energy Statistics
7.3.5. Energy statistics 3.Energy Statistics Today PV ......***KWH Load ......***KWH Export ......***KWH Import.......***KWH Charge.......***KWH Discharge....***KWH Down Month ↓ PV ......***KWH Load ......***KWH Export ......***KWH Import.......***KWH Charge.......***KWH Discharge....***KWH Down Year ↓ PV ......***KWH Load ......***KWH Export ......***KWH Import.......***KWH Charge.......***KWH Discharge....***KWH Down Lifetime ↓... - Page 57 PV ......***KWH Load ......***KWH Export ......***KWH Import.......***KWH Charge.......***KWH Discharge....***KWH User Manual for hybrid inverter HYD 10-20KTL-3PH - Rev. 1.0 of 25/08/2020 57/71 Identification: MD-AL-GI-00 Identification: MD-AL-GI-00 Rev. 4.0 of 31.01.18 - Application: GID...
-
Page 58: Software Update
7.3.6. Software Update The HYD 10-20KTL-3PH inverters offer the possibility to update the system via a USB stick for maximising the inverter's performance and preventing any operating errors caused by software bugs. Procedure: 1. Insert the USB stick into the inverter (the files necessary for the update are already inside it) 2. -
Page 59: Technical Specifications
8. Technical specifications User Manual for hybrid inverter HYD 10-20KTL-3PH - Rev. 1.0 of 25/08/2020 59/71 Identification: MD-AL-GI-00 Identification: MD-AL-GI-00 Rev. 4.0 of 31.01.18 - Application: GID... -
Page 60: Troubleshooting
9. Troubleshooting This section contains information and procedures for troubleshooting any problems and errors signalled by the inverter. Read the following section carefully. Check the warnings, messages and error codes shown on the screen. Attention If no errors are found, check that certain basic conditions are met before proceeding. Any type of check must be carried out safely according to the specific procedure. - Page 61 the AC connection to the inverter. If the grid voltage and frequency are The grid frequency is ID003 GridOFP within acceptable ranges and the AC too high. connection is correct, but the alarm persists, contact technical support to change the values of overvoltage, undervoltage, maximum frequency, The grid frequency is ID004...
- Page 62 the charge voltage Input current ID024 HwADFaultIdc measurement error ConsistentFault_GF Leakage current reading ID029 error ConsistentFault_Vg Grid voltage reading ID030 error communication ID033 SpiCommFault (DC) error (DC) communication ID034 SpiCommFault (AC) error (AC) Chip error (DC) ID035 SChip_Fault Chip error (AC) ID036 MChip_Fault Auxiliary power error...
- Page 63 protection 5 TempFault_HeatSin Radiator temperature ID055 protection 6 Ambient temperature ID057 TempFault_Env1 protection 1 Ambient temperature ID058 TempFault_Env2 protection 2 Module 1 temperature ID059 TempFault_Inv1 protection Module 2 temperature ID060 TempFault_Inv2 protection Module 3 temperature ID061 TempFault_Inv3 protection VbusRmsUnbalanc RMS bus voltage is not Internal inverter errors.
- Page 64 Software instantaneous ID073 SwBusInstantOVP overvoltage protection of the DC bus Battery software ID081 SwBatOCP overcurrent protection overcurrent ID082 DciOCP protection Instantaneous output ID083 SwOCPInstant current protection BuckBoost software ID084 SwBuckBoostOCP flow Current actual value ID085 SwAcRmsOCP protection Software ID086 SwPvOCPInstant overcurrent protection Parallel PV flows not ID087...
- Page 65 Excessive AC hardware ID103 HwACOCP output flows ID110 Overload1 Overload protection 1 Check whether the inverter is running ID111 Overload2 Overload protection 2 in overload ID112 Overload3 Overload protection 3 Internal temperature Make sure that the inverter is too high. installed in a cool, well-ventilated place, below the temperature limits ID113...
- Page 66 stant overcurrent error unrecoverHwPVOC Permanent hardware Internal inverter errors. Switch it off, ID139 overcurrent error wait 5 minutes and switch it on again. If the errors still occur, contact ID140 unrecoverRelayFail Permanent relay error technical support unrecoverVbusUnb Permanent unbalanced ID141 alance bus voltage error ID145...
- Page 67 Fan 1 error Check whether fan 1 of the inverter is ID169 FanFault1 working properly Fan 2 error Check whether fan 2 of the inverter is ID170 FanFault2 working properly Fan 3 error Check whether fan 3 of the inverter is ID171 FanFault3 working properly...
-
Page 68: Uninstalling
10.4. Disposal Zucchetti Centro Sistemi S.p.a. is not responsible for any disposal of the device, or parts thereof, which does not take place according to the regulations and standards in force in the country of installation. Where present, the crossed-out bin symbol indicates that the product, at the end of its life, must not be disposed of with domestic waste. -
Page 69: Warranty Terms And Conditions
11. Warranty terms and conditions VALIDITY PERIOD OF THE WARRANTY For all Azzurro ZCS inverters, the manufacturer provides a commercial warranty which is in place in addition to the legal reseller warranty. The EU legal guarantee has a two-year validity starting from the date of purchase and is associated to all Azzurro ZCS inverters. - Page 70 Furthermore, during the warranty period ZCS will pay a service fix payment to the installers to cover the labour costs associated with the materials in the event of a warranty claim, provided the other terms of these warranty conditions are met. No travel or installation expenses are covered by the warranty, in case they exceed the service fix payment as defined above.
- Page 71 implied warranties of merchantability and suitability for a particular purpose. Unless expressly declared in writing on a document duly authorized by ZCS, the latter is not subject to any type of obligation or liability except for those indicated above. Notwithstanding any contrary provision contained herein, any kind of liability is excluded, for ZCS or for any of its suppliers, based on contract, fault (including negligence or liability in the strict sense) or other reason for loss of time, loss of profits or special, indirect, accidental or consequential damages of any kind.
Need help?
Do you have a question about the ZCS HYD 10KTL-3PH and is the answer not in the manual?
Questions and answers